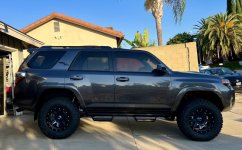
What did you do to/in your 5th Gen today?!

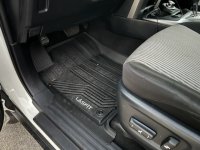
Got some new mats.
 

Attachments

  • 3B994B25-F39C-45CE-A98B-7C86C8F86B91.jpeg
    3B994B25-F39C-45CE-A98B-7C86C8F86B91.jpeg
    97.1 KB · Views: 1,006
Doing a bunch of maintenance today... put on 285/70/17s last week, minor issue with rubbing on the mud flaps, will likely replace them with skinnier flaps (in missing my rear flaps already from having too much fun in dirt)

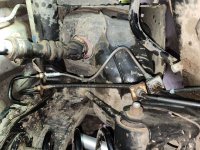
HOW-TO: grease your drive shaft

Was very happy to be able to get to the zerks on the front shaft without having to take off my skid plates. Set the truck in neutral to make accessing the zerks trivial.

Next on the list is wiring up my license plate light after installing a CBI dual swing bumper. After that, new icon overland rear springs for the extra weight, then I am putting on powerstop pads and rotors, and extended steel brake lines, and the obligatory bleeding of the brakes.
 
Made some progress today. Installed the S&B cold air intake, driver's side grab handle, screen protech film for the head unit and a/c display, and some Diode Dynamic bulbs in the map lights, dome, and rear hatch.

I was going to work on routing the wires for front and rear dash cams but realized I'm going to have to do a little more research to figure out how to access the side of the headliner to run the wires. So that will get finished up at a later time.

<blockquote class="imgur-embed-pub" lang="en" data-id="a/gPqQeHk" ><a href="//imgur.com/a/gPqQeHk">Today's Progess</a></blockquote><script async src="//s.imgur.com/min/embed.js" charset="utf-8"></script>
 
Doing a bunch of maintenance today... put on 285/70/17s last week, minor issue with rubbing on the mud flaps, will likely replace them with skinnier flaps (in missing my rear flaps already from having too much fun in dirt)

HOW-TO: grease your drive shaft

Was very happy to be able to get to the zerks on the front shaft without having to take off my skid plates. Set the truck in neutral to make accessing the zerks trivial.

Next on the list is wiring up my license plate light after installing a CBI dual swing bumper. After that, new icon overland rear springs for the extra weight, then I am putting on powerstop pads and rotors, and extended steel brake lines, and the obligatory bleeding of the brakes.


Got all the work done except wiring the license plate light... back end is sitting a little above the front again (about an inch up from the standard +2" icons), brakes are happy, brake fluid was gross, so the truck got a good wash, too.

Extended travel shocks + stock brake lines means much strain... the extended lines are sooo much nicer
20230806_093251.jpg

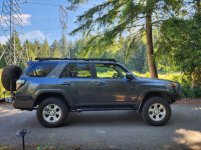
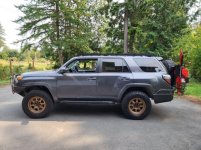
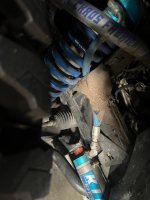
Before and after pics of the tires and springs (hard to tell the height difference, but it is significant and the handling is back to amazing again... really love these icons)
20230715_094703.jpg
20230806_142749.jpg
 

Attachments

  • 20230715_094703.jpg
    20230715_094703.jpg
    103.7 KB · Views: 881
  • 20230806_142749.jpg
    20230806_142749.jpg
    102.2 KB · Views: 862
  • 20230806_093251.jpg
    20230806_093251.jpg
    117.9 KB · Views: 874
HOLY Upgrade

I got a holy upgrade courtesy of mother nature.

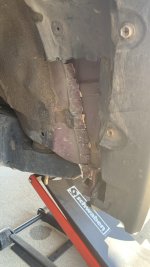
Passenger side splash guard decided it was time to allow extra ventilation to the engine bay....

Got some ARK splashguards on order....woot.:rockon:
 

Attachments

  • thumbnail-154.jpg
    thumbnail-154.jpg
    123 KB · Views: 581
I got a holy upgrade courtesy of mother nature.

Passenger side splash guard decided it was time to allow extra ventilation to the engine bay....

Got some ARK splashguards on order....woot.:rockon:

Let me know how those work out for you. My Rad Rubber ones have been holding up for a few years now
 
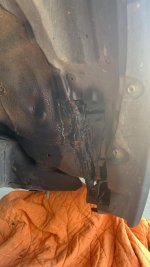
Finally got around to doing my pinch welds. I was a bit sloppy with the sealant but it’ll do…also greased my driveshaft and rear links before our trip next week
 

Attachments

  • A33F0D67-1F1F-4FE7-A62E-B42A9C49EED9.jpg
    A33F0D67-1F1F-4FE7-A62E-B42A9C49EED9.jpg
    94.1 KB · Views: 532
  • AB4079B5-F1E9-4C66-9E6E-762285C81716.jpg
    AB4079B5-F1E9-4C66-9E6E-762285C81716.jpg
    94.5 KB · Views: 525
Last edited:
Decided I wanted to put my roof basket back on top. Doing some minor
repairs. Lost a couple of bolts, so I bought replacements and some Loc-Tite.
 
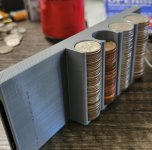
Made a coin holder to fit in the console

My 2013 has a place to hold some quarters, but I wanted a full compliment of coins for some of those tolls. It's 3D printed in PETG.
 

Attachments

  • 20230816_152955.jpg
    20230816_152955.jpg
    120.7 KB · Views: 600

Members online

Forum statistics

Threads
278,317
Messages
3,554,126
Members
248,016
Latest member
Advally Service

Trending content

Back
Top