What Did You Do To Your 3rd Gen Today?

Status
Not open for further replies.
It was supposed to be a simple rear license plate lamp bulb replacement, but due to rusted out screws I ended up taking the tailgate apart (and still apart until tomorrow :ohwell: )

I removed the license plate surround so I can get to the rusted license plate lamps' screws from behind. To make it easier to access the single nut and several plastic clips holding the surround I took the window regulator/motor assembly off; wasn't too bad, actually more room to work in than doing the regulator/motor on "regular" doors. Got the place lamps' screws out with vice grips, will be replacing them with stainless steel hardware.

The metal bracket holding the tailgate release handle was pretty rusty so I took the plastic handle off, sanded off the loose rust, and sprayed it with rust converter, I'll give it a coat of black epoxy chassis paint in the morning. The latch assembly is also getting rusty so it'll be getting the same treatment tomorrow.
 
Finished the soundproofing on my floor and panels. Just have the doors and rear gate left to do.

Test drive shows a modest 3.1 dB reduction in sound pressure. But, decibels are on a log scale, so that ends up being a >50% reduction. Of course, our hearing covers a logarithmic range too so it doesn't seem 50% quieter, but hey, music sounds better.
 
Decided to download sketchup and self taught myself the basics and took on the challenge of designing a bumper. It cant be that hard right? I don't really have any of the mounting or measurements right at all. Just playing around with a style. What's your guys opinions?
a0kj.png
 
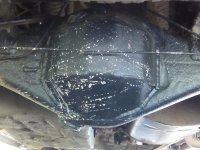
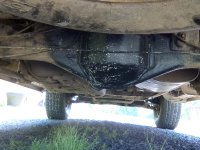
Admired the newly welded on Barnes4wd replacement diff cover.The one we cut off was like a piece of swiss cheese, 18 years of corrosion saw to that.
 

Attachments

  • IMG_20150816_115114.jpg
    IMG_20150816_115114.jpg
    133.1 KB · Views: 487
  • IMG_20150816_115125.jpg
    IMG_20150816_115125.jpg
    136.2 KB · Views: 476
Last edited:
Gave it it's first bath in who knows how long. Also the 15 year old window tint on the front two windows decided to start peeling off so instead of having it professionally detailed while I'm in Italy I'm going to have the front windows stripped and have 20% tint put on all of the windows and a 20% brow.
 
Drained the radiator and engine for the 8th time in two months. Still coming out orange from the stop leak but it's getting less orange each time. Going to work on coming up with a contraption that hooks a water hose to the lower radiator hose so I can run the engine and have clean water pumping through it at the same time and hopefully clean out the entire system. I'd like to be able to run actual coolant in this thing at one point.

Get a short piece of pipe to stick inside the hose and hose clamp it then get an npt to ght adapter. Boom. Done.
 
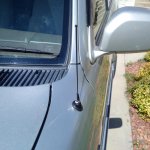
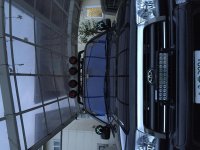
My version of taco whip mod

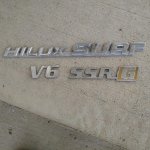
Also debadged
 

Attachments

  • IMG_20150816_124341.jpg
    IMG_20150816_124341.jpg
    128.8 KB · Views: 858
  • IMG_20150816_124316.jpg
    IMG_20150816_124316.jpg
    138.5 KB · Views: 820
Put on a new Aisin fan clutch. So nice to finally be able to hear the engine again. :P

It's about time for a lift now I think...
 
So I finally started my privacy covers/ keep the heat down in car-window covers.

So I few weeks back I bought like 4 sun reflectors from autozone for like $4 each. very thin foam but I mainly wanted the reflection foil and privacy.

It was something cheap like this. I still need one large enough for the back window.

Amazon.com: Max Reflector Jumbo Accordion Shade: Automotive

Its was kinda hard to make it clean and perfect but just held it up to window and used a knife to cup the shape of the window. Its a little squirrely in some spots but only lets a little slice of light in so no worries.

I cut thin strips of velcro and put in all the corners and in the middle on the back windows since they dont move.

<a href="http://s177.photobucket.com/user/jrmobb55/media/15ecfd67-a7b2-4a56-b279-531eefa59f3e_zpsvagzcoip.jpg.html" target="_blank"><img src="http://i177.photobucket.com/albums/w223/jrmobb55/15ecfd67-a7b2-4a56-b279-531eefa59f3e_zpsvagzcoip.jpg" border="0" alt=" photo 15ecfd67-a7b2-4a56-b279-531eefa59f3e_zpsvagzcoip.jpg"/></a>

<a href="http://s177.photobucket.com/user/jrmobb55/media/a2e5508b-db5d-49ac-8137-186f1943932a_zpsqhlug9s7.jpg.html" target="_blank"><img src="http://i177.photobucket.com/albums/w223/jrmobb55/a2e5508b-db5d-49ac-8137-186f1943932a_zpsqhlug9s7.jpg" border="0" alt=" photo a2e5508b-db5d-49ac-8137-186f1943932a_zpsqhlug9s7.jpg"/></a>
 
Last edited:
What did you do to your 3rd gen today?

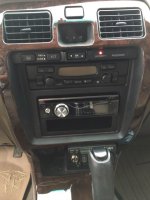
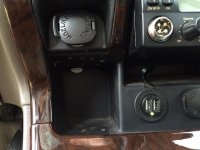
I recently installed a new Pioneer DEH-X8700BS to replace a messed up JVC DVD player. I didn't realize the Pioneer wouldn't lower the antenna when using CD & Bluetooth. If I had known in advance it still wouldn't have been a deal breaker. The other day I installed a simple SPST rocker switch inline with the blue antenna/amp power wire. I wanted to use a location for the switch that wouldn't take away from the mostly OEM look of my dash. (Plus, I had a white switch left over from something else and didn't want it sticking out like a sore thumb.) So, I installed it in the top of the small cubby beside the 12V power outlets. Works great and is easily accessible.

ImageUploadedByTapatalk1440129495.554767.jpg
ImageUploadedByTapatalk1440129509.338322.jpg
 

Attachments

  • ImageUploadedByTapatalk1440129495.554767.jpg
    ImageUploadedByTapatalk1440129495.554767.jpg
    51.9 KB · Views: 732
  • ImageUploadedByTapatalk1440129509.338322.jpg
    ImageUploadedByTapatalk1440129509.338322.jpg
    43.8 KB · Views: 635
Last edited:
Replaced Rear Wiper Motor

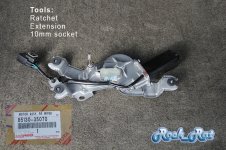
Finally got around to replacing my broken rear wiper motor. Ran it through Elephant Car Wash up in Maple Valley Wa. while I was on a road trip. I had a ton of time so decided to clay bar it. Heard a snap (Clunk) going through the wash and low and behold my wiper arm was tore right off. Snapped the bolt off just below the threaded portion of the nut. The owner was great. He normally doesn't replace anything on cars older than 7-10 years but he made an exception as it was the first he had ever seen this happen, plus he saw how well taken care of my 4runner was after 14 years.

Bottom line is I made a deal with him. Told him to just order the part from Toyota of Dallas and have it shipped to me. I will do all the work. Broadway Toyota wanted $500 plus for the part and labor. Total cost for part -$238.99, and it took me about an hour. There's a small trick to replacing it. If you ever need to know just give me shout.

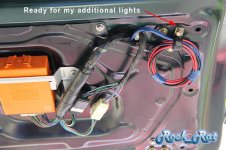
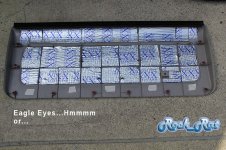
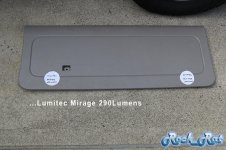
While I had the back tore apart I added my Rattle Trap and ensolite foam to the hatch and just Rattle Trap to the interior panel. Decided to run my wires for my additional lights from the rear dome light through the protective rubber boot on through the rear hatch. Wires are in a clamp just waiting for me to decide which lights I'm going to install - Eagle eyes or my marine quality Lumitec Mirage at 260 lumens (or something different). I'm concerned about the clearance and the aesthetics.
 

Attachments

  • Rear Wiper Motor.jpg
    Rear Wiper Motor.jpg
    118.2 KB · Views: 623
  • Rear Hatch Wiring.jpg
    Rear Hatch Wiring.jpg
    88.8 KB · Views: 706
  • Rear Interior Panel_1.jpg
    Rear Interior Panel_1.jpg
    128.8 KB · Views: 588
  • Rear Interior Panel_2.jpg
    Rear Interior Panel_2.jpg
    88.4 KB · Views: 586
Not today but tomorrow, going to put some elevation on the runner driving up to pikes peak. If anyone is in the Colorado Springs area, I will be at the summit around 10:30am-11:00ish am. Possibly hit up some trails or go fishing.
 
Status
Not open for further replies.

Members online

Forum statistics

Threads
278,316
Messages
3,554,120
Members
248,016
Latest member
Advally Service

Trending content

Back
Top