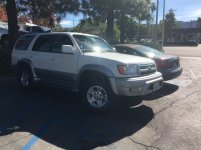
I installed my suspension this weekend. Wanted to share some observations and answer some questions that I had prior to install and wasn't able to have addressed.
A little about the truck:
Picked it up in August, 122K, 1 owner and recent timing belt job. It's in fair condition cosmetically and the rust is mostly on the hardware, not the frame.
Over the past few months I've replaced the radiator and rad hoses, would have done the thermostat but one of the nuts is rounded. I'll address it if it ever craps out. Also replaced the lower ball joints and a few other items. I'm working my through all of the maint - fuel filter, etc.
On to the lift etc:
I went with OME 880/906 springs and the 4runner specific Bilstein 5100's.
Notes on the install:
- Front 5100's on the 1st perch - stock height. The lift comes from the springs.
- There's no need to disconnect the tie rods or the lower ball joint for this install. You may need to if you're really lifting the front, but I think even at a 2.5 inch lift, you'd be fine leaving them connected as long as you disconnect the sway bar end links.
- The bottle jack method for pushing the UCA down is definitely the easiest method for getting that lower shock bolt lined up.
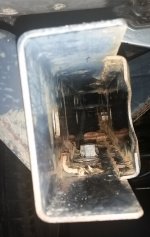
- Rusty hardware - All of my front strut mount bolts were completely rusted and seized. When I really tried to turn them, the bolts embedded in the strut mount bushings broke free and turned freely. I ended up having to use a dremel and a metal abrasive disc to cut the nuts off. Pic below:
- Rear shock mount bolts. I've seen a bunch of different suggestions on these. Mine were completely seized. I tried a sawzall as I've seen mentioned. I wasn't sure where to cut as I didn't know the diameter of the shock mount hole. You can cut below the last bushing and mount and it'll fit through. I didn't know and attempted to cut through the bushing. That didn't work very well. In the end, I bent them back and forth and broke them off. This is really the easiest method. It took 2 minutes a side. Just break them off.
- Front spring / strut assembly - you have to orient the strut mount correctly so that when mounted, the lower shock bolt lines up and the spring perch is also oriented correctly. There are various suggestions for doing this. What worked for me was to mark the assembly that I had removed with (red) paint, on the strut mount. I then assembled the new strut/shock and used the original as a reference to mark the new shock mount. This let me eyeball everything to keep it lined up as I released the tension on the spring. Pic:
- Also - I've watched the videos here and I want to make clear for anyone else doing this: When you assemble the strut and strut mount, you need to compress the spring enough that there's no tension on the strut mount when you're torquing it down. If the spring is pushing back, you're not accurately torquing that top nut. With these springs, that required an air impact wrench. I don't think it's possible by hand or with an 18V impact.
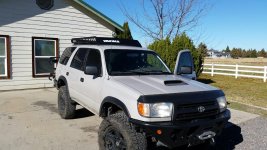
Bad pic of how it sits:
- Ride and handling - It rides great. I was worried that it would be harsh but it's not. It soaks up everything really well and is also very controlled. The spring and dampening combination is really spot on. I think it'll get even better as the springs break in. I don't know about how it would be over rutted dirt roads at speed, but it's great over terrible northern Virginia roads.
I went to have it aligned today and the Goodyear wanted to charge me $300 extra to work on the eccentric bolts in the front. I'm going to spray them down with PB tonight and take it to Toyota tomorrow to hopefully avoid having to pay that much to get the camber and caster in spec.