What Did You Do To Your 3rd Gen Today?

Status
Not open for further replies.
Replaced my factory Japanese head unit with non-functioning TV (due to over-the-air transmissions changing from analog to digital in Japan) and navigation with a Pioneer NEX AVH-4200. Also added a CT Sounds Amp and 10" sub.

Before:
18813430_10210702148643827_8679632264259625487_n.jpg


During:
19884020_10211097286162018_7147008452589847813_n.jpg


After:
19961465_10211097285802009_5159780774664228129_n.jpg


If anyone is interested in buying my JDM unit from my Surf SSR-G shoot me a PM with offer.
 
Replaced my factory Japanese head unit with non-functioning TV (due to over-the-air transmissions changing from analog to digital in Japan) and navigation with a Pioneer NEX AVH-4200. Also added a CT Sounds Amp and 10" sub.

Before:
18813430_10210702148643827_8679632264259625487_n.jpg


During:
19884020_10211097286162018_7147008452589847813_n.jpg


After:
19961465_10211097285802009_5159780774664228129_n.jpg


If anyone is interested in buying my JDM unit from my Surf SSR-G shoot me a PM with offer.

That's pretty damn neat - I'm guessing it requires a JDM bezel? (looks like triple DIN?)
 
Just got my invoice from Savage. The bumper is official. Dual swingouts with tire mount, hi-lift, and rotopax mount. I can't wait to get my spare out of the cargo area. lol
 
That's pretty damn neat - I'm guessing it requires a JDM bezel? (looks like triple DIN?)

The OEM unit is a double DIN. The unit below the OEM one is an aftermarket Alpine navigation system that came with the rig when I got it but never worked. I did not look into the reason why because I always intended to replace it anyway. If installing that nav unit you would need another DIN slot. The JDM panels have 3 DIN available whereas the US only has 2 but has more room underneath the ashtray.
 
I got going on my manual hub conversion/front suspension refresh today:

017cf251e26c1edb446c54d705e7f589.jpg


67f4f41876ce203b13e9dbe76603835b.jpg


Gusseted, powder coated uprights, manual hubs, new bearings and stuff, Spec upper control arms (welded ball joint receiver). Etc, etc.

Using some fresher lower control arms/bushings. ;)


Sent from my iPhone using Tapatalk
 
Some more pics of my disassembly. Going to rebuild the the top end for sure and possibly the bottom end depending on how all my measurements turn out. I should probably just start a thread on my own of all this work once I really get into the heads.

<a href="http://s61.photobucket.com/user/samcbishop/media/Removingcam_zpsjzj1fhhp.jpg.html" target="_blank"><img src="http://i61.photobucket.com/albums/h70/samcbishop/Removingcam_zpsjzj1fhhp.jpg" border="0" alt=" photo Removingcam_zpsjzj1fhhp.jpg"/></a>
<a href="http://s61.photobucket.com/user/samcbishop/media/CamGone_zps3q9lejkf.jpg.html" target="_blank"><img src="http://i61.photobucket.com/albums/h70/samcbishop/CamGone_zps3q9lejkf.jpg" border="0" alt=" photo CamGone_zps3q9lejkf.jpg"/></a>
<a href="http://s61.photobucket.com/user/samcbishop/media/5vz_zpshdxqlk88.jpg.html" target="_blank"><img src="http://i61.photobucket.com/albums/h70/samcbishop/5vz_zpshdxqlk88.jpg" border="0" alt=" photo 5vz_zpshdxqlk88.jpg"/></a>

In this last picture you can see exactly where the head gasket failed. Looks like it melted or something.

<a href="http://s61.photobucket.com/user/samcbishop/media/FailedGasket_zpstjc4yzqd.jpg.html" target="_blank"><img src="http://i61.photobucket.com/albums/h70/samcbishop/FailedGasket_zpstjc4yzqd.jpg" border="0" alt=" photo FailedGasket_zpstjc4yzqd.jpg"/></a>
 
Installed one of LCE's hi output alternators...stock napa replacement will be tossed into my wandering-into-desolation parts box as an emergency spare.
FYI stock blower belt worked fine for me. I'm towards the big end of adjustment though.

9b6f76a7a50230b501723ac9ea29c412.jpg


Sent from my iPhone, so probably some stupid typos and autocorrects
 
Worked on my tire carrier. Didn't get it finished, but knew that was going to happen. Waiting on the wheel to come in to see exactly where I'm going to mount it. Oh and 2 gas cans.

UyGWvTH.jpg
 
Did a bunch of stuff over the weekend. Lugged the axle over to my mom's rural property on the island to sandblast it. Can't really do that in a dense city suburb. That worked really well. Used a $40 sandblaster from Harbor Freight. I only did the spring mounts and control arm pillars and the upper half of the third member area, because I didn't have enough time.

I blasted it with compressed air afterwards to clean it all out, then sprayed it down with methanol, then painted these areas with SEM Rust Trap which was rock hard the next morning. They say it cures best with humidity so I painted it at 8 pm to get the dew. But it actually rained that night!! It degrades in the UV so I'll spray paint over it when I'm done. Also blasted and painted the rusty rear latch, now it looks and works great.

I can't imagine using wire wheels on rust again unless it's in an easy spot, sandblasting is so easy. Just messy, but so is wire wheeling. If you put down tarps you can recover most of the media and filter it through a pasta strainer and reuse.

Also it's no wonder these things rust as soon as they hit road salt, Toyota did pretty bad paint job on them. There was weld spatter that didn't get propoerly painted from the factory, it seems like rust blooms show up everywhere through the paint from incomplete coverage. So even if I had a truck that wasn't rusty, from California or somewhere and I was taking it somewhere with salt, I'd paint it with POR15 or Rust Trap or something similar, the Toyota paint job is shite.

I got paint in the shaft part of the rear latch, where the plastic turns on the metal. I was worried that the paint would seize it up so I sprayed acetone on it since I noticed that it too the paint off my skin very well. Oops, that melts the plastic!!! Acetone is a no-no for any plastic on these trucks. But that seemed to loosen it up and it didn't seize.

35701673432_c68f9509d0_z.jpg


35739231591_535226123e_z.jpg


35701672862_59cd839d9f_z.jpg


35701671142_a69b781da1_z.jpg


35701672342_537060056f_z.jpg


35739230141_53a3662ca8_z.jpg


35739231011_dbbdd9658a_z.jpg


35701671842_338ee1cbc4_z.jpg


35031470974_28b21c5237_z.jpg


35031471574_10951b521c_z.jpg
 
Last edited:
The previous week I made progress on my roof rack. I tacked it up. Next week hopefully I'll get the lower layer welded up and then start on the next layer up which will form the platform edge of the rack. I might just keep it at this level because of clearance issues with the garage. And then make a separate cage bar about 3-4" high that will then bolt onto that which I can put on once out of the garage.

This roof rack is ultra low profile, lower than the stock rack, the base of the cross pieces are about 1/2" off the roof, so there would have been room to lower it by about 1/4" or so, that's about it. You could go with thinner tubing than 1" to make it even lower but that might flex too much, I want to be able to walk around up there and I'm really light and 1" seems about as small as Id want to go.

The bottoms rails are 1/2" conduit which rest directly on the shoulder of the stock rails. I used a nut to space them out properly which will allow bolts to go into the square nuts in the rails.

I'm getting pretty absent minded and clumsy with age and I managed to drip weld spatter on the drivers side window which melted the glass. So now I'm on the lookout for a new window... luckily they are easy to swap out, I'll just try to find one for cheap, no rush.

I didn't want no mistakes so this job was measure 4 times, weld once.

One other thing I found out, is you can bend 1/2" square steel tubing in a 1/2" conduit bender if you're really careful. It is stronger than conduit and wants to twist but if you practise on some junk pieces you can get a nice 90 bend.

I also painted the rear bezel with SEM trim paint. Man that stuff dries fast!!! 30 seconds!!! It seems like good stuff. Also I started stripping the flaking paint from the 4runner emblem, that is a real PITA. I'll repaint that when / if I ever get it stripped.


35701674732_4f8a5d30de_z.jpg


35739233611_63f1e111e3_z.jpg


35701674472_516c69ed14_z.jpg


35739233171_ea8b9b35ec_z.jpg


35701674122_b2646c2131_z.jpg


35739232281_104c280493_z.jpg


35739232741_36cf5c8203_z.jpg


35701673782_d83768eeac_z.jpg
 
Last edited:
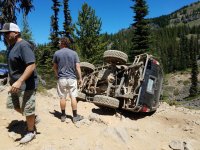
Finally after 2 months I got her back on the road.

What I thought would be an easy timing belt job and replacing lower control arm bushings was no so easy. Between breaking parts, ordering parts, waiting on parts, thinking I was ready to get her back on the road, finding out I need replace my steering rack, ordering one, waiting on it, getting a steering rack but not the one I ordered, ordering another one and getting it installed.

Hopefully I can get an alignment soon and then no more maintenance for a while and I get onto the fun stuff like installing my CB!
 
Never flop your own 4runner when you can flop your son's.
 

Attachments

  • 20170708_130522-2016x1512.jpg
    20170708_130522-2016x1512.jpg
    141.3 KB · Views: 469
Damn...that's two this month I've seen on here. Hopefully it's repairable.

Unfortunately it took a rock right to the junction of the pillar between the back window/back door and the roof. Caved in the pillar and rippled across the roof - so we are looking for another rig to swap the good parts on to.
 
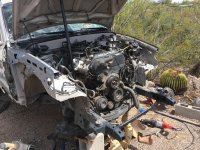
I sawzalled the front off to pull the motor and trans/tc. This is my first engine pull ever. I'm going to clean and refurb this motor for a spare. Anyone know if I can keep it all as one(engine, trans, tc) or if has to be split for certain reasons that I'm not seeing? I'll split at the trans. But just asking. Thanks
 

Attachments

  • IMG_3934.jpg
    IMG_3934.jpg
    140.7 KB · Views: 390
I sawzalled the front off to pull the motor and trans/tc. This is my first engine pull ever. I'm going to clean and refurb this motor for a spare. Anyone know if I can keep it all as one(engine, trans, tc) or if has to be split for certain reasons that I'm not seeing? I'll split at the trans. But just asking. Thanks

Just keep sawzaliing away and you can just leave the motor any trans there.:p
 
Unfortunately it took a rock right to the junction of the pillar between the back window/back door and the roof. Caved in the pillar and rippled across the roof - so we are looking for another rig to swap the good parts on to.
Damn that's awful news. When I went to the Overland Expo I took a course on "Roll Over Prevention and Recovery" but to be honest with you it was more about recovery and preparing for the roll over than prevention. Oh, and assessing and treating the victim.

Three things really stuck out in that course.
  • Never stick your hand out to try and stop the rollover (natural reaction of course). Just cross your arms against your chest.
  • Shut the engine off as soon as you know the roll over is inevitable. This will save the motor.
  • Finally, roll down all of your windows because you WILL break some glass and the rescue team will have to drag you out the back window.

Just out of curiosity, did you do any of these things? I know if I didn't go to the Expo I would have done the opposite. I would have tried to stop it and fight it all the way down to the dirt, would never have thought about the windows, and the motor would have coughed and sputtered and died on me.
 
Last edited:
Status
Not open for further replies.

Members online

No members online now.

Forum statistics

Threads
278,316
Messages
3,554,120
Members
248,016
Latest member
Advally Service

Trending content

Back
Top