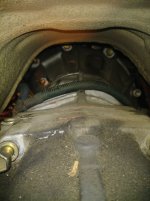
Yes. I installed a piece of sheet metal from an air conduit to patch the hole with silicone and pop-rivets.
It will be enough to keep the water out.
Did the same with the little lip between the bumper mount and main body. Turns out someone already did the same thing in the past, there where some rivets left...
That's a good enough case. Probably will put it for sale soon. Found a 2002 Badlands edition (Champagne with sport hood) for sale locally, but the guy does not want to deal except face 2 face, and it's a 1h30 drive just to go there... literally he does not want to take more pictures (and he only has 3 from far away, only driver-side).
Finally got myself a CVT RTT. I went with a rainier and damn that thing is massive on the top of my rig, wow. Will post some photos after our first trip!
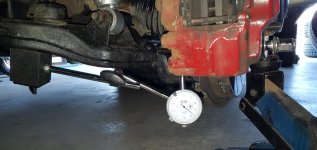
yes its out of spec.. guess who's ordering parts RIGHT NOW
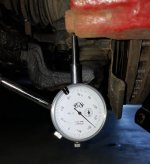
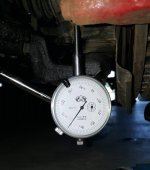
Max is supposed to be 0.020" and i got 0.023"
Will post up some pics of the joint once removed, that's the source of the clunk i have been getting in the last few weeks
Not really seeing Vadar, but maybe if one turns it around.
I actually kept the push pin in the 4Runner for a good two weeks, tweeking the holes everywhere. The most inquisitive looks I received were in a Subway parking lot.
But a huge improvement. Well worth the money spent IMHO. If the rear would only work half as well.
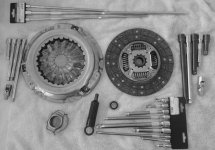
What I did last night was attempt to replace the clutch, where I'm stuck at figuring out how to unbolt the starter at the bellhousing where I can't see or feel the bolts that need to be removed yet.
So the last thing I did that was successful was remove all the electrical components and wiring harnesses so that the crown of the tranny is clean now. LOL.
What I did last night was attempt to replace the clutch, where I'm stuck at figuring out how to unbolt the starter at the bellhousing where I can't see or feel the bolts that need to be removed yet.
Right around 'behind' the starter. They go in from the transmission side. Feel around the back of the exhaust, one on the top, one on the bottom. An extension and a swivel will be your friend...
yes its out of spec.. guess who's ordering parts RIGHT NOW
Max is supposed to be 0.020" and i got 0.023"
Will post up some pics of the joint once removed, that's the source of the clunk i have been getting in the last few weeks View attachment 305415 View attachment 305416 View attachment 305417
How's that dial indicator treating you? Would you recommend someone purchase the same one? If so, could you please provide a link to where you purchased it? Thanks!
Right around 'behind' the starter. They go in from the transmission side. Feel around the back of the exhaust, one on the top, one on the bottom. An extension and a swivel will be your friend..
Thanks Charlie for confirming that both bolts go in from the tranny side because every hint helps when all I want to do is "remove two 14mm bolts" on the starter as part of the DIY to disconnect stuff from the transmission.
Your hint allows me to stop wasting time looking from the starter toward the transmission where I can spend my time looking from the transmission toward the starter. I can't believe how hard it is to find the missing two bolts.
But did I find the first one already or not?
Is the one bolt that I circled in the previous picture one of those two bolts?
(Also does the starter actually come out or do I just leave it dangling on wires like I did the slave cylinder?)
Regarding the extension bars and swivels I have PLENTY where this picture shows some of them as I was preparing the tools! LOL
Are you working on a 4-cylinder? The pics don't really match up with the V6 (starter is on opposite sides, I think). You'll find the last bolt, we all have faith!
As for the starter itself, if you can find a decent spot to set it, just leave it hanging. Make sure your battery is unhooked - the main power cable to the starter is UNFUSED and will cause major problems if it shorts to the engine/body/frame.
Are you working on a 4-cylinder? The pics don't really match up with the V6 (starter is on opposite sides, I think). You'll find the last bolt, we all have faith!
As for the starter itself, if you can find a decent spot to set it, just leave it hanging. Make sure your battery is unhooked - the main power cable to the starter is UNFUSED and will cause major problems if it shorts to the engine/body/frame.
Yup. 3RZFE 4-cylinder. 5-speed manual. Starter is on the driver side.
If it's the last bolt then it must be on top of the starter 180 degrees from the bottom bolt since the bottom 14mm bolt that came in from the transmission side came out when I disconnected the brake line & harness combined bracket.
Thanks for letting me know I can leave the starter dangling on a wire. The battery negative is disconnected.
I may take off the driver side wheel (easy enough) to see if that gives me more room to at least SEE the damn upper 14mm bolt and maybe the sway bar but I don't want to remove anything that won't help or that I don't have to.
I'll go back and look now that you've confirmed I only need to look in from the transmission side for the head of the hidden upper bolt.
Oil change last night, they always run better afterwards don't they? 5k int with Mobil1 Syn. Flushing out some of the PO small neglect, bit by bit.
Couple days ago on my drive into work I noticed my Passenger Headlight was aimed very low, that's odd. Turned out that the top adjuster ball had popped out of the socket and the spring force pulled the light in and down. My plan was to remove the clip, put the ball in the socket then insert the clip into the headlight frame. Fussed with the socket clip for a bit but felt like I was going to break it just getting it out. A quick shove on the light and bam we are back in. Probably wasn't completely seated when new and then the hot temperatures allowed it to come all the way out. No biggy, easy and done.
Received shipping confirmation on my RMR Antero Ext! Yeehoo!
After 6 months of having sliders in the way in my garage I finally welded them together and put them on. 4runner is more protected from shopping carts now.





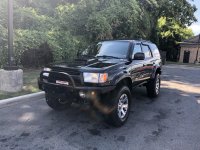


 .
.
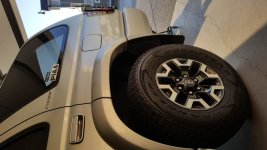





 . Thanks!