What Did You Do To Your 3rd Gen Today?

Status
Not open for further replies.
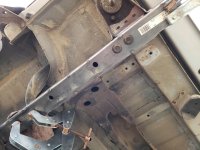
I did not find it that hard. There are a couple of write ups and a lot of *****ing about how hard it is to remove. I was prepared for the worst but it was not bad at all. Took way less time than I thought.

I found it easier to work with the liftgate open. Before you start, drop the window 1" or so. This will help later in realigning. You will need 10mm ratchet w extension, long needle nose pliers and maybe a flat head screwdiver to help w gentle prying.

Remove rear license plate.

Remove interior grab handle. Pop cover off, then 10mm bolt

Remove plastic interior hatch cover. Start from the bottom. The top lip will push up toward the roof

Unclip the 3 connectors - easy enough but some people just let it dangle or tape it up.

Remove just the driver side interior metal panel. Lots of 10mm bolts

Remove the window motor assembly. 4, 10mm bolts. With liftgate open I found it easy to slide the assembly side to side to make room for accessing the next few steps. Someone else mentioned to only move the window assembly around from the sides so as not to get fingers caught in the gears.

Remove 2 bolts, 10mmfor the rear hatch handle, undo the linkage.

Remove 1 bolt, 10mm for the rear lock

Pop the clips - I found needle nose pliers easiest - squeeze and push. Others used small socket heads to push through.

That should be about it. Assemble in reverse. I'm probably forgetting something as this is from memory and I'm not looking at the truck.

It's not bad at all IMO.

Thank you for the detailed instructions. Probably gonna tackle this next week!
 
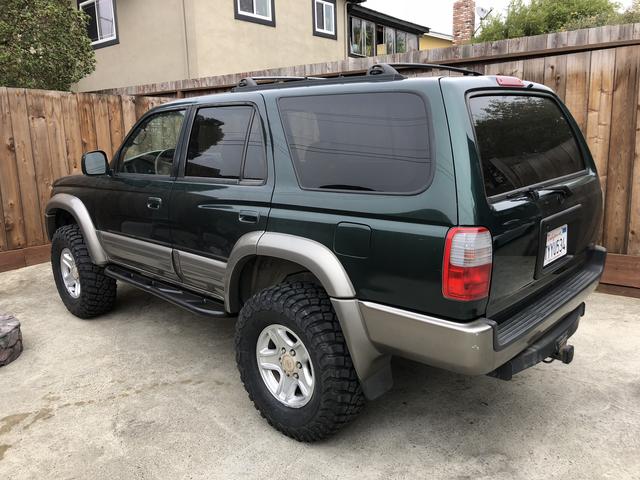
New KM3 tires..

8-C75-B621-6-E9-C-47-DB-B2-FA-3010723827-E4.jpg
 
1998 Limited

I have not posted a lot on here, but today I finished all of the work on my 1998 Limited. To stand back and look at it there doesn't seem to be a lot done other than 3" lift and 255/80/17 tires and new 17" rims, however, I have touched, modded, worked on, rebuilt, repaired, exchanged, everything on it excluding rebuilding the Motor and Transmission.
 

Attachments

  • IMG_0564.jpg
    IMG_0564.jpg
    137.2 KB · Views: 391
busy weekend

It's been a busy weekend......


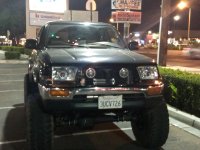
I bought a set of SRQ Morimoto HID's from a member here, that was earlier in the week. I just got some free time to install them.

That went Very smoothly THANK YOU
The lights are subtle, no extra stuff, just HID's. White and bright So got those installed.
I just wish they didn't look like eyeballs.

The grill is still out because I'm deciding what to do with it..Ziptie it back in place, You can't tell when it's installed, or replace it , Also I may need to adjust the lights.

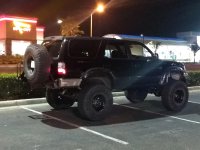
Headlight adjustment may be in order due to the 4XInnovations bumper/tire carrier, guessing loaded it's about 300 Lbs. on the back of the truck.

I called and had them change a few things, then still spent a couple hrs with the plasma and grinder "Modifying" it. No fault of 4XInnovations with the rear converted to leaf springs It needed some work.

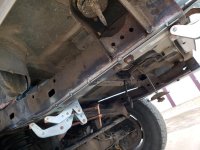
Lets start with this thing is heavy duty, much stronger that the rear of the truck, or the frame its mounted to I'm taking a good look at the frame to see where I can strengthen it. I may end up plating a section of it.
working with two floor jacks and jack stands I got it up on the truck, I'll drive with it for the week, then pull it, clean, prep, and coat with POR-15, easy tiuch up.
 

Attachments

  • Untitled attachment 00004.jpg
    Untitled attachment 00004.jpg
    124.1 KB · Views: 371
  • 4runner.jpg
    4runner.jpg
    131.8 KB · Views: 358
It's been a busy weekend......


I bought a set of SRQ Morimoto HID's from a member here, that was earlier in the week. I just got some free time to install them.

That went Very smoothly THANK YOU
The lights are subtle, no extra stuff, just HID's. White and bright So got those installed.
I just wish they didn't look like eyeballs.

The grill is still out because I'm deciding what to do with it..Ziptie it back in place, You can't tell when it's installed, or replace it , Also I may need to adjust the lights.

Headlight adjustment may be in order due to the 4XInnovations bumper/tire carrier, guessing loaded it's about 300 Lbs. on the back of the truck.

I called and had them change a few things, then still spent a couple hrs with the plasma and grinder "Modifying" it. No fault of 4XInnovations with the rear converted to leaf springs It needed some work.

Lets start with this thing is heavy duty, much stronger that the rear of the truck, or the frame its mounted to I'm taking a good look at the frame to see where I can strengthen it. I may end up plating a section of it.
working with two floor jacks and jack stands I got it up on the truck, I'll drive with it for the week, then pull it, clean, prep, and coat with POR-15, easy tiuch up.

Great looking 4runner man. So, one tip for the rear 4X Innovations rear bumper, or any rear swing out for that matter. I would add some solid body mounts to the rear if you have not done so already. >> 1996-2002 4Runner Rear Polyurethane Body Mounts (Pair) - $82.20 : Sonoran Steel Fabrication LLC, Toyota Truck Parts

I know someone else offers a whole kit, I don't recall who. But if you are running an OEM mount, it may still allow enough flex going over terrain to allow the rear frame to flex away from the body and as a consequence allow the bumper to hit the body. This has happened to a few who had not upgraded their mounts. Keep up the good work man.
 
Great looking 4runner man. So, one tip for the rear 4X Innovations rear bumper, or any rear swing out for that matter. I would add some solid body mounts to the rear if you have not done so already. >> 1996-2002 4Runner Rear Polyurethane Body Mounts (Pair) - $82.20 : Sonoran Steel Fabrication LLC, Toyota Truck Parts

I know someone else offers a whole kit, I don't recall who. But if you are running an OEM mount, it may still allow enough flex going over terrain to allow the rear frame to flex away from the body and as a consequence allow the bumper to hit the body. This has happened to a few who had not upgraded their mounts. Keep up the good work man.

Thanks for the reminder. Installing the Savage rear bumper with swingout pretty soon...

As far as a "whole kit" or body mount bushings for the entire 3rd gen, I believe that it is 4Crawler Offroad.
 
Last edited:
Installed the TBU. I went with 199mm instead of 231mm because I don't tow, and didn't feel like cutting the shield or having to upgrade my wheels (at least at this point).


I have to ask [MENTION=198376]4Runner4Leon[/MENTION] where they came from? Those have to be the funkiest looking slide pins I have ever seen. But hey, you should stop much better now.:bravo:
 
I have to ask [MENTION=198376]4Runner4Leon[/MENTION] where they came from? Those have to be the funkiest looking slide pins I have ever seen. But hey, you should stop much better now.:bravo:

I know, those pins seem a bit too long for the calipers, but they came with the calipers, and I didn't see any downside to the extra length :noidea:. I used the A1 Cardone Ultra Premium calipers, because they are very well priced, powdercoated, and are gray instead of the Powerstop red.

For the rotors and pads, I did go with the Powerstop items, but I found a pricing fluke at Rockauto - the combined rotor/pad kit was $168, but buying the same items separately, the rotors were $93 for the pair, and the pads were $27, so $120 instead of $168 :).
 
I have to ask [MENTION=198376]4Runner4Leon[/MENTION] where they came from? Those have to be the funkiest looking slide pins I have ever seen. But hey, you should stop much better now.:bravo:

Those calipers look scary, as well, like someone had at them with a grinder at some point. I have never seen a set of Toyota calipers with material missing from around where the bolts thread in, like I see in the images posted. Something ain't right, and I personally would have given those calipers back to who ever tried selling them to me as being suspect. Toyota does not leave bolt ends looking like that--They would use a shorter bolt, and have the threads fully supported full-length, if that was what gave them enough strength. That looks like someone ground away a bunch of the casting to make it fit something, and then put it back into the system as a core, and then the remanufacter said "Meh, you don't need all that metal, anyway...". Where did those come from, anyway?
 
I know, those pins seem a bit too long for the calipers, but they came with the calipers, and I didn't see any downside to the extra length :noidea:. I used the A1 Cardone Ultra Premium calipers, because they are very well priced, powdercoated, and are gray instead of the Powerstop red.

For the rotors and pads, I did go with the Powerstop items, but I found a pricing fluke at Rockauto - the combined rotor/pad kit was $168, but buying the same items separately, the rotors were $93 for the pair, and the pads were $27, so $120 instead of $168 :).

Look at where the bolts come through that hold the castings together. It looks like someone ground off a bunch of material at the ends, exposing the bolt tips. That does not look like any Toyota OEM set of calipers I have ever seen, and it argues for either someone having mangled OEM with a grinder and then turning it in as a core, or a manufacturer doing a quick-and-dirty job of copying the design. Either way, I'd not be putting those calipers on anything that was going to have people I cared about riding around in.
 
Look at where the bolts come through that hold the castings together. It looks like someone ground off a bunch of material at the ends, exposing the bolt tips. That does not look like any Toyota OEM set of calipers I have ever seen, and it argues for either someone having mangled OEM with a grinder and then turning it in as a core, or a manufacturer doing a quick-and-dirty job of copying the design. Either way, I'd not be putting those calipers on anything that was going to have people I cared about riding around in.

I appreciate the concern/warning, but I don't think there is an issue. There are no grind marks on this caliper, this is how it was cast. I've looked at a number of other calipers from different rebuilders, and there is quite a bit of variability from one to the other - I've seen others where the last few threads are showing, like they do on the photo I posted.

Here is a Powerstop caliper (which uses the same pins as mine does), you can see how much shorter their bolts are, and the bolt hole also cuts through the casting.


And a Centric caliper, also showing the bolt hole in line with the casting edge.


I think the bolts that were used in my rebuild are longer than stock, which is why the stick through and look scary. Toyota's original bolts are a good 1/4" shorter, and are hidden well inside the caliper.

Put another way, the portion of the bolt that is sticking through is not load carrying; the threads that are holding the caliper halves together are completely intact and well inside the casting.
 
The reason I asked [MENTION=198376]4Runner4Leon[/MENTION] is that it looks to me that the pins would have too much play in them for the pads. But if it works, then roll on:

I actually bought this kit for my 231s years ago, I am guessing they have one similar for 199s:
https://www.partsgeek.com/v4b9vlr-toyota-tundra-brake-hardware-kit.html

They do have a lot of play, but I see the same "extra long" pins used on other calipers as well. I don't really see an issue with extra play (I mean their primary job is to keep the pads properly located perpendicular to the pin, not parallel to it) - but I might get a different set of pins at some point, if I can find a set that is the more correct length. Thanks for the link!
 
Great looking 4runner man. So, one tip for the rear 4X Innovations rear bumper, or any rear swing out for that matter. I would add some solid body mounts to the rear if you have not done so already. >> 1996-2002 4Runner Rear Polyurethane Body Mounts (Pair) - $82.20 : Sonoran Steel Fabrication LLC, Toyota Truck Parts

I know someone else offers a whole kit, I don't recall who. But if you are running an OEM mount, it may still allow enough flex going over terrain to allow the rear frame to flex away from the body and as a consequence allow the bumper to hit the body. This has happened to a few who had not upgraded their mounts. Keep up the good work man.


Thanks for the tip, I did a complete Energy suspension body kit along with a 2" body lift when I started the SAS and rear suspension. Energy is polyurethane but the Sonoran Steel ones come up here a lot, anyone interested in the pucks and most of the hardware for a 2" body lift? 3rd Gen 4Runner??
I was able to tighten stuff up and remove it. The thing looked like it was on stilts.
 
The reason I asked [MENTION=198376]4Runner4Leon[/MENTION] is that it looks to me that the pins would have too much play in them for the pads. But if it works, then roll on:

I actually bought this kit for my 231s years ago, I am guessing they have one similar for 199s:
https://www.partsgeek.com/v4b9vlr-toyota-tundra-brake-hardware-kit.html

Looks like 231 and 199 calipers use slightly different approaches - the 231's have individual cotter pins for each guide pin, the 199s use the single spring that grabs both guide pins. Interestingly, all non-OEM guide pin kits I looked at (like this Raybestos) have the same long pins with two holes in each one, just like mine.

The OEM guide pins are under $2 each, I might just go that route if I get around to it :).
 
Lets start with this thing is heavy duty, much stronger that the rear of the truck, or the frame its mounted to I'm taking a good look at the frame to see where I can strengthen it. I may end up plating a section of it.
working with two floor jacks and jack stands I got it up on the truck, I'll drive with it for the week, then pull it, clean, prep, and coat with POR-15, easy tiuch up.


Plating the frame wouldn't be that hard but the rear frame is plenty strong without plate. I wheel my rig hard and the frame hasn't moved. Since it's fully boxed it adds a lot of strength from the factory.

What leafs are you running in the rear?
 
Status
Not open for further replies.

Members online

Forum statistics

Threads
278,317
Messages
3,554,126
Members
248,016
Latest member
Advally Service

Trending content

Back
Top