What Did You Do To Your 3rd Gen Today?

Status
Not open for further replies.
I went to O'Reilly's Auto parts and bought a trim and moulding tool kit. Then I returned home and parked my Toy in the sun for a couple of hours until it got real nice and warm. Here in Tucson it was 107 so I figured that it was a good time to remove all of the inside panels and the weather moulding on the drivers and passenger doors left side, and replaced them with some new molding that I had purchased from McGeorge Toyota Parts on-line store. Kind of expensive...but I needed the parts so I bought them. When I slipped the knew molding into place they slid right on like they had been buttered. The only problem I had was trying to keep from getting contact burns from the black rubber strips...Ouch!!It worked just awesome. When you live in Tucson you learn to deal with the heat or go inside every 10 min. to cool off..
 
Installed this Rockford p300-10T today.
1a8af90f15400056cb13aa036b63690d.jpg


Sent from my SM-G965U using Tapatalk
 
Cig lighter mod.

Rear cigg. lighter plug. Full time powered from my little blue seas panel under the glove box.

A little industrial looking but solid. There is a slightly larger aluminum plate on the inside and the rivets pull them together pinching the plastic tightly. Outlet is a toyota one I scored out of something at some time, had it in the parts bin.

Will come in handy for listening to podcasts while sleeping in the back or charging the laptop.

Nice job! That came out looking quite professional.
 
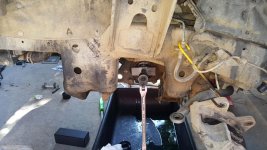
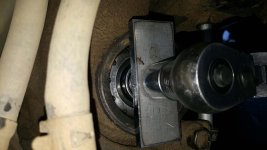
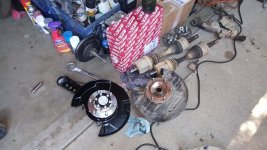
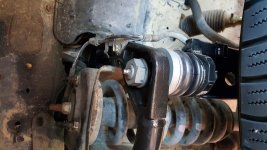
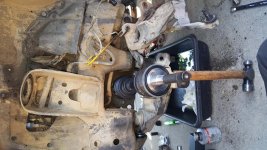
Started the front end refresh and manual hub swap. Got everything torn down and the drivers side reinstalled. Have to turn the spc ball joint 180 as I have it in wrong (I was a bit tired and rushing). But So far I have done the following:
Spc upper arms
Whiteline poly lowers
ECGS clamshell bushing
Cv seals
New manual hub cv's
Wheel bearings/seals/hub
Manual hubs
Poly rack bushings
Inner and outer tie rod ends
LBJ's

Will finish up tomorrow. Right now I'm pooped, but looks awesome none the less. Should firm up the front end quite a bit.
 

Attachments

  • 20190824_125802_compress60.jpg
    20190824_125802_compress60.jpg
    140.3 KB · Views: 536
  • 20190824_125809_compress2.jpg
    20190824_125809_compress2.jpg
    134.9 KB · Views: 524
  • 20190824_125823_compress52.jpg
    20190824_125823_compress52.jpg
    142.3 KB · Views: 533
  • 20190824_183134_compress30.jpg
    20190824_183134_compress30.jpg
    136.8 KB · Views: 535
  • 20190824_143145_compress36.jpg
    20190824_143145_compress36.jpg
    143 KB · Views: 531
thew a new set of plugs into the 2000 and man what a difference. I was getting a miss on both cylinders 1 and 3 and a bad hesitation under full throttle. All of it is gone and I have my power back. I'm sure my mpg will be back as well.
 
Install a Prinsu roof rack yesterday.

Looked at the Pinsu site, it says no-drill install but your front rack mount looks bolted...

Where did you get the rack, and did you bolt the rack on penetrating the roof up front or is it taped/glued?
 
Last edited:
Sunday:

Flipped my Thermostat so that the jiggle valve went from 12:00 to 6:00.
Coolant temps went from 209-211 average to 188-191.

AMAZING.

If you're wondering, YES the position of the jiggle valve absolutely does matter.
 
Day 1 of 2 doing a front-end refresh (suspension, bushings, lbj). Decided to work from the top down, so I started off with the upper control arms. Couldn't follow Timmy's method with the bearing splitter as mine is just too chunky at the edges, so I took to the metal lip with a hacksaw (sawzall) and just pushed the buggers out normally...

eTon7ck.jpg


Replaced with OEM, which went in great. The hardest part was having to be stretch armstrong to reach into the engine bay to move the bolt while holding the UCA from the wheel well while installing.

Then I moved onto setting up and installing the new Bilstein 6112's. Didn't order a new tophat (don't know why), not that it's necessary but it would have Looked nicer and I wouldn't have had to disassemble the OEMs. Be Warned!! This spring compressor ~ https://www.amazon.com/Powerbuilt-648627-Strut-Spring-Compressor/dp/B001OC5QJS ~ which is what Advance Auto loans, does NOT fit the Bilstein 6112 well. I don't know if it's the extra 1/2 inch body difference or what, but it Barely had ahold of the spring. No photos during because it was so sketchy.

JYDtcVi.jpg


Then it was time to get the truck up in the air so I could comfortably sit under it and do the steering rack bushings. These were a Lot easier than I had anticipated. Not sure if it's because I've only been doing control arm bushings, or they were excessively rotten (they were, IMHO), but they about just fell out. Replaced with some Energy Performance units, also did the sway-bars and end links with the same.

QiGRN1L.jpg


This feels a little ghetto, but when the truck is on a lift about 6' in the air, a jack support just isn't going to cut it. It's stable and secure though. Looped the ends around the frame rails:

T3ROAzn.jpg


And that's all in getting ready for tomorrow, where I'm doing the lower control arm bushings, lower ball joints (with new bolts) and getting the truck back on the ground for a final torque of everything.

JR9nsnr.jpg


Ah, spent a solid hour today just at the wire wheel cleaning corrosion off fasteners and brackets. Truck spent its whole life in Nashville, TN so not a salt state and there's next to no rust anywhere... but the fasteners show significant corrosion. Actually, I was shocked at just how back the LBJ bolts were when I zipped them loose. Painted anything that was previously painted, coated the rest in either anti-seize or grease, depending on the location/application.
 
Looks great! I did the same a little while back and it really made such a nice improvement. Lexus ain’t got nothin on me.


Sent from my iPhone using Tapatalk
 
Day 2 of...3? Dangit :frusty:

Thought I'd have an easy day today.... freaking re-assembly.

So, today I pulled the LCA's, popped the bushings with the "bottle-jack" method:

8HeN02f.jpg


Then cleaned them up and painted the small rusty spots (bleh, I just hit the whole thing with rattle-can) before popping the new Whitelines back in place:

YzT28rR.jpg


And the thing that started me down this path... LBJ's. Yup, they needed to be replaced... 20 years, 194k miles, stock vehicle with road tires and was "Grandmas" car. Doesn't mean the boots hold up though:

HwuCHkG.jpg


Go ahead and make that one bigger, glory in the rust-pit within. Photo just doesn't do it justice. The other side wasn't Quite as bad with the boot tear and I didn't bother digging further:

6SC2VBR.jpg


Buttoned up the front end as much as could be done before dropping it on the ground, and tackled the rear swaybar bushings since I hadn't bought those back when I'd done the back end a few weeks ago:

d7O2fl7.jpg


And somewhere in there I smashed my thumb, which gushed a bunch of blood.... happened to be a thumb I nearly amputated with a table-saw, so the nerves are wonky... dead in some spots, unbelievably sensitive in others... and where did I smash? Of course, a freaking sensitive spot. About made me pass out. I relay this because it threw me for a loop and is the reason I have some more work (maybe?) tomorrow. I hit every bolt on my checklist, but had to remove the front wheels because I didn't do the LBJ bolts or castle-nut and those aren't possible to do with a wheel on, at least with my tools. I also couldn't properly torque the rear adjusters on the LCA because I'd already installed the steering rack... but I'm going for an alignment soon, so I'll just get them to do it (or will check it After, more likely). I'm wondering what else I might have forgotten or skipped...

So, maybe there's a day 3... I donno, gonna think on it later. Of course, I'll Probably have to pull the dang front struts, compress those springs, disassemble and move the clips.... the nose on this thing looks Really high right now (I know it's not settled, going to drive it first). Use Bilsteins recommended 6 and 7 clip positions, which should have given me 1/2 inch rake.

qNTslZS.jpg
 
Last edited:
Finished the manual hub swap and front end refresh. Ended up pushing myself a bit much the 2nd day in the heat we were having and received on hell of a heat rash and got really light headed and dizzy. Greased the ball joints yesterday and today/tomorrow I'll top off the front diff, and torque the lugs. Then time for a test drive yay! Eimkeith's bumper should be here next week so I have to get the 1" bl installed, so I'll start prepping for that today.

So for all that work in the heat, take plenty of breaks and drink plenty of water and know when to call it quits. I was rushing to get it done so I could drive it on Monday and darn near paid the price for it.
 
Thinking about fixing a problem with my 3rd gen, rear door not receiving orders from front buttons. Is it a fuse replacement? I want help. The window rolls down with key in rear hatch. No wiper, no defrost.
 
Status
Not open for further replies.

Members online

No members online now.

Forum statistics

Threads
278,316
Messages
3,554,120
Members
248,016
Latest member
Advally Service

Trending content

Back
Top