What Did You Do To Your 3rd Gen Today?

Status
Not open for further replies.
Rusty nut wins

Check engine light came on yesterday and it was a P0136. Armed with a new O2 sensor and WD-40 rust penetrant, I slid under the truck on a Brooklyn side street, hoping for a quick swap. Many deep breaths and two hours later one of the nuts persevered and I had to call it a day. I sprayed a sh*t ton of WD-40 on it before throwing in the towel. I'll try again tomorrow.

Interestingly enough, when I started the truck after all this... the engine light was gone. :shrug:

Imgur: The magic of the Internet
 
So while working on a place to install the XM satellite radio antenna today, I found this.....no wonder the rear 3rd brake light and plate lights are not working. In fact it is a wonder that anything is working back there. 5 complete severed wires and at least 3 with exposed wires.

isn't it just pathetic? i had three severed and three more about to go. i soldered in splices for all of those last week. good on ya for checking for this.
 
Check engine light came on yesterday and it was a P0136. Armed with a new O2 sensor and WD-40 rust penetrant, I slid under the truck on a Brooklyn side street, hoping for a quick swap. Many deep breaths and two hours later one of the nuts persevered and I had to call it a day. I sprayed a sh*t ton of WD-40 on it before throwing in the towel. I'll try again tomorrow.

Interestingly enough, when I started the truck after all this... the engine light was gone. :shrug:

Imgur: The magic of the Internet

When I did my O2 sensors, I sprayed PB blaster on them over and over for days and it was still tricky to get them off. I ended up using a bolt-biter on a couple cause they were just too gone and corroded, with that said I had some type of nuts laying around that fit the stud pretty well so the threading probably isn't obscure or anything.
It also happened for me the two that were stuck were down the exhaust and more accessible. If you're in the same boat, try what I did and let the exhaust totally warm up (rev it a bit to get it toasty), and spray the break free once they're hot. Wait 5-10mins, spray again, wait again, then turn the car off and try tackling them. Be careful though. Working around a hot exhaust is kinda like playing Operation :target:
Strangely enough I had a different code on my OBD, but for the same reason, one sensor was receiving low voltage sporadically. I can't remember which one it was, but that code also came and went without reason
 
Last edited:
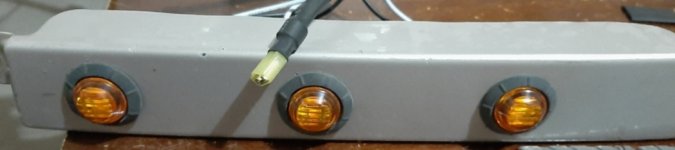
Working on getting rid of huge bumper blinkers currently
 

Attachments

  • 20201031_221225.jpg
    20201031_221225.jpg
    124.2 KB · Views: 324
Who makes those??

Those look homemade with some raptor lights, but SRQ makes some very nice ones if you're not handy. Was actually gonna install them this weekend, maybe. They're a little expensive though, and if your filler panels are in good condition I'd recommend doing it yourself.
 
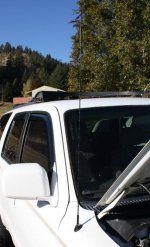
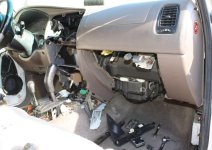
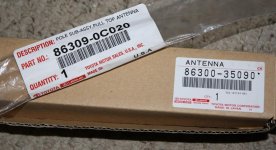
Loving seeing all these cool mods we are all doing. I replaced the non functioning motorized antenna with a solid one today. I am doing the sound system as I post this so I needed to get it working. Pretty easy, just have to remove a bit of stuff to route the new cable. Once I had the old one free from all the clips I used the fish tape technique to pull it through. I guided it carefully and then clipped the new one into the original position. Super nice to use real Toyota parts as they bolt in directly and have a quality look and feel. Have a great day all!:thumb:
 

Attachments

  • 1996 antenna 2.jpg
    1996 antenna 2.jpg
    60.2 KB · Views: 272
  • 1996 antenna 3.jpg
    1996 antenna 3.jpg
    82 KB · Views: 287
  • 1996 antenna1.jpg
    1996 antenna1.jpg
    86.5 KB · Views: 271
Haven't really done anything to the 4Runner in weeks, so decided the least I could do was give her a bath. Cleans up so well for a 23 year old truck!

HJe82Oz.jpg


w5gAMj4.jpg
 
Some people like the 99-02 bumper design – I am not one of those people. And after installing a 1" body lift last week, it was looking particularly heinous. So this weekend, with a lot of trimming and fabricating some new mounting brackets, I managed to make it visually tolerable (for my taste, at least – your mileage may vary). Eventually, I'll build or buy a nice winch bumper but this works for now.

apologies for the poor photo quality

0ez1auk.jpg


809iMmu.jpg


vj2fyYA.jpg
 
Replaced this mess that went at least another thousand miles like that and got me home by some amazing miracle...80,000 miles on it, would have gone more except for being broken....
aJ3jm9I.jpg


with this Marlin 1200# kit, disk with raised spring side facing the flywheel for the 3.4, flywheel 61 ft lbs-4 pass star pattern, disk 14 ft lbs pattern as portrayed in FSM
nShFCam.jpg


and also am doing a couple other little here and there things
 
Some people like the 99-02 bumper design – I am not one of those people. And after installing a 1" body lift last week, it was looking particularly heinous. So this weekend, with a lot of trimming and fabricating some new mounting brackets, I managed to make it visually tolerable (for my taste, at least – your mileage may vary). Eventually, I'll build or buy a nice winch bumper but this works for now.

apologies for the poor photo quality

I dig what you did man. Would you consider doing a 96-98 bumper on it? slimmer profile.
 
I dig what you did man. Would you consider doing a 96-98 bumper on it? slimmer profile.

thanks! that was my original plan so I’d been monitoring local junkyard inventories but hadn’t seen anything come up after a few weeks. I’m not a patient person, though. ditched that plan to just use what I had at my disposal – plus, this way was a big $0 project (the best kind)

I actually think that, with the trimming and relocation brackets, this way sits in tighter with the profile of the grille than the earlier model bumper would in its stock position.
 
Last edited:
Replaced this mess that went at least another thousand miles like that and got me home by some amazing miracle...80,000 miles on it, would have gone more except for being broken....
aJ3jm9I.jpg


with this Marlin 1200# kit, disk with raised spring side facing the flywheel for the 3.4, flywheel 61 ft lbs-4 pass star pattern, disk 14 ft lbs pattern as portrayed in FSM
nShFCam.jpg


and also am doing a couple other little here and there things

Nice work. How’d you manage to get a socket on those top bell-housing bolts? Did you have to drop the cross member and let the tranny lower down a bit to get clearance?
 
Nice work. How’d you manage to get a socket on those top bell-housing bolts? Did you have to drop the cross member and let the tranny lower down a bit to get clearance?

I have a 1" body lift which is plenty for those bolts. Pulled the cat too, which wasn't necessary, but the extra room is nice and I need to replace that gasket anyway. I did drop the cross member to get the tranny/transfer combo out from under the truck.
 
I have a 1" body lift which is plenty for those bolts. Pulled the cat too, which wasn't necessary, but the extra room is nice and I need to replace that gasket anyway. I did drop the cross member to get the tranny/transfer combo out from under the truck.

good to hear – I just installed a 1” body lift hoping it would make those bolts and the rear shock top bolts more accessible. last time I tried to do the clutch without that working space and eventually gave up on it. guess I’ll give it another go in about 70k. cheers
 
Finally chased down a squeak and clunk thats plagued me for months :usa2::usa2:
Thought it was my sway bar, everything around the squeak/clunk pointed to the sway bar, and to boot my end links were making noise too so it really convinced me it was the bar somehow, but it turns out it was the front diff support arms; on top of me never fully tightening down the bolts to proper torque after my diff drop (101ft-lbs, was maybe at 50-60), I can also see one of the bushings is fairly corroded from years of oil dripping down.
Regardless, torqued them down and 90% of the noise went away, so they have to be the culprit. Feels good to finally solve this
 
Went to replace my leaking passenger side front diff seal. Discovered my Reman-CV sealing surface was about 0.2mm smaller in diameter than my stock CV axle. Maybe they put them on a lathe and just turn them down? Anyway, decided to leave the as-new seal in the diff and replace just the CV axle. So far no more leaking!! Dang reman CV axle.... Also noticed my NEW sway bar links have cr*p rubber that's already cracking.
tR1rtBz.jpg

06UC0SB.jpg

KUnwDpt.jpg
 
Status
Not open for further replies.

Members online

No members online now.

Forum statistics

Threads
278,316
Messages
3,554,120
Members
248,016
Latest member
Advally Service

Trending content

Back
Top