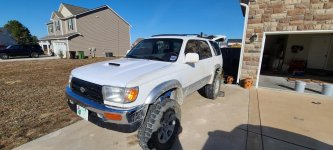
What Did You Do To Your 3rd Gen Today?

Status
Not open for further replies.
Oil change for the front diff. Last time I had to air chisel the drain plug off, so I had installed a new one with copper antiseize and under-torqued it (spec is 48 ft lb, I torqued it to 40). It STILL was a pain in the ass to get off!! I'm happy I didn't strip it though.

Once again, I had a new plug on hand just in case the old got stripped. This is a Lexus drain plug (PN 90341-24016) which has a bigger hex so hopefully it will be easier to remove -- I'm not the first to do this, but I'm not sure who to give credit to. The threads are a bit shorter but it seems ok and it has a magnet like the old one. Only $11 shipped from ssl-parts.com

nWUWL3W.jpg
 
^From the front diff, to the rear diff!

Replaced the original rear diff fill plug on mine . It was just about rounded off (not by me, previous lube tech jabronis). New crush washer too added.

Brother bought two of these pretty cool Toyota wheel stoppers, and I bought one off of him. They're much cheaper when you buy them through Amayama of Japan. I don't see myself using it, but I kinda like these quirky little accessories. Will be sitting under the seat where the jack kit is.


Finally pulled apart all my auxillary lighting wires that were crimped during install. Now all are soldered and heat shrunk then wrapped in harness tape. Shorting out in water crossings don't scare me now!
 
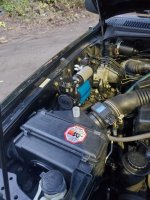
Mounted up arb compressor under the hood took awhile to determine where I wanted it but finally decided. No more cruise control haha don't need it on trail anyway
 

Attachments

  • 20210114_183651.jpg
    20210114_183651.jpg
    129 KB · Views: 462
I spent the weekend installing a backup camera, and while I was there painting the license plate surround. While I had the dash open I also replaced my dash bulbs again after I decided I didn't like the green I had used for my climate control lights a few weeks ago.

And just because it seemed like a good idea I decided to make things more difficult and instead of powering my backup camera with power from the reverse lights, I wanted to make it switchable. To do that without powering my reverse lights any time I turned on the backup camera, I used a SPDT (On-On) switch which tapped into the ACC fuse for constant power, or tapped into the reverse light circuit at the junction box by the drivers feet to only power on when in reverse.

The end result is a fully functional switched backup camera, 1 dead reverse light (I suspect I have a bad connection where I tapped the reverse light circuit), and a mess of malfunctioning turn signals/ hazard lights. Most of the turn signal power runs through the same connector on the junction box that I tapped for my reverse light power, so today I get to hunt down the mistake I made in there and try and fix it. I'm not looking forward to it as there is not much space to work in under there, and not a lot of extra wire length which probably means uncomfortable under dash soldering.
 
I spent the weekend installing a backup camera, and while I was there painting the license plate surround. While I had the dash open I also replaced my dash bulbs again after I decided I didn't like the green I had used for my climate control lights a few weeks ago.

And just because it seemed like a good idea I decided to make things more difficult and instead of powering my backup camera with power from the reverse lights, I wanted to make it switchable. To do that without powering my reverse lights any time I turned on the backup camera, I used a SPDT (On-On) switch which tapped into the ACC fuse for constant power, or tapped into the reverse light circuit at the junction box by the drivers feet to only power on when in reverse.

The end result is a fully functional switched backup camera, 1 dead reverse light (I suspect I have a bad connection where I tapped the reverse light circuit), and a mess of malfunctioning turn signals/ hazard lights. Most of the turn signal power runs through the same connector on the junction box that I tapped for my reverse light power, so today I get to hunt down the mistake I made in there and try and fix it. I'm not looking forward to it as there is not much space to work in under there, and not a lot of extra wire length which probably means uncomfortable under dash soldering.

And to follow up on this, I have a PSA. When working on plugged connections, don't be an idiot. Double check that you plugged everything back in, and that the plug is fully seated and clicks so it doesn't back itself out after you put everything back together. Thank you for coming to my lecture. Have a great day.
 
Mounted up arb compressor under the hood took awhile to determine where I wanted it but finally decided. No more cruise control haha don't need it on trail anyway

You removed your CC so you had a good spot for your arb pump? thats madness to me haha. Feel like there is plenty of other spots it would fit nicely.
 
Replaced the LCA bushings... Timmy makes it look way too easy.

20210117-182737-1.jpg


Although, after the alignment this one change has added a whole different dynamic to how the front end feels! Only one bearing and one axle before the entire front end is replaced, lol!
 
Shrockworks bolt-on

Due to a lack of welding, let alone any non-battery-powered electricity, I installed a set of Shrockworks bolt-on sliders in the vacant (holiday) parking lot at my job. Much cursing, flying hot metal shards, and a $50 step drill bit later, they are rock solid.
 

Attachments

  • IMG_8432.jpg
    IMG_8432.jpg
    130.9 KB · Views: 358
Panhard correction kit completely changed my truck! I have a 3.5 inch lift in the front and almost 5 in the rear. I was driving it without the correction for a while and it got the job done but the correction kit really brought it back to a stock feeling. Very happy
 
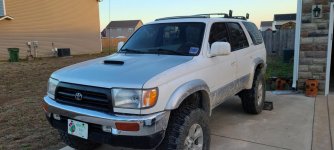
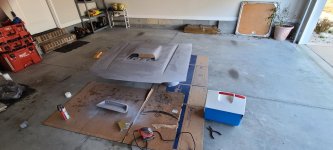
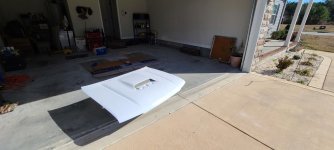
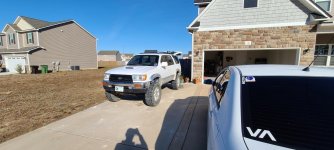
Couldn't get a hold of enough 056 so went with a generic white for now so I could keep the hood on without looking so crazy. Color isn't perfect but better than it was and happy with my rattle can garage paint job!
 

Attachments

  • 20210120_074950.jpg
    20210120_074950.jpg
    144.3 KB · Views: 287
  • 20210120_091014.jpg
    20210120_091014.jpg
    142 KB · Views: 296
  • 20210120_131258.jpg
    20210120_131258.jpg
    138 KB · Views: 300
  • 20210120_144101.jpg
    20210120_144101.jpg
    144.8 KB · Views: 291
If it bothers me too much I'm confident that I can do it again when I get some 056 color matched paint
 

Attachments

  • 20210120_144114.jpg
    20210120_144114.jpg
    146 KB · Views: 297
You removed your CC so you had a good spot for your arb pump? thats madness to me haha. Feel like there is plenty of other spots it would fit nicely.

Not knocking on your choice [MENTION=640628]98snowrunner[/MENTION] as I used the same spot but relocated/adjusted how my CC sits. I did that cause I use my CC on long 13hr drives. But my compressor is tight in their. If I didn't use the CC I too would eliminate it fora cleaner compressor area. It can be a struggle to undo my MAF harness currently. Basically without eliminating the CC that compressor would be smashed in tight to MAF connector/Air box, CC, and ABS module. That's my situation I think you made the right call if you don't use the cruise control.
 
spent a bunch on it on ordering parts, not sure when I will get to all of it to install...
LBJ's and bolts, outter tie rods all toyota, steering rack bushings and sway bar busings ( energy suspension), gonna do them asap, got an alignment scheduled in 2 weeks, parts wont get here for a few days before.shipping is slow to this place.
crush washers for every drain and fill plug, o ring for power sterring pump resavior clean out, magnafine filter for trans line plus new tranny filter, down stream sensor, ( currently thowing a 420 code)
lots of new bulbs, leds for back up, parking and dome, PIAA for headlights ( dont want to do led or other right now on headlights)
leather steering wrap, rubber brake pedal pad,window visors and hood protector
weather tec rear mat thingy...in cargo area
monday goes in for a new windshield

guess im gonna keep this replacement rig after a lot to make it run right to confirm I was gonna keep, ( gambled and bought as a fixedr upper) and after many days of driving in snow/ice.determined to keep and thus the new order of parts...$$$$ ..otherwise...id not spend the money...trying to come up with a name for her.

this spring it will get a mild lift b4 overland season.....still got all my overland stuff from the "old" rig
 
Last edited:
Status
Not open for further replies.

Members online

No members online now.

Forum statistics

Threads
278,316
Messages
3,554,120
Members
248,016
Latest member
Advally Service

Trending content

Back
Top