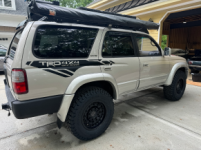
What Did You Do To Your 3rd Gen Today?

Status
Not open for further replies.
Finally replaced the factory coil packs after 220k miles. Also got the correct spark plugs in (was running 1 step colder for years from my SC days). Replaced the plug wires and MAF as well. She runs so much smoother now.

Fuel pump and fuel filter is next month.
 
Oh darn, I always wanted to see how that's done!

I got to know how you did it lady....ive got some springs and shocks I need to swap out, and i am never using those hook things again in my life.

So I needed to replace the right front bilstein, but our spring compressor is a no-how no-way for the front springs so I started doing some research. There were a couple of mentions on a Tundra thread (what my coil-overs are) about spring compressors that do work and then one that mentions doing it using the weight of the truck. There was a link to videos on you-tube called PART 1 TOYOTA TACOMA STRUTS INSTALL | No Spring Compressor, and PART 2... The guy was working on an 05 tacoma, so we have a few more things to detach than he did. Basically, if it's attached to the lower control arm it's either going to be loosened (bolts that hold the lower control arm to the truck- mark alignment cams first) or removed (sway bar link, outer tie rod end, 4 lower ball joint bolts).

I put the right side frame on my super big fun jack stand (harbor fright), pulled the wheel,
Undid the sway bar link, the tie-rod end, the 4 bolts that hold the ball joint assembly on.
Marked, then loosened the bolts for the lower a-arm because we're gonna need that thing to go maximum droop.
Next I supported the lower a-arm with a jack until it was lifting the truck a little. After that I took the nut off the top of the shock shaft, then slowly lowered the jack until the spring was loose. The upper ball joint did hang on the spring a little, but since the spindle wasn't attached to the lower a-arm it was easy enough to move out of the way. Once there was no longer any tension on the spring I was able to undo the lower bolt and remove the shock and spring.

To install the shock and spring I set them in place, somewhat loosely bolted the shock to the lower control arm, then slowly jacked up the lower control arm. As it ascended my husband used a wrench (guy in the video used his fingers, no thank you) to guide the shock shaft through the hole in the top-hat.
Once it was through it was just a matter of making sure the spring was in the proper place as I continued to raise the lower control arm (and therefore the coilover) until the nut could be threaded on and installation completed.

Ball joint bolts have been replaced with new (or the ARP) and properly torqued with loc-tite, still need to finish bolting the tie-rod end back on, as well as the sway bar link and the wheel.
Once it's on the ground again I'll tighten up the lower shock mount and lower control arm mounts bolts, making sure to match my marks on the alignment cams. I'll also seat and tighten the tie-rod end.
I didn't replace the top-hat stuff, of course that would be done before installing the new shock and spring.

I'll try to remember pics for the other side, strictly for entertainment as I am not a mechanic, nor do I play one on tv.

 
Last edited:
[MENTION=5345]habanero[/MENTION] well said on how to use vehicle as spring compressor.

Thing I do different since BJ bolts rated one-time use, disconnect big honkin stud of LBJ.
Procedure works for Tundra 6112's on 3rd gen also.
 
This works extremely well!

I dislike re-using the LBJ bolts so many times, and having poly
bushings really helps get the arm to move w/o messing with the cams.

Nice to know about the poly bushings, and I agree about the bolts. That should have been reflected in my post, thanks to you and 96RedRunner now it is.

[MENTION=5345]habanero[/MENTION] well said on how to use vehicle as spring compressor.

Thing I do different since BJ bolts rated one-time use, disconnect big honkin stud of LBJ.
Procedure works for Tundra 6112's on 3rd gen also.

You're right about the bolts, I fixed my post to reflect that because that's important.

I have the ARP bolts on the right side, a product of Spiker Engineering's usual well-done research https://www.toyota-4runner.org/3rd-...-know-about-lbj-bolts.html?highlight=arp+bolt

Being in the rust belt...10 months later...
bBDmtxel.jpg


Which is very likely no problem, but when the older oe bolts on the left side look like this...
qa4iSPpl.jpg


Though they're not as good as the ARP test-wise I bought the requisite 4 lower ball joint bolts and used them. I kept the ARP bolts for the uh-oh kit.
 
Last edited:
[MENTION=5345]habanero[/MENTION] I would stick with messing with cam bolts, while loose rotate cams functioning camming action.
Spray liberally with PB or such better chance of not having to cut them out at later date.
$.02 worth from former StL inhabitant/survivor. :)
 

Attachments

  • StL Pumpin gas.jpg
    StL Pumpin gas.jpg
    49.8 KB · Views: 181
[MENTION=5345]habanero[/MENTION] I would stick with messing with cam bolts, while loose rotate cams functioning camming action.
Spray liberally with PB or such better chance of not having to cut them out at later date.
$.02 worth from former StL inhabitant/survivor. :)

You're not wrong. Luckily they're still in good shape, the last alignment I had done somewhat recently the tech was surprised. IIRC there was some anti-seize involved regarding the sleeves when I pulled the lower a-arms for new bushings.
My sills....we're not going to look at my sills right now! Repairs need to be made...last winter was rough, I don't know what they were using on the roads, other than it was no good and very bad.

Truck's back together, will do left side when the opportunity exists.
 
Being in the rust belt...10 months later...
bBDmtxel.jpg


Which is very likely no problem, but when the older oe bolts on the left side look like this...
qa4iSPpl.jpg


Though they're not as good as the ARP test-wise I bought the requisite 4 lower ball joint bolts and used them. I kept the ARP bolts for the uh-oh kit.

Thanks for sharing these, this is horrible. It looks like the ARP bolts had some basic black oxide coating, which would not be good for an undercarriage or anything else exposed to weather. The Toyota ones have much better plating. I might update my posts in the study to reflect this. Did you switch to the "black" bolts?

Would you be OK if I shared your photos, and can you send me some more if you have them? I think you have my contact info; if not, just ping me on PM.
 
Would you be OK if I shared your photos, and can you send me some more if you have them? I think you have my contact info; if not, just ping me on PM.
The ARP's on my LBJ's here in SoCal are rusting too - not *quite* that bad, but still fully rusted top and bottom. They will definitely have to be brushed and soaked before removal in the future. Looks like whatever makes those bolts strong also makes them prone to oxidation...

-Charlie
 
Thanks for sharing these, this is horrible. It looks like the ARP bolts had some basic black oxide coating, which would not be good for an undercarriage or anything else exposed to weather. The Toyota ones have much better plating. I might update my posts in the study to reflect this. Did you switch to the "black" bolts?

Would you be OK if I shared your photos, and can you send me some more if you have them? I think you have my contact info; if not, just ping me on PM.
Yep, the black ones 663-1004.
I've still got the bolts, they're out of the truck and covered in b'laster stuff. They didn't give me too much trouble coming out- I didn't even try until they'd had a couple of days to think about their situation.

Will get pics to you one way or another, will try to do it tonight (central time).

EDIT: just realized I didn't answer your question. I went with the ones for the 96 Toyota 90080-10066, the flange bolts that match what's on the left side.
 
Last edited:
The ARP's on my LBJ's here in SoCal are rusting too - not *quite* that bad, but still fully rusted top and bottom. They will definitely have to be brushed and soaked before removal in the future. Looks like whatever makes those bolts strong also makes them prone to oxidation...

-Charlie

Charlie, would you mind sharing a photo? You know that parts are substandard when they rust in So Cal!
 
Yep, the black ones 663-1004.
I've still got the bolts, they're out of the truck and covered in b'laster stuff. They didn't give me too much trouble coming out- I didn't even try until they'd had a couple of days to think about their situation.

Will get pics to you one way or another, will try to do it tonight (central time).

Thanks for the pics. I guess that's not super surprising given that they are finished in black oxide, not plated.

I'm going to update my recommendations based on this feedback, I think the Toyota black bolts are a better choice, since they were essentially tied with ARP, but are plated and won't rust like these did.

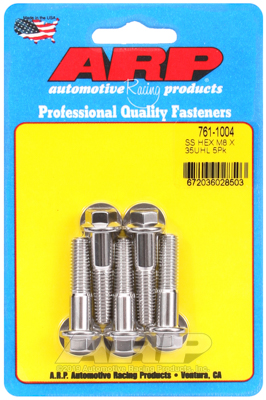
If I can dig up my test setup I might run some tests on ARPs stainless bolts, like the 761-1004. They are 300 series, so a tad weaker than the chrome moly bolts, but they won't rust. That may be a good alternative:

761-1004.jpg
 
Finally able to log back in here as anyone else had an issue ? Anyway changed front brake pads and rotors at 383,988 then changed oil at 384,987
 
Changed the left shock using the truck as a spring compressor.
I'm silly pleased with how well this worked.

A few pics with explanations, description of the entire job was a few posts back.
I'm still not a mechanic, but I can whip up a whole lot of school lunches!
Floor jack to lift the loosened lower control arm and compress the spring so I can remove the shock.
okp0ixel.jpg


Using a wrench to push and guide the shock shaft into place, part of installing the new one.
ytbYdwml.jpg


and there you go, ready for the bushing, washer, and nut
Q5x7pyZl.jpg
 
Last edited:
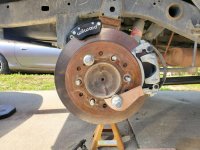
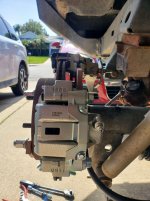
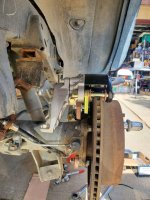
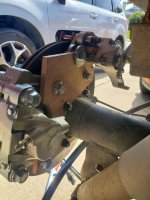
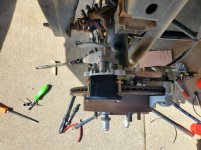
Started the work on the land cruiser rear caliper brackets and wilwood mc4 parking brake bracket. My co workers dad is a carpenter and he planed me down some hard wood to use for the bracket template. I used the ford caliper bracket to get the axle housing bolt pattern, then started mocking everything. Started with the caliper, was going to use some penny's to space the caliper bracket off the rotor, but I used some zip ties taped to the rotor and it worked perfectly. Got the caliper bracket as close to centered as I could (I don't have any m12 shims at the moment).

The caliper fits perfectly. Moves freely and the line and bleeder are perfect! Next up was the parking brake. It was a bit more tricky as the lever and cable brackets stick out a bit. Since I was only mocking up on the passenger side (brackets are the same left to right) I had to get it to clear the panhard mount and bump stop (I'm changing to perry parts bumps) so I'll have a bit more room then the oem bumps.

Got it mounted to the bracket. Now the big test is wheel clerance. It fits perfectly. About 1 inch all around on a oem 5 star 16 inch rim. Sweet. Tidied up the template by removing material where it's not needed. I'll use 3/8" steel for the brackets. Cutting them out will be fun though.....sigh....

Here are some pics.

Edit to add: I'll be swapping to a lc80 brake booster and master cylinder as well.
 

Attachments

  • 20240508_160716_ATtfPNRH7U.jpg
    20240508_160716_ATtfPNRH7U.jpg
    136.6 KB · Views: 331
  • 20240508_160738_RuNIC5jd2d.jpg
    20240508_160738_RuNIC5jd2d.jpg
    134 KB · Views: 330
  • 20240508_160808_7X3BA18G2v.jpg
    20240508_160808_7X3BA18G2v.jpg
    137.3 KB · Views: 317
  • 20240508_160825_vViDJarA5I.jpg
    20240508_160825_vViDJarA5I.jpg
    128.9 KB · Views: 329
  • 20240508_160732_EiMHWeNE6l.jpg
    20240508_160732_EiMHWeNE6l.jpg
    136.2 KB · Views: 328
Last edited:
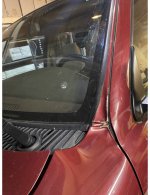
windshield replaced body repainted

Anyone know a skilled body shop place in the north Idaho area? Broke my mirror, dented my frame around the window.Wondering if someone knows of a guy who can do body work/replace window as well? Don't want frame to rust
 

Attachments

  • 4runner frame.jpg
    4runner frame.jpg
    131.8 KB · Views: 307
Paint, Tires, Rims, Tint

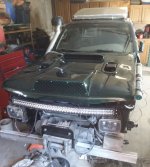
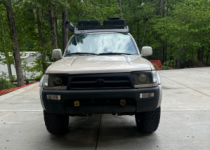
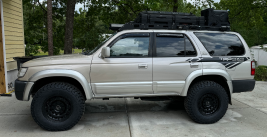
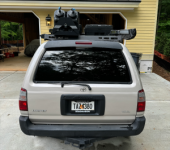
Almost to the end of my 1997 4runner build. I started this project in 2021 to build the best 3rd gen I could, almost full restoration. I'm moving to my final project, a full engine rebuild. This last month, I got most of the car painted, new rims and tires, and nano ceramic tint.

Link to the full build sheet with costs and links -
4runner build - Google Sheets
 

Attachments

  • IMG_7168 1.png
    IMG_7168 1.png
    119.9 KB · Views: 313
  • IMG_7170 1.png
    IMG_7170 1.png
    70.9 KB · Views: 310
  • IMG_7171 1.png
    IMG_7171 1.png
    134.5 KB · Views: 303
  • IMG_7172 1.png
    IMG_7172 1.png
    118.9 KB · Views: 306
Last edited:
Status
Not open for further replies.

Members online

Forum statistics

Threads
278,316
Messages
3,554,120
Members
248,016
Latest member
Advally Service

Trending content

Back
Top