What did you do with your 4runner today?

Lookin good Alex!

Thanks!

Here's an update!
juhyjy6u.jpg
 
What's that supposed to mean? :p

Still working! Almost done with fab, then we have to finish weld and grind.

We are TIG welding this one. None of the machines here are set up for steel, only aluminum, stainless, and brass. The TIG welding is taking FOREVER
ebymubes.jpg
 
SICK!!!!...alex that truck is badt assss....needs a spray of camoflauge..n its battle ready....needs a zombie outbreak sticker to be complete
 
Thanks everyone! I'm not 100% done, so for the meantime I'm gonna throw some cheap black spray paint on it until we add the winch hole and my shackle mounts. Then I will rhino line it


wow, that bumper leans.
What do you mean?

SICK!!!!...alex that truck is badt assss....needs a spray of camoflauge..n its battle ready....needs a zombie outbreak sticker to be complete

Thanks man! I have a few zombie stickers, plus my 42" is hooked up to a "zombie lights" switch from OTRATTW
 
wow, that bumper leans.

What do you mean?

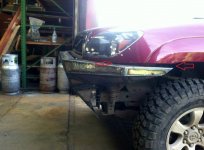
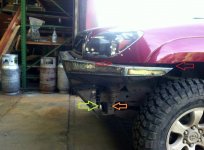
I think he's talking about how it appears to lean down at the side of the bumper

(indicated by arrows because i didn't think i could type an explanation lol)
4uvanape (1024x765).jpg
most bumpers do have a gap there to allow the body to flex on the frame and the bumper not interfere with the body but typically the gap is even.

also since your still in the build stage of the bumper I might suggest a little strengthening option.
4uvanape (1024x765) - Copy.jpg
The orange arrow in the picture above is pointing to a hole pre-threaded from the factory. you can make a bracket that bolts to that factory hole and then attaches to the plate that is indicated by the green arrow. Just a suggestion

also i think it looks pretty kick ass, nice job!
 

Attachments

  • 4uvanape (1024x765).jpg
    4uvanape (1024x765).jpg
    79.5 KB · Views: 652
  • 4uvanape (1024x765) - Copy.jpg
    4uvanape (1024x765) - Copy.jpg
    80.7 KB · Views: 673
Last edited:
Thanks everyone! I'm not 100% done, so for the meantime I'm gonna throw some cheap black spray paint on it until we add the winch hole and my shackle mounts. Then I will rhino line it


What do you mean?


Thanks man! I have a few zombie stickers, plus my 42" is hooked up to a "zombie lights" switch from OTRATTW

DIY rhino line or get it done?
 
20130605_141039_zps13ec7602.jpg~original


Alex, i was just saying the bumper gap leans hard, while your still building and its far beyond what i personally could do so i definitely give you credit there, the gap would drive me insane. But from what im told its normal with all aftermarket bumpers, could be the reason why i dont have one yet.
 
Looks good man, mine leans the same way but I figure it might come forward a bit first time i pull you out of a tree with the winch so I didn't adjust it yet. I just ordered some sliders from Stubbs welding. Owner is super cool and I should have them in a week. Talk about quick turnaround. Alex did my guages Sunday and it looks great, I'll post a pic later.
 
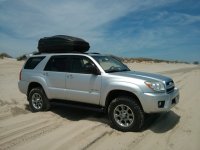
Love em... Had a bunch of fj cruiser people waving at us on the beach today.

A heads up tho, these 8 hole style fj rims are about 5lbs heavier per than the 6 spoke fj rims,
I'll take the trade off as these still look good dirty while the shiny 6 spoke don't IMO.

Off-set on these are 0. 17x7.5 which almost gives the same spacing as 1.25in wheel spacers.
 
How is your luggage rack mount holding up with that led bar Alex? Been thinking about doing something similar
It's holding up just fine actually! Not bad for Gerry rigging

I think he's talking about how it appears to lean down at the side of the bumper

(indicated by arrows because i didn't think i could type an explanation lol)
View attachment 90417
most bumpers do have a gap there to allow the body to flex on the frame and the bumper not interfere with the body but typically the gap is even.

also since your still in the build stage of the bumper I might suggest a little strengthening option.
View attachment 90420
The orange arrow in the picture above is pointing to a hole pre-threaded from the factory. you can make a bracket that bolts to that factory hole and then attaches to the plate that is indicated by the green arrow. Just a suggestion

also i think it looks pretty kick ass, nice job!

Very good points Austin and thanks for the pictures! Plus one internets for you.

Going to add the winch hole, the shackle mounts, and the extra mounting holes next time we work on it. For now I'm just gonna paint it to keep it looking pretty

DIY rhino line or get it done?

DIY, I don't have that kind of money right now
 

Members online

No members online now.

Forum statistics

Threads
278,316
Messages
3,554,112
Members
248,016
Latest member
Advally Service

Trending content

Back
Top