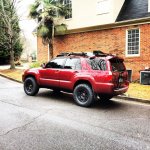
What did you do with your 4runner today?

I read in another lower bj post about somebody else having the same issue with not having the right size receiver to press it. I think they did something similar to what you did and just fabbed up they're own. I know [MENTION=47269]Darklight[/MENTION] did his and i think everything worked out fine, maybe i'll hit him to see what kit he rented. I was thinking they might be a little easier to press in and out once off the truck since i'll have to take them off anyways to to the bushings but idk it might not make a difference?
You just need the kit that has more cups. There's the basic like 5 or 7 piece then a kit with 13 or 15...i don't recall exactly how many. But with the right kit and a cheater bar it's really easy. I did both mine in under 2 hours in the dark. Watch where you position the zerks as the cv axle will block access if you don't get them properly oriented.

Oh yeh. Leave the lcas on the truck. Just disconnect at the lbj bracket. Easy peasy.
 
Jared, it is actually easier to press the ball joints on/off while on the vehicle, unless you have a good vise to hold them. As for the ball joint press kit. Get the biggest one you can find. Get a big cheater bar too. I used a breaker bar with about a two foot pipe over it. Just row them off and back on. When putting them back on make sure they start off evenly with the zerks facing the right way. Good luck with everything.

Check out my write up for more info.


Lower Ball Joint Replacement - Toyota 120 Platforms Forum


Bobby

Ok great good to know, I was just on T120 last night looking at both your write ups for the BJ replacement and the poly bushings replacement. Great write by the way Bobby :thumb: You really make it easier and take out a lot of the pain and suffering for the rest of us:hatsoff: So you think i should just do the BJ's first while the lower control arm is still on the truck and then take it off to do the bushings after? Thanks bro

You just need the kit that has more cups. There's the basic like 5 or 7 piece then a kit with 13 or 15...i don't recall exactly how many. But with the right kit and a cheater bar it's really easy. I did both mine in under 2 hours in the dark. Watch where you position the zerks as the cv axle will block access if you don't get them properly oriented.

Oh yeh. Leave the lcas on the truck. Just disconnect at the lbj bracket. Easy peasy.

I'm going to look around in advance and see what kits i have available to me. Hopefully between Advanced auto,Pep boys, Napa and my buddy's shop i'll find the right one. Thanks for the heads up about the zerks fitting i also read that in another thread about having it properly positioned in the right direction so it's easily accessible..
 
Last edited:
Discovered that my sunroof drains are clogged? Frozen? It finally warmed up here and I had water sloshing around and making its way through the top of each A pillar.

Snaked out the holes with long wire that should be going to the ground but I can't see where they drain down bottom. Plenty of snow and slush not helping that search.

Can't tell yet if the are draining correctly. Dried things up and pulled both A pillars to keep tabs on it.

Have towels under the mats to try and get the excess water out of the carpets.

Annoyed but hoping a couple of warmish days will set things right again.
 
I squirt a turkey basters worth of marine antifreeze (environmentally friendly) into my sunroof drains before cold weather settles in, never had a problem...
 
Took my 4th gen to go check on some land my dad owns in the Zuni Mountains. Normally there would be so much snow, a 4runner would probably be unable to make it. This year, just a little bit of snow, rough and muddy roads. Took a few pics of the land.

F8F183AB-775B-4933-9896-0E0E9637C1D3_zpsmsfhgwzw.jpg~original


4754094E-FACF-492D-9A20-DAEB843D5236_zpsnqgxs0rb.jpg~original


1D510C8F-4083-4B5C-93D8-DE73A6832F72_zpsquvksnx9.jpg~original
 
Last edited:
Drove up North to see my dad and family this weekend. It's about a 2 hour drive mostly county highway and a little expressway. Took it at 80-90 without a single hiccup! I love passing little cars with my big ass 4runner! :D :lookout:
 
totally underestimated the weight of the shrockworks bumper. holy s*** my back is killin me! got me worried about if my 885's will hold it up alright! installation next weekend.
 
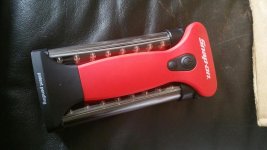
This came in the mail today, good tool for my emergency box for engine probs should the need arise, the lights swivel and has a hook+magnet at the end to hang on hood. Super bright!
 

Attachments

  • image.jpg
    image.jpg
    137 KB · Views: 585
That's a great idea, I may try that tomorrow. Than you!

we had this happen all the time at the dealership .we would just for take an air hose and gently blow out the tubes. If you send to much pressure you will actually blow out the plastic sleeve in the tube and then you will just have metal on there so be careful.
 
got rear ended by some lady while waiting to make a right turn. Bumper is toast and liftgate has a good dent on the bottom corner. Might be time for an aftermarket rear bumper. I don't think I can let that insurance money go to $1000+ replacement plastic bumper. Anyone else done that with insurance claim money?
 
00319bd7ba06f2bdbd938f7f1a9ec96b.jpg


I figured out I need to remove the rear mud flaps and probably do a little trimming. Anyone trimmed the cladding? I'm assuming it's just like trimming a regular fender?
 
we had this happen all the time at the dealership .we would just for take an air hose and gently blow out the tubes. If you send to much pressure you will actually blow out the plastic sleeve in the tube and then you will just have metal on there so be careful.

So one side (pass.) is clear but the other just won't, even with alcohol poured down it. Seems it's all clogged up at the bottom with dirt or whatever.

I'm going to pull off the lower kick panels if it ever gets above freezing again and pull up the tube from the bottom and clean it. I suspect it's just really, really clogged down there and nothing from the top is moving it.
 
got rear ended by some lady while waiting to make a right turn. Bumper is toast and liftgate has a good dent on the bottom corner. Might be time for an aftermarket rear bumper. I don't think I can let that insurance money go to $1000+ replacement plastic bumper. Anyone else done that with insurance claim money?

Did the exact thing for my front bumper. Quoted almost $800 for the part plus install and paint came out just shy of $1000.00. I took that money and just ordered a shrockworks! But it does vary from company to company. Some companies will allow while others, may just give you the cash to do with it what you want. Whose your insurance with, or I guess it would be who hers is with. Seeing as its the other vehicles they could be more of a stickler about it all.
 

Members online

No members online now.

Forum statistics

Threads
278,316
Messages
3,554,112
Members
248,016
Latest member
Advally Service

Trending content

Back
Top