What did you do with your 4runner today?

Unfortnately, it looks like I popped all three of the spot welds on my driver's door window regulator, so I spent far more time taking the door apart than I wanted.
 
Fixed an inoperative rear passenger door courtesy lamp, the one below the armrest. I noticed it was not working, and expected a burned out bulb. I pried the fixture out of the door trim and was surprised to see the electrical harness was not connected! It may have been forgotten by a repair shop when an exterior trim piece was replaced.

All four door courtesy lamps now functional! And both dome lamps and both map lights.
 
IMG_1610.jpg

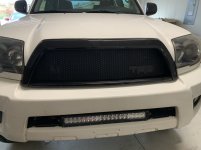
Finally, always wanted to do the satoshi but was afraid of messing up my grill. It’s not perfect but I love how it turned out. Needs some touch up paint in a few small spots.


Sent from my iPhone using Tapatalk
 

Attachments

  • IMG_1610.jpg
    IMG_1610.jpg
    133.3 KB · Views: 495
Installed my dash cam (Roav S1). In the process of testing out the quirks, knocked the rear view mirror completely off the windshield. Luckily the permatex adhesive is only $1.99 and seems to be working.

Hardwire kit for the dash cam should be in today.

Also replaced my dead dual USB plug.
 
Changed the front axle oil. The drain plug didn't give up without a fight. It required an air chisel for every bit of rotation to remove.

The fluid was muddy and the drain plug magnet had a fair bit of fuzz on it. Surprising because the vehicle has never been taken off road and is rarely used in 4WD. 206,000 miles.
 
Last edited:
Changed the front axle oil. The drain plug didn't give up without a fight. It required an air chisel for every bit of rotation to remove.

The fluid was muddy and the drain plug magnet had a fair bit of fuzz on it. Surprising because the vehicle has never been taken off road and is rarely used in 4WD. 206,000 miles.
The front differential gears spin whenever you drive, just no power will transfer through them in 2wd.
 
Mormimoto Mini D2S 5.0

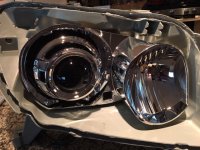
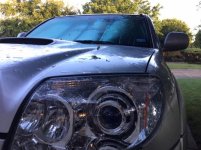
Finally finished my projector retrofit project. It only took 2 sets of TYC housings to figure it out:) The light output is amazing and glad I did it.
 

Attachments

  • retrofit1.jpg
    retrofit1.jpg
    133.1 KB · Views: 392
  • retrofit2.jpg
    retrofit2.jpg
    54.6 KB · Views: 388
That’s up for me this weekend! Easy?


Yes, it does involve scuttling around on your back under the vehicle, unless you have a lift.

I used a small handheld grease gun with rigid 6” delivery tube. Some locations this is useful compared with a full sized gun with rubber delivery hose. The front propeller shaft, rear u-joint is a little tight access-wise and might benefit from using a rubber hose gun. You might need to jockey the vehicle back and forth to get the grease fittings into an accessible position for the front propeller shaft. Things are a little tight there. My vehicle is a 4WD V6. I know the exhaust routing is different for V8s so it might be a little different.

Job took 30 minutes max, maybe 20.
 
I came from XJ life too, I miss the size a bit but the 4runner is a comfy beast that handles bumps better. I also don't miss the spring wrap effect the Jeep had plus the body was falling apart.

I’ve been a big Jeeper my whole life, probably 10 TJ’s and 3 XJ’s, but this truck has me wondering why. Really impressed and love it.
 
Degreased the engine to get a better look at some weeping oil. It’s either passenger side cam cover gasket or the small square timing chain cover gasket.

Replaced the second of two key fob shells with a new replacement shell from remotesremotes.com. They look like new OEM and should last another 15 years.
 
https://www.toyota-4runner.org/atta...nt.php?attachmentid=336282&stc=1&d=1560057820

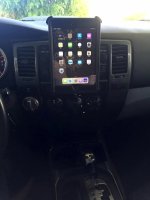
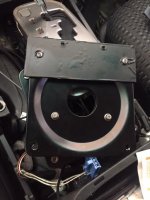
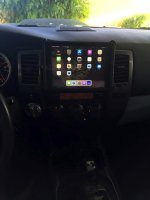
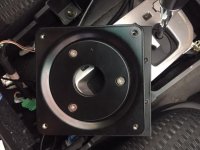
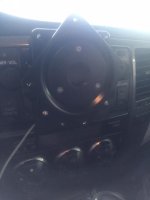
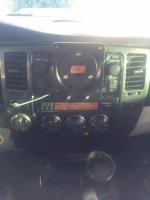
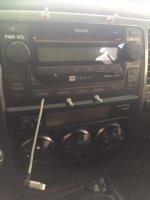
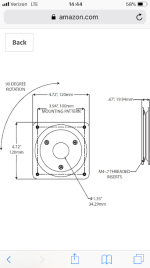
Ive never used the radio because i have an aftermarket bluetooth adapter. Its left on AUX and I just use the steering wheel controls. I wanted a screen for the radio but couldn't justify 500-800 for a Double Din with Apple Play. I wanted the abilities to use my offline terrain maps as i Use the 4runner for hunting and going out to places with no signal. My solution was purchasing a Used Ipad Mini 3 with cellular capability for $175 and custom making a solid mount. I looked at every option for Ipad mounting and none of them seemed good to me. The vent/CD/ Magnet options were all too unstable for when I go offroad. The Ram mounts and window mounts were solid but took up passenger room or window space. This was my solution. You do have to permanently alter the center trim piece but I keep vehicles until 250k+ so this wont change the value at that point. I am beyond pleased with the outcome. The Ipad is removable and the USB is hard wired to the factory fuses. So now I have a complete Navigation/ Music setup as well as an Ipad I can take when I get to my Destination. Let me know if this interests anyone and Il try to list the parts used. This this is SOLID and does not budge.
 

Attachments

  • 0-1 copy.jpg
    0-1 copy.jpg
    41.1 KB · Views: 520
  • 0-1.jpg
    0-1.jpg
    28.4 KB · Views: 433
  • 0-2 copy.jpg
    0-2 copy.jpg
    39.9 KB · Views: 427
  • 0-2.jpg
    0-2.jpg
    30.7 KB · Views: 419
  • 0-3.jpg
    0-3.jpg
    11.5 KB · Views: 421
  • 0-4.jpg
    0-4.jpg
    17.5 KB · Views: 423
  • 0.jpg
    0.jpg
    17.8 KB · Views: 417
  • 0.png
    0.png
    51.4 KB · Views: 433
Questions?????

I’d like to add a 120v Ac input in the rear area of my runner as well as add lighting with a switch. What would be the best way to make this happen. Tap into an existing power wire or run a new cable.

At what point should you add an extra battery.

I bought an audio system today waiting for it to get here!!
 
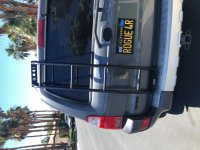
Ladder up!

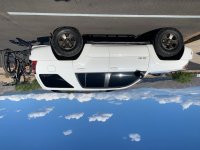
The Gobi ladder that I ordered last month arrived yesterday. I was expecting a 8-10 week lead time, it took three. So that was a wonderful surprise indeed!

Took me all of 20 mins to install it. Cleaned the panels that received the 3M adhesive with 91% isopropyl alcohol. Measured, leveled and applied! I have everything adhered/bolted into place. I did however neglect to use the small ladder side strip that adheres to the actual lift gate. I plan on repainting the truck in a few months, so I wanted to be able to unbolt it and take it right off without having to get new adhesive.

The pinch plate holds the ladder extremely secure already, and I'm able to climb up and down with ease. Granted, I'm a twig at 143lbs. I do intend to apply that little strip after painting though. Really excited about the look on the back end once I get my Coastal Off-Road rear bumper next week. My truck is finally close to being done with all the major cosmetic mods/armor.

 

Attachments

  • IMG_7930.jpg
    IMG_7930.jpg
    132 KB · Views: 406
Replaced the belt mldgs (outer weatherstripping) on my left front door and liftgate yesterday. Dealer quoted me $60 each for a total of $120 labor to replace them and I did both in 5 minutes. The liftgate took 1 minute.
 

Members online

Forum statistics

Threads
278,316
Messages
3,554,111
Members
248,016
Latest member
Advally Service

Trending content

Back
Top