What did you do with your 4runner today?

Installed updated tail lights! Super easy and took maybe 10 minutes to swap out. 100% plug n play
3qn9CvZl.jpg

nm8c9JRl.jpg


Brakes are also my Achilles heel. I could not bleed brakes to save my life no matter how many youtube videos I watch. Ive spent hours trying and used several bottles of brake fluid trying to bleed the brakes on my motorcycles to no avail
For what it's worth, motorcycle brakes are a lot harder the bleed than car brakes.
 
Last edited:
My 06 is at 178k miles, Ive recently replaced front hubs/bearings, front calipers and rotors. Carfax shows my timing belt was done at 98K.. when do I need to start planning for another timing belt job? The dealer and car have been draining my wallet big time lately as both of my breakdowns- related to bearings and brakes- have happened while I was on the road and needed my car and didn't have another vehicle to use so I had to go to the dealer..
On the fence to just ditch the runner and get a low mile jeep TJ that's cheaper and easier to work on, to last me 1.5 more years of grad school

I had mine done when purchased at 112k. The mechanic said it was way overdue and could have broken in the near future (I didn't really look at it). I got around to it again at 210k (98k interval) and tackled it myself. The belt itself was OK, needed replacing but didn't look like it was about to break, but the water pump seal had pretty much failed and was leaking quite a bit. (When done my coolant leak vanished :banana:)

You don't need a ton of space to do it, just a place to drain fluids and dispose of them, and a second person usually helps to remove the fan from the clutch (just needs to be a relatively strong person). Everything else is doable solo. If you have a buddy with a garage you could use for a weekend that'd work fine.

There is a good write up out there on a similar lexus V8 that showed me almost everything I needed to do. I made one mistake with sealing the water pump properly; the first shot took me about 20 hours with multiple parts stores runs; it ran but leaked about 2 cups of coolant over 100 miles. I re-did it in about 6 hours and it's been great, going on 15k pretty soon.

I paid $800 at a budget mechanic to do just the belt & water pump change the first time. I was quoted up to $1200 but that included cam & crank seals. I attempted those the second time but was unable to remove the crank gears, so I skipped them as none were leaking - I believe 05+ have more issues with crank seals, unfortunately.

My total costs were just under $400 the second time, and I bought the ~$70 crank holder tool and a $60 torque wrench (included in the $400). If you wanted to tackle it, don't hesitate to buy the crank holder (Schley sch64300). I bought a lot of coolant - in the future I'd probably test with water before filling up on coolant...

Also... Autozone free rentals are your friend.

 
Ordered a 79" CVT awning today. Can't wait!

I was tempted to get a tent on clearance too, but not sure if I can justify that purchase just yet... Anyone want to convince me? :lol:
 
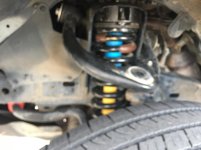
I got the ‘18 TRD Tacoma shocks and struts on. Took about 5 hrs, no big deal, although I had to cut the rear shocks off. XReas is history. I may be sitting a bit too high in the front now with my spacers.
 

Attachments

  • 18806FBF-98FB-4381-A8F4-18E59347CB7B.jpg
    18806FBF-98FB-4381-A8F4-18E59347CB7B.jpg
    122.9 KB · Views: 557
Finally had a chance to have the body mounts chopped this weekend. I got these filler plates from RSG Metalworks and they worked perfect! The last pic is with them welded in before they were cleaned up and painted.

l8sJg9x.jpg


b2b3KHU.jpg


0huCQuH.jpg
 
I finally, after like 2 years, replaced my front lower valence (the piece behind my license plate) that got smashed on a rock. It was surprisingly hard to find (most places wanna sell you the entire bumper), but I ran across a new one on eBay for like $60. It's unpainted, but I wanted a black one anyways.

4xjkBYjl.jpg


You have to remove the bumper to get to two bolts that're blocked by the crash bar, but I had the bumper off in 10 minutes or so. The hardest part was removing the bolts holding the valence to the bumper that'd seized thanks to rust.
 
Last edited:
HID Retrofit

I purchased a set of aftermarket housings from Ebay for $80 and retrofitted Morimoto Mini H1 7.0 projectors into the housings. I used these two threads as references (thanks @TiN and [MENTION=65918]krupnation[/MENTION]):

Finally done! Mini Morimoto H1 retrofit...pic heavy

TiN's Mini H1 Retrofit

I purchased this retrofit kit from Lightwerkz and went with 4500 K XB bulbs and mini gatling gun shrouds. Install was easier than I thought and I have the rotational alignment pretty well dialed in, but I still need to do horizontal and vertical aiming adjustments. One of the vertical adjustment screws looks like it came out of the housing so I'll likely need to re-open the headlights and get the aim dialed in right.
 
Finally was able to change the oil in the front diff. Just took a sacrificial Allen socket, my welder and a harbor freight electric impact.

20200208_134816-X4.jpg
 
Finally was able to change the oil in the front diff. Just took a sacrificial Allen socket, my welder and a harbor freight electric impact.

20200208_134816-X4.jpg

I'm willing to bet that the heat from welding that to the fill plug did more to make it break loose than making them both one piece, I've read of several members here that couldn't get the plug to break loose ahter numerous attempts until they applied a little heat and then it broke free easily.
 
I'm willing to bet that the heat from welding that to the fill plug did more to make it break loose than making them both one piece, I've read of several members here that couldn't get the plug to break loose ahter numerous attempts until they applied a little heat and then it broke free easily.

The heat might have helped a little but I had to hammer on it for a bit with the impact, even after welding that on there.
 
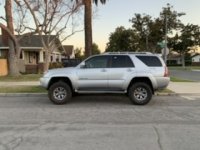
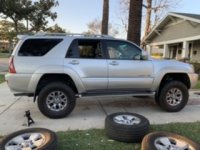
Changed up the wheels a little
 

Attachments

  • 06C9D085-790D-43B7-A68A-366B8491CB9E.jpeg
    06C9D085-790D-43B7-A68A-366B8491CB9E.jpeg
    31.2 KB · Views: 519
  • EFB2832A-CF9F-4C2C-AE2E-21E87576409A.jpeg
    EFB2832A-CF9F-4C2C-AE2E-21E87576409A.jpeg
    32.8 KB · Views: 524
Detailed it! Man, the stuff you find under the seats in a vehicle that's been owned by other people for 150k. Felt real good to clean it out.
 
Finally was able to change the oil in the front diff. Just took a sacrificial Allen socket, my welder and a harbor freight electric impact.

20200208_134816-X4.jpg


A long hex helps a lot with the front diff given the location of those plugs. Also, spraying Fluid Film or something similar on the fill & drain plugs after they’re reinstalled will keep them from getting rusted in or otherwise gummed up. They’ll be much easier to remove next time.
 

Members online

Forum statistics

Threads
278,316
Messages
3,554,113
Members
248,016
Latest member
Advally Service

Trending content

Back
Top