What did you do with your 4runner today?

Did my fan clutch and ordered sliders yesterday. Hoping to get king coil overs from filthy motor sports tomrorow!!

Anyone here running king 2.5’s tuned from filthy on their trucks?
 
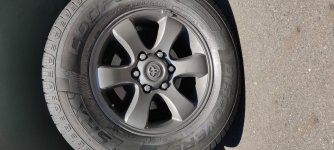
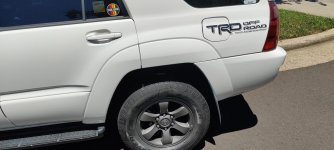
Picked up some 17" Sequoia wheels since I've always really liked that style and the gunmetal color complements my dipped badges nicely. Found a terrific deal on Facebook Marketplace too so that helped move things along. My Defenders were at 65K miles, still had some tread but Michelin & Discount Tire had a $110 rebate on so I picked up a set of LTX A/T2 tires. Very happy with the whole setup. My SE wheels are for sale in case anyone is interested.

ixJFqI1l.jpg


MmH0LOpl.jpg
 
Head gasket Repair

So it seems my head gasket is bad. I don't have any equipment to change it my self. Toyota dealer wants $4000.00 just to check and make sure thats the problem. My favorite mechanic wants $2300.00 to repair and rebuild top end since it will be apart. But I was wondering if it would be easier to replace the motor? I an get a used motor with roughly 50K on it. With motor and install it would cost me $4000.00.
I have 206,000 miles on my 2004 V6 Runner.
My other thought since I am going to replace motor is to upgrade to a V8?

So any suggestions?

Andy
 
So it seems my head gasket is bad. I don't have any equipment to change it my self. Toyota dealer wants $4000.00 just to check and make sure thats the problem. My favorite mechanic wants $2300.00 to repair and rebuild top end since it will be apart. But I was wondering if it would be easier to replace the motor? I an get a used motor with roughly 50K on it. With motor and install it would cost me $4000.00.
I have 206,000 miles on my 2004 V6 Runner.
My other thought since I am going to replace motor is to upgrade to a V8?

So any suggestions?

Andy

Common problems with head gasket in 4th gens, I had a shop rebuilt my motor and redo my heads also. Cost is about same, now have about 38k mileage on new rebuilt motor runs just like new. Make sure to have your shop replace hose, belts, bearing and water pump to save cost later
 
So it seems my head gasket is bad. I don't have any equipment to change it my self. Toyota dealer wants $4000.00 just to check and make sure thats the problem. My favorite mechanic wants $2300.00 to repair and rebuild top end since it will be apart. But I was wondering if it would be easier to replace the motor? I an get a used motor with roughly 50K on it. With motor and install it would cost me $4000.00.
I have 206,000 miles on my 2004 V6 Runner.
My other thought since I am going to replace motor is to upgrade to a V8?

So any suggestions?

Andy
I'd go with the gasket replacement over an engine replacement, personally. That way you know it's been done, and shouldn't happen again. Unless you replace the HG on the new engine before putting it in, that engine ends up being a gamble.

A V8 swap would be a pretty large undertaking and if a shop were to do it, would go far beyond the $4k mark
 
Installed a few things last week! C4 Lo-Pro front bumper with a Warn VR8-S winch, Factor 55 fairlead and Flatlink-E, and a Baja Designs S2 flush mount in the rear bumper.

I'm a little disappointed in the bumper, only because the fairlead didn't fit initially. For being the most popular aftermarket one there is I expected that to be considered. So I had to flap wheel away at my powder coated bumper giving a little extra room to get it in. Nothing a little spray paint couldn't take care of though, got everything in and functioning and just need a cut-off switch for the winch to be really complete.

49990775183_4312c7c321_c.jpg


49990775093_7e44a3a63f_c.jpg
 
Front camera

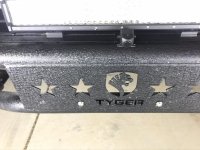
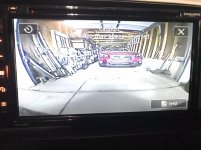
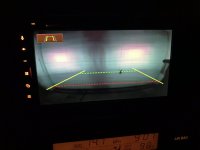
Installed my front camera this evening on my bull bar. I am able to view at any time and can toggle back and forth between the rear and front camera. Plus it goes in to the rear view mode when in reverse with parking grid if chosen.

It will be nice to finally see in real time what’s on the other side of that hill as it’s crested while off-road.
 

Attachments

  • 2DA3BCDA-7D3D-49A8-9BDA-285F136C0687.jpg
    2DA3BCDA-7D3D-49A8-9BDA-285F136C0687.jpg
    133.5 KB · Views: 358
  • B8B88F75-600C-49C0-A7E8-8E693655CE32.jpg
    B8B88F75-600C-49C0-A7E8-8E693655CE32.jpg
    127.4 KB · Views: 357
  • 26039C72-8CE9-423D-A2A2-12F73DB5B573.jpg
    26039C72-8CE9-423D-A2A2-12F73DB5B573.jpg
    86 KB · Views: 355
  • AD92988D-F72D-463C-B73A-C123F3C0F61C.jpg
    AD92988D-F72D-463C-B73A-C123F3C0F61C.jpg
    122.5 KB · Views: 355
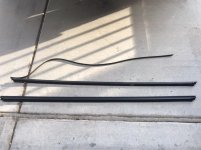
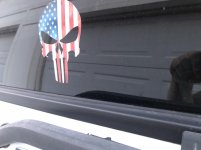
Today I got in my OEM rear window exterior weatherstrip and got it installed. I knew it wasn’t in the best shape, it worse than I thought lol. Sits nice-N-tight against the glass now. It is a TOYOTA Genuine 68290-35031 Door Glass Weatherstrip Assembly

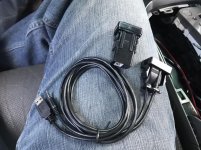
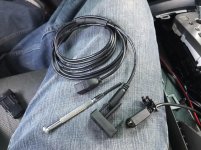
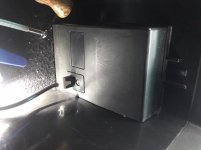
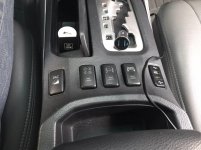
Also got in my auxiliary usb/3.5mm jack connector in. I took a gamble that it would fit into the existing opening inside my console that just has the old school headphone jack and figured I’d make it work whether I had to build it up or trim something. Well it fits perfect! Super pumped about that :clap2:

These don’t have that great of reviews and how they can fail so I was actually able to just use the one that came with my Pioneer HU and put it in the jack body housing assembly. I don’t think it would have reached anyhow. I haven’t tried to plug in headphone jack yet to back of HU but don’t think it will be long enough, didn’t want to remove whole HU and have it not be long enough. I’ll get an extender or just a longer one and figure it out later. Not sure I’ll ever use it though but would rather have it if I do.
 

Attachments

  • 12347E6C-02ED-4797-9863-21B654E72AE2.jpg
    12347E6C-02ED-4797-9863-21B654E72AE2.jpg
    127.4 KB · Views: 564
  • 45DD64C4-B539-4C9B-B791-C43E5E3A8775.jpg
    45DD64C4-B539-4C9B-B791-C43E5E3A8775.jpg
    141.5 KB · Views: 561
  • BF58E983-2933-4D5D-BE33-8DC0E2DC43A0.jpg
    BF58E983-2933-4D5D-BE33-8DC0E2DC43A0.jpg
    142.1 KB · Views: 553
  • 71649548-9ABA-4E6D-A379-A7696BFEA035.jpg
    71649548-9ABA-4E6D-A379-A7696BFEA035.jpg
    81 KB · Views: 557
  • BAAECE5F-95BB-4148-9F19-8304686A23FB.jpg
    BAAECE5F-95BB-4148-9F19-8304686A23FB.jpg
    126.8 KB · Views: 550
  • CDF5220C-DB57-405C-B175-02CC16DFA39D.jpg
    CDF5220C-DB57-405C-B175-02CC16DFA39D.jpg
    71.9 KB · Views: 550
Last edited:
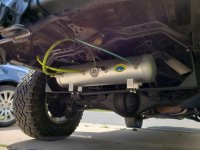
Finally got this progect finished. 99% lol. After mounting the airtank under the cargo area and bolted everything up, I can raise the tank 3" more, which I will do later.
So happy this out of my cargo area to free up room.
I do have a coupler in the cargo area so I dont have to get under, the rig to air back up sorry no pic of that lol
 

Attachments

  • 20200613_111458 - Copy.jpg
    20200613_111458 - Copy.jpg
    129.6 KB · Views: 508
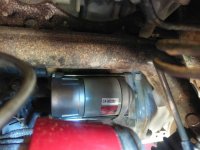
Finally had some time to replace my starter. Old one was still working but every once in a while it would not start (probably bad solenoid contacts). Replaced it with a Denso one from Amazon (Amazon.com: REMAN STARTER: Automotive). Followed the video below. As long as you get the break line out of the way you can get the starter out through the side. Tight to work in there but doable. Took me 30-45 min. Glad I have the V6!

YouTube -2003 Toyota 4runner starter removal
 

Attachments

  • IMAG1114b.jpg
    IMAG1114b.jpg
    98.5 KB · Views: 526
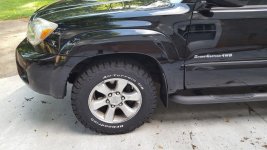
Finally got around to spray painting my wheels, gunmetal gray. put tire shine on the tires before painting so it didn't stick. Really love the look of these.
 

Attachments

  • IMG_20200614_125556.jpg
    IMG_20200614_125556.jpg
    142.7 KB · Views: 515
  • IMG_20200614_125603.jpg
    IMG_20200614_125603.jpg
    139.8 KB · Views: 488
New rear window weather strip and Weathertech for the cabin area. Gonna get the cargo area soon, haven’t decided on Weathertech or Husky for that.

Ordered the weatherstripping for the four doors but unfortunately was sent the wrong part.

Also learned that my evap core for the A/C is bad. :-( so next weekend I’ll be tearing the ENTIRE dash apart to get that taken care of. It’s too darn hot to not have A/C. It had to be the worst thing to change in the A/C system. Repair shop quoted me around $1,000, I bought all the Denso parts from RockAuto for $140 and doing the work myself.
 
Finally got this progect finished. 99% lol. After mounting the airtank under the cargo area and bolted everything up, I can raise the tank 3" more, which I will do later.
So happy this out of my cargo area to free up room.
I do have a coupler in the cargo area so I dont have to get under, the rig to air back up sorry no pic of that lol

Dang, this is super cool. I've always kinda had this idea and seeing that might be the motivation I need.

I also conveniently have a tank for my '63s Air Ride laying around... :naughty:
 
Have been angry at not being able to keep an alignment for the entire year of owning the rig.

Replaced the rack. And tomorrow I’m gonna have heaps of fun with new parts.

cdf5bac4289ab0318de6b94f634e971b.jpg


0108f2d70f44c66220e7d403a70e1eb5.jpg


Sent from my iPhone using Tapatalk
 
Have been angry at not being able to keep an alignment for the entire year of owning the rig.

Replaced the rack. And tomorrow I’m gonna have heaps of fun with new parts.

cdf5bac4289ab0318de6b94f634e971b.jpg


0108f2d70f44c66220e7d403a70e1eb5.jpg


Sent from my iPhone using Tapatalk
Hoping to refresh my LCA with whiteline bushings and add the TC gussets and Taco Tabs. Should be bullet proof then. What rack did you go with? Did you follow a write up or just wing it? Thanks!

Sent from my SM-G986U using Tapatalk
 

Members online

Forum statistics

Threads
278,316
Messages
3,554,120
Members
248,016
Latest member
Advally Service

Trending content

Back
Top