What did you do with your 4runner today?

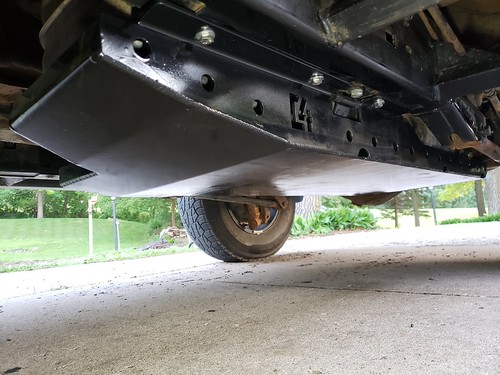
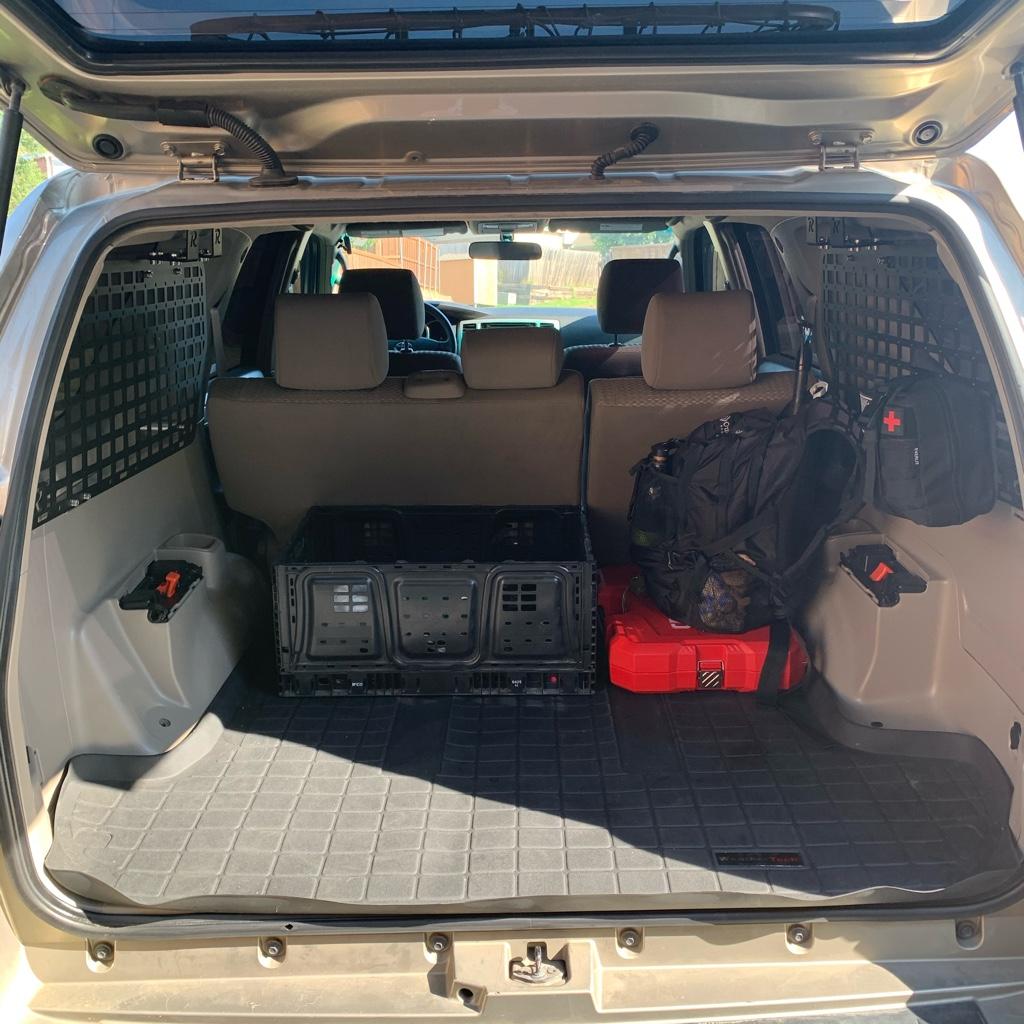
I finally finished my Modular Storage Panel install on my ‘08. I installed the Rago Fabrication panels in the cargo area, which did not go in as easily as I thought they would but they are very sturdy.
23c6bc552e7b5e47f2e71603d2e845be.jpg


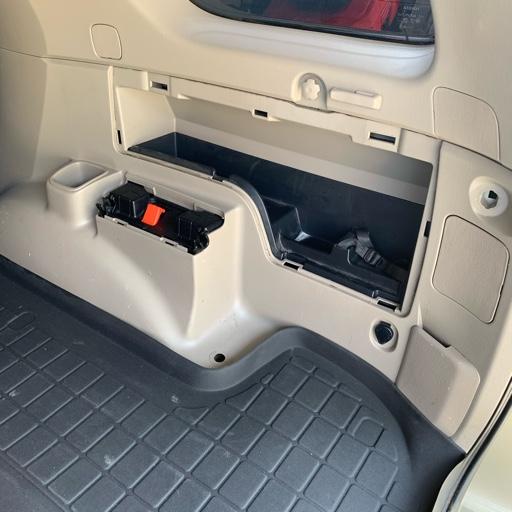
The longest part of this install was a custom install that I added to my cargo area- inside the passenger side compartment intended for fire extinguishers.
7f1ff448d3a0824d12e68913a4ec84f2.jpg

The biggest challenge was getting the right panel and getting it in there nice and sturdy so that I don’t have to listen to it rattle. Long term, I want to reinforce the hatch and make it a low-key safe.
0b6520ea23cc76868f65935eb4108542.jpg

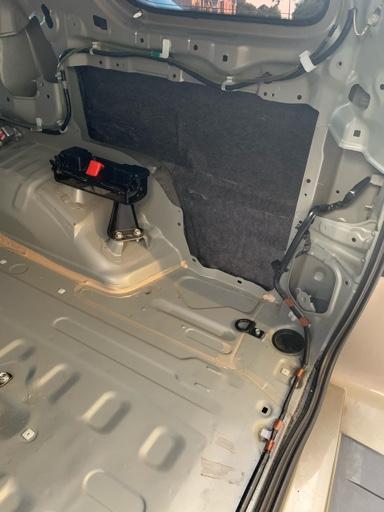
Heat barrier to protect anything stored inside. When it comes to installing this. I had to remove both the lower and upper panels so that I could take off the seatbelt. I was drilling and securing right behind it.
e808a7ae9665d5b1f9fe5f80d3e3876c.jpg

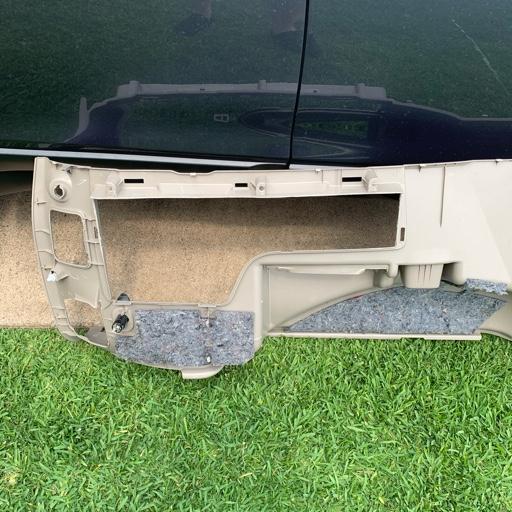
I had to trim the lower panel of the original compartment shape so that it would fit back on. Then I cleaned it of any plastic debris.

618149c76c80abf432fe4c1f765c1c79.jpg

You can see the panel behind there. It was tricky figuring out the holes, bolts, bushings, and lengths for the spacers to make an even and sturdy frame but it came out! The black “bucket” part of the original compartment was not put back in because they would have collided. I would have had to trim a fair amount off and I like the possibility of having space down on the right to stash or install something else (outlet?).
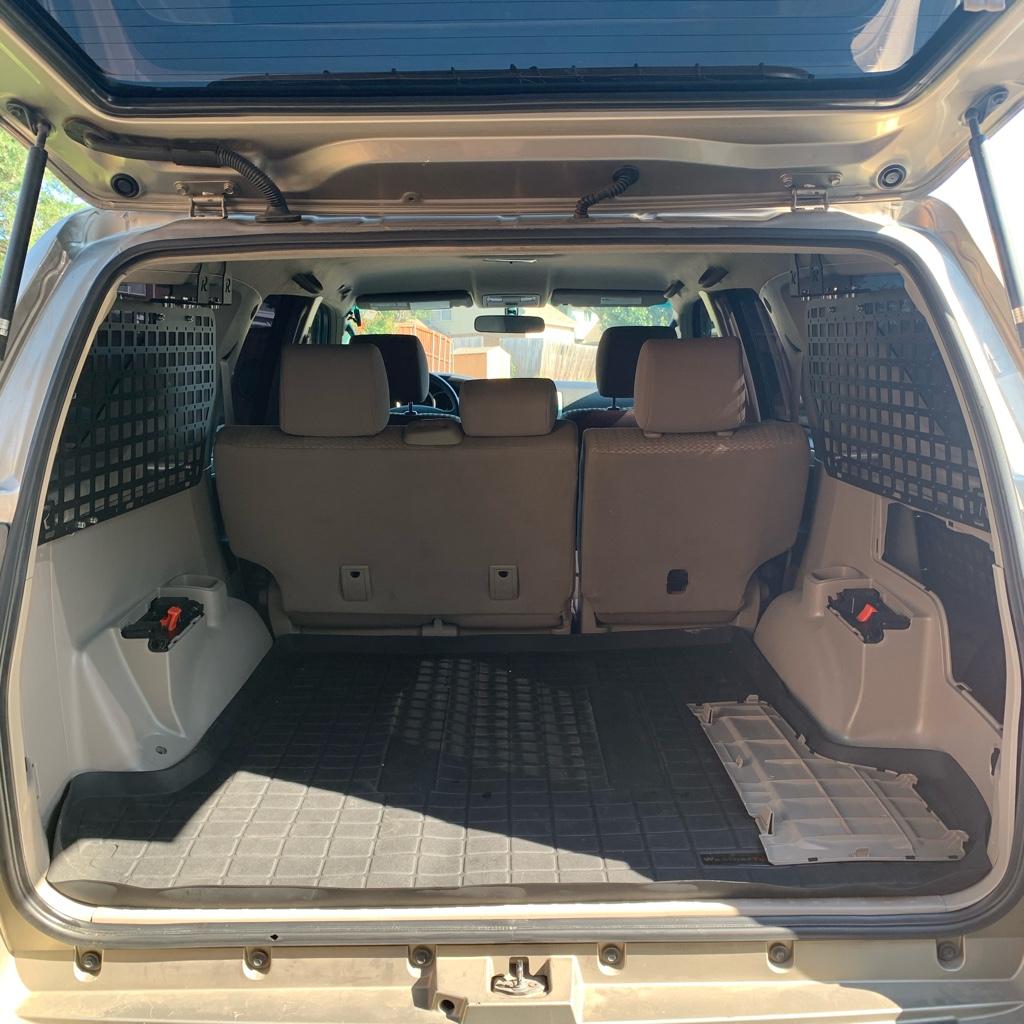
94d408e47b38a0e5204a3744e8f85322.jpg

All panels installed. The passenger side compartment hatch is my next step of the project. I have a special lock picked out for it and I am going to reinforce it and put hinges on it so that it can be pried from the bottom when locked. More to come!


Sent from my iPhone using Tapatalk


Those look sweet, how long did the install take?


Sent from my iPhone using Tapatalk
 
My passenger side CV axle is busted and the LCA bushings are leaking grease.

What recommendations?

My passenger CV is also cooked. I found an almost brand new Toyota OEM CV at a junkyard for $32. Look around in your area to see if there are any around. Even though the boots are in good condition, I'm going to reboot and regrease it. The boot kit for 4th gen in PN 04427-60141 , but I heard the 2010+ PN 04427-60131 boot kit has a better inner boot.

I also rebuilt my LCA with the Whiteline bushings, so if you have any questions, let me know. It took some time, but wasn't that bad. I used Import Direct ball joints on a recommendation from someone in a facebook group, but I hear the Moogs and the Sankei 555 are good. I made a full tutorial on the bushing and ball joint installation here: Whiteline Lower Control Arm Bushing Tutorial (120+ Pictures)
<a href="https://imgur.com/aBtOQuv"><img src="https://i.imgur.com/aBtOQuvm.jpg" title="source: imgur.com" /></a> <a href="https://imgur.com/YDa5Q8F"><img src="https://i.imgur.com/YDa5Q8Fm.jpg" title="source: imgur.com" /></a> <a href="https://imgur.com/8GjjdSc"><img src="https://i.imgur.com/8GjjdScm.jpg" title="source: imgur.com" /></a>
 
My passenger side CV axle is busted and the LCA bushings are leaking grease.

What recommendations?

My new Whiteline LCA bushings arrived via Amazon today. Import direct lower ball joints will be here this week and parts will be installed next weekend. I’ve heard good things about the Whiteline bushings that lead me to my decision. I’m still on factory original axles so I’m of no help there.
 
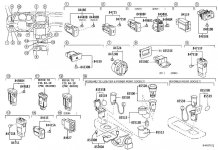
Does anyone know if the VSC Switch (bottom left of the steering wheel) lights up when the lights are turned on? I am in the process of switching burned out bulbs for the climate control, rear window switch, DAC switch, cupholder bulb, etc, and I am not sure about the VSC switch (if it has a bulb).

Thanks

I have a 2005 Sport 4Runner

Spiro
 
Does anyone know if the VSC Switch (bottom left of the steering wheel) lights up when the lights are turned on? I am in the process of switching burned out bulbs for the climate control, rear window switch, DAC switch, cupholder bulb, etc, and I am not sure about the VSC switch (if it has a bulb).

Thanks

I have a 2005 Sport 4Runner

Spiro

It does have a bulb. It is a T3 Neowedge.
Part number is 9001001083 found on Toyota parts website under Electrical > Electrical Parts > Switch & Relay & Computer.
Or if you are going with LED, there are plenty of websites selling the T3 Neowedge in many variations. I personally went with VLED anywhere that bulb was used.
 

Attachments

  • E6E2ECDA-E5B6-4CBE-9811-AF231FB6CA05.jpg
    E6E2ECDA-E5B6-4CBE-9811-AF231FB6CA05.jpg
    140.3 KB · Views: 420
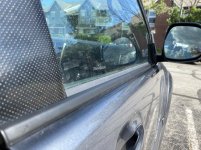
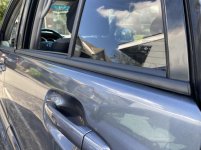
New weatherstripping. All of them were tattered and in need of replacing
 

Attachments

  • 3A2B1D04-26D6-4C08-A8A0-9EC239CC173A.jpg
    3A2B1D04-26D6-4C08-A8A0-9EC239CC173A.jpg
    134.2 KB · Views: 405
  • 8978D756-9151-4F1A-B0CE-76F0EE64D7B5.jpg
    8978D756-9151-4F1A-B0CE-76F0EE64D7B5.jpg
    128.2 KB · Views: 391
My passenger CV is also cooked. I found an almost brand new Toyota OEM CV at a junkyard for $32. Look around in your area to see if there are any around. Even though the boots are in good condition, I'm going to reboot and regrease it. The boot kit for 4th gen in PN 04427-60141 , but I heard the 2010+ PN 04427-60131 boot kit has a better inner boot.

I also rebuilt my LCA with the Whiteline bushings, so if you have any questions, let me know. It took some time, but wasn't that bad. I used Import Direct ball joints on a recommendation from someone in a facebook group, but I hear the Moogs and the Sankei 555 are good. I made a full tutorial on the bushing and ball joint installation here: Whiteline Lower Control Arm Bushing Tutorial (120+ Pictures)
<a href="https://imgur.com/aBtOQuv"><img src="https://i.imgur.com/aBtOQuvm.jpg" title="source: imgur.com" /></a> <a href="https://imgur.com/YDa5Q8F"><img src="https://i.imgur.com/YDa5Q8Fm.jpg" title="source: imgur.com" /></a> <a href="https://imgur.com/8GjjdSc"><img src="https://i.imgur.com/8GjjdScm.jpg" title="source: imgur.com" /></a>


I just did my Whiteline install last night, passenger side gave me some issues getting the old bushings out, but the drivers side went smooth. Highly recommend the bushings, I used them on my front diff as well. Very happy.
 
I just did my Whiteline install last night, passenger side gave me some issues getting the old bushings out, but the drivers side went smooth. Highly recommend the bushings, I used them on my front diff as well. Very happy.

Nice, thats awesome! I got mine in earlier this month, but have only put like 40 miles on them since I'm not commuting to work anymore. It definitely feels more planted on the highway, but that could just be a fresh alignment making it handle better or a combination of both. I'll have to check them out their front diff bushings, looking to tackle a bunch of bushings in the future.

Also out of curiosity, did you see the tutorial I made before doing the installation? If so, did it help you? I'd like to add the comments and experiences from others that did the installation to that thread. Even if you didn't follow it, I think a variety of perspectives will help to better explain everything for anyone in the future.
 
Last edited:
I just did my Whiteline install last night, passenger side gave me some issues getting the old bushings out, but the drivers side went smooth. Highly recommend the bushings, I used them on my front diff as well. Very happy.

Do you mind sharing the part # for the diff bushing you used?
 
Nice, thats awesome! I got mine in earlier this month, but have only put like 40 miles on them since I'm not commuting to work anymore. It definitely feels more planted on the highway, but that could just be a fresh alignment making it handle better or a combination of both. I'll have to check them out their front diff bushings, looking to tackle a bunch of bushings in the future.

Also out of curiosity, did you see the tutorial I made before doing the installation? If so, did it help you? I'd like to add the comments and experiences from others that did the installation to that thread. Even if you didn't follow it, I think a variety of perspectives will help to better explain everything for anyone in the future.


No, I did not see your tutorial until after, I watched some youtube videos just to see if there was anything special I needed to know, gad I did since they are orientated with the longer side facing outwards and the bottle jack helped. As far as the diff bushing, I have been very happy with it. the rest of my bushings are all energy suspension. Never had any issues since I replaced them a few years ago.
 

Members online

Forum statistics

Threads
278,316
Messages
3,554,111
Members
248,016
Latest member
Advally Service

Trending content

Back
Top