What did you do with your 4runner today?

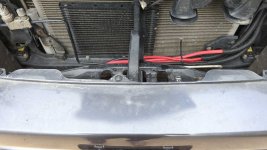
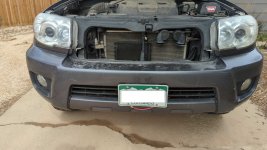
Today I relocated the rear diff breather by following this guide (Yet another rear differential breather mod with photos (tail light)). Also found out one of the plastic brackets that holds the bumper up (52588-35010) is broken, along with about half of the clips. So I'm going to wait a few days until I get the new bracket and clips before reinstalling the bumper.

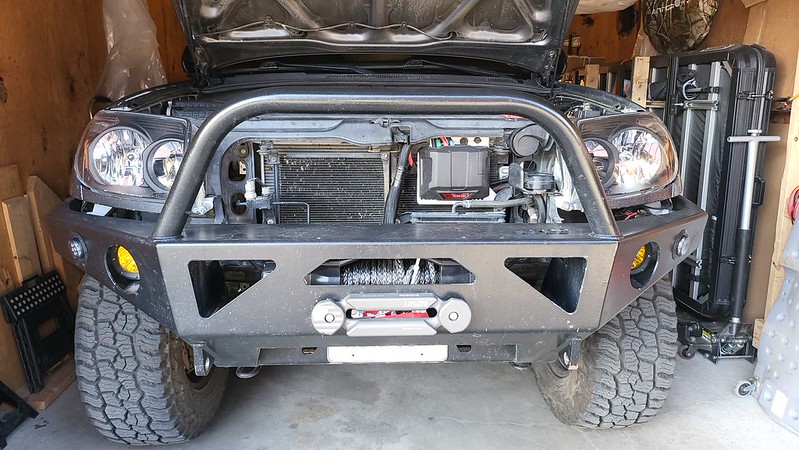
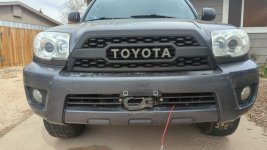
Back in December I installed the budbuilt hidden winch mount with a Warn evo vr-10 (with a HF synthetic line). I didn't take any pics, but installing the budbuilt mount was fairly straightforward and there are some other pics already on the forum. I relocated the winch relay to the top of the stock relay box, and clocked the clutch 90 degrees so the clutch lever is on top. I also had to bend the bumper support with a hammer to clear the lever, but I probably could have avoided that if I clocked it 180 degrees instead of 90.

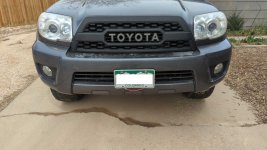
Then a couple weeks ago I designed a 3d-printed license plate bracket. I'm using the same bolts that originally held the black plastic "grille" in the bumper, but I'm screwing them in from the bottom instead of the top (inside the bumper) to hold on the bracket. The license plate is held on with 1/4 turn quick release fasteners, common on sport bikes and airplanes. I've also got a steel cable attached to the license plate, so I don't lose the plate if I hit something and break the bracket, and to dissuade theft. The only downside is it would rub the winch line if I have to pull upwards, but it would just take a few seconds to remove the whole mount with a 10mm wrench.
 

Attachments

  • IMG_20240323_152925_816.jpg
    IMG_20240323_152925_816.jpg
    85.3 KB · Views: 176
  • IMG_20240323_152627_660.jpg
    IMG_20240323_152627_660.jpg
    77.3 KB · Views: 179
  • IMG_20240323_153047_325.jpg
    IMG_20240323_153047_325.jpg
    90.4 KB · Views: 176
  • IMG_20240323_153059_867.jpg
    IMG_20240323_153059_867.jpg
    87 KB · Views: 176
Theft has been hot, here in Los Angeles CA. So I decided to add an extra safety feature by installing this Greddy Performance Steering/ Quick Release combo. Anyone else have additional anti theft features?

That's a great idea. My airbag already doesn't work (already replaced the clock spring - issue is the wiring in the air bag. :( ), so replacing the steering wheel with a quick release is surely an option.

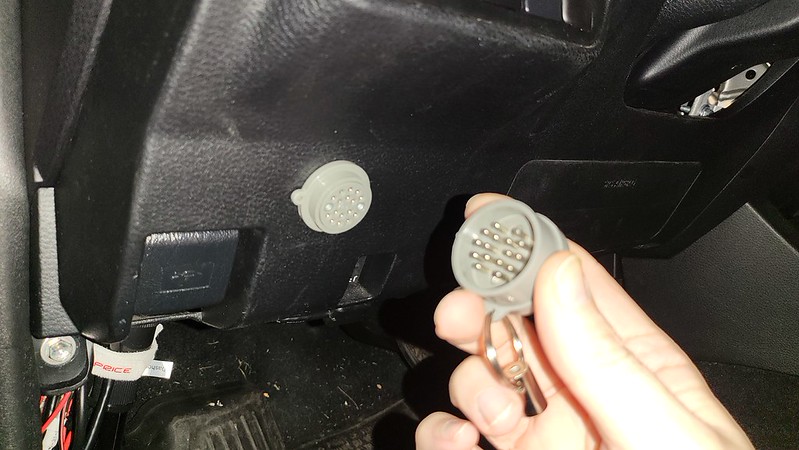
I had a Ravelco in my 3rd Gen Tacoma. They are a bit pricey, but considering getting one for the 4Runner. Your vehicle can't start or run without this dongle installed in the plug and each dongle is unique.

53631608858_bbae52a2bc_c.jpg"
 
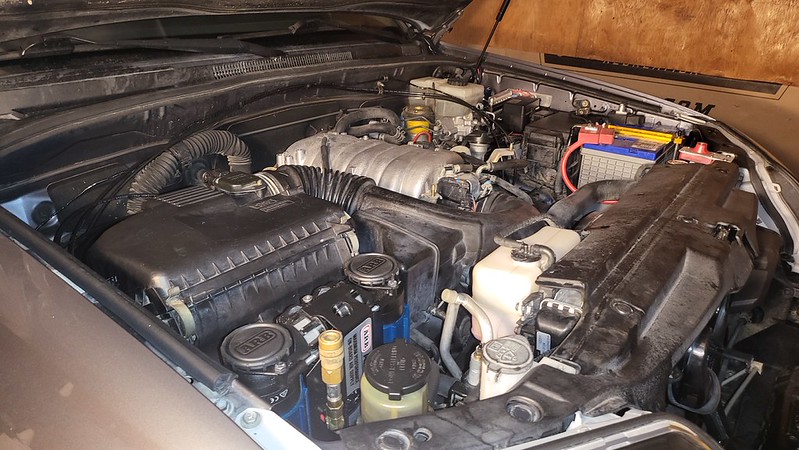
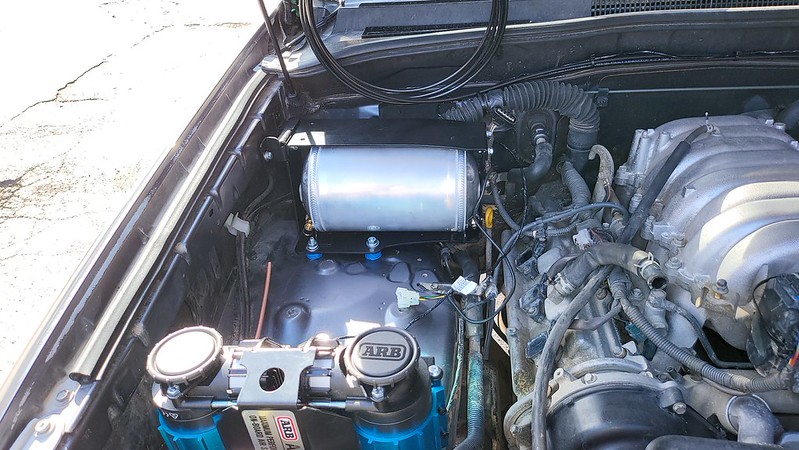
In the process of building out my onboard air system with 1 gallon tank. I had to create a custom bracket to mount the ARB Twin air compressor. This also required relocating the power steering reservoir, which also required customizing a bracket.

I think it came out pretty good. I need to make some revisions to the bracket, but it’s solid.

53631620813_4e2df9dd79_c.jpg


With the air comp installed and wired, I am positioning and plumbing the 1 gallon air tank after which, I will get my air locker solenoids hooked up.

53630519322_41a15797b0_c.jpg
 
Today I relocated the rear diff breather by following this guide (Yet another rear differential breather mod with photos (tail light)). Also found out one of the plastic brackets that holds the bumper up (52588-35010) is broken, along with about half of the clips. So I'm going to wait a few days until I get the new bracket and clips before reinstalling the bumper.

Back in December I installed the budbuilt hidden winch mount with a Warn evo vr-10 (with a HF synthetic line). I didn't take any pics, but installing the budbuilt mount was fairly straightforward and there are some other pics already on the forum. I relocated the winch relay to the top of the stock relay box, and clocked the clutch 90 degrees so the clutch lever is on top. I also had to bend the bumper support with a hammer to clear the lever, but I probably could have avoided that if I clocked it 180 degrees instead of 90.

Then a couple weeks ago I designed a 3d-printed license plate bracket. I'm using the same bolts that originally held the black plastic "grille" in the bumper, but I'm screwing them in from the bottom instead of the top (inside the bumper) to hold on the bracket. The license plate is held on with 1/4 turn quick release fasteners, common on sport bikes and airplanes. I've also got a steel cable attached to the license plate, so I don't lose the plate if I hit something and break the bracket, and to dissuade theft. The only downside is it would rub the winch line if I have to pull upwards, but it would just take a few seconds to remove the whole mount with a 10mm wrench.

Thats awesome creating a bracket with a 3d printer. I need to make better use of mine. Didn't think we had that much clearance above the fuse box.

This is were I mounted my relay box. Not a fan of this as it blocks the much needed air flow to the radiator. I haven't experienced any overheating yet, so it might be ok.

53632006799_16c9937142_c.jpg
 
Thats awesome creating a bracket with a 3d printer. I need to make better use of mine.

PETG was a gamechanger for me. Just as easy to print as PLA, with almost the same temperature-tolerance as ABS. Anything printed in PLA will start to melt the first time you park in the sun...

The bracket I'm using now was printed in ABS, but most of the testing was done with PETG.

Didn't think we had that much clearance above the fuse box.

It's pretty tight, I think it actually touches the hood liner when the hood is closed, but not enough to leave an indentation or put much pressure on the hood/fuse box.
 
Replaced my inner and outer tie rods. Watched a video on youtube first and of course everything they did came apart just talking about it! Not so with mine! The passenger side was a PITA, particularly the jam nut, it would not budge! Heated it several times, soaked with LW and it would not budge. The complete inner/outer will come off together, so I removed it that way and then sawed the inner rod in two just behind jam nut and then was able to get the jam nut off in the vice.
The drivers side was just the opposite, it all came apart fine and went together in a breeze.
My steering wheel was off just slightly afterward and a full turn of the driver side inner into the outer corrected it and toe was spot on from when I started.
Another fun project done!
Note: I run my toe at 62" between the centerlines of the front tires, I have a board marked with two lines 62" apart, so when I check toe I put the board across two 6x6 that are about 10" tall and put one each up against the front of each tire, then lay the board across the tops of the 6x6s and align one mark at the center of the tread, the other matches on the other tire. This is how I kept my toe correct doing this job. Checked it this way after I did the passenger side and was right on, checked after I did the driver side and was off about 1/4" and steer wheel was slightly cocked when driving so made the adjustment to driver side and all back where it was.
 
Last edited:
AC recharge for $140 from a local shop. Never chilled great when I got it in 2016, but never got worse than it was.

Sent from my moto g pure using Tapatalk
 
Changed the front diff fluid in preparation for installing my RCI skids. Fill plug came out easily. Drain plug not so much. Took about an hour of soaking, heating, then finally had to break out the impact. Well you know what happened. When it broke loose it came all the way out. Gear oil all over the garage floor. Fun Stuff!
 
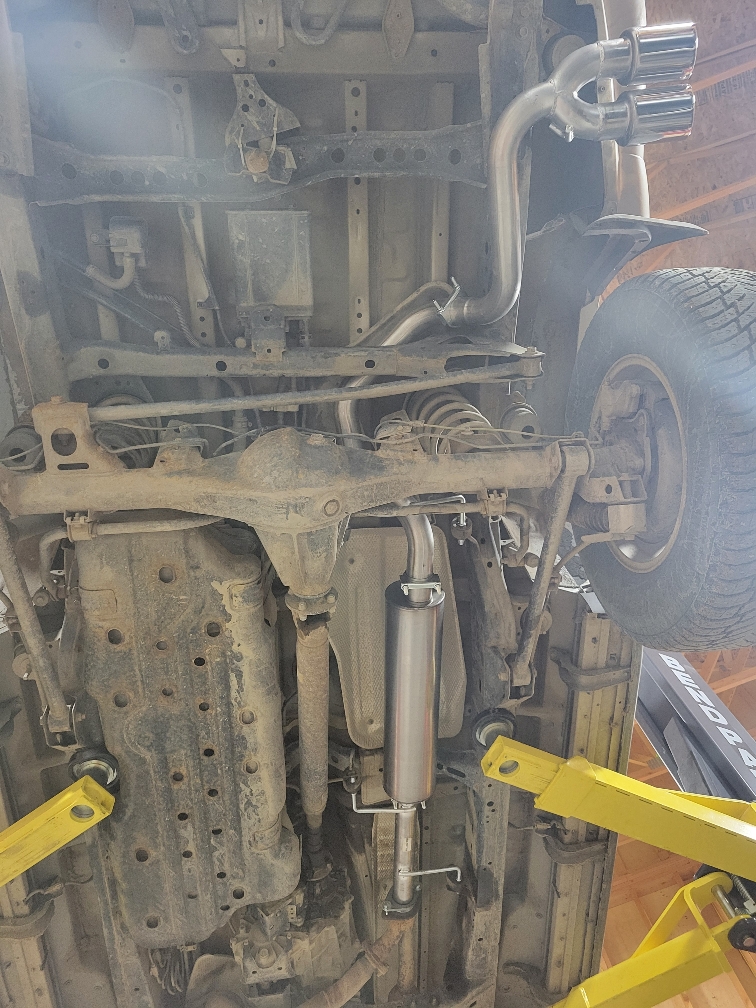
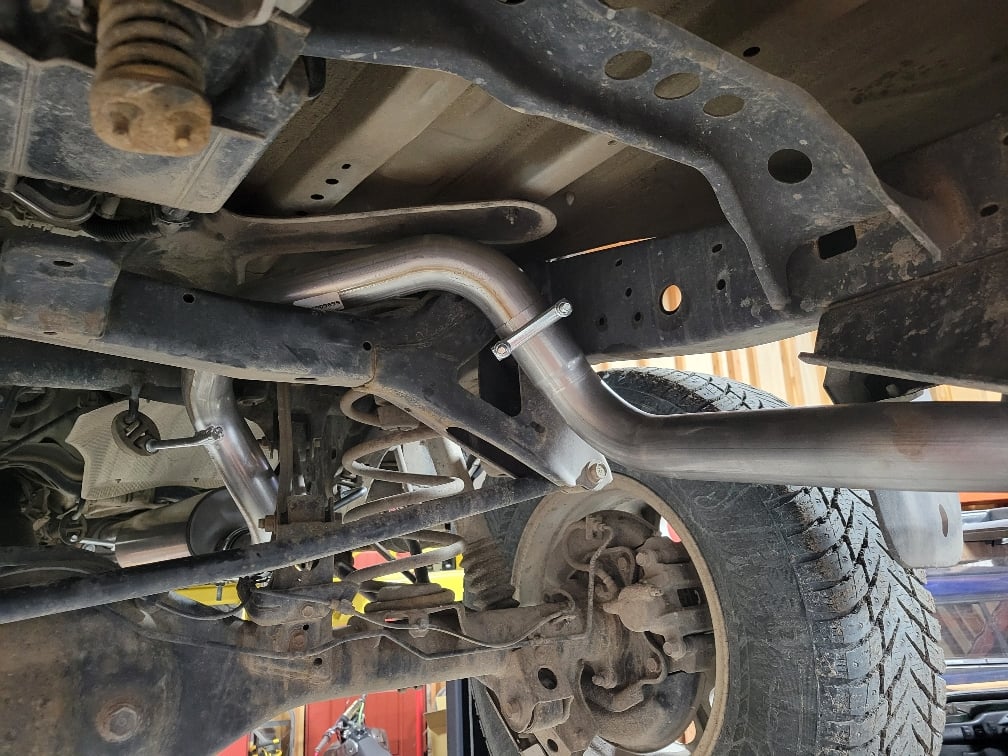
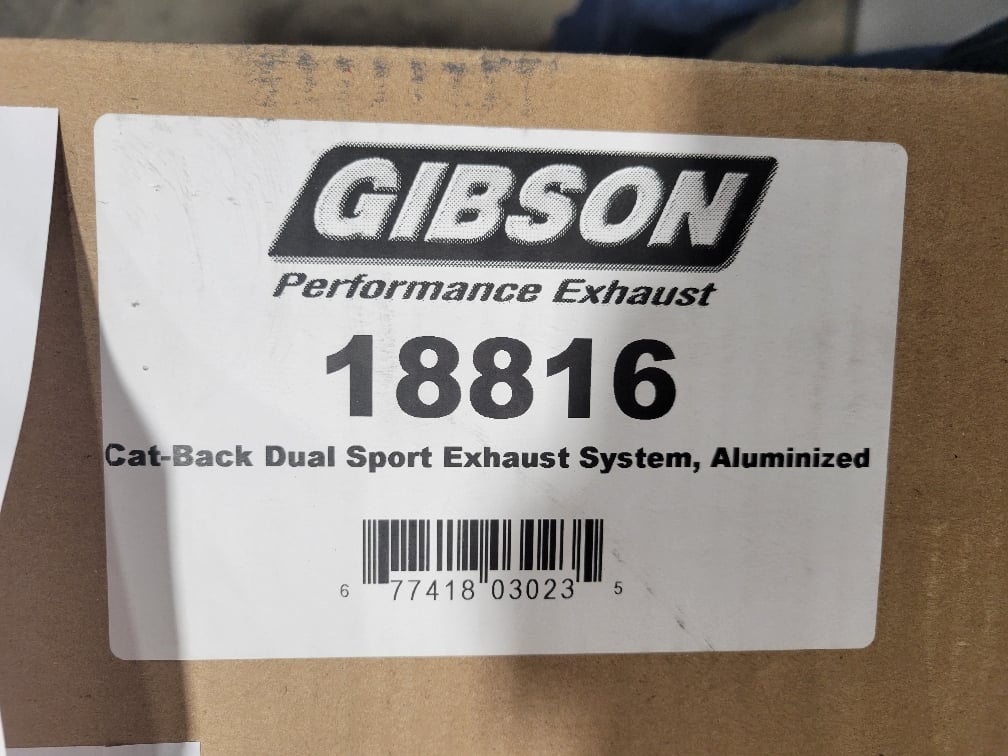
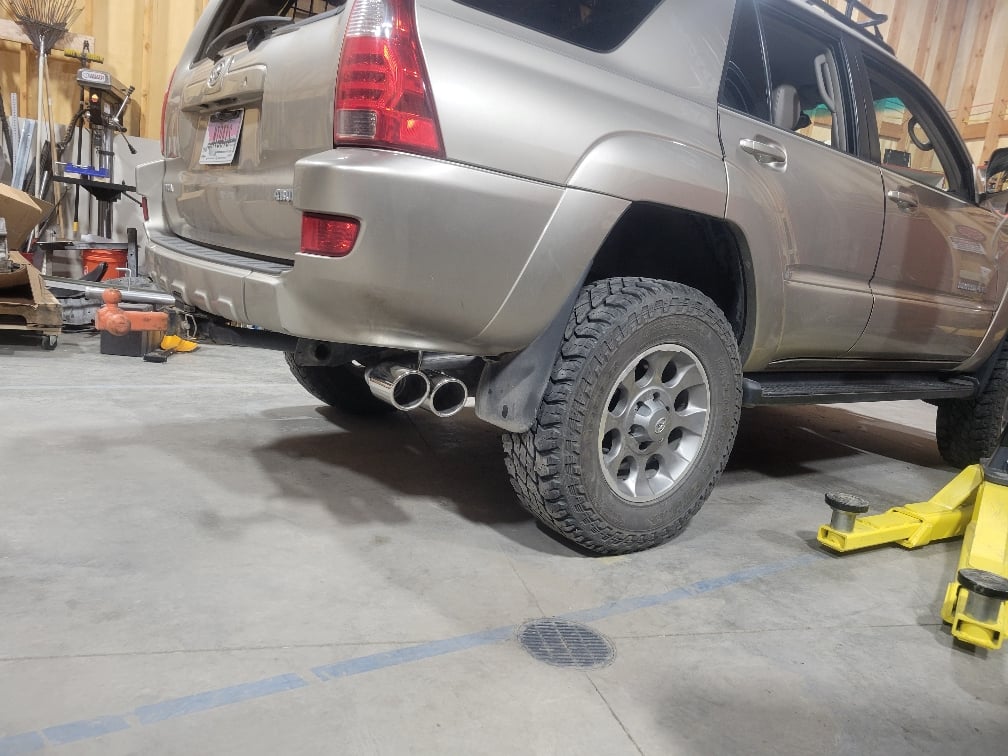
I threw on a Gibson exhaust catback side exit.... also threw on the summer wheels and tires...a solid Friday evening!
3a29db75ca9e2fa4f9a697b169a74eff.jpg


Sent from my SM-G991U using Tapatalk


i had to cut my side exit exhaust off after wheeling a couple times, it's just in the most terrible place. ended up having it just dump after going over the rear axle.
 
Changed the front diff fluid in preparation for installing my RCI skids. Fill plug came out easily. Drain plug not so much. Took about an hour of soaking, heating, then finally had to break out the impact. Well you know what happened. When it broke loose it came all the way out. Gear oil all over the garage floor. Fun Stuff!

I remember my front diff drain plug being like that too. I think it took my impact wrench 30+ seconds to get it loose. Luckily my fill plug was easy (just took a socket wrench), because I don't think my impact wrench could reach it.
 
Upgrades

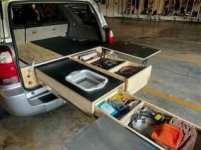
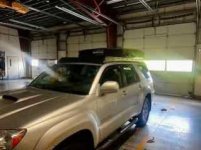
Just got done building a camp kitchen in the back of my 4Runner. Needed it low enough to get work stuff in the back and I think this will work! Also replaced the stock roof rack with a Prinsu rack! Really like the look and it lowered my RTT quit a bit!

As a result of the camp kitchen, I removed the deck board in the back of my 4Runner. I know these are expensive from Toyota when they sold them, but can they be added to a 4Runner that didn't include them? I'm thinking not, but I'm going to try and sell mine.
 

Attachments

  • IMG_4318.jpg
    IMG_4318.jpg
    14.4 KB · Views: 231
  • IMG_4319.jpg
    IMG_4319.jpg
    15.4 KB · Views: 231
  • IMG_4320.jpg
    IMG_4320.jpg
    13.7 KB · Views: 228
I remember my front diff drain plug being like that too. I think it took my impact wrench 30+ seconds to get it loose. Luckily my fill plug was easy (just took a socket wrench), because I don't think my impact wrench could reach it.
Probably not in my case either. Also, neither plug had a crush washer, even though this was "dealer serviced" its whole life. Just because they did something doesn't mean they did it right.
 
Just got done building a camp kitchen in the back of my 4Runner. Needed it low enough to get work stuff in the back and I think this will work! Also replaced the stock roof rack with a Prinsu rack! Really like the look and it lowered my RTT quit a bit!

As a result of the camp kitchen, I removed the deck board in the back of my 4Runner. I know these are expensive from Toyota when they sold them, but can they be added to a 4Runner that didn't include them? I'm thinking not, but I'm going to try and sell mine.
Very good looking set up. Just curious how much weight is hanging off the driver side of that box & how is it anchored in the truck?
 
Last edited:
Swapped the Chrome outside door handles for new Matte Black ones. Looks much better. Not a fan of Chrome.

I put handle covers on a couple weeks ago too, it definitely looks better without the chrome. I first tried some generic handles (not just covers, but entire handles) from ebay that were supposed to fit. The front handles fit, but pulling them open didn't feel as smooth as the OEM handles. And the rear didn't fit at all, so I went with the same covers J.A. installed: Toyota 4Runner Topography Door Handle Covers

IMO the handle covers look great from 4+ feet away, but they're a little tacky right up close. I might try to find some color-matched handles from a Limited. Hard to beat the price of the covers, though.
 
On my 2008 T4R V8 Limited AWD, I replaced the Bank 1 Oxygen Sensor 1 after getting the P0031 code. Read up a bit on what others did and that helped. This sensor is located on the driver's side of the engine and is upstream of the catalytic converter right up close the engine itself making access very difficult.

I followed the plan someone else had laid out when they dis this same repair and was able to access it by jacking up the front end, removing the wheel, then disconnecting the sliding yoke on the steering shaft. (Be sure to match mark the yoke on both ends to ensure properly orientation during re-assembly) This was the most difficult step I encountered due to corrosion on the splined shaft. But after lots of B Blaster and heating it up with a small propane torch, I was finally able to break it loose so that I could slide the yoke up the shaft enough to separate the lower shaft from the upper. I did have to use a hammer and long punch to do get it to finally break loose.

Removing this steering shaft out of the way gave me direct line-of-sight to the sensor. I hit it with copious amounts of PB Blaster then worked on disconnecting the wire. I used a long Allen wrench to press the release tab on the connector and was finally able to disconnect it - that took a bit. Once that was loose, I used a 22-mm (7/8") O2 sensor offset socket and 3/8" ratchet with a long extension to brake it loose.

On the new sensor I applied anti-seize on its threads and installed it again using the sensor socket to tighten it. Reconnecting the plug was challenging mainly because I have big hands. But I was finally able to get it started, then used a long punch to seat it.

It took a bit to install the sliding yoke and align the two shafts. Before I did this, I cleaned the yoke and the splines on both shafts and applied some white lithium grease to all the mating surfaces. This helped tremendously.

After that, I replaced the wheel, tightened the lug nuts, dropped the vehicle back onto the ground and finally torqued the lug nuts to 83 ft-lbs.

I took it back to Advance Auto to return the sensor socket I had "rented" off them and asked to have them clear the code, since I bought the sensor from them and could easily prove that I had fixed the problem. They flat out refused to clear it. Oh well, when I started it up, the code was gone, or at least the CEL, VSC, and Traction lights did not come on. All's well that ends well. God is good!
 

Members online

Forum statistics

Threads
278,316
Messages
3,554,112
Members
248,016
Latest member
Advally Service

Trending content

Back
Top