Willbgood Build Thread

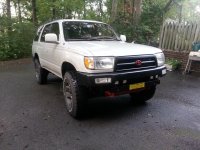
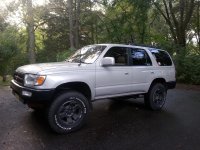
That's what I am thinking. Graphite trim, and black bumpers and wheels. I might play around with some red highlights on the wheels and under carriage.

So pretty much mine except with flares! I'm getting ready to paint my wheels soon and I'm making the circle T logos red.
 
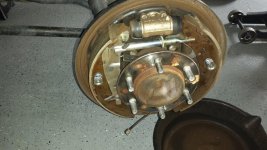
Rear brakes today, I have to figure out a way to convert the rear to disk...

I hate drum brakes! I also feel like you need to have three hands.

Fighting the drums off, is never fun either.

I discovered that somewhere in this toys history, someone did A half assed brake job. The drivers side had to different brand shoes, and a mix and match of other parts. I can n ot imagine anyone doing a half assed job, but especially since rig was primarily dealer serviced...why would you risk the farm on shitty work?

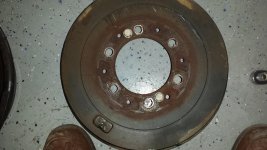
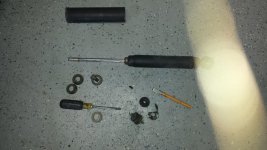
So in the first picture you will notice two thread bolts. I used these to bust the drum loose. Not pretty and I don't like putting pressure equilaterally on anything that spins. Therefore I will tap the five hole, which I suppose are for heat dissipation, and use 5 bolts to remove the drums the next time by doing half turns in a star pattern.

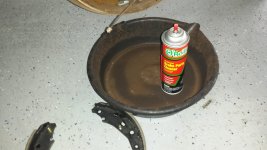
As well I too picture of brake cleaner. I use a lot of it. I figure brake dust, no matter how safe the current dust is, can not be healthy, so I vacuum and then I wash, to 1. get rid of the dust, and 2. clean work is better work.

Also, if you have not done this before, take pictures, so you can remember what the hell it looked like when you started...:)

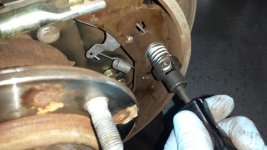
You don't really anymore tools then you normally us for brakes, but you should get a brake spring clip tool..it makes life a lot easier.

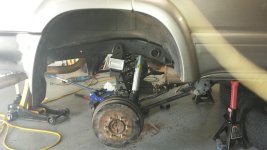
Finished up the brakes and started the rear suspension...not fun, the rear shock bolt are rusted and do not want to break loose. Combine that with the fact that getting to the nut above is a Biotch, and there is no nut below to hold the upper part of the shock while you bust it loose...and tonight is a double whiskey night...tomorrow its a die grinder and cut the F'ers out.
 

Attachments

  • 20151008_133447.jpg
    20151008_133447.jpg
    82.3 KB · Views: 407
  • 20151008_133524.jpg
    20151008_133524.jpg
    72.3 KB · Views: 402
  • 20151008_133615.jpg
    20151008_133615.jpg
    62.9 KB · Views: 424
Last edited:
I missed this pic, and I wanted to show how easy a $4.59 can of cleaner and a pan can make the job. In stead of every thing being dusty and greasy, its clean and easy to dissemble, inspect, and reassemble.
 

Attachments

  • 20151008_133505.jpg
    20151008_133505.jpg
    91.9 KB · Views: 409
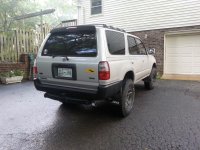
I would recomend a "satin black" for everything. The front bumper is that. The rear bumper is bedliner with satin black over it. Bedliner sucks btw! The wheels are plastidipped and will be painted satin black soon.
2015-09-27 17.19.18.jpg

2015-09-27 17.19.30.jpg

2015-09-27 17.20.01.jpg
 

Attachments

  • 2015-09-27 17.19.18.jpg
    2015-09-27 17.19.18.jpg
    137.7 KB · Views: 446
  • 2015-09-27 17.19.30.jpg
    2015-09-27 17.19.30.jpg
    137.1 KB · Views: 482
  • 2015-09-27 17.20.01.jpg
    2015-09-27 17.20.01.jpg
    137.3 KB · Views: 436
I would recomend a "satin black" for everything. The front bumper is that. The rear bumper is bedliner with satin black over it. Bedliner sucks btw! The wheels are plastidipped and will be painted satin black soon.
I found your links and I was reading you stuff. Nice job, I will go back and read more.

The black looked good when you had flairs, but I am not sure how it will look with the limited package...worst case scenario, I paint it twice...paint is like working with steel, if you don't like it just heat and redo it, with paint grab the sand paper, 2x, etching and do er again...keeps me of the street.
 
Rear Disk Brakes

There has to be a way to do it. I think that will be a future project...maybe I can Josh Whitson interested and we can collaborate on it? HINT,HINT, HINT
 
Graphite paint question PM answer

I try not to PM, as then I find myself answering the same questions over and over. This way the question is asked and answered.

The paint brand is VHT, wheel paint, which is actually duplicolor, and compatible with their primers and clear coat. Best deal is online at amazon if you have prime or Autozone, but they will not ship. I am amazed at the quality and the results of two light coats followed by a medium coat. It is by far the best canned paint I ever used and looks just like I used one of my guns, and did 6 coats and a clear...I can not wait to see it with a clear coat.

I think it looks as good as any powder coat on wheels.

Of course spraying it over a large area, may prove difficult and I will update this
 
Last edited:
Day 21

Starting out bad...rear shock bolts after soaking with PB for several days, still will not budge. I am going to use my grinder to cut the shaft...arggh, I hate having to use a big hammer....
 
Starting out bad...rear shock bolts after soaking with PB for several days, still will not budge. I am going to use my grinder to cut the shaft...arggh, I hate having to use a big hammer....

You can also bend the shocks back and forth to break off the end
 
You can also bend the shocks back and forth to break off the end

I cut them with a sawsall right at the upper stop, and then ground the ends so I could push them up and through...for a few hours today I hated Toyota...

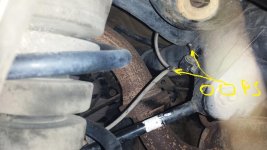
I managed to get the lift in, but I also cut a Trac wheel sensor. No I have to find out if I can splice it, or do I have to replace the whole line because of resistance. In another application I went crazy trying to trace a ghost in an instrumentation system, only to find out that the previously done soldered joint was giving a an incorrect OHM reading due to the solder resistance.

Any smart guys out there have any real knowledge of this system?
 
Today as I said above started out rough. The rear shocks simply were not going to break free. So I grabbed a grinder and starting cutting. My first mistake was that I did not have an extinguisher handy. It was major safety error, and could have been a disaster. My second mistake was using the grinder to cut through the rubber bushing, which almost made me need the missing extinguisher.

The rubber caught fire started melting and dripping before I could get out from under the truck. I have a n ice 1 inch by 1/8 third degree burn to prove the stupidity of my rush to get it done. "hey y'all hold my beer and watch this".

After I extinguished the burning rubber, I used a sawsall to cut through the rubber and the shock and then groung the upper stop of the shock and pushed it through. In the process I cut what I thought was called the trac sensor, but is actually the ABS sensor. Now I have to figure out if can be spliced, or whether it needs to be replaced....argh...

The right side installed no problem. Got to the left and realized that I forgot to disconnect the brake lines and lateral control arm. I am glad I did, because I noted the left brake lines was fully extended before I removed the old spring...brake lines will have to be replaced, and the sensor problem sorted out. I may need a new lateral control arm as well, but will not know until I put wheel and tires on it.

When I got home, the Stabilizer bar links that MStudt made for me arrived and I am very pleased. I will install them tomorrow on the front and back. Well worth the money.
 

Attachments

  • 20151009_130410.jpg
    20151009_130410.jpg
    73.7 KB · Views: 339
  • 20151009_130421.jpg
    20151009_130421.jpg
    76 KB · Views: 339
  • 20151009_151048.jpg
    20151009_151048.jpg
    63.3 KB · Views: 353
Last edited:
Yeah, continue with the hard work! Most wouldn't even consider trying to restore a vehicle in this condition. You're giving it a new life, 4Runners will thank you in return!:hug::car:
 
damn, you are making serious progress on this build :snacker:

Yeah, continue with the hard work! Most wouldn't even consider trying to restore a vehicle in this condition. You're giving it a new life, 4Runners will thank you in return!:hug::car:

Thanks, it was paid for, and I love it, so any money spent is spent on a vehicle that will last for awhile. If I was buying, I would have searched for one that was a little cleaner, but finding one as low mileage might have been hard. So in the end, I will have a fairly low mileage semi-restored toy...
 
Valuable lesson today

I have been wrenching most of my life. Everything from dozers to nuclear power plants, and of course my beloved toys. I have also been a researcher for my own business, and for several attorneys. Information is powerful, and almost always equals money, and good information has almost always had a high cost benefit ratio.

Sometimes, I think I know it all, but I always realize I don't, therefore I learned to research because I know there are smarter folks than I.

Back in the day information was very costly. You had to invest much more time, and money to get it, and it almost never was just the cost of your time. In many case, monopolies, often protected by the state, controlled the free flow of information.

Time=cost, as they say TANSTAFL. When there are no other costs, but time, and the time searching for information is reduced, it benefits us all.

The internet has changed world in regards to information. The idea that I can gather info, quickly, for the cost of my time, amazes me everyday. The fact that folks are willing to share it, amazes me even more.

The cost of information has decreased almost direct correlation to Mores law. The internet will continue to change the world in ways we can not even imagine, and I ain't talking about free porn, I am talking about freedom, and the free exchange of ideas and information. The centralized state is doomed.

What a wonderful time we live in.

So, onto my lesson. I made some assumptions about oil filters. Today, in an hour of reading while I had my morning coffee, I discovered my fallacy of correlation and adjusted my position. It's back to Toyota OEM OIL filters for me.

Here are the links, choose for yourself, but I am pretty convinced, and will act accordingly.

The start of my journey:

http://www.toyota-4runner.org/5th-g...-mile-oil-change-schedule-10.html#post2150786

The absolute best write up on Oil filters for a Toyota I have ever seen:

https://www.tacomaworld.com/threads/toyota-oil-filter-made-in-thailand-vs-the-competition.123608/
 

Members online

No members online now.

Forum statistics

Threads
278,306
Messages
3,554,045
Members
248,016
Latest member
Advally Service

Trending content

Back
Top