0xfded
New member
This is not rocket science, but I had to do this twice and figured I'd take pictures the second time to make it easy in case someone else wants to do it.
This is for a 98, and I imagine it's the same for a 96 or 97. I understand that 99's and later had fancy heated mirrors, so there might be more wires and the plugs might be different, but it's probably the same overall.
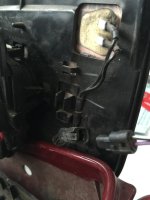
1) Remove the interior door panel to access and disconnect the wire harness. Instructions for that here. The wire harness is taped to a white plastic tab, which is difficult to remove without ruining. Simply work the tape loose and slide the wire up and off the tab.
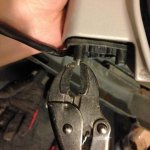
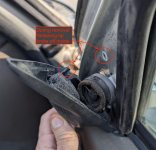
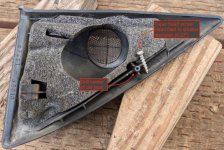
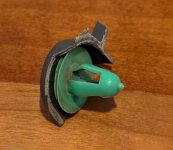
2) Remove the black triangular corner panel. Simply pry it back from the top, and it will pop out. Don't pry from the bottom, which is held on by a plastic clip.
3) Remove the three 10mm bolts. The mirror won't fall off, don't worry.
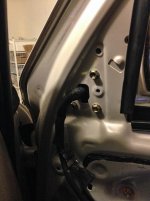
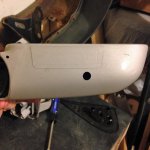
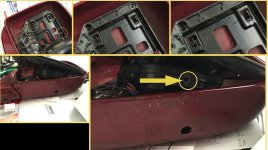
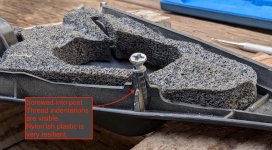
4) The mirror is now being held on by a screw in a hole with a plastic ring near the top. Feed some wire slack and work the mirror off. Center the screw and firmly pull and the entire mirror assembly will come off.
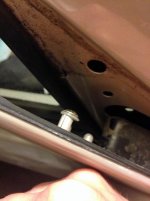
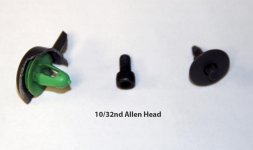
5) The mirror is attached to the base by these three screws. They are made of soft cheese. Recognizing this deficiency, Toyota helpfully secured each with a dab of blue Loctite. You're going to strip one or two. Per side.
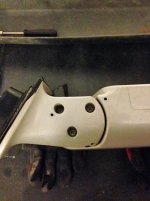
5b) Because you stripped one of those screws, use an extractor to work it out, or just carefully use a large drill bit to obliterate the head of the screw. Grimace.
5c) Go to Home Depot and get some replacements. These are M5 x 0.8 thread 10mm screws. Up to 12mm will work, longer won't fit. Grab some stainless steel ones so that they don't strip or rust in case your descendants need to do this after they inherit your runner, which will be just broken in by that time.
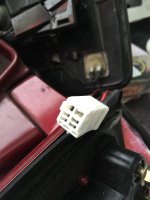
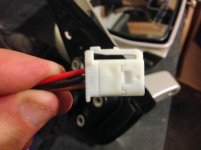
6) The plug is on the wires is too large to fit through some of the subsequent holes. If you need to fully dismantle the mirror (ex: to replace the mirror and motor), then you need to de-pin this plug. First, snap a picture so you remember the order of the wires:
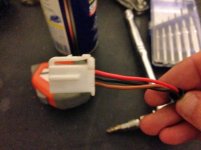
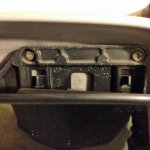
6b) On top of the plug is this little cover. Gently pry it off with a pin or very small screwdriver. It just snaps into place, no hinges or anything.
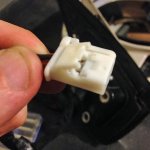
6bi) Find the little cover after it springs free and lands somewhere in your workspace.
6c) Each pin is held in by a plastic latch. While applying some traction to the wire from the back, slide a needle or small screwdriver in between the plastic latch and pin from the front. It doesn't take much pressure. The wire should slide right out. Careful not to bend the front of the pin down by pressing down on it. Press in to separate latch and pin, not down on the pin.
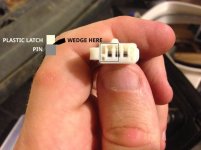
Remove all three wires and the plug is out of the way.
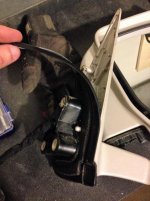
7) The rubber gasket peels off in satisfying fashion, if you want to clean up or paint. You can slide the wires out through it.
Continues:
This is for a 98, and I imagine it's the same for a 96 or 97. I understand that 99's and later had fancy heated mirrors, so there might be more wires and the plugs might be different, but it's probably the same overall.
1) Remove the interior door panel to access and disconnect the wire harness. Instructions for that here. The wire harness is taped to a white plastic tab, which is difficult to remove without ruining. Simply work the tape loose and slide the wire up and off the tab.
2) Remove the black triangular corner panel. Simply pry it back from the top, and it will pop out. Don't pry from the bottom, which is held on by a plastic clip.
3) Remove the three 10mm bolts. The mirror won't fall off, don't worry.
4) The mirror is now being held on by a screw in a hole with a plastic ring near the top. Feed some wire slack and work the mirror off. Center the screw and firmly pull and the entire mirror assembly will come off.
5) The mirror is attached to the base by these three screws. They are made of soft cheese. Recognizing this deficiency, Toyota helpfully secured each with a dab of blue Loctite. You're going to strip one or two. Per side.
5b) Because you stripped one of those screws, use an extractor to work it out, or just carefully use a large drill bit to obliterate the head of the screw. Grimace.
5c) Go to Home Depot and get some replacements. These are M5 x 0.8 thread 10mm screws. Up to 12mm will work, longer won't fit. Grab some stainless steel ones so that they don't strip or rust in case your descendants need to do this after they inherit your runner, which will be just broken in by that time.
6) The plug is on the wires is too large to fit through some of the subsequent holes. If you need to fully dismantle the mirror (ex: to replace the mirror and motor), then you need to de-pin this plug. First, snap a picture so you remember the order of the wires:
6b) On top of the plug is this little cover. Gently pry it off with a pin or very small screwdriver. It just snaps into place, no hinges or anything.
6bi) Find the little cover after it springs free and lands somewhere in your workspace.
6c) Each pin is held in by a plastic latch. While applying some traction to the wire from the back, slide a needle or small screwdriver in between the plastic latch and pin from the front. It doesn't take much pressure. The wire should slide right out. Careful not to bend the front of the pin down by pressing down on it. Press in to separate latch and pin, not down on the pin.
Remove all three wires and the plug is out of the way.
7) The rubber gasket peels off in satisfying fashion, if you want to clean up or paint. You can slide the wires out through it.
Continues: