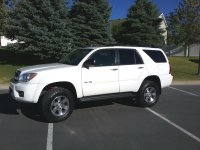
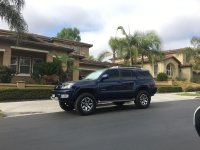
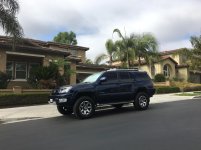
Moog FJ Cruiser lift project finally completed!!!
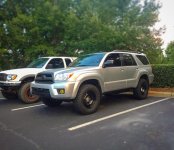
I guess I can't start a new thread since this is my first post, but I just finished up all of the work on my 2006 Toyota 4Runner SR5. I figured out what I wanted to do and how to do it by lurking on this thread along with others. Thanks!!
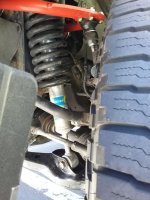
I went with Moog FJ springs because they were easy to find and less than $100 for all four from Rock Auto. I just trimmed 1" off of the bottom so the springs seat flush. . . no big deal with a dremel and cutoff discs). I got the 5100's and set them at 1.75. I also got a 1 " poly spacer off of ebay for the left rear, an OME rear trim packer for the right rear, and a 1/4" poly top spacer for the left front. This gave me around a 2 1/2- 3" lift up front, and about 2" in the back that is level left to right.
My 4Runner suffered bump steer before the lift, but after it was worse.
The kicker was when I took it in for an alignment to see if my control arms were seized. The passenger side was, but the driver side was not. They aligned it anyway without my consent , and the alignment, ride, and bump steer got even worse.
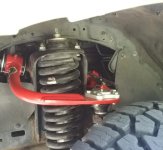
Looking at the alignment numbers, it was apparent I needed to replace at least one lower control arm and put on some aftermarket upper control arms to compensate for the lift.
I decided to just replace both lower control arms along with the upper control arms and be done with it. I went with OE Toyota lower control arms and alignment cams to avoid the problems that I read about with the aftermarket parts. I have also replaced enough control arms on various vehicles to know that it isn't worth saving a few bucks to use aftermarket control arms- my time is too valuable to ever replace or mess with the control arms again.
Cutting the control arms off with a sawzall and Diablo blades for thick metal was one of the easier things to do on this project. It helped that I could lift the truck on a commercial lift and get it up high for a good angle to use the sawzall. I put anti-seize on the hardware to hopefully keep them from seizing while I own this car.
I went with JBA upper control arms. I like them. They had great reviews and the ball joint won't need to be pressed out for replacement. I like the idea of not having to remove the upper control arms again because the hardest part of this project was getting the control arm and the 4 washers aligned to get the long bolt through! That was a huge balancing act. I put the grease on the bushings that JBA sent for lubrication, but I don't know how much really ended up staying there after knocking the washers out like 34 times! Every time they would fall out and hit the floor, I would wipe them off of dirt and try them again. So there probably isn't a lot of grease left.
The only advice I can give about getting them aligned is to get the front bushing and washers lined up and the bolt through and just barely engaged with the chassis. This leaves enough maneuverability to move the back of the control arm side to side and up and down to wiggle the small washer in between the bushing and the chassis, but not so much that that the front washers are dislodged while doing it. It takes trial and error!!!
It took me about 15 hours to do all of the control arms and I also replaced my rotors and pads while everything was apart. 2-3 hours of that was finding out I had a bad battery at the very end. I was all done and the car wouldn't start. Looking at the battery it was over 5 years old, so it made sense that it was bad, but it hadn't showed any signs before. What are the chances??? So I had to run and buy a new battery. But that was better than having an issue with the starter!
I finally took it back to the shop for an alignment and tires. I went with 265 70 17 Falken WildPeak AT3W passenger tires because of all the good reviews, affordable price ( I just spent about $1700 in parts!!!), and good looks. They are a bit heavier, but I believe that is for two reasons- deeper treads and more durable sidewalls. I put these on 5th generation Sr5 wheels. They look great! The last bump in the road was that my alignment tabs were flattened in several areas. So the shop bent them back and placed a bead of welding to strengthen them. That cost me another $100. Not that big of a deal.
It rides good- not like a car anymore, but everything is solid. No more bump steer and wandering all over like it is super windy outside. Anyways- thanks for reading! I will try to add some pictures!