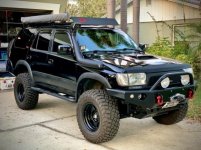
Papabeach's Mod Thread

Manual hubs, TBU, Lotus axles...

ARY1N35l.jpg
1n4FkSnl.jpg


Stoked about my recent mods!

-Refurbished a set of used spindles with new bearings and seals, painted with Por-15 and added manual hubs
dLuY5v8.jpg
F77N7cyl.jpg


-TC spindle gussets welded in
4DQDpVtl.jpg
CZuIbc0.jpg


-TBU: NAPA calipers, OEM rotors/pads
vTh6Dh8l.jpg


-Lotus axles
2SUM6zul.jpg


-Spidertrax lug centric spacers
*no pic

These mods led me to buying a shop press, tap and die set, bearing race/driver set, press sleeve kit and some other odds and ends. The only help I had was with welding (I didn’t do this) and some assistance pulling my front diff (will discuss more in a minute). I have never done any of this work before and did this all based on the service manual and Timmy the tool man and Sean videos (amazing btw).

In addition, I ended up pulling my front diff d/t oil leak from the breather on top of the diff. When I installed it previously I didn’t have good alignment between the breather tube and the hard line so the rubber connection between the two didn’t have a good seal and I was blowing oil out the top and down the back of the axle. It was a PITA to pull the whole diff again but it went much quicker this time (practice makes perfect). I added a couple clamps to the rubber hose and straightened out the connection.

E37HCTal.jpg

xnRu41ll.jpg

As a bonus during this part of the job I found out why my 4WD wasn’t working….the vacuum lines had both melted completely through d/t proximity to my headers. I think had I not pulled the diff I don’t know if I would have figured this out because the vacuum lines were connected on either end and looked fine…so note to self in the future….check for connectivity of all vacuum lines and not just they are attached. Anyway, a quick trip to OReilly’s for some replacement lines and some heat proof shielding and I was back in business.

The only problems I ran into included a leaky piston seal on the passenger side 13WL caliper, quick trip to NAPA and they swapped me for a new one…no problem. I did have to bleed to brakes twice because I did a crummy job the first time. No problems with a soft pedal so far and everything seems normal. Also, hub centric spacers don’t fit over manual hubs so I had to order lug centric spacers. You can see in the pics that without spacers I barley clear the spindle gussets…maybe 1-2mm. I am looking at SCS F5’s 16x8 w/3.5” backspacing as a better overall solution…but would like to test fit a wheel/tire before pulling the trigger.

Overall this was a very involved upgrade but not difficult. I took my time ordering parts, rebuilding/refurbishing the old spindles. I did this the expensive way with new parts with the exception of rebuilding an old spindle. Used parts aren’t my thing…probably should be but whatever….I searched parts.com for used manual hub parts for weeks and finally got impatient…my pretty new spindles were staring at me and told me to get on with it…so there you go.

Parts/equipment came from Harbor Freight, Amazon, Trail Gear, Low Range Off Road, SpiderTrax, Camelback Toyota, Lotus Development, SPC Alignment. I used a loaner ball joint puller from Oreilly’s to separate the UBJ…otherwise everything was hand tools with the exception of my cordless dewalt ½” impact which is nothing short of amazing! I used a MityVac to bleed the brakes…super easy, highly recommended if you are by yourself.

Timmy the Toolman Manual Hub 1&2, TBU, Front Diff Replacement
YouTube
YouTube
YouTube
YouTube

PhoRunner Manual Hub swap 1&2
YouTube
https://www.youtube.com/watch?v=e2M3H2oD4dk

Sonoran Steel Manual Hub Write-up
http://sonoransteel.com/junk_yard_manual_hubs.html
 
SCS F5's pre-ordered

Hopefully, I am done with wheel spacers. I just placed a pre-order for 5x SCS F5's 16x8, 3.5" backspacing in matte jet black! Not sure what I will do with my current setup:
--Wheels specs are FJ TRD Trail Team 16" x 7.5" with a +15mm offset 6x5.5" Bolt --Tires are 285/75/16 BF Goodrich AT T/A KO2's

gwXyaNOl.png


Now debating pairing with a new set of KM3s. Would appreciate feedback from anyone with experience with these tires.

mqlzZwWl.png
 
7QdSj5x.jpg
nNden4d.jpg


1999 TOYOTA 4RUNNER SR5 HIGHLANDER
(5spd, 4x4 with factory E-locker)
~220K miles

Upgrades & Modifications:

Engine & Performance:

OEM 1999 5VZ-FE 3.4L V6

Forced induction:
TRD 2nd Gen Supercharger (complete rebuild by Magnuson S/C ~150K)
URD 2.2" Pulley
URD 2.1"/Nose cone replacement
URD 7th Injector
URD AIC/FTC w AFR calibrator
TRD Dynamic Tensioner
Walbro 190LPH Fuel Pump
170F T-stat
Denso IK22 Plugs/Wires
Moroso air and oil separator 85651

Air intake & exhaust:
Deckplate mod
Intake Silencer Removal
Wotefusi Snorkel w YodaTeq Grill
Airaid Modular Intake tube
Doug Thorley Headers
MagnaFlow 51006 Hi Flow Cat
Borla 14659 Cat-Back Exhaust
OEM Front O2 sensor replacement
Exhaust Pipe SAWZALL Chop

Electrical system:
Optima Yellow Top battery w/ military terminals
“Big 4” wiring upgrade (Marion Bumper 2 Bumper)
250A alternator powder coated red
Warn Power Interrupt Kit for winch
Fulltime 12V power mod for accessory outlets
Accessory Fuse Block install
-4Ripcord Acc Fuse Block mount
-Blue Sea 5025 ST Blade Fuse Block (6 circuit)
-Blue Sea 5026 ST Blade Fuse Block (12 circuit)
-100A relay (ACC triggered)
-Blue Sea 285Series Surface Mount 100A Circuit Breaker
-4ga welding wire/marine grade tinned copper lugs
-Anderson SB50 ARB/Engel Fridge 2-PIN to Battery Complete Wiring Kit (10ga) for cargo area

Transmission/clutch:
Original OEM 1999 R150F 5 speed
URD Short Throw Shifter
Marlin Crawler HD shifter seat & socket
Marlin Crawler HD flywheel (23.2lb) w HD pressure plate bolt kit
Marlin Crawler 1200lb clutch (Seco Disk/Aisin Cover)
New OEM Clutch Master Cylinder
New OEM Clutch Slave Cylinder
Redline MT-90 Fluid

Drivetrain:
“Blue-wire” mod (allows E-locker engagement in 2Hi/4HI)
ECGS Nitro 4:88 w ARB locker up front
ECGS Nitro 4:88 R Ring & Pinion diff (factory e-locker in rear)
Lucas 85W140 Non-synthetic gear oil F/R diffs
OEM Transfer Case-Standard “J” shifter w/ Red Line 75W90 fluid
OEM Rear E-locker

Steering:
Original OEM steering rack
New OEM ITREs, OEM Driver OTRE, NAPA Passenger OTRE
Energy Suspension Bushings from Wheeler's Offroad walmartone login

Suspension & Chassis:
Front:
SPC Light Racing UCAs
Radflo 2.5in/650lb COs
Strongflex Bushings in LCAs
Wheeler's Front SuperBump Bumpstop set
OEM LBJs
Total Chaos Spindle Gussets
Aisin Manual Hubs
Lotus axles
Addco 573 sway bar w/Energy Suspension greasable poly bushings, Green Grease (removed)
Toytec 1” Diff Drop

Rear:
OME 861 coils
Tokico Black Heavy Duty Shocks 48531-69417
SS Adjustable Panhard Bar
SS Extended bump stops/Daystar bump stops
Strongflex bushing in rear upper control arms
SS rear lower control arm replacement
Extended Rear Differential Breather
Addco 483 sway bar w/Energy Suspension greasable poly bushings, Green Grease
Eimkeith Panhard Correction Kit Install

Misc:
SS Rear Polyurethane Body Mounts
Toytec 1” Body Lift
MStudt extended sway bar double disconnect links rear
Yota driver-side lean correction:
-Toytec TP14 (1/4”) driver front spacer
-OME 80PF10 (10mm) rear driver spacer

Wheels, Tires, Brakes:
16 x 7.5” FJ Cruiser Black Trail Edition Wheels, 15mm Offset
285/75R16 BFG All-Terrain T/A KO2
Spidertrax wheel spacers
Wheelers Off-Road SS Extended Brake Lines x3
NAPA Eclipse 13WL calipers (TBU)
OEM rotors/pads


Armor:
Shrockworks front bumper w/stinger
CBI rear plate bumper w/ dual swingouts
Shrockworks full skids
Stubbs Welding HD-SKO Sliders
Lotus RCAM Skids
BudBuilt rear diff skid

Additional Instrumentation:
Lotek A-Pillar Dual Gauge Pod (Color Matched)
PLX DM-6/SM-AFR
White TRD Boost Gauge
ScanGauge 2 OBDII Interface
Hilux Surf Field Monitor

Exterior Lighting Upgrades:
LS460r Bixenon projector retrofit
-D2S: Morimoto 5Five DSP ballasts
-MotoControl Bixenon: H4/9003 harness
-Osram Xenarc 66240 CBI bulbs
-Morimoto XB LED 100mm white angel eyes
Rigid Industries 91061 SR-Series White 10” Driving LED Light Bar in Hood Scoop
Rigid Industries 93551 SRQ2 Flush Mount Pair in rear bumper
Rigid Industries 50211 D2 Wide on CBI ditch light brackets
VLED 194 WHITE HIGH OUTPUT 360° 26 LEDs front corners
VLED 921 5K White (500 lumen) back up LEDs
VLED 5K TYPE 2 DUAL COLOR CHANGING WHITE HV AMBER SWITCHBACK 42 HIGH POWER LED TURN SIGNAL BULBS 1157 2057 (Front bumper turns)
VLED HIGH VISIBILITY RED 6 LED 7443 7440 (taillights/brake lights)
VLED HIGH VISIBILITY RED HIGH POWER 6 LED 921 (3rd brake light)
VLED HIGH VISIBILITY AMBER 6 LED 7443 7440 (tail turn lights)
VLED VLR-6 PRO SAFE LOAD TURN SIGNAL RESISTOR EQUALIZER-6 ohm x4 (each turn signal)
VLED VLR-25 PRO PARKING LIGHT RESISTOR-25 ohm x1 for 3rd brake light to get rid of ABS light
PIAA 580s converted to 55W HIDs (DDM Tuning Ultra Kit with 5500K bulbs) on Bumper
PIAA LP530 Fog lights w/mod to stay on when high beams are on
Clear Corner (JDM) / Clear turn Lenses (Ebay Version)
Â’01-Â’02 Tail light swap/lightly smoked
Lux lighting rock lights x8
Headlight Filler Panel LED bars-Rigid Industries 906213BLK

Interior Lighting/Aesthetics Upgrades:
LED swap Dome/Speedo/Console lights
LEDGlow Lighting Courtesy floor lights (door triggered)
Custom Wet Okole seat covers (black, red piping, TRD logo)
WeatherTech Digital Fit Floor Liners & Cargo Liner w TRD decals
Moved Driver's Side Grab Handle to above door
Top tether bracket/ child restraint system added
OTRATTW custom switches
Additional switches added on armrest
Additional switches added to radio bezel

Exterior Mods:
Custom Billet grill
Gobi rear ladder
Whitson Metal Works Full length Roof Rack with Sunroof insert/custom fairing
Added OEM rear wind deflector
Line-X premium: grill, hood lip, roof rack, fender flares, quarter panels, rear wind deflector, sliders, ladder
Front Window/Rear Window/Hatch/Windshield eyebrow tint
Flare edge trim
WeatherTech Side Window Deflectors-In-Window-Channel x4
CBI ditch light brackets
Insain Fab 3rd Gen CB antenna mount (modded to fit with CBI rear bumper)
Rad Rubber Designs Engine Splash guards (1" BL)
Overlook Graphics Flag Decal, Matte Black
Marcus Clarkus End Cap install

Interior & Coms Upgrades:
Uniden Pro520XL CB Radio (installed in the ashtray location)
Pyle PSP8 5in PA speaker (installed in radiator skid plate)
Yaesu FT-60R handheld Ham Radio
Diamond MR77SMA 144/140 Mobile Mag Antenna
Firestik II 4ft CB Antenna w/Tuned Tip
Vibration/Sound deadener treatment
Kenwood Excelon DDX9905S stereo
Kenwood CMOS-230 backup camera

JL Audio XD700/5 amplifier
Hertz speakers ESK 6.5 w crossover (front) / ECX 5.25 (rear)
JL Audio 10TW3-D4 Subwoofer (custom install in right rear cargo wall) by Custom Sounds, San Antonio
“Y” adapter for front/rear antenna plugs
Added power antenna up/down switch
Rear Hatch Window Switch Mod

Camping/Recovery gear:
Custom Camp Table/Tilting Fridge Storage System
ARB 50qt Fridge/Freezer
Alu-Cab Tilting Fridge/Freezer Slide
Tepui 6Â’ Awning mounted to roof rack with ARB OS850 awning mounts
ARB CKMA12 Air compressor mounted in engine bay on custom Tater Fab battery box
ViAIR 450P Portable Air compressor
Warn M8000 winch w/synthetic rope & wireless remote (pending install)
Factor 55 ProLink
High-Lift Jack on rear bumper
20L fuel can on rear bumper
Bag of stuff: jumper cables, battery jump start kit, straps, winch accessories, shackles, tools, etc.

Other:
AJT Design Injection Key Fob
High Pressure StrongArm struts for rear hatch

This is the complete information. Thank you very much.
 
Last edited:
Rear Axle Bearings/seals/brake job

Took care of my rear axle bearings and seals today. Went with all OEM parts and reused the ABS ring, took the Dr. Coffee approach and swapped/flipped the retainer. Should have dealt with this sooner…what a mess. Passenger rear had obviously been leaking for some time....the driver rear wasn't nearly as bad but was still leaking. I spent a serious chunk of time just cleaning up oil/brake dust, rust and painting but happy with the outcome. Went ahead and replaced my rear shoes as they were worn down and completely saturated with oil...not sure that there is enough brake cleaner in the world to clean that up…I followed Timmy the Toolman and Sean’s tutorial and utilized Duane’s bearing puller (worked great). Glad to have this job out of the way and some well functioning rear brakes! I did however find an oil leak where the 3rd member meets the axle housing...the bolts weren't torqued so hopefully simply tightening them will take care of the problem....I am not excited to pull 3rd member and replace the gasket...

AzpUjunl.jpg


TgrERfVl.jpg


HmW2hgql.jpg

rfwQBxAl.jpg

B2obsrvl.jpg

Fy4p1gIl.jpg
 
Last edited:
Nice! Your wheel and tire upgrades somehow make your vehicle look even cooler. Good job on the maintenance too. I was close to buying a couple black 4runners as my replacement. Both had issues that I didn't want to deal with, but I would have been stoked to find one as clean as yours my friend.
 
good stuff here my friend! sicmods are always my favorite but sometimes a little maintenance is necessary.

I have some of those planned to be on the way too! Improved sound deadening, attic, molle panels, new drawer setup, more lights and folding power side mirrors with led covers. I needed to get this one done before getting to the fun stuff! Still need to replace my door lock actuators and a number of little annoying things...but nothing unusual for a 21 year old truck! About the only left to replace is the steering rack and the original is still holding out...not sure how much longer though.

Nice! Your wheel and tire upgrades somehow make your vehicle look even cooler. Good job on the maintenance too. I was close to buying a couple black 4runners as my replacement. Both had issues that I didn't want to deal with, but I would have been stoked to find one as clean as yours my friend.

Thanks bro! Maitenance is a must. Hard to find a clean black 3rd gen 4Runner...I have had to repaint a lot of it over the years between general wear and tear, off road use and a few accidents. If I were to buy another one I would seriously consider repainting the whole thing. Agree with the wheels/tires...been wanting to do this for a long time, very pleased!
 
What did you use to clean those drums? I went through the same thing about a week ago and my drivers side was just as bad as your passenger, just completely soaked. I did the seals and brakes, but plan to get back in there over the summer and do a better job cleaning it out, it's just too damn cold and wet outside right now for me to get to particular.
 
What did you use to clean those drums? I went through the same thing about a week ago and my drivers side was just as bad as your passenger, just completely soaked. I did the seals and brakes, but plan to get back in there over the summer and do a better job cleaning it out, it's just too damn cold and wet outside right now for me to get to particular.

3 cans of brake cleaner, manual wire brush, bigger wire brush 2" and 3" on drill then bigger thicker wire brush on my angle grinder, emory cloth on the braking surface of the drums then a final rinse with brake cleaner. Every part I took off got cleaned as well. I highly recommend a face shield and respirator if you go this route...

Did you do the bearings too or just the seals? If not, you might be re-doing this sooner than this summer if your bearing are as worn as mine. Hope this helps.
 
Re-sealed rear 3rd member

As it turns out my rear diff leak didn’t fix itself so I figured I would take care of it today. Why I didn’t do this when I was recently replacing my rear axle bearings/seals…I have no idea because it would have made more sense as I already had the diff drained and the axles out and brakes disconnected. Disassembly went pretty smooth and I cleaned up the mating surfaces for a fresh coat of Toyota Red FIPG. The shop that previously installed the rear 3rd member used some black FIPG and not much of it…none the less I sprung leak.
rGLqLatl.jpg
o4xzkWzl.jpg


So my reinstall was going well until…ah snap! One of the studs snapped in half…PITA.
qqaKWvVl.jpg


Unbolt the last 10 bolts I just tightened, pull 3rd member, clean up all the sticky red FIPG and go to Toyota for a $2 part. I bought two just in case, lol (didn't need the extra!).
DQFxfAol.jpg


Just like that…back on track. More Toyota red FIPG, more bolts and done! Reinstalled the rear sway bar, axles, brake lines, parking brake, bleed the brakes, mounted the wheels/tires, test drive…e-locker works, everything works, brakes feel pretty good.

Hope this takes care of the leak!
 
Last edited:
3 cans of brake cleaner, manual wire brush, bigger wire brush 2" and 3" on drill then bigger thicker wire brush on my angle grinder, emory cloth on the braking surface of the drums then a final rinse with brake cleaner. Every part I took off got cleaned as well. I highly recommend a face shield and respirator if you go this route...

Did you do the bearings too or just the seals? If not, you might be re-doing this sooner than this summer if your bearing are as worn as mine. Hope this helps.

I did everything inside, so hopefully it's good for awhile. I also did the breather mod up into the gas cap area.

I cleaned up the rear diff fluid pretty good, next time I do brakes though, I'll be digging in a little deeper, haha. The face shield is a good call though, will get one of those on order.
 
Oil change, bath and my MC TacoBox finally shipped!!!! Triple sticks are getting closer...
 

Attachments

  • DECA1812-0A7E-43FE-A49E-6FF362EFA450.jpg
    DECA1812-0A7E-43FE-A49E-6FF362EFA450.jpg
    60.1 KB · Views: 527
VLED HIGH VISIBILITY RED 6 LED 7443 7440 (taillights/brake lights)
VLED HIGH VISIBILITY RED HIGH POWER 6 LED 921 (3rd brake light)

I was looking at these on their site and they suggest a resistor to purchase with them. Do the 3g's require this resistor?
 
I was looking at these on their site and they suggest a resistor to purchase with them. Do the 3g's require this resistor?

I added them when I did the install. If the current pull isn’t correct it can mess with system...I had a weird problem with the turn signal cancelling the cruise control by changing the current pull through the tail lights. I tried to understand the wiring diagram but in the end it was very easy to install a resistor and forget about it. Some people also have luck changing out their flasher as opposed to installing resistors.
 
I can't remember how many months it has been but my MC Tacobox is here (w/Inchworm adapters)! Few more pieces to get together and then install time.

6Dxicoml.jpg
 
Great, thanks, I'll just add them. I drive in high-fog conditions often so these are on the top of my list for upgrades. Do I need a resistor for the 3rd brake light as well?
 
Great, thanks, I'll just add them. I drive in high-fog conditions often so these are on the top of my list for upgrades. Do I need a resistor for the 3rd brake light as well?

Apologies for slow reply, I somehow missed this post. I added a resistor for the 3rd brake light, I am not sure it is always necessary though.
 
Dual Jerry Can Holder

4MafcLYl.jpg


Not sure why I didn't do this originally...a single can holder was silly. Not to mention the single can holder from CBI rattles something awful and made me never want roll my rear window down...double is much more secure. At one point I added some padding to the single can holder and some other stuff to stop rattles but it all eventually fell out...

I am shocked at how much happier I am with this....seemed like a silly upgrade when I bought it but it has made me happy! Also put the shovel/axe/flag holder mounts on both sides, ready to git'r dun now.
 

Members online

Forum statistics

Threads
278,305
Messages
3,554,043
Members
248,016
Latest member
Advally Service

Trending content

Back
Top