2000 4runner 4cyl. auto to manual transmision swap

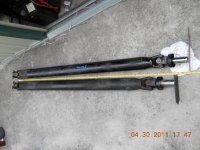
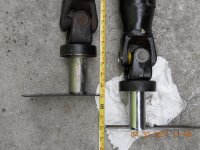
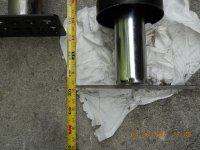
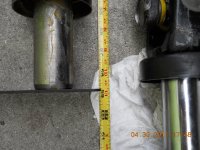
driveshaft installation....

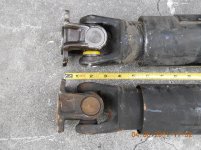
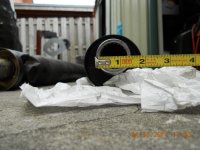
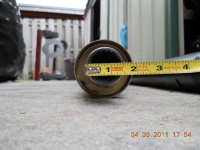
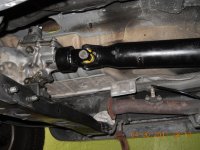
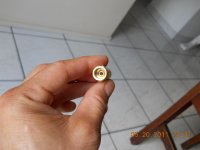
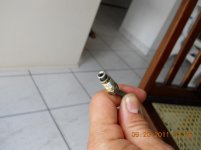
The driveshaft length from the auto tranny. is different from the manual tranny. The auto driveshaft measures 58 3/4" from one end to the other or 52 3/8" not counting the sleeve yoke and the flange yoke. The manual driveshaft measures 61 5/8" from one end to the other or 55 1/8" I paid $100.00 for mine. The sleeve yoke on the auto tranny is wider in diameter than the auto; the auto being: 1.582" and the manual: 1.493" Take into consideration the rechroming of the sleeve yoke. I had to take it to a chrome plating shop since it was bleeding rust, I didn't want to risk the output seal going bad because of the rust. I had taken pictures of the sleeve yoke before the chrome plating but lost them along with a bunch of pictures I had set up for uploading later on. The shop charged me $30.00 for chrome plating it versus $106.00 plus S/H from the stealership. Here is the P/N for the sleeve yoke just in case you need to buy it: 37302-35030 I also replaced both front & rear u-joints. The front one was binding so I purchased both. I bought these from my local autozone for $19.25 ea lifetime warranty! If you prefer the genuine part, here is the p/n: 04371-30040 It costs around $70 bucks. A word of advise when replacing he u-joints.... clean the holes where the bearings go real well with scotch brite before installing, it'll make your life easier... don't oversize it just clean it. The hardware to install the rear portion of the driveshaft is the same as the auto.
 

Attachments

  • 4runnerpictures 001.jpg
    4runnerpictures 001.jpg
    135.2 KB · Views: 2,403
  • 4runnerpictures 002.jpg
    4runnerpictures 002.jpg
    137.2 KB · Views: 2,235
  • 4runnerpictures 003.jpg
    4runnerpictures 003.jpg
    137 KB · Views: 2,097
  • 4runnerpictures 004.jpg
    4runnerpictures 004.jpg
    138.6 KB · Views: 2,137
  • 4runnerpictures 005.jpg
    4runnerpictures 005.jpg
    138.7 KB · Views: 2,115
  • 4runnerpictures 006.jpg
    4runnerpictures 006.jpg
    126.3 KB · Views: 2,105
  • 4runnerpictures 007.jpg
    4runnerpictures 007.jpg
    126.7 KB · Views: 2,129
  • 4runnerpictures 009.jpg
    4runnerpictures 009.jpg
    131.7 KB · Views: 2,353
Last edited:
clutch pedal repair....

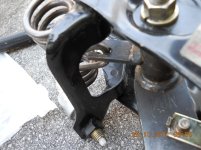
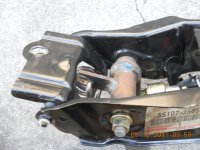
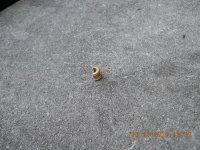
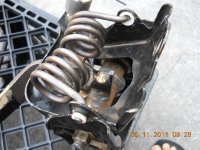
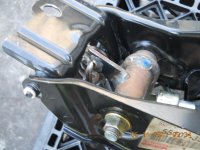
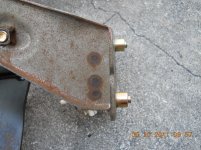
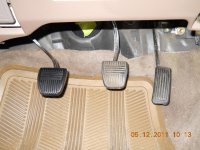
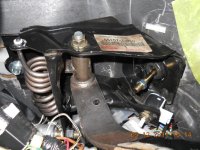
As you may all know about this issue with the tacomas and 4runners, the clutch pedal center spring bushing wears out and starts to wear out the area where the spring rests. Mine was not an exception so I decided to do as many of you guys out there may have done. I grabbed a pipe plug made out of brass and drilled a hole in the center. Then I cut it in half to make a half moon bushing out of it and shaped it. (You can find male pipe plugs at your local home depot) Sorry, I'm not providing pictures and p/n's when I was making the bushing, like I said before I lost all my pictures. I removed the spring (you may have a hard time putting it back since it has a lot of tension, but it's not impossible) and placed it where the original plastic bushing used to be. I put a little bit of JB weld to keep it in place and let if dry for a whole day. You can see the tremendous amound of wear that the spring caused on the pedal.
 

Attachments

  • 4runnerclutchpedal 003.jpg
    4runnerclutchpedal 003.jpg
    134 KB · Views: 2,073
  • 4runnerclutchpedal 007.jpg
    4runnerclutchpedal 007.jpg
    128.9 KB · Views: 2,186
  • 4runnerclutchpedal 009.jpg
    4runnerclutchpedal 009.jpg
    138.1 KB · Views: 2,052
  • 4runnerclutchpedal 010.jpg
    4runnerclutchpedal 010.jpg
    127.6 KB · Views: 2,128
  • 4runnerclutchpedal 011.jpg
    4runnerclutchpedal 011.jpg
    133.1 KB · Views: 2,421
  • 4runnerclutchpedal 012.jpg
    4runnerclutchpedal 012.jpg
    126.7 KB · Views: 2,131
clutch pedal center spring side bushings...

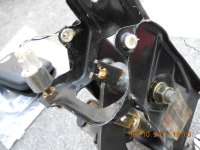
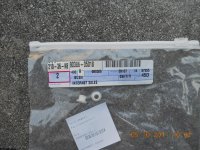
I also replaced the center spring side bushings, they were not too bad, but decided to replace them since I was fixing the problem with the center spring. The p/n for the side bushing is: 90386-05018 and you're going to need 2ea. and my price was $1.68 ea
 

Attachments

  • 4runnerclutchpedal 002.jpg
    4runnerclutchpedal 002.jpg
    131.8 KB · Views: 2,139
  • 4runnerclutchpedal 008.jpg
    4runnerclutchpedal 008.jpg
    140 KB · Views: 2,129
clutch pedal assy. installation....

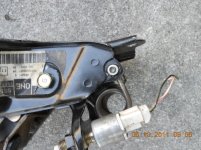
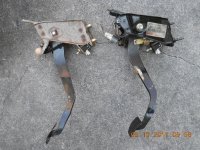
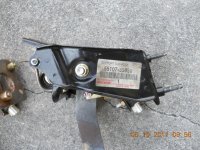
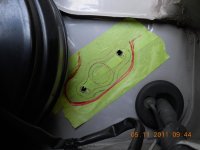
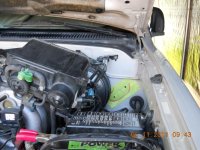
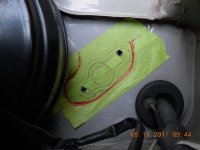
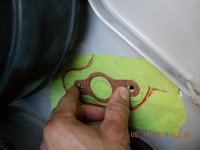
Ok... I paid $50 dollars for my clutch pedal and bracket assy. The p/n for the bracket is: 55107-35050 and the dealer calls it "SUPPORT SUB-ASSY, CLUTCH PEDAL" The pedal and the rest of the parts that makes the assembly come separate so it's better to get it from a junk yard. I had another clutch pedal that wasn't exactly for my 4runner, so I cut the studs to see where I could drill the holes for the clutch master cylinder. This would give me an idea more or less where I needed to drill the pilot holes for the M.C. After aligning the dummy clutch pedal I marked where I needed to drill. I also bought the clutch master cylinder gasket (p/n 31415-10010, $1.02) and used it to mark the holes on the engine bay side. After drilling the mounting holes, noticed that the holes I drilled did not match the ones on the engine bay ...~!@#$%^& :wow2: But that's ok, I used a 1/16 drill bit, so the holes were small and I covered them with JB weld. You want to make sure these holes are pretty much where they're suppose to be so your clutch pedal is straight and not misaligned unless you don't mind. Ohh.. yeah you need to remove that emission canister to gain access.
 

Attachments

  • 4runnerclutchpedal 004.jpg
    4runnerclutchpedal 004.jpg
    135.3 KB · Views: 10,781
  • 4runnerclutchpedal 005.jpg
    4runnerclutchpedal 005.jpg
    138.8 KB · Views: 2,076
  • 4runnerclutchpedal 006.jpg
    4runnerclutchpedal 006.jpg
    137.8 KB · Views: 1,994
  • 4runnerclutchpedal 014.jpg
    4runnerclutchpedal 014.jpg
    127.1 KB · Views: 2,077
  • 4runnerclutchpedal 013.jpg
    4runnerclutchpedal 013.jpg
    135.5 KB · Views: 2,031
clutch pedal assy. installation....

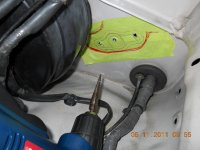
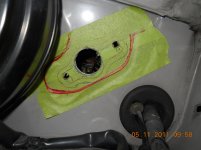
The red heavy marking is the area where the M.C seats. I more or less centered the M.C gasket in that area to drill the pilot holes. You can see in the pictures my first marking with a blue pen. This one, is too far down and too close to the bottom edge. I traced the M.C gasket for a second time with a red pen and removed the pushrod from the clutch master cylinder so that I could align it with the red marking just to verify that the M.C was vertical. It looked good so I went ahead and drilled the mounting holes with a 1/16 drill bit, then I used a 1/8 drill bit. Next, I used a unibit that starts with 1/8 and took it all the way to 5/16" which is the size for the studs on the clutch pedal bracket. I used a unibit since it makes cleaner cuts than a regular drill bit.
 

Attachments

  • 4runnerclutchpedal 014.jpg
    4runnerclutchpedal 014.jpg
    127.1 KB · Views: 1,979
  • 4runnerclutchpedal 015.jpg
    4runnerclutchpedal 015.jpg
    126.5 KB · Views: 2,104
clutch master cylinder installation....

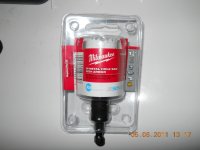
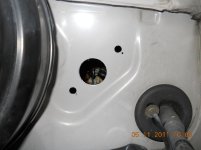
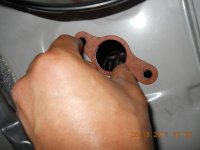
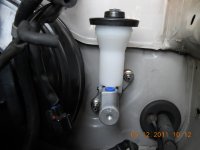
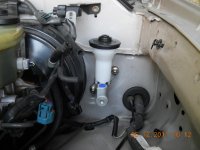
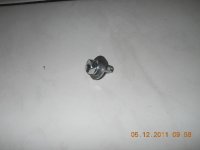
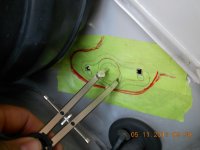
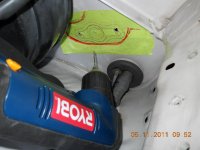
I used a protractor to find the center on the M.C hole. (very important, if not your M.C won't fit thru. the hole) Again, I used a 1/16 drill bit, a 1/8 and then the unibit all the way to 1/4" size hole. Why.??? well the pilot drill bit for the bi-metal hole saw is 1/4", that's why.! As you can see I used a 1 1/4" bi-metal hole saw to cut the center hole for the M.C.; about $11 bucks at my local home depot. Try to go easy and firm on the hole saw, you'll get better results. It took me while to do the holes for the M.C but I'm very satisfied with the results. I got cleaned cut holes and the alignment on the pedal and M.C are perfect.:D I painted the holes to prevent corrosion. I used nuts that I already had from my extra parts bin to secure the M.C but here is the p/n in case you need it: p/n 90179-08052
 

Attachments

  • 4runnerclutchpedal 016.jpg
    4runnerclutchpedal 016.jpg
    117.8 KB · Views: 1,998
  • 4runnerclutchpedal 017.jpg
    4runnerclutchpedal 017.jpg
    119.7 KB · Views: 1,957
  • 4runnerclutchpedal 018.jpg
    4runnerclutchpedal 018.jpg
    122.7 KB · Views: 2,058
  • 4runnerclutchpedal 001.jpg
    4runnerclutchpedal 001.jpg
    121.4 KB · Views: 1,955
  • 4runnerclutchpedal 019.jpg
    4runnerclutchpedal 019.jpg
    131.6 KB · Views: 1,958
  • 4runnerclutchpedal 020.jpg
    4runnerclutchpedal 020.jpg
    122.1 KB · Views: 1,979
  • 4runnerclutchpedal 021.jpg
    4runnerclutchpedal 021.jpg
    119.2 KB · Views: 2,047
  • 4runnerclutchpedal 027.jpg
    4runnerclutchpedal 027.jpg
    110.4 KB · Views: 1,965
Last edited:
clutch master cylinder installation continue...

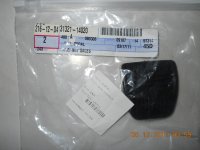
You can see in the above picture the very first holes that I drilled, they were in the wrong spot but that's why I used a small drill bit. I also replaced the clutch pedal pad, mine was worn. The p/n is: 31321-14020 and $2.73. The M.C gasket p/n: 31415-10010 $1.02 Hmm.... I think I already posted these numbers but just in case.....
 

Attachments

  • 4runnerclutchpedal 028.jpg
    4runnerclutchpedal 028.jpg
    117.3 KB · Views: 2,101
  • 4runnerclutchpedal 024.jpg
    4runnerclutchpedal 024.jpg
    121.5 KB · Views: 1,953
M.C hydraulic line...

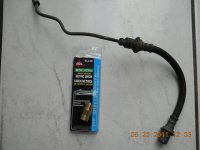
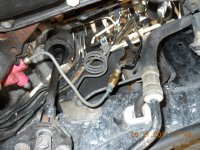
I bought the M.C at my local advance autoparts for $39.05. The hyd.lines were included with my transmission. I did not use the flex hose nor the bracket. The hyd. lines had so many bends that I didn't know the exact routing so I bought a union (p/n BLU-9C Inverted flare fitting for a 3/16 line M10x1.0) for $1.49 at my local auto zone to connect the upper & lower hyd.lines, just had to reshape it a little bit and worked fine. I'm working on a bracket to support it againts the chassis. I also bought the upper bolt with washer from the dealer to install the clutch pedal bracket, it was too cheap not to buy it so I ordered it... p/n is: 90119-08079 for 0.47 cents.! The washer comes with bolt. The slave cylinder came with the tranny, too. When bleeding the slave, I pushed the rod in and held it there while bleeding it. I placed a screwdriver between the slave cyl. rod and the clutch fork to hold the rod it in. This made the bleeding process a lot easier.!
 

Attachments

  • 4runnerclutchpedal 023.jpg
    4runnerclutchpedal 023.jpg
    119.4 KB · Views: 1,953
  • 4runnerclutchpedal 029.jpg
    4runnerclutchpedal 029.jpg
    133.9 KB · Views: 6,808
  • 4runnerclutchpedal 030.jpg
    4runnerclutchpedal 030.jpg
    136.7 KB · Views: 2,478
  • 4runnerclutchpedal 026.jpg
    4runnerclutchpedal 026.jpg
    133.2 KB · Views: 1,925
  • 4runnerclutchpedal 031.jpg
    4runnerclutchpedal 031.jpg
    126.4 KB · Views: 1,961
  • 4runnerclutchpedal 033.jpg
    4runnerclutchpedal 033.jpg
    111.4 KB · Views: 2,068
  • 4runnerclutchpedal 034.jpg
    4runnerclutchpedal 034.jpg
    109.7 KB · Views: 1,948
  • 4runnerclutchpedal 036.jpg
    4runnerclutchpedal 036.jpg
    139.8 KB · Views: 1,989
Last edited:
Props to you man. I would have had to do this if i decided to go local with my purchase. I'm kind of glad I went to Denver to drive my 5spd back. Great write up though. Before your thread all i kept seeing is people saying to sell the auto and buy a manual...how's the progress?
 
progress update...

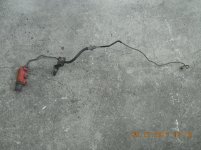
Well, it's summer and kids are out of school. It's hard to accomplish anything and there is too many things going on around here, so I haven't had any time to continue on the wiring for the ECU, but I downloaded the FSM wiring for the 4runner. I figured out the connections for the clutch pedal switches coming from the auto tranny connector, I ordered wires from different colors from allelectronics.com. As you can see all the mechanical stuff is done, just the wiring is pending. To be continue.... just need time.!
 
Last edited:
sorry for the delay....

I just haven't had time to finish the ECU, but I already finished the wiring for the clutch pedal which is the cruise control wiring, clutch start switch and the wiring for the reverse light switch, I got the pictures but I just haven't had the time, even the wife asked me when I was going to be done.! I have the table for the ECU wiring but but but... no time.!!! I've been working like a horse......~!@#$%^&* As soon as I get some time I'll post everything. thanks.!!!
 
Can't wait man, thank you!

I've been dying to hear about the wiring. Glad to see it all worked out, I can't wait to start on my truck!

The more details and photos, the better :D haha
 
I can't wait to start on my truck!

+1 - I'm on the verge of starting to collect parts for the swap as well...with the wife's WRX gone (thank god!) I've got nothing that breaks routinely, so my tools are getting lonely and I'm getting the itch to wrench on something.

toritochis - I've got to tip my hat to you for what you've done thus far, looking forward to seeing the final product!
 
Ecu wiring

I'm almost done... stay tuned :sleepy: I still haven't figure out how to put all this info on a pdf file yet but I'll get some help from my wife...
 
I've got all my parts for my swap, which I'll be starting very soon.

I'm really looking forward to your wiring. You've gotta post that up.
 
1st issue.

Ok, a couple of days ago, I tried to crank the engine, but the starter spins but does not engage, so today I got under the truck and disconneted the wire from the ignition and used a jumper to crank it. I could hear the plunger come out and spin. I removed the starter and kind of measure how far the flywheel is from the starter flange. According to my measurement, the starter gear won't reach the flywheel teeth. I got the vin number from the donor vehicle and is a 98 tacoma 4x4 with a 3rz-fe. I checked the p/n's from a toyota website and the p/n from 2wd 4runner with manual transmission and the donor are identical.!!! The starter p/n from the auto and manual tranny 4runner are identical, too. ~!@#$%^&* I ran out of time today, so I'll go to my local auto zone sometime this week and see if they have a flywheel for a 2000 4runner and compare it to mine. I checked the reverse lights and they work, so that part is good.
 
issue resolved

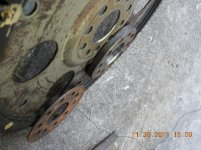
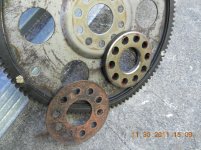
Ok, I found out what the problem was with the starter. As soon as I removed the lower transmission cover I saw the problem. I failed to remove the spacer for the pressure plate. (see picture) I removed the tranny the clutch and removed the spacer. I already put everything back, I'll try to crank it tomorrow...
 

Attachments

  • DSCN1444.jpg
    DSCN1444.jpg
    132.9 KB · Views: 2,201
  • DSCN1443.jpg
    DSCN1443.jpg
    141.3 KB · Views: 2,115

Members online

Forum statistics

Threads
278,316
Messages
3,554,120
Members
248,016
Latest member
Advally Service

Trending content

Back
Top