3rd Gen Hood Scoop Removal & Restoration Tutorial (pic heavy)

Was this tutorial helpful?

  • Yes

    Votes: 18 94.7%
  • No

    Votes: 1 5.3%

  • Total voters
    19

Cytronus

New member
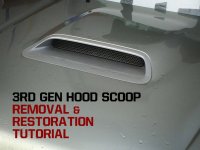
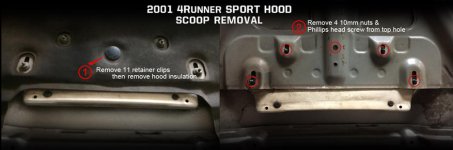
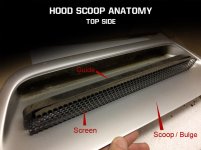
This tutorial will assist you in the removal and restoration of an OEM 3rd gen 4Runner hood scoop.

What you need:
1.5 - 2 hours
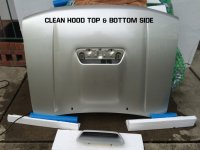
car wash / cleaning materials
10mm socket & socket wrench
standard size phillips head screwdriver
small flat head screw driver
dremel or drill with carbon grinding wheel
pliers
400 - 600 grit sandpaper
flat black spray paint (and your choice of color for personalization)
2 small black anodized screws and nuts (to replace removed OEM rivets)

OEM parts you may want if you're replacing plate and guide (Optional):
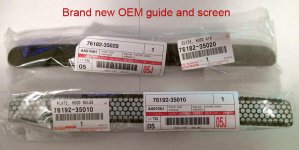
76192-35010 Plate (Mesh Screen), Hood Bulge ($13.20)
76182-35020 Guide, Hood Air ($13.58)
76183-12030 Protector, Hood ($0.71)
76187-35010 Retainer, Hood ($0.89)
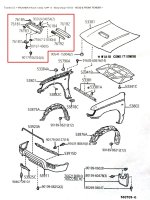
Other parts noted in manufacturer diagram image in this thread
 

Attachments

  • 3rd gen hood scoop.jpg
    3rd gen hood scoop.jpg
    125.2 KB · Views: 9,543
  • IMG_0066.jpg
    IMG_0066.jpg
    123.6 KB · Views: 7,606
  • hood scoop removal smaller.jpg
    hood scoop removal smaller.jpg
    38.5 KB · Views: 6,840
  • IMG_0087.jpg
    IMG_0087.jpg
    128.4 KB · Views: 7,460
  • 3rd gen bulge guide plate.jpg
    3rd gen bulge guide plate.jpg
    66.1 KB · Views: 9,902
  • hood scoop anatomy.jpg
    hood scoop anatomy.jpg
    71.4 KB · Views: 7,329
  • IMG_0111.jpg
    IMG_0111.jpg
    132.1 KB · Views: 6,680
  • IMG_0115.jpg
    IMG_0115.jpg
    95.4 KB · Views: 6,582
Last edited:
Register to hide this ad
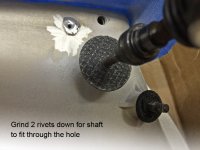
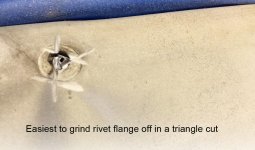
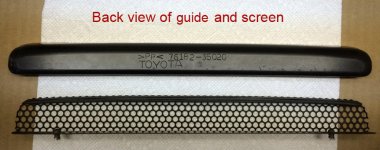
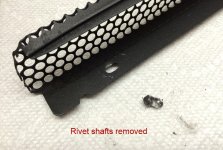
Continue with guide and screen removal, grind off and remove 2 rivet shafts

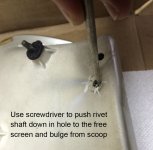
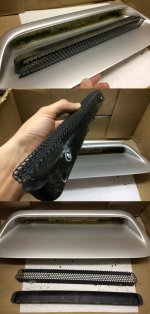
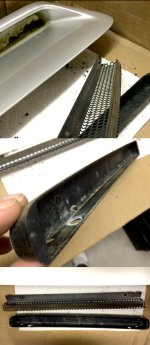
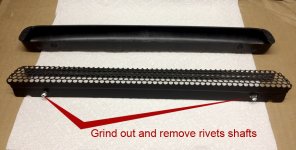
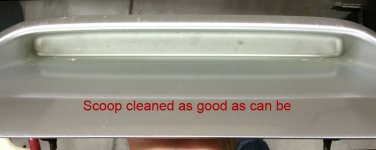
Once the rivet flanges are ground away to allow the rivet shaft to fit through the scoop hole, use a small flat head screw driver to push the rivet shafts down and pry shaft to push the screen and guide forward. Turn the scoop right-side-up and you should be able to grasp the edges of the screen with your fingers and pull both the screen and guide out of the scoop. Once the metal screen is out, grind off and remove the remaining rivet shafts being careful not to scratch the visible areas that can be seen when the screen is installed. Clean all parts (scoop, guide and screen) and prep for paint.
 

Attachments

  • IMG_0116.jpg
    IMG_0116.jpg
    132.4 KB · Views: 6,494
  • IMG_0118.jpg
    IMG_0118.jpg
    140.9 KB · Views: 6,682
  • IMG_0124.jpg
    IMG_0124.jpg
    144.3 KB · Views: 6,566
  • IMG_0129.jpg
    IMG_0129.jpg
    115.9 KB · Views: 6,384
  • IMG_0139.jpg
    IMG_0139.jpg
    59 KB · Views: 6,395
  • IMG_0201.jpg
    IMG_0201.jpg
    86.5 KB · Views: 6,372
  • IMG_0148.jpg
    IMG_0148.jpg
    57.8 KB · Views: 6,254
Last edited:
On to painting

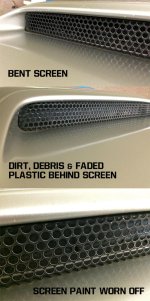
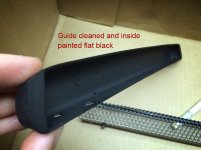
After cleaning the black plastic guide, it still had a milky white haziness so I decided to paint it flat black. One coat did the trick there.

My screen was bent on the left side so I used a small block of hard wood in a bench vise to work the screen against it by hand to put the shape back into place without any tools or hammering. It's quite forgiving and easy to manipulate with your fingers.

With fine sand paper (400 - 600 grit), give the metal mesh screen a few gentle passes and clean it with a solvent or soapy water to prep for paint.

If you want the stock look, paint your metal screen flat black. I started out painting the screen flat black to provide a base for a personalized color.

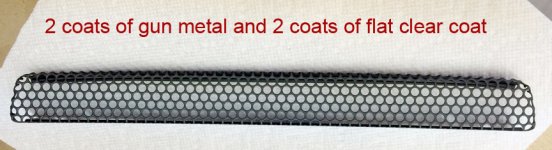
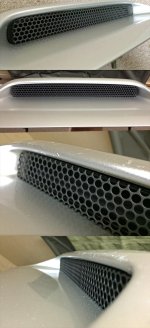
I decided to paint my metal screen a dark gun metal to really make it look like metal and to give it slightly more contrast and visibility. What I don't like about the stock/OEM flat black mesh screen is that it's difficult see when it's hiding in the shadow of the scoop. The gun metal will help it stand out subtly from the dark shadowy cavity and the guide backing. I think it nicely compliments the millennium silver ext. paint as well as closely matches the plastic trim colors in the front lower grille and rear bumper plastic trim so it still has that stock Toyota appeal with a little something extra. If I had a black 4Runner, I'd likely stick with the flat black screen.

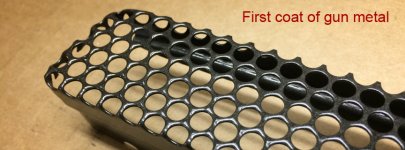
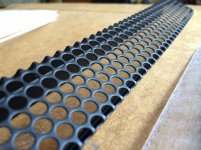
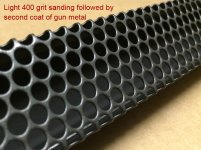
I applied 1 coat of gun metal, let it cure over night, then gave it a light sanding and applied a second coat of paint, followed by 2 coats of flat clear coat.

It's important to paint the screen whilst level so the paint coats the mesh evenly and uniformly.

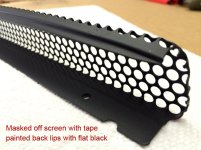
Lastly, after drying, I masked off the front and back of the mesh but left the lips exposed and painted those with 2 coats of flat black so that anything rearward of the screen and visible would be in flat black.
 

Attachments

  • 3rd gen hood scoop bulge.jpg
    3rd gen hood scoop bulge.jpg
    61.1 KB · Views: 6,522
  • IMG_0150.jpg
    IMG_0150.jpg
    97 KB · Views: 6,205
  • IMG_0219.jpg
    IMG_0219.jpg
    101.6 KB · Views: 6,424
  • repainted hood scoop screen.jpg
    repainted hood scoop screen.jpg
    79.9 KB · Views: 6,826
  • IMG_0228.jpg
    IMG_0228.jpg
    84.3 KB · Views: 6,331
  • IMG_0230.jpg
    IMG_0230.jpg
    79.9 KB · Views: 6,591
Last edited:
In case you want part numbers and brand new OEM mesh screen and guide...

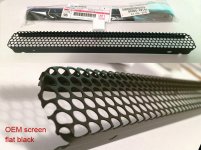
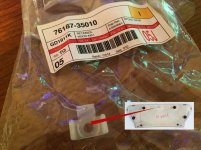
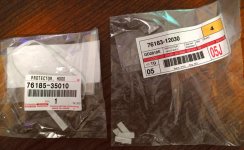
Below is the Toyota diagram for the 3rd gen hood scoop parts and what the real-life brand new OEM mesh screen looks like. I bought one just in case I couldn't bend my old one back into shape but I did so these new items will sit in my Yota box for a later restoration.
 

Attachments

  • 3rd gen hood scoop diagram.jpg
    3rd gen hood scoop diagram.jpg
    117.9 KB · Views: 10,166
  • IMG_0236.jpg
    IMG_0236.jpg
    60.5 KB · Views: 6,334
  • IMG_0237.jpg
    IMG_0237.jpg
    62.2 KB · Views: 6,528
  • IMG_0238.jpg
    IMG_0238.jpg
    91.2 KB · Views: 6,791
  • IMG_0242.jpg
    IMG_0242.jpg
    104.9 KB · Views: 6,567
  • IMG_0243.jpg
    IMG_0243.jpg
    85.5 KB · Views: 6,417
Apply 2 black anodized screws and nuts where rivets were

I haven't yet picked out the screws and nuts that will replace the ripped out rivets and mount the mesh screen and guide to the scoop but that should be pretty simple.

Here's a test fit in the scoop.
 

Attachments

  • IMG_0231.jpg
    IMG_0231.jpg
    140.2 KB · Views: 6,420
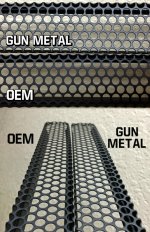
If anyone is curious what a new OEM vs. Gun Metal Painted screen plate look like...

here is a side-by-side comparison of the screen plate painted gun metal vs. the OEM flat black. The OEM coating is super thin.
 

Attachments

  • OEM-vs-gun-metal.jpg
    OEM-vs-gun-metal.jpg
    126.4 KB · Views: 6,240
[MENTION=81106]Cytronus[/MENTION]

Here is mine now that I finished it. Thanks for the thread on removing the scoop.
Before:

I added mesh to match my grille, and painted the scoop with a satin black, SEM Honda Black Bumper coater to be specific. I stole the idea to match the mesh from BigFishAllDay. Sorry the truck is dirty in most of the pics.
After:


@Unner, that looks sweet!!!

Where did you get that awesome horizontally slatted mesh? Is it metal? I dig it! Nice job on the paint too. Schaweet!
 
Where did you get that awesome horizontally slatted mesh? Is it metal? I dig it! Nice job on the paint too. Schaweet!

Thanks, I'm really happy with the paint too. SEM has definitly become my favorite spray paint brand. I've painted my wiper arms, grille, and spoiler on the 4Runner with their paint and they are all holding up great. It's pricey, but worth it.

Yes, it is a metal mesh, aluminum to be specific. I really like the style of it too. I got it from customcargrills.com and it is the SS Perforated mesh. I just trimmed it to the correct size for the scoop through a process of cut, test, repeat, until it was close and then it was file, test, repeat haha.
 
Cool post. I'm in the process if getting new hood painted and installed. I have all new parts and aftermarket cappa hood.

I didn't open all the parts, but is the guide black oem? Is this something I should paint over black before install? Referring to the guide... My vehicle is garage kept and taken care of like a ferrari. Just didn't know if these guides fade easy.
 
I'm not sure where the Protector 76185-35010 gets installed on the scoop. Can someone clarify where it's supposed to go?

 
If you look closely there are flats molded into scoop where it goes.

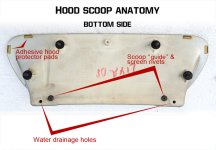
I looked, but don't see the flat for this one long strip. I found where the four small pads go, as shown below, but not the long strip. Does it go on the bottom or back or top of the scoop?

150535d1427086936-3rd-gen-hood-scoop-removal-restoration-tutorial-pic-heavy-hood-scoop-anatomy.jpg
 
I looked, but don't see the flat for this one long strip. I found where the four small pads go, as shown below, but not the long strip. Does it go on the bottom or back or top of the scoop?

Look at the edge you can't see in pic, that is where a long piece goes almost all the way across.
Where small pads mount follow that edge around.
 
Last edited:
Hmm any pics of what that goes, can you post a pic after you do it ? I'm assuming some 3m foam tape would do same thing, but just leave the backing on it.

I think I have all the parts for the hood but not this. Is there something else that can be used instead of this? Would be cool to see a pic that shows this.
 

Members online

Forum statistics

Threads
278,316
Messages
3,554,113
Members
248,016
Latest member
Advally Service

Trending content

Back
Top