3rzrunner
Member
3rzrunner's 4cylinder CS144 Alternator Upgrade
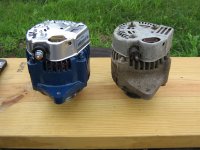
Hey guys, I just completed my alternator upgrade and i thought i would do a write up on my installation since from what i have found, all write-up's on installing the CS144 are directed at those with the 5VZ-FE (V6) engine, and there are no write ups for us 3rz (4cyl) guys.
The Stock 3rz alternator that came out of my truck was rated at 70A and the CS144 that went in is rated at 140A.
So lets get started.
Parts that were needed to complete this upgrade.
I will explain what each component is for later on in the post.
-Delco Remy large case CS144/6-12(position of mounting holes) Alternator.
-One 7/16" Stainless Steel Nut.
-One Pigtail connector (Toyota oval to GM CS series square)
-One 5 groove 54mm pulley (~2.2"Dia) (17mm shaft)
-One Washer in between pulley and alt. fan.
-One AC Delco 5k350 belt (longer than stock)
-Upper Alt. Bracket needed to be extended.
Ok, for the installation.
Once you open the hood you will notice it is fairly difficult to access the alternator area. After you remove the battery from the vehicle, it is very helpful to disconnect to radiator hose that runs over top of the alternator, to do this the coolant will have to be drained. Now that you have the hose out of the way you can go ahead and remove the factory alternator.
Once you have the factory alternator out, you can go ahead and test fit your cs144, to bolt it on, you will need a 1/4" spacer on the back side of the lower Alt. bracket and you will need to lengthen the upper bracket by about 1"
here are pictures of the stock upper bracket, modified bracket, and the lower spacer.

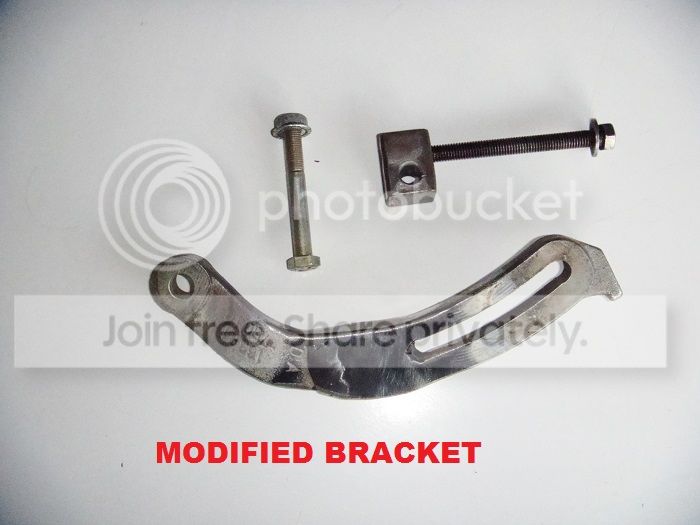


Now that you have extended the upper bracket to increase the belt tensioning range, the stock belt will be just short. In ACdelco part number, the stock belt is a 5k345 and the belt that was needed was an 5k350

Ok, after the brackets are made, you will need to change out the pulley because the pulley that most likely come with alternator is a 6 groove, and the toyota is a 5 groove. The alternators pulley diameter will determine how quickly you are spinning your alternator at idle and how many amps you are getting at idle, and on the upperend it will determine maximum RPM's for the alternator when you are doing maximum engine RPM. Therefore with the ~2.2" pulley the ratio of engine rpm to alternator rpm is 1:2.5. This provides good amperage at idle and does not overrev the alternator at high rpm's.
Here is a picture of the pulley, and a picture of it installed on my CS144.
*Important* The washer that is placed between the alternator fan and the pulley is for aligning the alt's pulley with the crankshaft pulley so that the belt does not get chewed up. you will have to determine how thick that washer will be for your truck.


Now that the Alternator is bolted up and pulley is changed and aligned, you will have to buy an adapter plug (pigtail) from Toyota Oval to CS144 Square
its around 30$ at any alternator shop. here is an example of the adapter

here is a place where it is available for purchase Part # W1232 Alternator Wiring Harness Adapter. converts CS130 or CS144 4 pin Plug to Toyotal Oval Style Alternator Plug
After it is plugged in, the alternator will be fully installed. At the same time of doing this upgrade i completed the big 3/4 wiring upgrade, this is important as the stock wires are not designed to handle this kind of power.
Here is a picture of it installed in my truck.

Thanks for reading through my write up. This place has given me so much great information and insparation and I hope this will help people in the future to complete this mod.
3rzrunner
Hey guys, I just completed my alternator upgrade and i thought i would do a write up on my installation since from what i have found, all write-up's on installing the CS144 are directed at those with the 5VZ-FE (V6) engine, and there are no write ups for us 3rz (4cyl) guys.
The Stock 3rz alternator that came out of my truck was rated at 70A and the CS144 that went in is rated at 140A.
So lets get started.
Parts that were needed to complete this upgrade.
I will explain what each component is for later on in the post.
-Delco Remy large case CS144/6-12(position of mounting holes) Alternator.
-One 7/16" Stainless Steel Nut.
-One Pigtail connector (Toyota oval to GM CS series square)
-One 5 groove 54mm pulley (~2.2"Dia) (17mm shaft)
-One Washer in between pulley and alt. fan.
-One AC Delco 5k350 belt (longer than stock)
-Upper Alt. Bracket needed to be extended.
Ok, for the installation.
Once you open the hood you will notice it is fairly difficult to access the alternator area. After you remove the battery from the vehicle, it is very helpful to disconnect to radiator hose that runs over top of the alternator, to do this the coolant will have to be drained. Now that you have the hose out of the way you can go ahead and remove the factory alternator.
Once you have the factory alternator out, you can go ahead and test fit your cs144, to bolt it on, you will need a 1/4" spacer on the back side of the lower Alt. bracket and you will need to lengthen the upper bracket by about 1"
here are pictures of the stock upper bracket, modified bracket, and the lower spacer.
Now that you have extended the upper bracket to increase the belt tensioning range, the stock belt will be just short. In ACdelco part number, the stock belt is a 5k345 and the belt that was needed was an 5k350
Ok, after the brackets are made, you will need to change out the pulley because the pulley that most likely come with alternator is a 6 groove, and the toyota is a 5 groove. The alternators pulley diameter will determine how quickly you are spinning your alternator at idle and how many amps you are getting at idle, and on the upperend it will determine maximum RPM's for the alternator when you are doing maximum engine RPM. Therefore with the ~2.2" pulley the ratio of engine rpm to alternator rpm is 1:2.5. This provides good amperage at idle and does not overrev the alternator at high rpm's.
Here is a picture of the pulley, and a picture of it installed on my CS144.
*Important* The washer that is placed between the alternator fan and the pulley is for aligning the alt's pulley with the crankshaft pulley so that the belt does not get chewed up. you will have to determine how thick that washer will be for your truck.
Now that the Alternator is bolted up and pulley is changed and aligned, you will have to buy an adapter plug (pigtail) from Toyota Oval to CS144 Square
its around 30$ at any alternator shop. here is an example of the adapter
here is a place where it is available for purchase Part # W1232 Alternator Wiring Harness Adapter. converts CS130 or CS144 4 pin Plug to Toyotal Oval Style Alternator Plug
After it is plugged in, the alternator will be fully installed. At the same time of doing this upgrade i completed the big 3/4 wiring upgrade, this is important as the stock wires are not designed to handle this kind of power.
Here is a picture of it installed in my truck.
Thanks for reading through my write up. This place has given me so much great information and insparation and I hope this will help people in the future to complete this mod.
3rzrunner
Last edited: