5th Gen HID / Projector retrofit installation (pics).

philsey

New member
* Night PICs added - 5th Gen HID Projector retrofit installation.

- This install is of 5G 4R headlight assemblies retrofitted with Bi-Xenon projector HIDs.
- They were retrofitted by Lightwerkz, who specialize in this work. Work quality is exemplary, and they are helpful, and just good at what they do. HID Projector Headlight Retrofit for Subaru, Honda, BMW, Scion and More | LightWerkz.net
- Please mention our forum if you contact them – maybe they’ll advertise here.
- Photos of the finished assemblies at their shop: Phil’s 4 Runner – TFX Conversion | | LIGHTWERKZ.net | The Best In Automotive Lighting
- Source for my lighting products, which you can also buy from Lightwerkz: The Retrofit Source online: headlight upgrades for all applications
- The kit I used: Bi-xenon FX-R Stage III Kit - Complete Kits from The Retrofit Source LLC
- A very informative lighting forum: HiDplanet : The Official Automotive Lighting Forum
- I used Bi-Xenon projectors in order to have both Low-and-High-beam HIDs. I also wired the HID high beam into my halogen hi beams.
- Orig. thread and pics of installed lights are here. http://www.toyota-4runner.org/5th-gen-t4rs/73866-who-s-interested-hid-projector-retrofit.html
- Thanks to Harper for advice... and to Nashman for publishing the RM. (recommend you use it)
http://www.toyota-4runner.org/5th-gen-t4rs/65237-tis-fsm-2010-4runner-here.html
- Time: ~4 hrs w/ 2 people.
- Cost: ~$1K – could be done for less with less expensive components.

- I WELCOME any constructive help if I’ve left out, or poorly explained anything.

Suggest you read this all the way through before you begin.

#####################

-Before you begin. My test for rough-checking final alignment was to park close to the garage door, and put tape X’s on it where the halogen beams centered, so as to have some point of reference, and then compared the HIDs to these same references. I got lucky, and seem to be aligned just fine. Those with lifts should probably do an alignment check (see RM).

- Remove the upper radiator shroud, and both those upper fender-edge plastic thingies.
- Remove the battery.
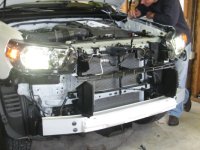
- To remove the front bumper cover, read ahead a few steps. I had a helper, which made it lots easier to get off, and put back on.
* Caution! The fogs and DRLs are still connected. So with the bumper cover off just a few inches, disconnect them on both sides. (Damned if I know how Harper does this by himself)
This cover does not come off easily. You first have to work the 3 clips loose in each wheelwell. Then from the front, lift and pull from the bottom. Again, read ahead a few steps.

- Here’s from the RM.
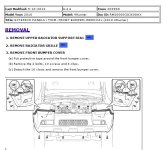
front bumper.JPG


- Notice that I left the upper grille section attached to the larger bottom section – contrary to the RM. I believe this was easier.
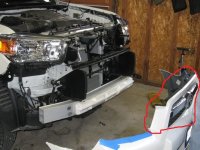
IMG_0027.JPG


- The 7 red arrows are the fasteners to do this…. (the blue circles I think are the clips that hold the lower cover to this piece – didn’t want to mess with these).
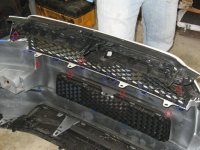
IMG_0028.JPG


- Disconnect HB & LB headlight plugs both sides. Observe which-is-which for later.
- To begin removal of headlight assy, remove 2 screws on top, 1 bolt on the side. See next step for removal of final retainer and then the headlight.
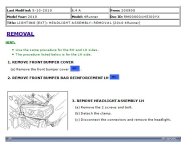
headlight.JPG


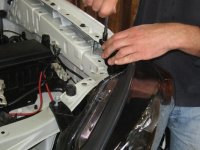
- This clamp (red arrow) is tight. Stick a large flat-blade screwdriver in the slot (arrow) and lever the handle down carefully while you pull the light free. It’s some kinda snap-fit, and stubborn. NOTE: The side marker lamp assys are still connected to the headlight. That whole assy comes out with a twist. Now the headlight should be free.
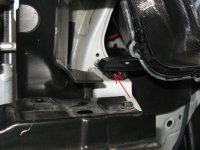
IMG_0035.JPG
 

Attachments

  • front bumper.JPG
    front bumper.JPG
    69.9 KB · Views: 37,409
  • IMG_0027.JPG
    IMG_0027.JPG
    100.9 KB · Views: 37,104
  • IMG_0028.JPG
    IMG_0028.JPG
    88 KB · Views: 37,474
  • headlight.JPG
    headlight.JPG
    58.1 KB · Views: 37,201
  • IMG_0035.JPG
    IMG_0035.JPG
    67 KB · Views: 36,681
Last edited:
Register to hide this ad
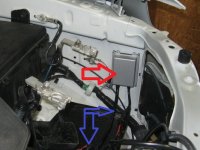
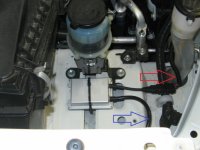
- Mount the ballast (red arrow) using double-back tape. It needs to be close to the headlight due to wire length. The heavy cable (blue arrow) will plug into the projector later.
IMG_0030.JPG


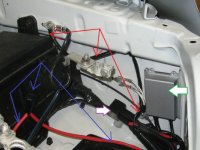
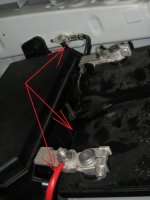
- Position the relay (purple arrow) and fuse block wiring harness (blue arrows). Connect the relay ground wire (red arrows) to this existing chassis ground. The red (hot) wires from the relay and the fuse block (blue arrows) will lay behind the battery when it’s put back in. The red wire terminal is connected to the battery later.
IMG_0032.JPG


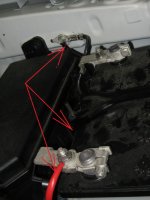
- This is how it will look AFTER the battery is back in and the hot lead connected to it (later).
IMG_0038.JPG


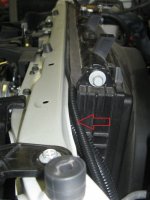
- Run the long sheathed wiring bundle (red arrow) over to the pass. side.
IMG_0039.JPG


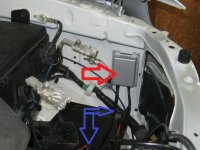
- Mount the pass. side ballast like shown - keeping in mind that it needs to be close to the projector (this was almost not close enough!!). I used dbl-sided tape and tie wrap. Plug in the connector from the long harness from the driver side (red arrow). The other connector (blue arrow) will plug into the projector later.
IMG_0042.JPG


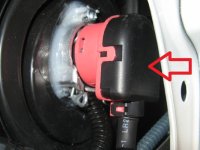
- At this point, the original LB and HB plugs are off. Make sure you know which-is-which. On the driver’s side, connect the original LB’s female plug into a matching male plug on a cable from the relay. (So, when you turn on the lights, instead of lighting the LB’s, it will energize the relay, firing up the ballasts, which in turn ignites the HID bulbs). The ballasts have a heavy black cable with a unique red cap which will be plugged into the HID bulbs after the retrofitted headlights are installed.
- On the pass. side, just tape up the old LB plug as it serves no purpose.

** Sorry, no pics of this.
 

Attachments

  • IMG_0030.JPG
    IMG_0030.JPG
    82.1 KB · Views: 41,209
  • IMG_0032.JPG
    IMG_0032.JPG
    74.6 KB · Views: 36,874
  • IMG_0038.JPG
    IMG_0038.JPG
    58.3 KB · Views: 36,467
  • IMG_0039.JPG
    IMG_0039.JPG
    63.4 KB · Views: 36,595
  • IMG_0042.JPG
    IMG_0042.JPG
    65.1 KB · Views: 36,475
Last edited:
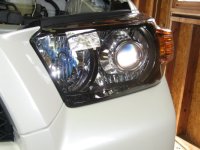
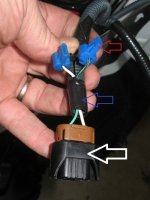
- If you bought the Bi-Xenon retrofit, there will be a small cable coming out of the base of the projector, with 2 blue crimp connectors on the ends (red arrow). These are to connect the projector HB to the reflector HB, should you wish to have them come on together (I did).
- Pull the blue crimp connectors off – they’re on a spade connector. Open them with a little screwdriver.
- Caution: Be sure you know the HB plug from the LB plug. Locate the HB plug (white arrow) and open the sheathing, pull a small loop out and retape the sheathing (Blue Arrow).
-Next pinch the crimp connectors onto the wires as shown (Red arrow), polarity doesn’t matter. This is a tight fit, I had to squeeze them shut with pliers. They will lock shut. I recommend a continuity test from the crimp connector to the end of the HB plug. I now see this as the only potential weak link in the system. In hindsite, I would have bared these wires, clipped off the spade connectors, and soldered / shrinkwrapped this connection – bit anal perhaps.
-This HB plug (white arrow) goes back onto the reflector HB, and the spade connectors from the projector cable are plugged back into the blue crimp connectors after the headlight in reinstalled. These steps are the same for both sides.
IMG_0033.JPG


- Install the retrofitted driver side headlight assy. Reinstall the side marker light as you do this.
IMG_0034.JPG


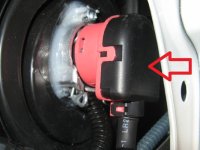
- Plug the short heavy ballast cable into the projector (blue arrow).
- Do the same for the pass. side.
IMG_0030.JPG

- Close up of the plug from the ballast.
IMG_0059_1.JPG


- This is a good time to make sure all the wiring is properly connected (except the next step)

- Reinstall battery and connect the red lead from the fuse block / relay. We tucked the fuse block behind the battery.
IMG_0038.JPG


- Give it a test. Hopefully it will look like this.
IMG_0043.JPG
 

Attachments

  • IMG_0033.JPG
    IMG_0033.JPG
    65.2 KB · Views: 38,269
  • IMG_0034.JPG
    IMG_0034.JPG
    72.5 KB · Views: 36,703
  • IMG_0030.JPG
    IMG_0030.JPG
    82.1 KB · Views: 36,815
  • IMG_0038.JPG
    IMG_0038.JPG
    58.3 KB · Views: 35,954
  • IMG_0043.JPG
    IMG_0043.JPG
    79.1 KB · Views: 36,367
  • IMG_0059_1.JPG
    IMG_0059_1.JPG
    66 KB · Views: 36,076
Last edited:
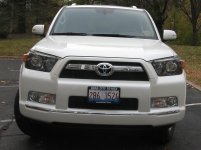
IMG_0044.JPG

IMG_0046.jpg

IMG_0050.jpg

IMG_0052.jpg


** I sure wish I'd taken that fugly license plate off and tucked it into the grille while I had it apart.

*** I will post night pics as soon as I can

-- Done --
 

Attachments

  • IMG_0044.JPG
    IMG_0044.JPG
    69.4 KB · Views: 36,100
  • IMG_0046.jpg
    IMG_0046.jpg
    131.4 KB · Views: 41,489
  • IMG_0050.jpg
    IMG_0050.jpg
    134.1 KB · Views: 40,047
  • IMG_0052.jpg
    IMG_0052.jpg
    137.8 KB · Views: 41,900
Last edited:
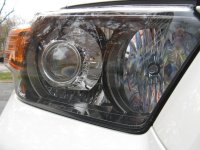
Sweet! Awesome Write up! Do you have any pics of the back of the headlight? That way I could get a sense of how much cutting needs to be done. I'd like to tackle this project meyself. Thanks!
 
Sweet! Awesome Write up! Do you have any pics of the back of the headlight? That way I could get a sense of how much cutting needs to be done. I'd like to tackle this project meyself. Thanks!

Sorry, that's something I neglected to do. I even asked Lightwerkz this morning for that pic, and he has none. Seems odd, but that's what he said.
 
The FX projector is one of the smallest bi-x projector around, so I doubt any of the rear of the headlight needed trimming. Probably only the reflector itself was trimmed.
 
The FX projector is one of the smallest bi-x projector around, so I doubt any of the rear of the headlight needed trimming. Probably only the reflector itself was trimmed.

I think he's right. I just went down to my garage and looked. I took some pics .... stand by.
 
Sweet! Awesome Write up! Do you have any pics of the back of the headlight? That way I could get a sense of how much cutting needs to be done. I'd like to tackle this project meyself. Thanks!


Best I could do - pretty tight in there.
IMG_0059_1.JPG
 

Attachments

  • IMG_0059_1.JPG
    IMG_0059_1.JPG
    66 KB · Views: 36,677
Great write-up. Looks like quality work! One question for you: With those projector housings and HIDs, how do you compensate for the weight of a trailer or lots of stuff in the back causing the lights to point upwards slightly upwards? Does that kit include an auto leveling system? Those HIDs will blind on-coming drivers if they are pointed too high, so you want to make sure they get adjusted when you have weight in the back!
 
Great write-up Phil!!!

Great write-up. Looks like quality work! One question for you: With those projector housings and HIDs, how do you compensate for the weight of a trailer or lots of stuff in the back causing the lights to point upwards slightly upwards? Does that kit include an auto leveling system? Those HIDs will blind on-coming drivers if they are pointed too high, so you want to make sure they get adjusted when you have weight in the back!
True , you have to be responsible any time you tow or have weight in the back that you don't blind oncoming traffic. That's with HID's or Halogen!When I first put a leveling kit on and raised the front 2 inches I was getting flashed and lighting up the back of people's heads until I adjusted them down.You need to adjust them when you do a lift or level.

There are no retrofits that I know of that have auto leveling and most OEM HID's are not auto leveling. Just some real high end cars and trucks.I'm pretty sure Acura TSX and Honda S2000 HID's did not come from the factory with auto-leveling and they are favorites for retrofits because they have such a sharp, wide cut off. Plus they are so small, at around 4 inches long for the body, and that makes them easy to work with to fit in the housing.

The up down adjusters are easy to get at on these 4runners to adjust them. Another easy fix if you tow alot is install airbags to level it. Several on the forum have installed Airlift 1000 air bags with good results.
http://www.toyota-4runner.org/5th-gen-t4rs/62499-airlift-1000-install.html
http://www.toyota-4runner.org/5th-gen-t4rs/64161-another-toytec-ultimate-te-w-kdss.html
 
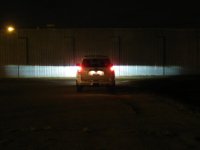
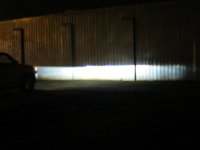
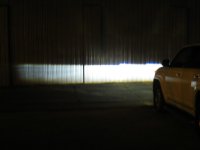
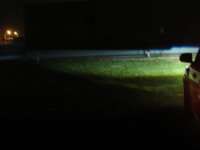
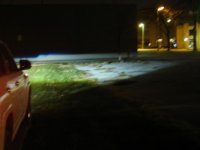
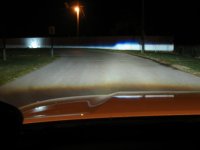
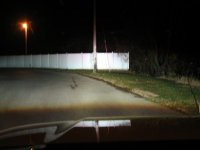
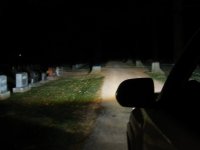
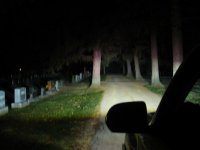
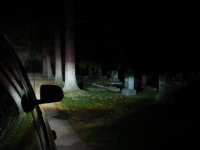
Night pics of HID projectors

First, I’m not a good photographer, so I’ll apologize once for the blurry pics. I’m not experienced enough to have known I needed a tripod. Second, I had no intention of posting so many pics, but I’m soooooo impressed with these lights that, well, I did.
Unfortunately, the pics do not do justice to these lights. None of these were taken in total dark – I simply couldn’t find anything.

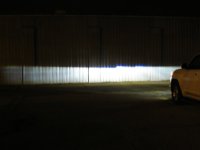
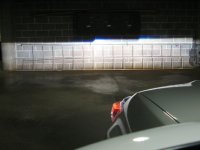
- @ 30’, white metal bldg, cutoff is ~ 33” high, truck leans a little R. Glare is from ambient lighting, not the lights.
IMG_0001_1.JPG
IMG_0004_1.JPG
IMG_0009_1.JPG
 

Attachments

  • IMG_0001_1.JPG
    IMG_0001_1.JPG
    29.9 KB · Views: 43,276
  • IMG_0004_1.JPG
    IMG_0004_1.JPG
    32.6 KB · Views: 16,061
  • IMG_0008_1.JPG
    IMG_0008_1.JPG
    30.8 KB · Views: 5,440
  • IMG_0009_1.JPG
    IMG_0009_1.JPG
    30.7 KB · Views: 6,470
Last edited:
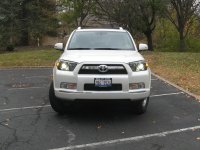
@ 150’ (?) Across field facing bldg. Alley and telephone poles next to bldg.
IMG_0014_1.JPG
IMG_0015_1.JPG
 

Attachments

  • IMG_0010_1.JPG
    IMG_0010_1.JPG
    25.8 KB · Views: 5,374
  • IMG_0011_1.JPG
    IMG_0011_1.JPG
    26.3 KB · Views: 5,389
  • IMG_0012_1.JPG
    IMG_0012_1.JPG
    24.3 KB · Views: 5,387
  • IMG_0014_1.JPG
    IMG_0014_1.JPG
    24.7 KB · Views: 5,375
  • IMG_0015_1.JPG
    IMG_0015_1.JPG
    37 KB · Views: 5,478
Last edited:

- @ ~ ½ city block, 6’ white fence curving to L. Low beam, high beam.
IMG_0016_1.JPG
IMG_0020_1.JPG


- Low beam, high beam, high beam
IMG_0024_1.JPG
IMG_0025_1.JPG
IMG_0028_1.JPG


- @ 30’ inside parking garage.
IMG_0038_1.JPG
 

Attachments

  • IMG_0016_1.JPG
    IMG_0016_1.JPG
    34.2 KB · Views: 6,525
  • IMG_0020_1.JPG
    IMG_0020_1.JPG
    36.8 KB · Views: 5,384
  • IMG_0024_1.JPG
    IMG_0024_1.JPG
    30.9 KB · Views: 5,378
  • IMG_0025_1.JPG
    IMG_0025_1.JPG
    37.3 KB · Views: 5,365
  • IMG_0028_1.JPG
    IMG_0028_1.JPG
    37.5 KB · Views: 5,336
  • IMG_0038_1.JPG
    IMG_0038_1.JPG
    46.8 KB · Views: 12,924
Last edited:

Wow, that is a sharp cutoff. Beats the crap out of the factory HIDs in my VW GTI. As far as I can tell, it looks like you have a very good HID setup.
 
Looks awesome! With my last car I was always amazed at how far the light travels, I'd be driving a hilly country road and see my cut-off hundereds and hundreds of feet in front of me.

I was going to wait on installing HIDs, I just recently convinced myself that the stock halogens were "good enough"..

Thanks for ruining that =)

Oh, did you install 35w or 55w ballasts? I had 55s on my last HID set-up.
 

Members online

Forum statistics

Threads
278,316
Messages
3,554,111
Members
248,016
Latest member
Advally Service

Trending content

Back
Top