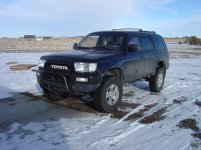
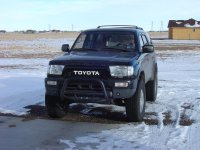
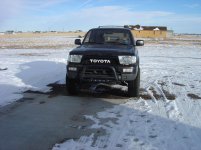
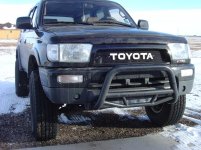
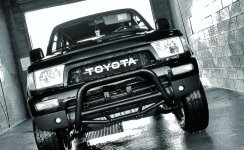
A few pictures of my Runner

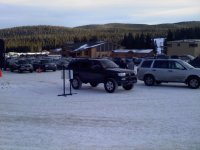
Went snowboarding at Eldora Ski resort in Colorado yesterday. Heres Jitters

1222021531b.jpg


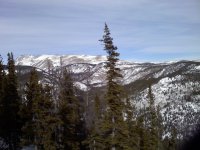
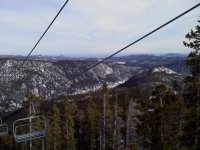
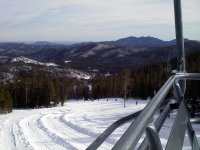
And I took a few shots with my phone while going up the lift

1222021151b.jpg

1222021152b.jpg

1222021153b.jpg
 

Attachments

  • 1222021531b.jpg
    1222021531b.jpg
    112.3 KB · Views: 2,295
  • 1222021151b.jpg
    1222021151b.jpg
    132.4 KB · Views: 2,281
  • 1222021152b.jpg
    1222021152b.jpg
    129.8 KB · Views: 2,262
  • 1222021153b.jpg
    1222021153b.jpg
    124.8 KB · Views: 2,273
Sweet pictures of skiing - I can't wait to get out and hit the slopes... and we're in the same state at the moment haha. Keep up the good work and get a camera!
 
Sweet pictures of skiing - I can't wait to get out and hit the slopes... and we're in the same state at the moment haha. Keep up the good work and get a camera!

Actually my parents just gave me a camera for Chirstmas, so good pictures to follow! And Im currently working on a mod thats all original and gonna be awesome! stay tuned . . .
 
My Modified Sotoshi Mod

Alright dudes, I did the Sotoshi mod awile back using a large toyota emblem from a Tundra. But I love the Sotoshi mod with the vintage LC Toyota badges. But I also wanted mine to be a bit bigger than the biggest emblem you can buy (I believe the FJ 60 is the biggest emblem at 13" long), and a bit unique.

So, I fabricated my T O Y O T A letters from scratch. So here it is. And, the pictures I took while making the emblem were taken with my phone. BUT, the finished product photos were taken with a REAL CAMERA. Thats right people, I finally have an actually digital camera to display my truck for what it really looks like!


I didnt take many pictures while making the emblem, but youll get the idea.

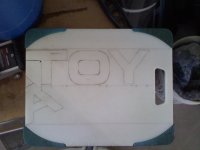
I started by drafting the letters on paper, which was kinda fun. It took me back to high school tech ed class where we did some basic drafting. I drew several different sized letters, and finally decided on a letter dimension of 2.25" high by 2.75" long. These letters are significantly larger than the LC emblem letters as youll see.

I then cut them out and traced them onto the following . . .

1220021538b.jpg


If this looks like a cutting board to you, then you are correct. I thought about making the letters out of a strip of auminum, but the strips of aluminum were'nt quite as thick as what I wanted, and I could foresee some issues going that rout. I wanted the letters to look thick and a bit blocky, and the 1 cm thick plastic cutting board was perfect. Plus it's extreamly strong stuff as it's intended to withstand a serrated knife. And the flat white color is exactly what I was looking for.

Not many pictures of the letters as I was forming them, but I will tell you it was a pain with the tools I had available, and took forever. Every single cut was made by hand, using three different sized hack saws. I won't go into the process of forming the letters. But it involved cutting, drilling holes to cut the inner sections of the O's and A, and a ton of filling and sanding with a close eye.

1223022205b.jpg


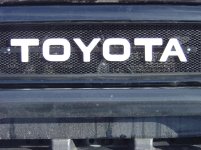
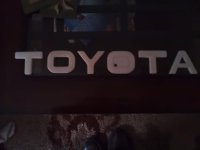
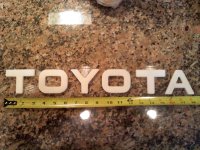
And here are the letters finished. This shows you just how large they are. The tape measure reads 18". This is 5" longer than the LC Toyota emblem.

1224021359bc.jpg


I used a strip of aluminum to mount the letters. Initially I thought about keeping the aluminum bare, but decided it would probably look better painted black. The blue tape on the aluminum is over the areas where the letters were epoxied on. Obviously the letters needed to be epoxied to bare metal rather than paint.
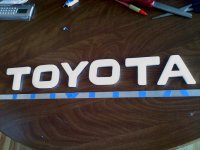

1227021307b.jpg


So the finished product includes the six letters epoxied onto a strip of aluminum which I painted black, and then mounted to grill mesh using small machine screws with nuts and washers.

 

Attachments

  • 1220021538b.jpg
    1220021538b.jpg
    67.3 KB · Views: 2,180
  • 1223022205b.jpg
    1223022205b.jpg
    34.8 KB · Views: 2,146
  • 1227021307b.jpg
    1227021307b.jpg
    101.1 KB · Views: 2,175
  • 1224021359bc.jpg
    1224021359bc.jpg
    136.4 KB · Views: 2,192
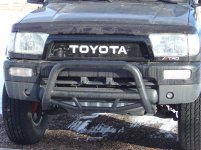
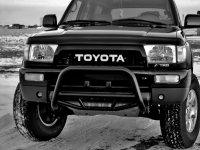
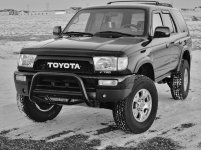
And the finished product . . . bigger is better


DSC00045.jpg

DSC00044b.jpg

DSC00048b.jpg

DSC00047b.jpg

DSC00049b.jpg

DSC00050b.jpg
 

Attachments

  • DSC00045.jpg
    DSC00045.jpg
    136 KB · Views: 2,350
  • DSC00044b.jpg
    DSC00044b.jpg
    135.9 KB · Views: 2,331
  • DSC00048b.jpg
    DSC00048b.jpg
    130.3 KB · Views: 2,316
  • DSC00047b.jpg
    DSC00047b.jpg
    137 KB · Views: 2,338
  • DSC00049b.jpg
    DSC00049b.jpg
    138.1 KB · Views: 2,338
  • DSC00050b.jpg
    DSC00050b.jpg
    138.4 KB · Views: 2,289
Last edited:
I dig it! That looks awesome and you can read those letters from miles away! (okay, maybe not miles, but still)... Love the contrast with the rest of the black truck... I like it a lot!

Oh, and the background of your pictures does look like suburban Wyoming haha.
 
Super nice nice work. You're patience paid dividence in the end, I like it alot. I have been eyeing for some TOYOTA emblem for some time now and I may just go your way if I find none.

Also did you paint the boards white or leave them the way they were?, coz the color you chose is perfect with the black.
 
I dig it! That looks awesome and you can read those letters from miles away! (okay, maybe not miles, but still)... Love the contrast with the rest of the black truck... I like it a lot!

Oh, and the background of your pictures does look like suburban Wyoming haha.

Oh ya, I love that I can read TOYOTA from a long ways off. Thats how to represent! I drove past a dude in an FJ Cruiser today and caught him checking out the emblem. And the pictures were taken at my parents house in the praire a few miles east of Cheyenne. The good old flat, brown plains of WY . . .

Super nice nice work. You're patience paid dividence in the end, I like it alot. I have been eyeing for some TOYOTA emblem for some time now and I may just go your way if I find none.

Also did you paint the boards white or leave them the way they were?, coz the color you chose is perfect with the black.

Thanks Ervin! All you need is a plastic cutting board, and a strip of aluminum. This project cost me exactly $3.75 as all I needed to buy was the aluminum stip. I had the paint, cutting board, and a few little machine screws with nuts and washers. You probably have better tools than I do here, which would make it an easier and faster process. Having the right tools would have made such a difference for me.

The plastic was the perfect color as is, kind of a flat white, so I didnt need to paint at all. I just sanded the texture out to get a smooth surface. I like the flat white against black. Though I have considered several different paint schemes which I may experiment with in the future
 
imitation is the sincerest form of flattery

I may have to copy your Satoshi mod with the large letters, especially if I can get my buddy to water jet the cutting board for me...
 
imitation is the sincerest form of flattery

I may have to copy your Satoshi mod with the large letters, especially if I can get my buddy to water jet the cutting board for me...

Thats exactly what I wanted to do as well. Getting it cut out of .25" aluminum would have been awesome. Just too expensive for me. If you do that you should see if he could shave the edges to give a more dimensional look from the front. I went as far as filing and sanding my front edges, but thats it
 
That new emblem looks awesome. I really like it because no one has ever done that before. If you don't mind me asking, how long did it take you to cut and file out the letters with just basic tools? And also, how did you stabilize the board while cutting through it?
 
That new emblem looks awesome. I really like it because no one has ever done that before. If you don't mind me asking, how long did it take you to cut and file out the letters with just basic tools? And also, how did you stabilize the board while cutting through it?

I would say the whole process of cutting and finishing the letters took a good 8 hours. I used a small hack saw, another general purpose saw with bigger teeth for making faster straight cuts, and then a tiny saw blade that I actually held by hand to make some of the cuts for the O's and A. Its really impossible to make perfect on-the-line cuts that way, so I made several of the cuts outside the lines and then spent tons of time with a dremel and a few different files. If I had access to a miter saw and band saw the process would have been half the time.
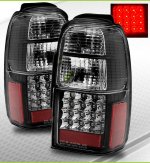
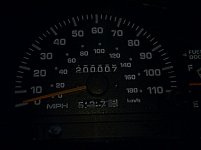

For holding it I used a vice, clamps, and more than anything else, my eagle talon hands.
 
Just because I washed it . . . and because Im still pumped about my home-made emblem


DSC00058c.jpg

DSC00051b.jpg

0101031612b.jpg
 

Attachments

  • DSC00058c.jpg
    DSC00058c.jpg
    100.9 KB · Views: 2,053
  • DSC00051b.jpg
    DSC00051b.jpg
    135.3 KB · Views: 2,065
  • 0101031612b.jpg
    0101031612b.jpg
    136.8 KB · Views: 2,058
Last edited:
Just picked up a 98 after wrecking my 2000 and this is what I'm hoping for it to come out looking like. I like where you went with it for your DD, it's definitely clean!
 
Just picked up a 98 after wrecking my 2000 and this is what I'm hoping for it to come out looking like. I like where you went with it for your DD, it's definitely clean!

Thanks man. Theres still a ton I want to do to it, like everyone on the forum. Is the 98 black?
 
No it's silver but I'm kind of wanting to go with white or the jade green. Once I get the body fixed up I'm planning on painting it though.
 
Hey man! Just wanted to let you know I loved your emblem so much that I attempted to copy it! Hopefully I can make mine look as good as yours
 

Members online

Forum statistics

Threads
278,317
Messages
3,554,129
Members
248,016
Latest member
Advally Service

Trending content

Back
Top