Advice requested from those of you who have mounted tires & balanced wheels at home

Status
Not open for further replies.
IMO, your "certified Tire Rack installers" qualification holds little value, based on reports of what you've seen them do or not do. They pay a fee to Tire Rack to use their name to become "certified".

I don't think that is correct; we're a "recommended" installer, by the virtue of client reviews - and no fee paid to Tire Rack. I'm not sure if "Recommended" equals "Certified", do we know for certain that Tire Rack uses the "Certified" designation for some of their installers?

I know that paying to be a "Certified Installer" is common in other automotive areas, however.
 
That very well could be. I'm basing it off of many other "certified" things I've seen which are nothing more than marketing.

I still don't believe that what foo has seen with the shops he's observed are necessarily representative of the industry and certainly not found in every tire shop.
 
That very well could be. I'm basing it off of many other "certified" things I've seen which are nothing more than marketing.

I still don't believe that what foo has seen with the shops he's observed are necessarily representative of the industry and certainly not found in every tire shop.

I'm in complete agreement; I've had previous bad experiences with tire store chains (years ago); but in this era of the internet there is virtually no reason to choose a bad service provider.
 
OK so here's a question for those who have used a dynamic balancing machine . What is a acceptable range to get a tire within ? My buddy recently bought a mechanics shop and now has a balancing machine but he's a mechanic not a tire guy so limited experience on tires . We mounted and " balanced " new tires for my plow truck Saturday and I'm pretty sure I have a couple of bent rims .
 
OK so here's a question for those who have used a dynamic balancing machine . What is a acceptable range to get a tire within ? My buddy recently bought a mechanics shop and now has a balancing machine but he's a mechanic not a tire guy so limited experience on tires . We mounted and " balanced " new tires for my plow truck Saturday and I'm pretty sure I have a couple of bent rims .

On a spin balancer it is very easy to tell if you have a bent wheel, you'll see it wobbling or dipping as it spins, you just keep an eye on the lip of the rim, if it isn't moving side to side and the tire's bouncing up and down, either the tire is out of round or just needs spun on the rim for better runout.

If the machine's asking for .25-.5OZ on one side on a larger light truck tire that's usually "close enough", but any relatively modern machine should be able to get it 100% dialed if properly calibrated.
 
Sorry for the delay in response; I'm just now off work.
I apologize for my delay also, as I finally got the car early enough to work on it in the garage where I mounted all four tires and only have left to swap the spare.

We don't, because I haven't expressed any opinion whatsoever; I simply asked you to clarify yours as it relates to a few statements you've made about the industry at large.
Basically I only have two defensible statements and one looming question:

Tenable statements:
  1. We should be able to mount and (static) balance at home, and,
  2. I've never seen a tire mounted and balanced by the book at "Tire Rack recommended installers".

Overarching question:
Q: If a vehicle doesn't vibrate after static balancing, does it need a dynamic balance?

I fully support getting one's hands dirty and learning how to do stuff, so I'm certainly not critical of DIY efforts - and frankly, I appreciate your enthusiasm.
Thanks for the kind words of support.

A lot of people who would never mount and balance their own tires would love to tell me all the reasons they wouldn't do it; but nobody would learn anything from that discussion because we all know the reasons that 999 out of 1,000 people would never mount and balance at home.

If you were closer, you'd be welcome by and actually do some apples-to-apples comparisons on newer equipment. I think you'd be surprised (but I'm a bit biased, haven't had to do a static balance since I was 16.)
It would be fun to use the spinny stuff!

Nonetheless, I learned a lot and in the six tires I've done this week, I learned a few tricks, which is a good thing.

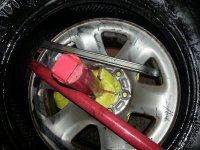
For example, hooking a tire iron inside the wheel rim when putting on that last very slippery bead works wonders to keep the very slippery tire from simply spinning on the wheel rim.
 

Attachments

  • hooking_tire_iron.jpg
    hooking_tire_iron.jpg
    78.7 KB · Views: 271
No, you are talking with partial data to back your assumptions up.
I don't think I have any data, per se. If I did, I wouldn't be asking the questions; I'd be telling folks the data (e.g., like I would about high-octane fuel).

All I have are two emotions, and a question:
a. I feel we should be able to mount and (static) balance at home, and,
b. I'm not happy with ANY of the Tire Rack Recommended Installers I've been to over the years.

The question I have is the same as always, which time and experience will answer:
Q: If a tire doesn't vibrate at speed, does it need dynamic balancing?

There's a metric crap ton of trade specific data that you're not going to find via google search. Trade journals, training for pros in the business, etc. I've seen this data and been part of training, albeit 30 years ago, and it continues to this day.
Oh, I apologize if I implied that the data doesn't exist. I never meant to imply that.

The data, for sure, exists, since any company making the equipment will have to test it against the various methods. They just may not tell us the results, as they have a vested interest in a certain answer, and MARKETING never tells you the bad stuff (just the good stuff).

IMO, your "certified Tire Rack installers" qualification holds little value, based on reports of what you've seen them do or not do. They pay a fee to Tire Rack to use their name to become "certified".

I had assumed Tire Rack has some kind of vetting process.

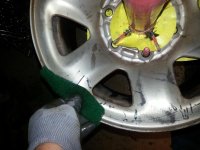
Anyway, I learned another hint today which others reading this can benefit from which is to clean the inside of the lip of the rim with scratchy stuff so as to get rid of caked on rubber. However be careful for sharp edges!
 

Attachments

  • clean_rim.jpg
    clean_rim.jpg
    55 KB · Views: 270
I don't think that is correct; we're a "recommended" installer, by the virtue of client reviews - and no fee paid to Tire Rack. I'm not sure if "Recommended" equals "Certified", do we know for certain that Tire Rack uses the "Certified" designation for some of their installers?

I know that paying to be a "Certified Installer" is common in other automotive areas, however.

I was under the impression that they are vetted, and, if enough people complain, that they're kicked out of the program for six months at a time. But that's only from memory of a phone call to Tire Rack Customer Service years ago when I complained about a bad installation.

Anyway, I learned something else that everyone already knew, but I'll mention it so that someone reading this thread in the future benefits.

That lever-action valve-remove-installation tool?
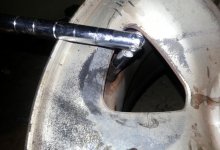
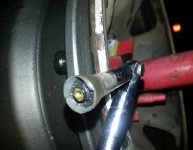
I thought, for some reason, that it could push in a valve stem without destroying it; but I found out two things (which should have been obvious from the start), which are:
  1. The tool destroys the valve stem (drawing and quartering it), and,
  2. The tool is a pain to thread onto the valve (because it should spin on a spindle).
 

Attachments

  • leverl_tool_on.jpg
    leverl_tool_on.jpg
    63.9 KB · Views: 288
  • lever_tool_off.jpg
    lever_tool_off.jpg
    50 KB · Views: 281
That very well could be. I'm basing it off of many other "certified" things I've seen which are nothing more than marketing.

I still don't believe that what foo has seen with the shops he's observed are necessarily representative of the industry and certainly not found in every tire shop.

We would have to run a study, which we'll never do, so, we'll never know the answer definitively.

However, look at my statements from a logical standpoint.
Take just the torque statement.

What do you think every shop torques the lug bolts/nuts to?
There really are only two possible answers:
  1. Every lug bolt/nut gets the same torque, or,
  2. They look up each and every car to torque lugnuts/lugbolts properly.

Same question for the PSI for every tire (bearing in mind some vehicles' manufacturers specify different psi for the front than for the rear).

What do you think they do?
Do you think they bother to look up each and every vehicle?

Anyway, I want to pass on an important trick for seating the bead of the new tire when filling it with air.

At first I was just cajoling the tire into seating, but then I realized a simple trick that worked most of the time:
  1. With the wheel facing upward on the tire-mounting machine,
  2. I manually seated the underside (bottom) bead as best I could with hand force, and,
  3. Then I pulled NOT on the entire tire!
  4. I pulled up with both hands just on the OUTSIDE TREAD of the tire!
  5. I had to bring the top bead over the open valve hole!
  6. Once I pulled up on just the tread area, I was consistently able to seal the tire
  7. Which then popped into place, with a resounding pop!

That trick is invaluable, because if you can't get a momentary seal, you'll never set the beads of the new tire.
 

Attachments

  • seating_bead.jpg
    seating_bead.jpg
    81.5 KB · Views: 360
  • seating_bead2.jpg
    seating_bead2.jpg
    54.4 KB · Views: 272
Another invaluable trick is that two different sizes of vise grips are useful when leveraging the last (top) bead of the new tire onto the rim.

Small vise grips are useful for the top beat to prevent the tire from spinning on the slippery rim.

Large vise grips are useful on the end of the handle to keep it from spinning (which causes the business end to slip off the tire bead, necessitating starting over).
 

Attachments

  • vise_grips_on_top_bead.jpg
    vise_grips_on_top_bead.jpg
    60.8 KB · Views: 285
  • vise_grips_on_handle.jpg
    vise_grips_on_handle.jpg
    113.2 KB · Views: 284
Two other tricks I learned which are invaluable for breaking the first (inside) bead of the old tire were
  1. A board worked better than the wire-rack shelf to hold down the bead-breaking machine, and,
  2. I had to move the bead breaker two or three inches at a time all around the circumference of the rim to finally break the bead!

Just those two hints make the breaking of the first (inside) bead more manageable!
 

Attachments

  • board_and_breaking_bead.jpg
    board_and_breaking_bead.jpg
    73.8 KB · Views: 1,186
Overall, I would have to say the Harbor Freight tools stunk, for the most part, but, if you modify them slightly, they will do the job which is hard for an SUV and very easy for a passenger car tire (in my humble experience).

For the tire changing tool, the main modification you must do is you must add a vise grip to the end of the lever bar when levering the last (top) bead of the new tire onto the rim.

For the tire changing tool, you really should give up on the bead breaker, but if you use it, you must shore it up (as previously shown) and you should put bolts in place of the clevis pins (so as to reduce slop which causes it to skewer which bends the metal).

For the tire changing tool bead breaker, you really need a longer lever handle, and, you don't want to use the tire iron as designed, because it can bend and you really need the tire iron, whereas the lever handle could be any old pipe.

For the bead breaker tool, the worse problem is that it is too short so you need to either mount it (but it has no mounting holes) or you need to extend it (I extended it by putting a board on top of it, which worked for me but which is substandard to mounting it).
 

Attachments

  • wheel_mounted_on_vehicle.jpg
    wheel_mounted_on_vehicle.jpg
    74.2 KB · Views: 1,105
Last edited:
What do you think every shop torques the lug bolts/nuts to?
There really are only two possible answers:
  1. Every lug bolt/nut gets the same torque, or,
  2. They look up each and every car to torque lugnuts/lugbolts properly.

I don't believe that EVERY tire shop does anything the same. To that end, I don't believe that every tech working in one given shop does it all the same. There are no absolutes. One option you've forgotten is torque specs based on lug size, to which torque sticks apply.

Same question for the PSI for every tire (bearing in mind some vehicles' manufacturers specify different psi for the front than for the rear).

What do you think they do?
Do you think they bother to look up each and every vehicle?

I know that the shop I use inflated the tires purchased for one of my pickups recently to the pressure listed in the door jamb. They specifically mentioned this when the install was completed. YMMV, since there are no absolutes.

I'm not sure that any of this has a thing to do with mounting/balancing at home as it's complete hyperbole.
 
I don't believe that EVERY tire shop does anything the same. To that end, I don't believe that every tech working in one given shop does it all the same. There are no absolutes. One option you've forgotten is torque specs based on lug size, to which torque sticks apply.
This is good in that it proves you are thinking about the problem realistically.

The unrealistic answer is that they actually bother to look up the torque spec for each and every vehicle that comes in.

The more realistic answer is that they use some kind of "rule of thumb", basing their torque on general parameters.

I agree with you on that.
I know that the shop I use inflated the tires purchased for one of my pickups recently to the pressure listed in the door jamb. They specifically mentioned this when the install was completed. YMMV, since there are no absolutes.
The problem with the pressure on the door jamb, as you well know, is that it only applies to the OEM tire (and probably a similar tire to the OEM tire).

Another problem is, for example, when the axles are different pressures (as are mine).

The more realistic answer is that they use some kind of "rule of thumb", basing their air pressure on general parameters.

I'm not sure that any of this has a thing to do with mounting/balancing at home as it's complete hyperbole.

I agree with you and you'll notice that I try to stay on topic, which is the topic of mounting and balancing such that this thread can serve as a useful reference to others in the future.

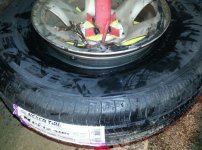
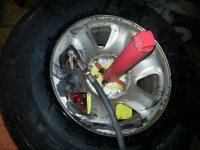
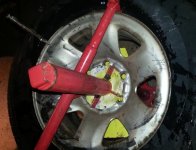
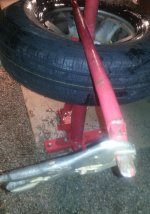
I'm doing two alloy wheel tire repairs today (if I get the vehicle in) for a friend so I will see if I can post some pictures. I expect the 60-series alloy wheels to be so simple as to not require many pictures, but I'll snap some for you so that people with alloy wheels will see that the tool doesn't damage them.

Overall, the major advice that I would give someone who asks the same question I asked a few days ago, is that it will be difficult, but not impossible, to change SUV tires, where the only hard part is breaking the initial inside bead.

The rest is, essentially, a piece of cake.

As for tools, my advice is just as simple.

Fact is, removing/installing the valve and weights is simple so almost any tool will work.
And, you buy a purpose-built bead breaker, and a purpose-built tire mounter/dismounter.

In addition, you *modify* the bead-breaking and tire-mounting contraptions before using them!

How to modify the HF Pittsburgh Bead Breaker, Harbor Freight item #92961:
a. The bead-breaker arms are too weak (and bend like a pretzel, so you strengthen them)
b. The clevis pins are far too sloppy (so you replace them with bolts)
c. The bead breaker arc is far too small (about 1/2 to 1/4 of what you need so you buy a standalone bead breaker)
d. The tire iron twists out of your hands (use a vise grip to prevent that)
e. The tire iron is too soft so it bends when used as a lever (use pipe as a lever instead)
f. The base *must* be bolted down for SUV tires which require turning force (use 3/8" anchors, female, 16TPI and 3/8" bolts as close to 2-3/4 inches long as you can get but never shorter, so they'll probably be 3" long so use a few washers or cut off 1/4 inch)
h. There is no protection for alloy wheels (you can easily fashion plastic protectors out of an empty jug of coolant)

How to modify the HF Pittsburgh Manual Tire Changer, Harbor Freight item #62317
a. The base is far too short for big tires (so extend the base any way you can)
b. The base has no attachment holes for securing to concrete or pallets
c. The lever action isn't all that powerful (but it's strong enough)

As for special tools, two pairs of vise grips are de rigueur (at least one that is six inch for the end of the red tire iron, and another that is smaller to stop the tire from slipping on the rim when mounting the last top bead).

The weights are the type for your wheel, and you need to stock at least 10 of each clip-on weight from 1/4 to 1 ounce, in 1/4 ounce increments (more variety of larger ones is better, of course up to about 2 or 3 ounces). For the stick on weights, probably 1/2 ounce and 1/4 ounce will do.

The hand tools required are at least one Harbor Freight 24-inch tire iron (it's especially useful due to its great shape) but you really don't need either the special weight pliers nor the special valve puller/installer tool. Nothing wrong with them - but - you have to store them and find them when you need them, and they're not really all that useful on their own for a job that you only do once a year or so. As long as you have a utility knife (to remove the old valve) and anything that you can grab that screws onto the valve threads, you can pull it through to install (some use just a nail stuck through the core hole from behind and pull with pliers).

Similar story with the weights, where a hammer & chisel removes them and a hammer & pliers installs them.

As for special "parts" and materials, you just need to measure the existing valve and buy 0.463" replacements of the same size, and dish detergent, water, and a valve stem removal tool of some sort for twisting out the Schrader valve cores.

 
Last edited:
For practice, I decided to mount and dismount and repair these five tires today, two of which are 55-series alloy wheel tires and the rest are 75-series SUV tires (all of which are holed within an inch of the shoulder):
231728d1482363894-advice-requested-those-you-who-have-mounted-tires-balanced-wheels-home-000_holes_in_tires.jpg


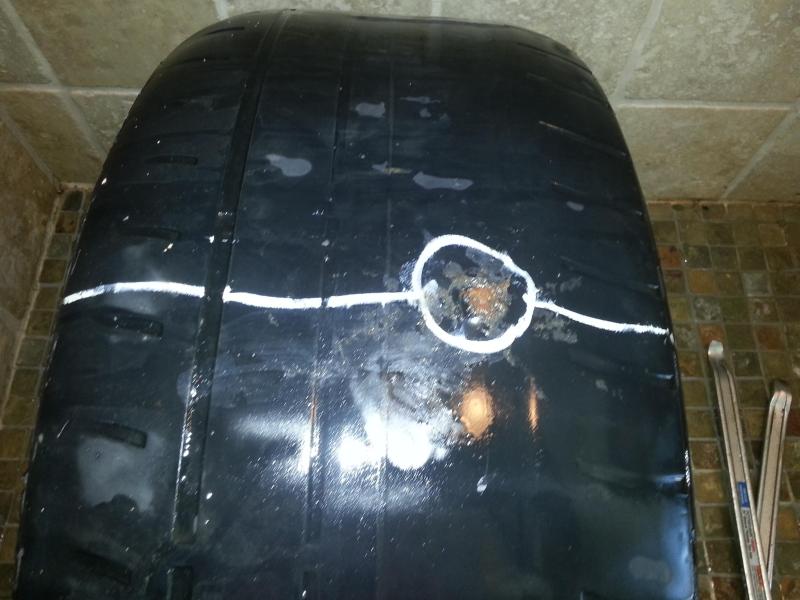
Ignoring the treadwear, what do you think of the safety and efficacy of my patch technique?

The first thing I did was set up the bead breaker with the wood on the sharp end and I butted the round end against the tire changing machine:
231729d1482364084-advice-requested-those-you-who-have-mounted-tires-balanced-wheels-home-00_bead_breaker_board.jpg


Then I easily broke the bottom bead on the 55-series alloy wheel tires:
231730d1482364103-advice-requested-those-you-who-have-mounted-tires-balanced-wheels-home-02_breaking_bottom_bead.jpg


Flipping the wheel, it was even easier to break the top bead of the lower-profile tire:
231731d1482364237-advice-requested-those-you-who-have-mounted-tires-balanced-wheels-home-03_breaking_top_bead.jpg


Once the beads were broken, I put the wheel outward side up on the tire changer to remove the top bead:
231735d1482364672-advice-requested-those-you-who-have-mounted-tires-balanced-wheels-home-04_removing_top_bead.jpg


The top bead came off with a simple 360 degree rotation of the tire iron:
231732d1482364287-advice-requested-those-you-who-have-mounted-tires-balanced-wheels-home-05_done_with_top_bead.jpg


The bottom bead requires the breaker bar to be inserted the same way:
231733d1482364404-advice-requested-those-you-who-have-mounted-tires-balanced-wheels-home-06_removing_bottom_bead.jpg


Then the bottom bead came off the rim almost as easily as did the top bead:
231734d1482364619-advice-requested-those-you-who-have-mounted-tires-balanced-wheels-home-07_removing_bottom_bead.jpg


Now I had the wheel off the alloy rim, I could look inside to inspect for internal damage:
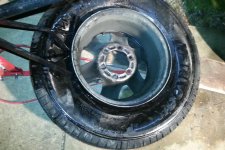
231736d1482364933-advice-requested-those-you-who-have-mounted-tires-balanced-wheels-home-08_tire_off_rim.jpg


After patching the tire first with a plug, and then with a patch, I slid the bottom bead onto the rim without any problem whatsoever.

For one of the alloy-wheel 55-series tires, the top was only slightly hard, but for the second tire of the matched set, I still haven't been able to get the tire on the rim!
231737d1482365125-advice-requested-those-you-who-have-mounted-tires-balanced-wheels-home-bent_tire_iron.jpg


In fact, it took so much force for the second tire of that set, that it bent the tip of the tire iron!
231738d1482365171-advice-requested-those-you-who-have-mounted-tires-balanced-wheels-home-bent_tire_iron_tip.jpg
 
For practice, I decided to mount and dismount and repair these five tires today, two of which are 55-series alloy wheel tires and the rest are 75-series SUV tires (all of which are holed within an inch of the shoulder):
231728d1482363894-advice-requested-those-you-who-have-mounted-tires-balanced-wheels-home-000_holes_in_tires.jpg


Ignoring the treadwear, what do you think of the safety and efficacy of my patch technique?

The first thing I did was set up the bead breaker with the wood on the sharp end and I butted the round end against the tire changing machine:
231729d1482364084-advice-requested-those-you-who-have-mounted-tires-balanced-wheels-home-00_bead_breaker_board.jpg


Then I easily broke the bottom bead on the 55-series alloy wheel tires:
231730d1482364103-advice-requested-those-you-who-have-mounted-tires-balanced-wheels-home-02_breaking_bottom_bead.jpg


Flipping the wheel, it was even easier to break the top bead of the lower-profile tire:
231731d1482364237-advice-requested-those-you-who-have-mounted-tires-balanced-wheels-home-03_breaking_top_bead.jpg


Once the beads were broken, I put the wheel outward side up on the tire changer to remove the top bead:
231735d1482364672-advice-requested-those-you-who-have-mounted-tires-balanced-wheels-home-04_removing_top_bead.jpg


The top bead came off with a simple 360 degree rotation of the tire iron:
231732d1482364287-advice-requested-those-you-who-have-mounted-tires-balanced-wheels-home-05_done_with_top_bead.jpg


The bottom bead requires the breaker bar to be inserted the same way:
231733d1482364404-advice-requested-those-you-who-have-mounted-tires-balanced-wheels-home-06_removing_bottom_bead.jpg


Then the bottom bead came off the rim almost as easily as did the top bead:
231734d1482364619-advice-requested-those-you-who-have-mounted-tires-balanced-wheels-home-07_removing_bottom_bead.jpg


Now I had the wheel off the alloy rim, I could look inside to inspect for internal damage:
231736d1482364933-advice-requested-those-you-who-have-mounted-tires-balanced-wheels-home-08_tire_off_rim.jpg


After patching the tire first with a plug, and then with a patch, I slid the bottom bead onto the rim without any problem whatsoever.

For one of the alloy-wheel 55-series tires, the top was only slightly hard, but for the second tire of the matched set, I still haven't been able to get the tire on the rim!
231737d1482365125-advice-requested-those-you-who-have-mounted-tires-balanced-wheels-home-bent_tire_iron.jpg


In fact, it took so much force for the second tire of that set, that it bent the tip of the tire iron!
231738d1482365171-advice-requested-those-you-who-have-mounted-tires-balanced-wheels-home-bent_tire_iron_tip.jpg

2nd pic up. put your knee onto the tire and push it down.
you have to get it into the drop center of the rim, to have enough room to get the tire to go around the bead of the wheel.
 
2nd pic up. put your knee onto the tire and push it down.
you have to get it into the drop center of the rim, to have enough room to get the tire to go around the bead of the wheel.

I thought of that but I was pulling UP on the bottom bead to try to get it into the drop center, but that took both my hands leaving nothing to pry with on the top bead.

I'm sure you're right about the drop center though, so, to just confirm, are you saying that I need to press DOWN on the opposite side of the last quarter of the top bead that won't go onto the rim?

That is, instead of pulling UP on the bottom bead which is diagonally across from the stuck part, I should press DOWN on the top bead in that diagonal location?
 
I thought of that but I was pulling UP on the bottom bead to try to get it into the drop center, but that took both my hands leaving nothing to pry with on the top bead.

I'm sure you're right about the drop center though, so, to just confirm, are you saying that I need to press DOWN on the opposite side of the last quarter of the top bead that won't go onto the rim?

That is, instead of pulling UP on the bottom bead which is diagonally across from the stuck part, I should press DOWN on the top bead in that diagonal location?
yes, don't worry about the bottom bead, its already on the wheel.

you need the top bead into the drop center, so you have room to get it around the wheel lip.
yes, but not just the last quarter, you want that section of tire down in the drop center the entire time you are trying to mount it. waiting until the last bit is a good way to tear the bead.

yes. pulling up on the bottom bead, that is already in place will not help you.

there is a heavy steal ring in each tire bead, which supports the bead, and the rest of the tire ties into it. THIS is what you are trying to get over the rim lip. they are independent of each, and need to be installed the same. so pulling on an opposite one wont help you.

I hope that makes sense.


for reference.


Bridgestone_tire_cross_section.png
 
yes, don't worry about the bottom bead, its already on the wheel.
Thank you for confirming that I was wasting my time trying to pull up on the bottom bead.
Not only does it leave zero hands to work on the top bead, but it clearly didn't work!

you need the top bead into the drop center, so you have room to get it around the wheel lip.
Since I had done more than a half-dozen tires without needing to worry about this detail, I didn't know how crucially important your advice is - but without dropping that top bead of this last tire into the drop center, there was no way I was ever going to get that top bead seated (bent tire irons and a damaged bead being a testament to that fact).

Here is an example of a guy in the Philippines stepping on the top bead with his bare feet in order to lower the top bead into the drop center:
231985d1482469676-advice-requested-those-you-who-have-mounted-tires-balanced-wheels-home-bead_seating.jpg


yes, but not just the last quarter, you want that section of tire down in the drop center the entire time you are trying to mount it. waiting until the last bit is a good way to tear the bead.
Too late for tearing the bead, as I ripped the rubber a bit; but since this was an experimental tire, the real harm was that I scratched the alloy rim a bit.

yyes. pulling up on the bottom bead, that is already in place will not help you.
This turns out to be 100% correct. The bottom bead, once mounted on the rim, is something to forget (until it comes time to put the air in anyway).

ythere is a heavy steal ring in each tire bead, which supports the bead, and the rest of the tire ties into it. THIS is what you are trying to get over the rim lip. they are independent of each, and need to be installed the same. so pulling on an opposite one wont help you.
That steel ring is literally IMPOSSIBLE to get over the top lip of the wheel, as you noted, without dropping this particular tire's top bead into the drop center.

What's odd is that I did a sister tire on a sister rim, and it went almost right on without much fuss. So, every tire/wheel combination seems to be a little different in some way.

yI hope that makes sense.
Yes. Thank you for the critical advice that, even after a half dozen tires, I needed because this tire was the hardest in my life to seat the top bead, because I was doing it wrongly (but that wrong method worked on all the other tires).

After leaving the recalcitrant tire and wheel assembly outside in the cold in the 3/4-mounted position for about a week, I finally gathered up the courage to tackle the job again, despite it having previously taken me a couple of hours to fail where I bent even the strongest of steel implements, and damaged both the rim and the bead of the experimental tire, I followed the words of advice to ensure that the top bead was in the drop center.

Taking the lead from the barefoot Filipino in the photo above, I took a shower with this recalcitrant tire & wheel assembly.
232271d1482785280-advice-requested-those-you-who-have-mounted-tires-balanced-wheels-home-01_bead_shower.jpg

I don't know if heating the entire assembly in the shower helped or not (I didn't even use detergent), but it just popped right into place when I stepped on the bead with my bare feet (being emboldened by that photo of the Filipino doing it) to ensure it was in the drop center for as much of the circumferential arc that I could get it.
232272d1482785284-advice-requested-those-you-who-have-mounted-tires-balanced-wheels-home-02_bead_shower.jpg

Much to my relief, the tire bead popped into place with just the use of the two 24-inch tire irons, where there was no need for much force and no need for vise grips or a helper, or anything.
232273d1482785289-advice-requested-those-you-who-have-mounted-tires-balanced-wheels-home-03_bead_shower.jpg

So, while most tires will go into place whether or not you lower the top bead into the drop center, some will NEVER go on the rim unless you do so.

Lesson learned!

Luckily this was just a test tire, as my entire goal was just practice in learning the process for:
  1. Safely jacking & supporting the 4Runner on jack stands
  2. Breaking the initial bead of the old tire and seating the final bead of the new tire
  3. Removing and replacing the valve stem
  4. Balancing (statically) the tire and wheel assembly
  5. And patching holes using a plug-and-patch system

I'm not sure how I'm going to get rid of the copious amount of water that infiltrated the bead during this process so that I can properly balance it with stick-on weights, but I did patch a hole in the tire, which I will describe separately so that others can help advise where I went right and where I went wrong, which will serve as a decent reference for the next person who contemplates patching their own tires at home.
232275d1482785941-advice-requested-those-you-who-have-mounted-tires-balanced-wheels-home-04_bead_shower.jpg


NOTE: It's so easy to get the first bottom bead of the new tire on the bottom of the rim by hand. And, this method gets the second top bead on the top of the rim. Given how easy it is to mount a new tire on the wheel by hand, I wonder if the HF tire-mounting tool does anything useful that you can't do with just tire irons and bare feet in the shower.

The HF tire-mounting tool is useless for breaking the bead, so, you need a separate bead breaker anyway.

I guess the HF tire-mounting tool is best for removing the first and second bead on the old tire (which it does do handily).
 
Last edited:
We use torque charts to check specific torque on vehicles, there's quite a few manufacturers that use the same specs across the board, so you end up learning what's what after a few months.

Sent from my Z958 using Tapatalk
 
Status
Not open for further replies.

Members online

No members online now.

Forum statistics

Threads
278,315
Messages
3,554,125
Members
248,016
Latest member
Advally Service

Trending content

Back
Top