ANTMAN'S Thread

I've been gone for awhile and had two questions...

1. When did Antman and Titanpat57 get married?
2. Did Antman take photography lessons?
 
I've been gone for awhile and had two questions...

1. When did Antman and Titanpat57 get married?
2. Did Antman take photography lessons?


Answers...

1. After our camping trip (also know as the Great Flatulence War of 2013) [MENTION=47340]Titanpat57[/MENTION] and I decided to join forces and tie the knot. We have never been happier. The house smells great...:toilet:

2. [MENTION=72821]Kinnick[/MENTION] - YOU, my friend need glasses.:D Just to set you straight, here are some awesome photo's [MENTION=93894]J-BlickPhoto[/MENTION] :

http://www.toyota-4runner.org/5th-gen-t4rs/158462-j-blickphoto-thread.html
 
Last edited:
Trail Edition Skid Plate Swap


Today I added yet another TE piece to my SR5. [MENTION=49537]4ShoreRunner[/MENTION] gave me his old gas tank skid plate when he came to the Antman Garage last weekend for a fire-safety lesson...:boom: Thanks man!


Anyway- this skid is pretty much famous because it has seen lots of use- from Ouray to The Cove. I think it held up reasonably well for the trail duty it's seen. Lots of character! Overall, it's in good enough shape for me to make use of it with a little work.

I know, I know- I don't really offroad (maybe a little), but eventually I guarantee I will be scratching and denting this thing up (again!).

Here she is...


Yo Mr. Antman :) I can't get the rust out of those hairline scratches for the life of me... What did you do / what do you recommend? Or did you not go after the hairline scratches ?
 
Yo Mr. Antman :) I can't get the rust out of those hairline scratches for the life of me... What did you do / what do you recommend? Or did you not go after the hairline scratches ?

Might be worth your while to try OSPHO, it's a rust converter we use on ships all the time. You lay it on and it chemically alters the rust then you can paint over it. Generally can pick it up at places like west marine.
 
Yo Mr. Antman :) I can't get the rust out of those hairline scratches for the life of me... What did you do / what do you recommend? Or did you not go after the hairline scratches ?

I used some really coarse sandpaper- I think 80 grit. You can fold the sheet in half to get into those cracks.
 
Yo Mr. Antman :) I can't get the rust out of those hairline scratches for the life of me... What did you do / what do you recommend? Or did you not go after the hairline scratches ?

Danny, SKID plates, not decorative plates. Just spray some black rustoleum paint over it and install it already, lol.

If you really want to get the rust out of the fine hairline scratches I'd trying a wire brush, maybe even a drill mounted one if you have access to it :)
 
Danny, SKID plates, not decorative plates. Just spray some black rustoleum paint over it and install it already, lol.

If you really want to get the rust out of the fine hairline scratches I'd trying a wire brush, maybe even a drill mounted one if you have access to it :)

I agree. I just used the Rustoleum truck bed spray on my skids and sliders. They're going to get beat underneath, and you never see them anyway.
 
Dual Battery Setup

I've been planning this for several months now- getting parts together and doing research. Nothing new here really, but I had a few goals in mind with this setup.

1- I wanted an extremely "clean" installation. No wires running everywhere- pretty much stock in appearance.

2- Keep the cost down and use the original/stock battery as the aux. The relay was the most expensive part at $70- but I think I have less that $150 in the entire thing.

3- Super reliable and simple.

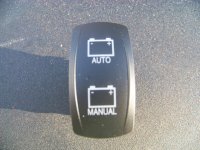
4- Ability to automatically charge both batteries when the truck is running, separate the batteries manually, and self jump start all from one switch.

5- This setup is a little different than most. My "Main" battery is a deep cycle/starting battery, so it won't suffer any damage if it's drained completely. With 160 minutes reserve capacity, this battery will power my accessories a long time before it's depleted. The Aux battery is to be used solely as a starting battery if the Main battery is dead.

PARTS LIST

*1 PAC 500 relay

*2 ANL Fuse Holders

*2 200A ANL Fuses

*Approx 12 feet of 2ga copper wire ( http://www.harborfreight.com/300amp-6ft-inverter-cable-set-69537.html )

*10 2ga Ring Terminals

*1/2" Split Loom (Approx)10 feet

*Battery Hold Down/tray

*2 Battery Terminal Clamps

*Battery Terminal Covers

*Custom bracket for P/S pump res.

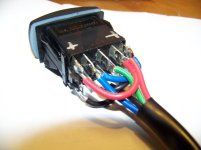
*ON/OFF/ON switch- or OTRATTW V-Series Contura Switch # VJD2UHTB : DPDT ON/OFF/ON, GREEN/DAYLIGHT BRIGHT RED BOTH INDEPENDENT LED'S.

*12V Indicator LED

*2 Gammatronix LED's (optional) http://www.ebay.com/itm/6v-12v-24v-...307?pt=LH_DefaultDomain_0&hash=item2c752a2133


****This is the basic underhood wiring string.

Main Battery positive terminal / 200a ANL fuse / PAC Relay / 200a ANL Fuse / Aux Battery positive terminal. Aux Battery Negative to ground. The PAC relay also needs a ground and a power source to connect .

**Here's a wiring diagram using a simple SPDT switch along with an LED to indicate when the batteries are connected.
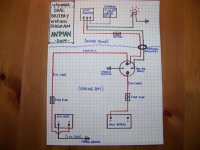
100_4305.jpg


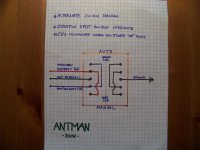
The diagram below incorporates the optional custom switch I used, a DPDT from OTRATTW.


100_4286.jpg

100_4295.jpg


100_4311.jpg


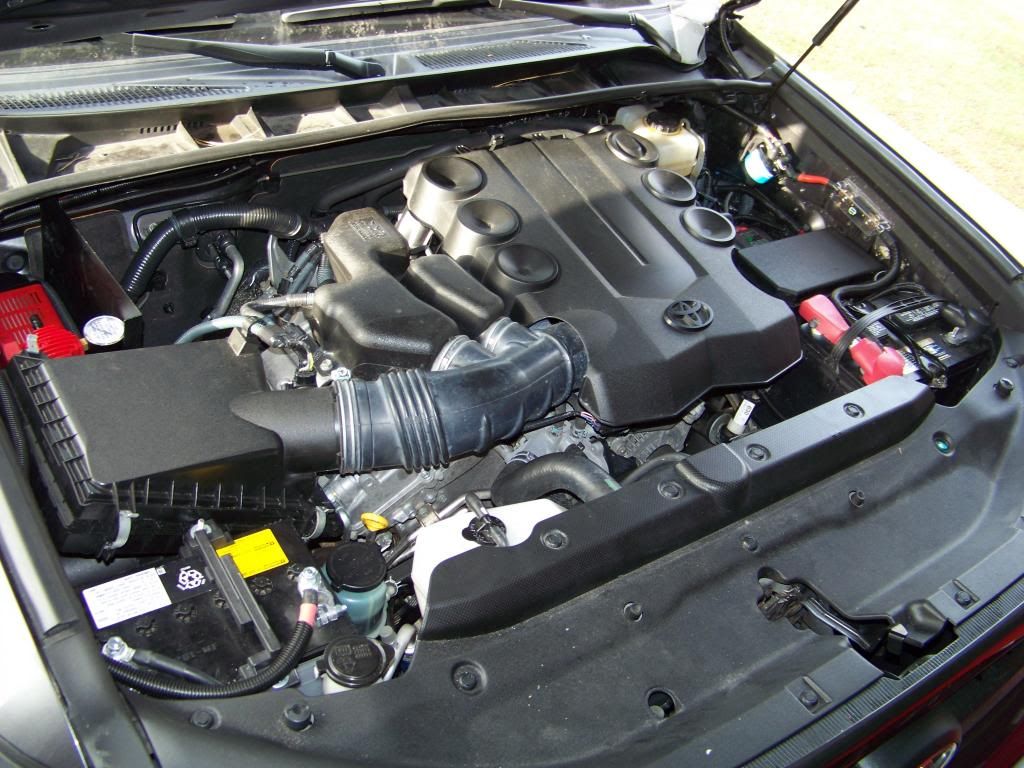
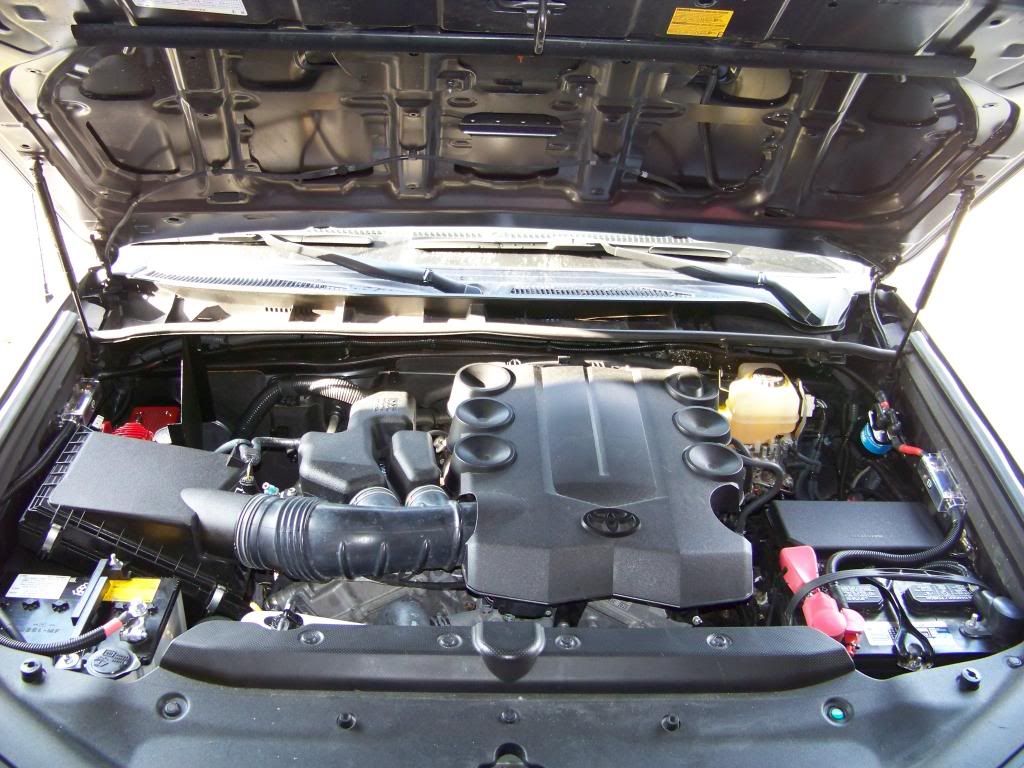
By far, the hardest part of this was relocating the A/C lines and the power steering reservoir so they were out of the way and safe from rubbing with the battery in there. I had to make 2 custom brackets to accomplish this. Honestly, buy the ABR battery tray and be done with it. I spent 2 days fabbing and re-fabbing brackets until I was happy. It worked out well, but gees, what a pain!


Here are some pics-


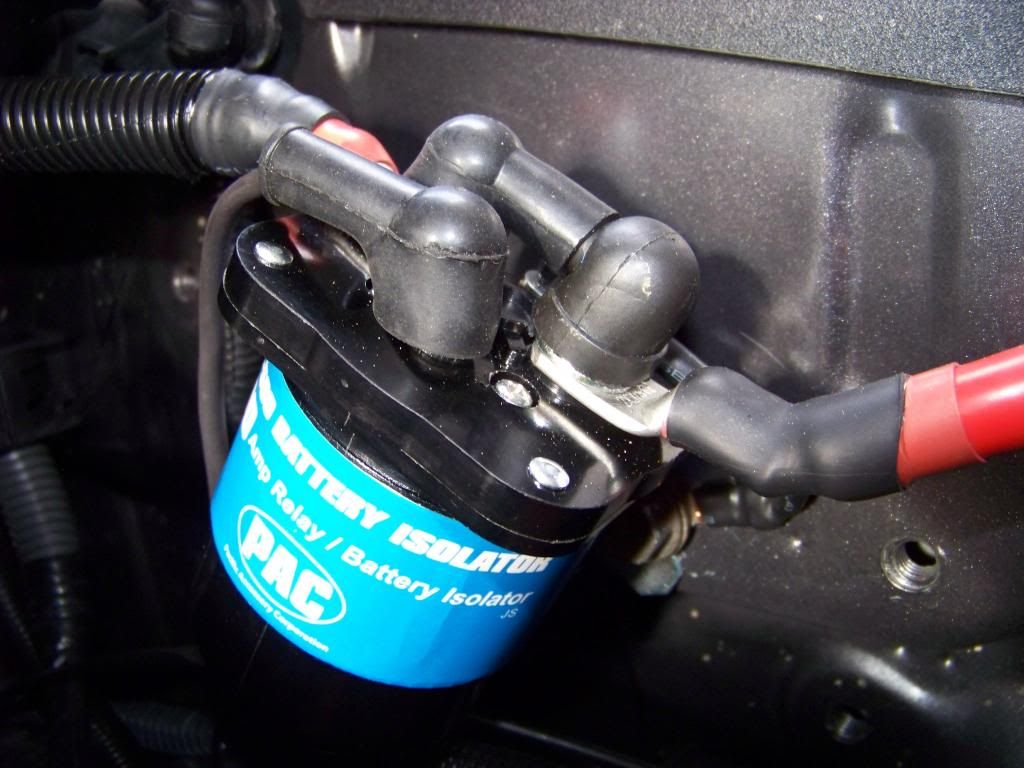
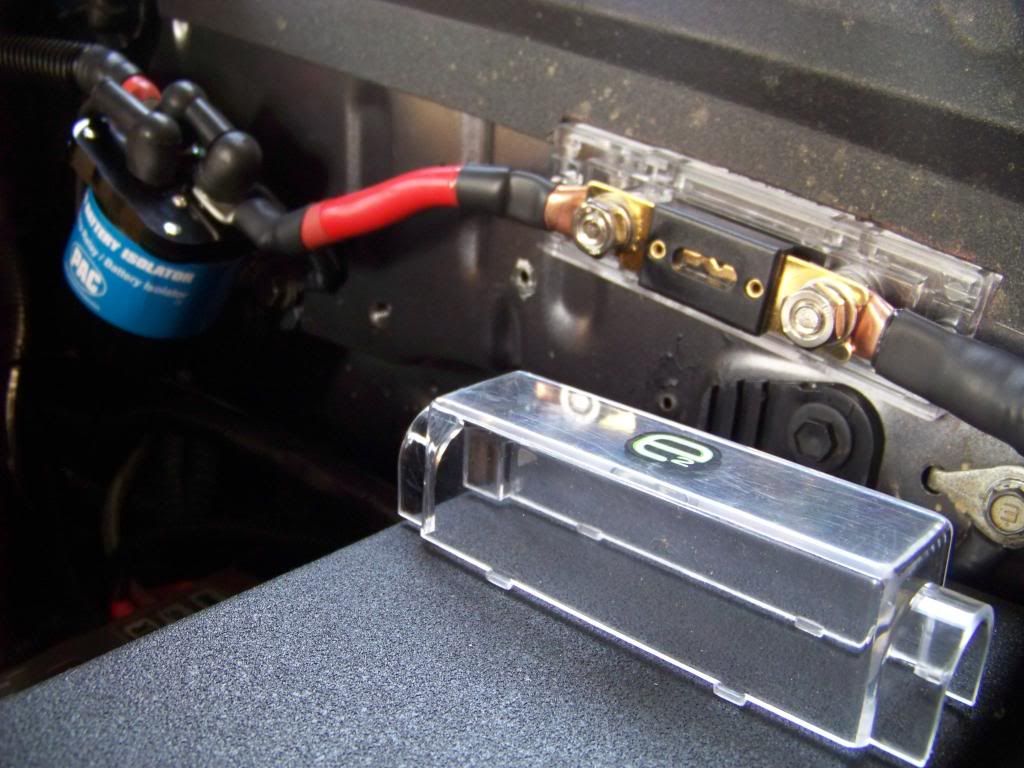
**This is the PAC 500 relay- the key to the system. This will allow the batteries to be connected or separated. The 500A rating allows it to be robust enough to handle self-jump starting.


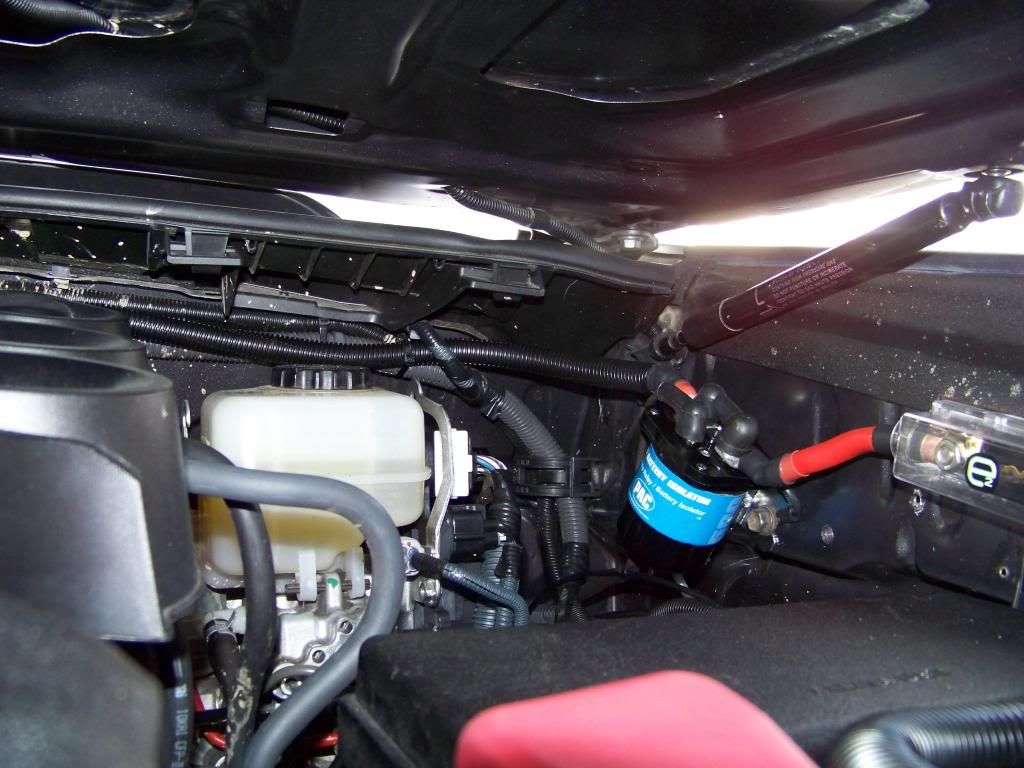
**I wanted to use the factory threaded holes on the fender wall, but the relay was too close to the hood strut. I had to modify it a little bit, imagine that. Basically I just took the bracket off and drilled another hole so it could slide down in the mount further. This picture shows the clearance with the hood almost closed. There is plenty of room now.


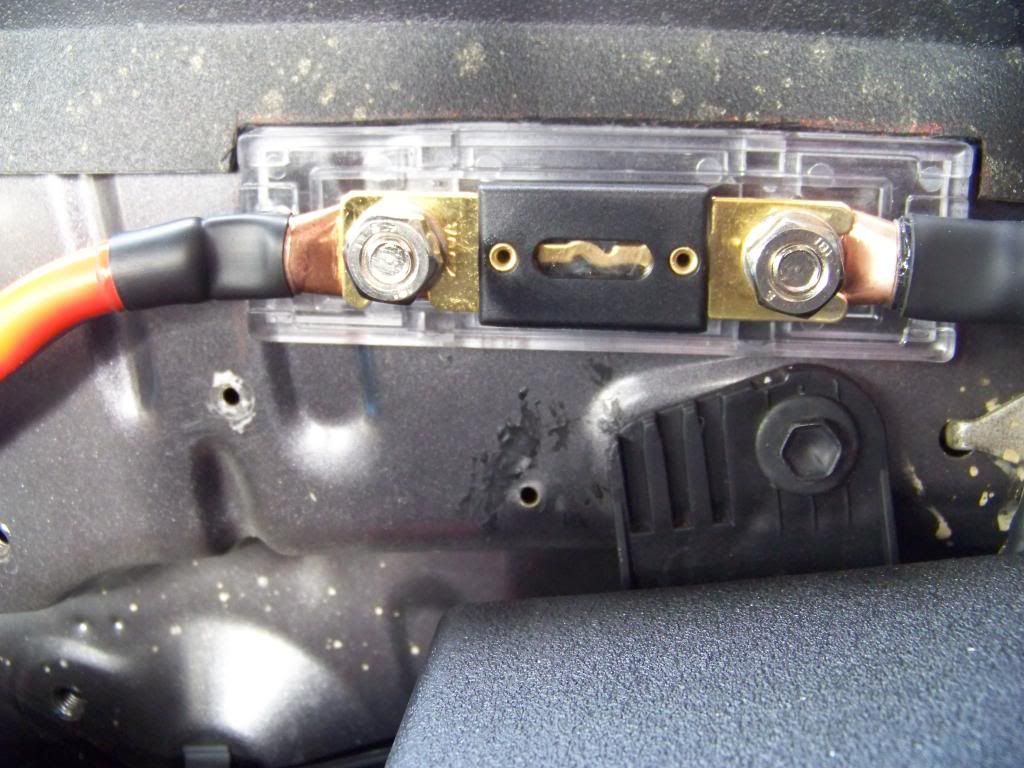
**Two fuses are required. These are 200A ANL fuses. 1 for each battery- between the positive terminal and the relay.
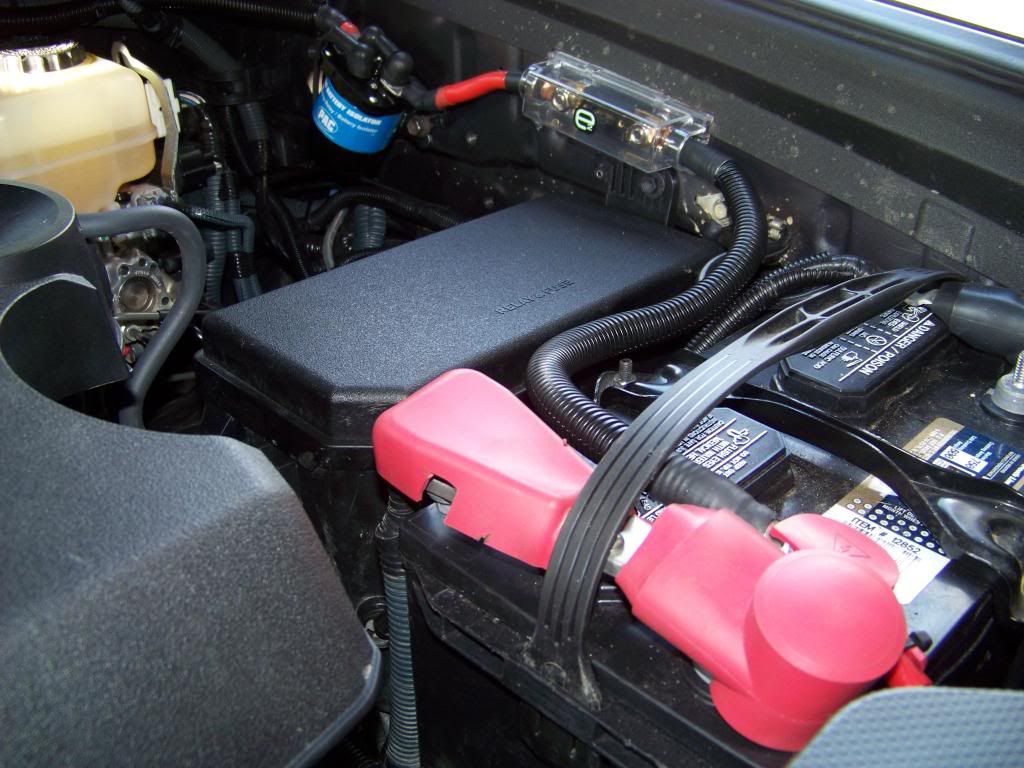
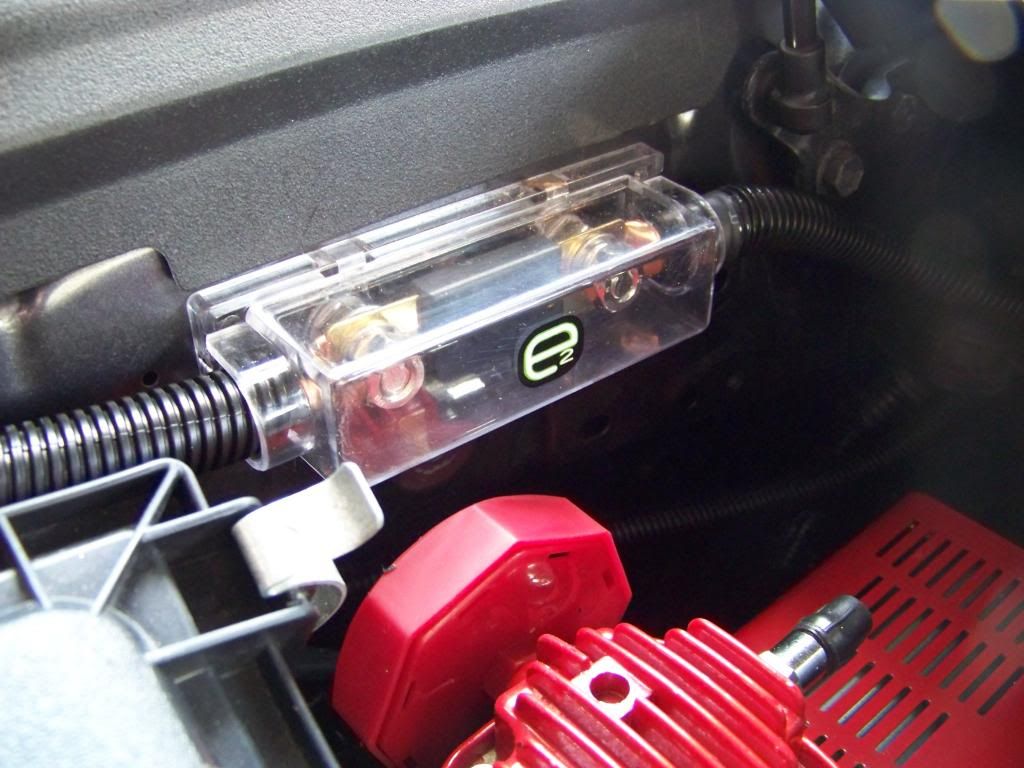


**Cable routing to the second battery.
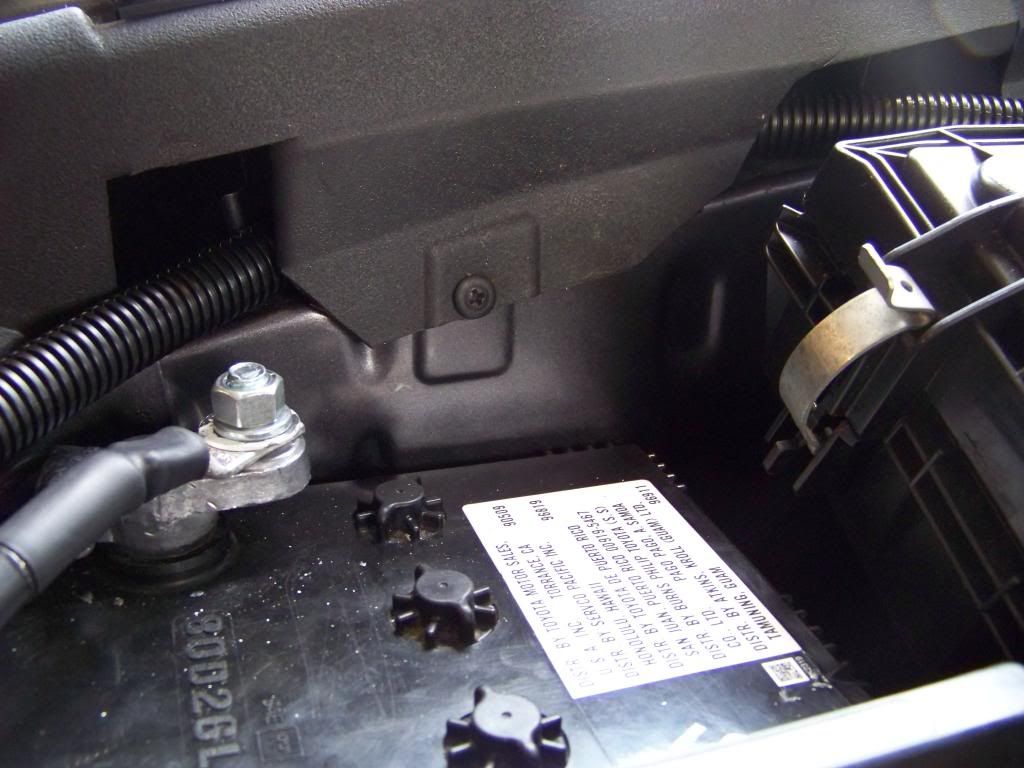


**The negative cable routes to the frame and connects under an existing bolt that holds an A/C line bracket.
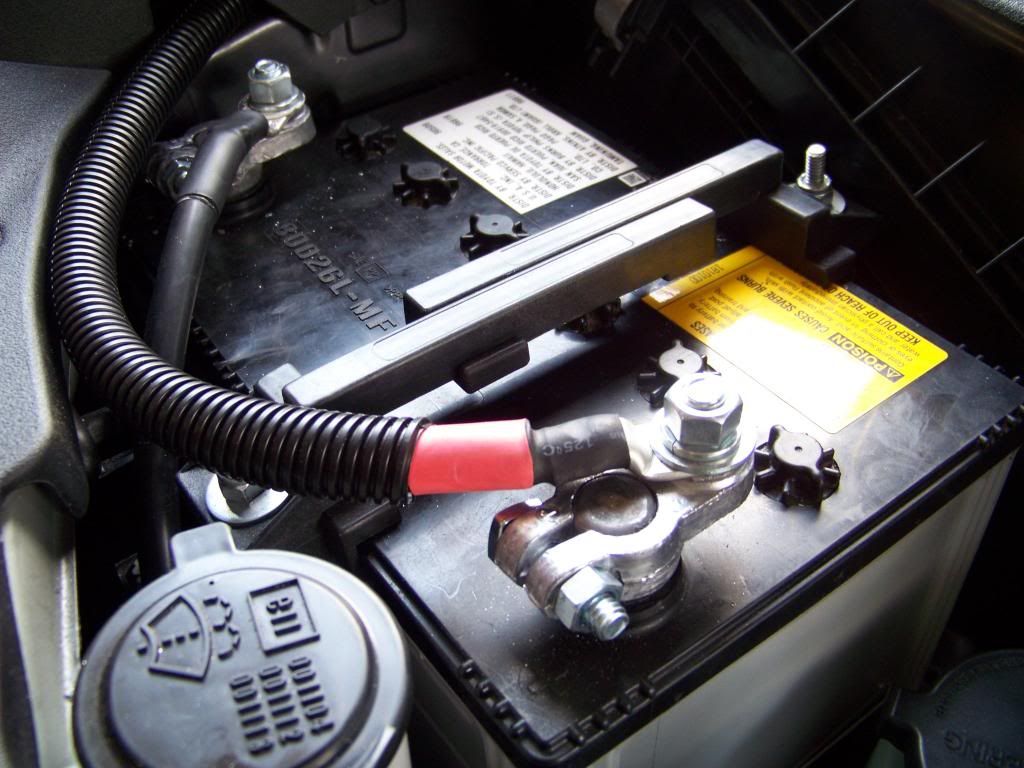


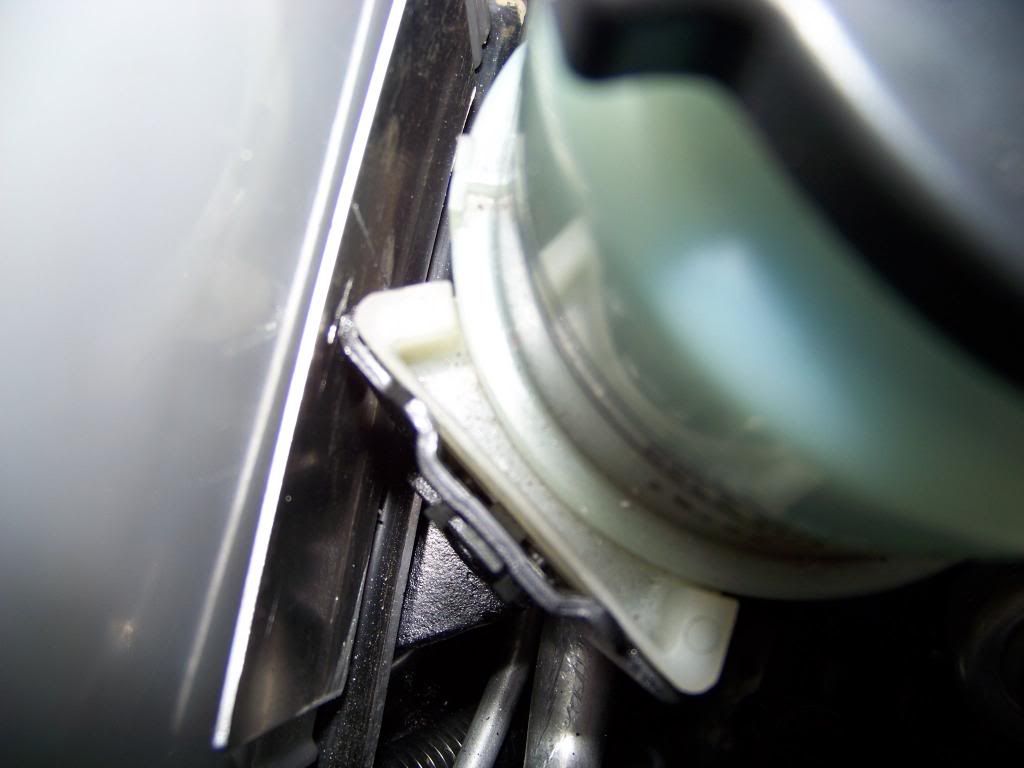
**This shows just how close the P/S bracket is to the battery. I have an aluminum sheet there to protect from rubbing- but it has a small gap there (though it doesn't look like it in the picture).


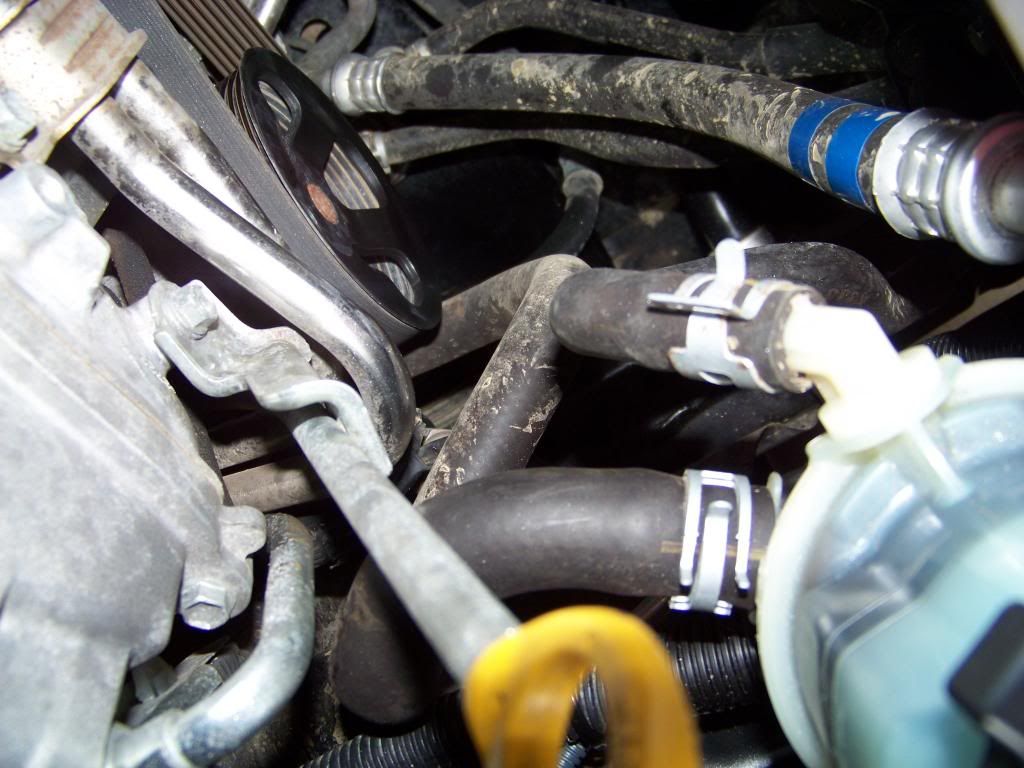
**The A/C line and the P/S lines can't touch or they will eventually rub through. The hose with the two blue lines (A/C) is about 1/2" away from the P/S line.


Overall I'm very happy with the result! All the 2 ga wiring is split loomed and has marine heat shrink applied. I spent A LOT of time planning this project!

I tested out a self jump-start and it works flawlessly.


Happy Modding!

 

Attachments

  • 100_4305.jpg
    100_4305.jpg
    131.4 KB · Views: 6,178
  • 100_4311.jpg
    100_4311.jpg
    124.1 KB · Views: 5,208
  • 100_4286.jpg
    100_4286.jpg
    138.2 KB · Views: 4,797
  • 100_4295.jpg
    100_4295.jpg
    112 KB · Views: 5,086
Last edited:
I suspected you were cooking up something good after I saw your welding post!

Great job as always! Any pictures of the custom brackets?
 
I suspected you were cooking up something good after I saw your welding post!

Any pictures of the custom brackets?

Not yet. I forgot to snap pics before I bolted the battery in. I'll get some later. Nothing special though- both are aluminum- nothing welded! The A/C bracket has a rubber isolator just like the factory bracket- but not as fancy...
 
Very clean. I am just about to embark on this...went the ABR route and will use the IBS system instead but very nice install.
 
Dual Battery Setup

By far, the hardest part of this was relocating the A/C lines and the power steering reservoir so they were out of the way and safe from rubbing with the battery in there. I had to make 2 custom brackets to accomplish this. Honestly, buy the ABR battery tray and be done with it. I spent 2 days fabbing and re-fabbing brackets until I was happy. It worked out well, but gees, what a pain!

Great write up, thanks! This is literally top of my todo list.

I wanted to ask, you recommend the ABR battery tray, it looks to deal with the relocation no problem, but does this fit a 31 battery? I found the site (Battery Trays & Clamps) but not sure which tray it is. Is it the FJ or the Prada or are they both the same? I live in the rust belt, do you know if this is just bare steel or stainless, by any chance?
 
Great write up, thanks! This is literally top of my todo list.

I wanted to ask, you recommend the ABR battery tray, it looks to deal with the relocation no problem, but does this fit a 31 battery? I found the site (Battery Trays & Clamps) but not sure which tray it is. Is it the FJ or the Prada or are they both the same? I live in the rust belt, do you know if this is just bare steel or stainless, by any chance?

Thanks!

I have no idea about that battery tray other than I know many on here have it and it works well. Maybe [MENTION=6163]phillyd2[/MENTION] , or [MENTION=47340]Titanpat57[/MENTION] can answer your questions?
 
Great write up, thanks! This is literally top of my todo list.

I wanted to ask, you recommend the ABR battery tray, it looks to deal with the relocation no problem, but does this fit a 31 battery? I found the site (Battery Trays & Clamps) but not sure which tray it is. Is it the FJ or the Prada or are they both the same? I live in the rust belt, do you know if this is just bare steel or stainless, by any chance?

I'll jump in. Here's some pictures from when I did my install. It can fit a full size battery, but it's a tight fit. Also I'm not sure about steel vs aluminum...I can't remember what it was when I had it. It's been a while.

Here's the link: http://www.toyota-4runner.org/5th-gen-t4rs/116234-jangoforhires-build-pictures.html#post1077907
 
Great write up, thanks! This is literally top of my todo list.

I wanted to ask, you recommend the ABR battery tray, it looks to deal with the relocation no problem, but does this fit a 31 battery? I found the site (Battery Trays & Clamps) but not sure which tray it is. Is it the FJ or the Prada or are they both the same? I live in the rust belt, do you know if this is just bare steel or stainless, by any chance?

Pretty sure the 31 is going to be waaaaay to wide, lol. Check out this thread, seems like 34 is the about the max you can wedge in there: http://www.toyota-4runner.org/5th-g...r-dual-batt-tray-group-buy-8.html#post1346691
 
Pretty sure the 31 is going to be waaaaay to wide, lol. Check out this thread, seems like 34 is the about the max you can wedge in there: http://www.toyota-4runner.org/5th-g...r-dual-batt-tray-group-buy-8.html#post1346691

You are probably right! LOL my biggest concern was actually the height, the optima yellow top 31 is quite a bit taller. Checked the spec and yep the thing is over a foot wide! Last time I did a setup like this I had a tiny 22RE in the engine compartment I could have slept in there. Thanks
 

Members online

Forum statistics

Threads
278,306
Messages
3,554,045
Members
248,016
Latest member
Advally Service

Trending content

Back
Top