Black798's 98 limited build thread

Gas Tank Skid

Gas Tank Skid

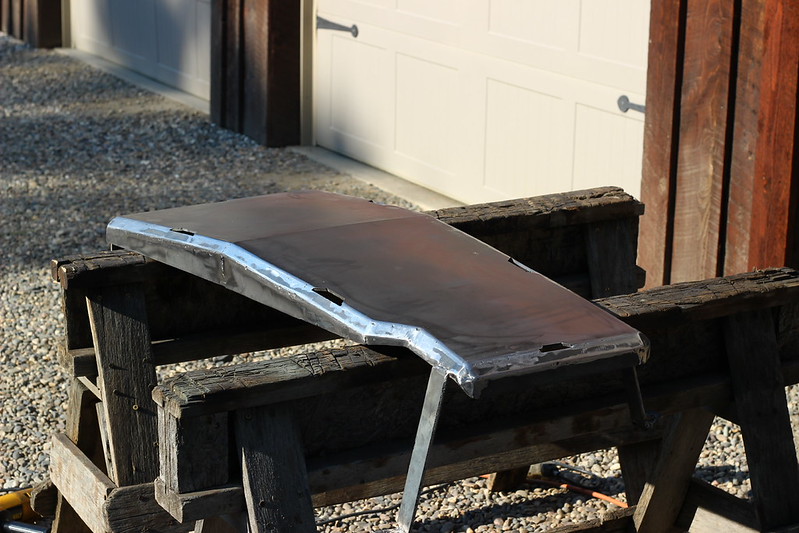
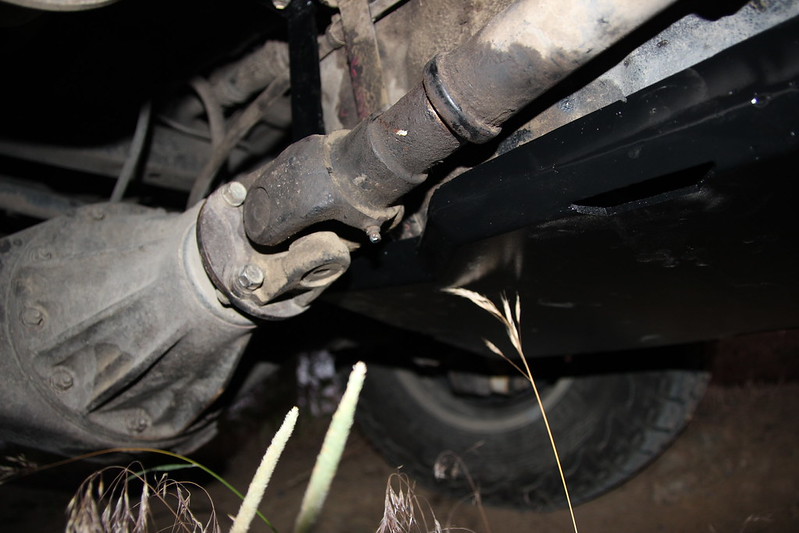
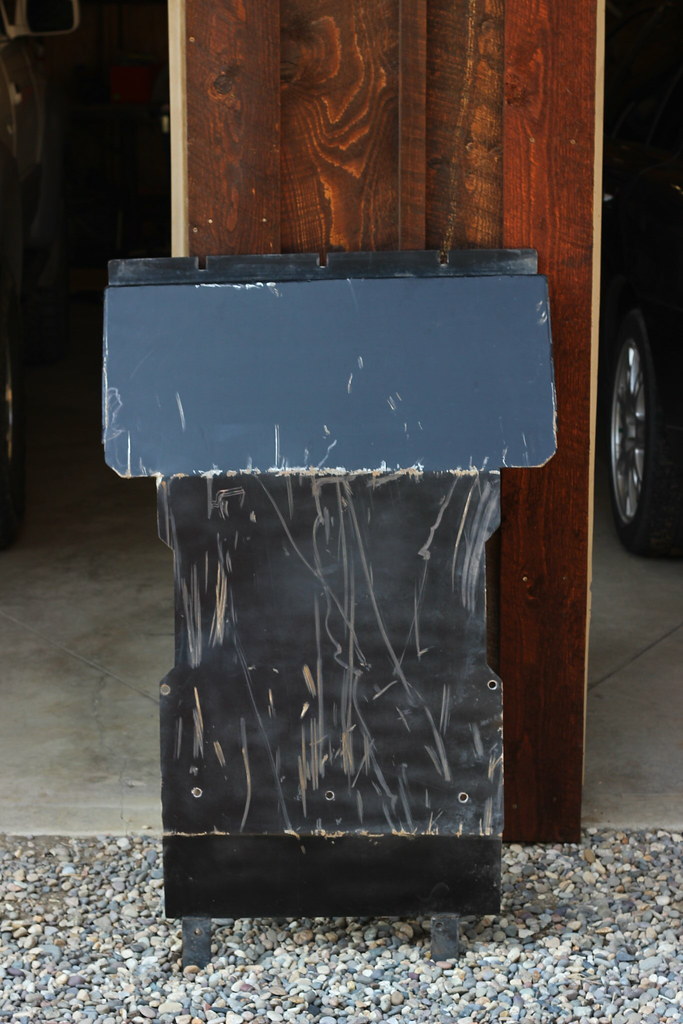
Over the past week I have been working on building the new gas tank skid to solve the issue with the driveshaft contacting the skid and shearing off the slipjoint zerk. I used 3/16 just like the front skids for added strength. I tried to keep it as close to the tank as possible while still leaving some wiggle room. It isnt perfect and Im sure some things will get refined in time but it should do for now.

Started by cutting out the base and putting a slight bend in it.
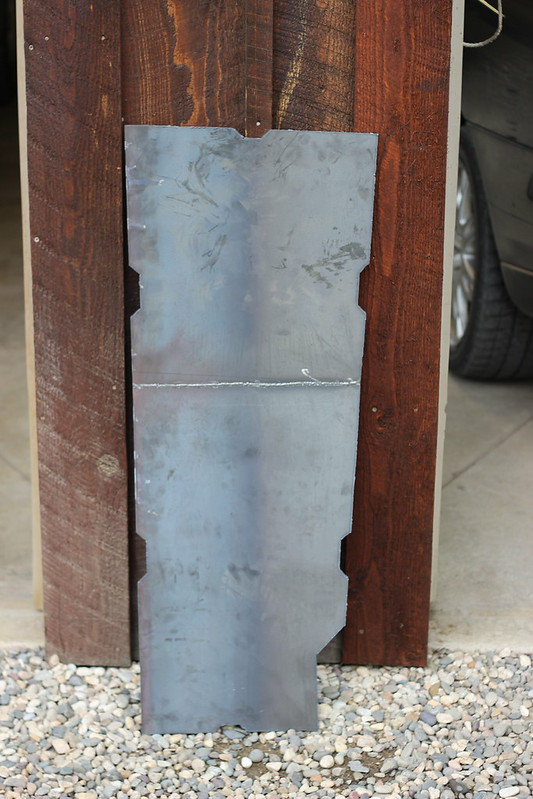
IMG_5462 by Phoenix Black, on Flickr

Then added some small angled sides
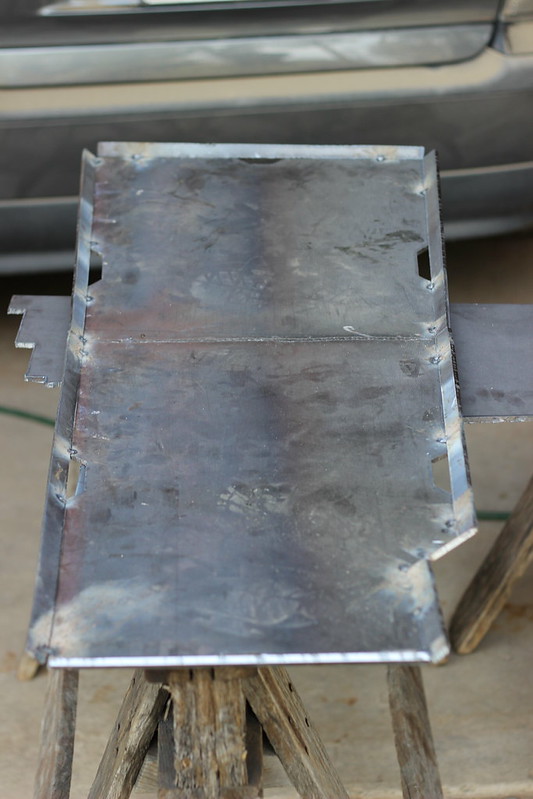
IMG_5463 by Phoenix Black, on Flickr

Finished it by adding vertical sides for strength and added the mounting points
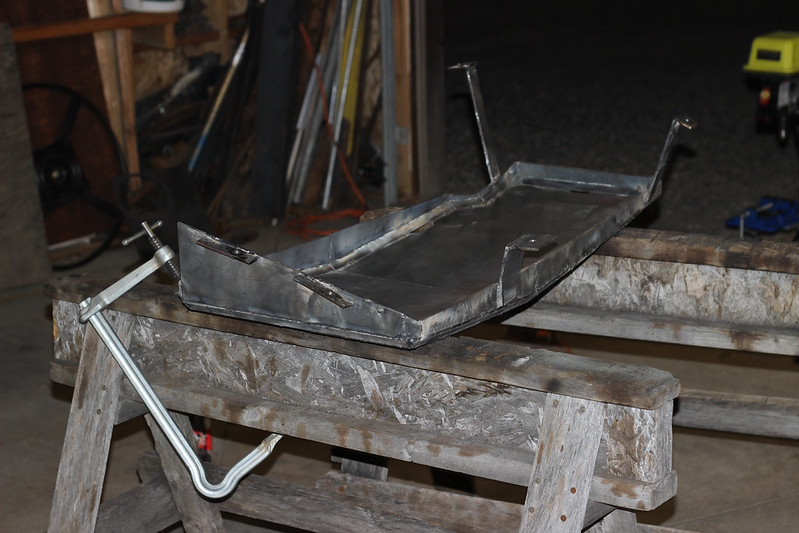
IMG_5466 by Phoenix Black, on Flickr
IMG_5474 by Phoenix Black, on Flickr
My make shift paint booth
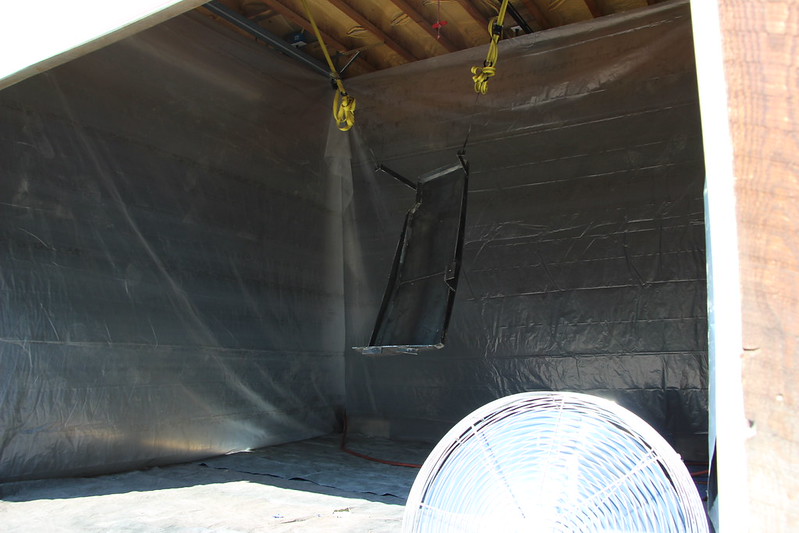
IMG_5477 by Phoenix Black, on Flickr

Installed
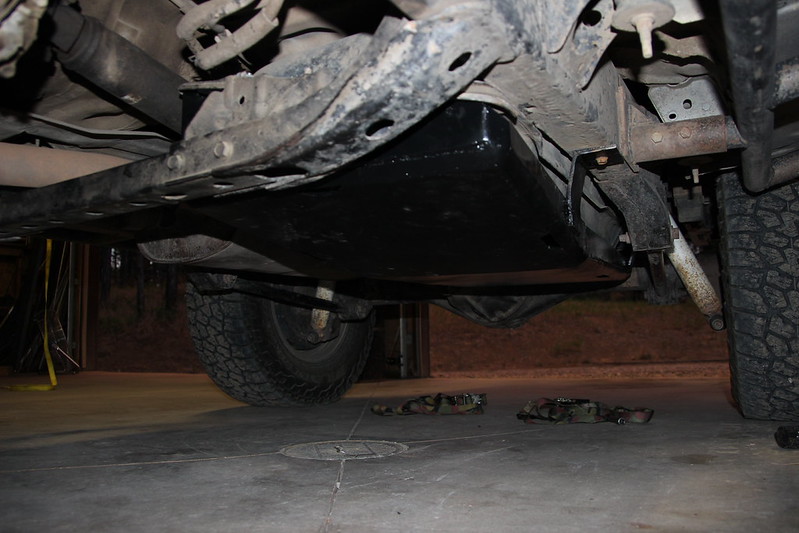
IMG_5494 by Phoenix Black, on Flickr

Finally have some clearance at the driveshaft. This was at full flex with the driverside stuffed. I think I may replace the zerk with a panhead bolt just to make it smoother and only reinstall the zerk to grease it.
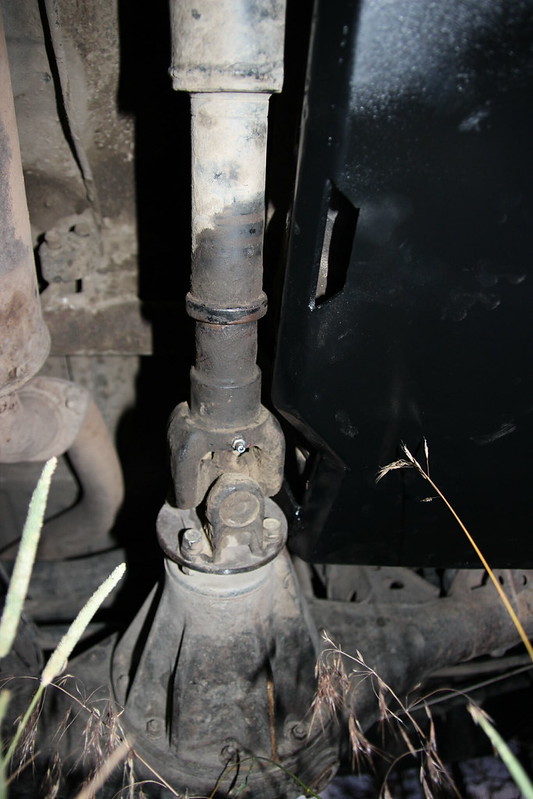
IMG_5499 by Phoenix Black, on Flickr
IMG_5500 by Phoenix Black, on Flickr

Also gave the 4runner a quick wash, Im loving the stance and look it has now.
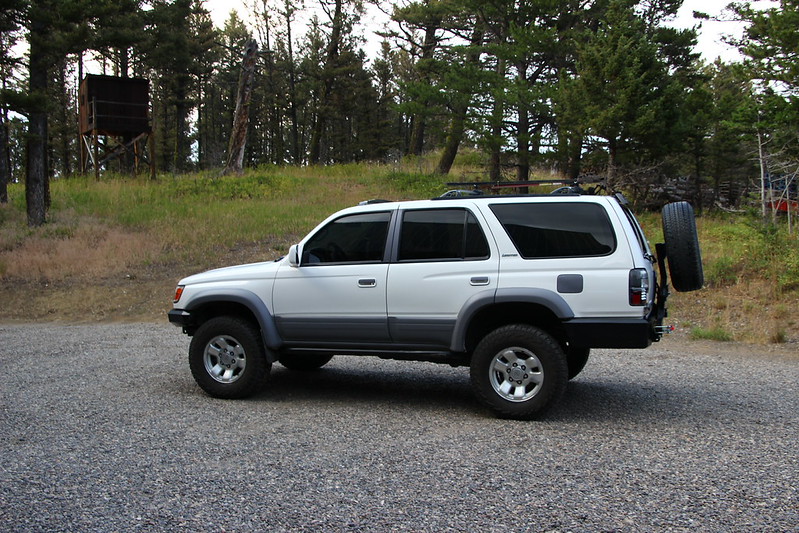
IMG_5489 by Phoenix Black, on Flickr

In other news I am going to look at a 97 limited tomorrow that is for sale so stay tuned.
 
gas tank skid looks geat

tint looks good how dark is it ?

Thanks, its 20% 3m color stable. The specific version of it isnt available to the public and may never be thought. What happened was the night that one of my relatives and I did it, he installs and instructs professionally, he dug through the rolls of film and grabbed it because its guaranteed to never turn purple and he had never used it before. Unfortunately 3m has been dragging their feet on getting it released, its a great film that matches the stock tint almost exactly.

Awesome gas tank skid. Looks a lot like mine.

Thanks man, I can not confirm nor deny that I sourced some inspiration from your skids, great minds think alike.
 
Winch Rebuild Phase 1

I finished phase 1 of the winch rebuild this weekend and it was by far the messiest project I have done to date. It is fairly well known that the first gen xrc winches had a few issues.

1) the grease used from the factory is like tar making them very difficult to freespool, especially when cold.
2) the solenoids are not sealed very well and can leak causing failure of the solenoid
3) the wiring connections are sub par and can causes some loss in performance.

Due to the fact that my bumper requires me to remove it to install a winch I want this to be a one time deal that I wont have to go back and redo. I also just want the winch as reliable as possible because when the time comes that I need it I know I will REALLY need it.

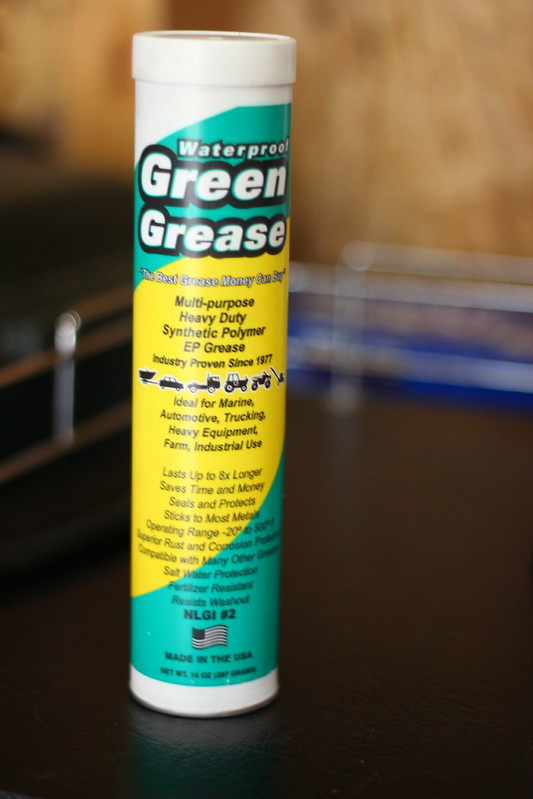
First up was to replace the nasty grease with something a little better. I went with "the best grease money can buy," because its waterproof and has an operating range from -20 to 500 degrees.
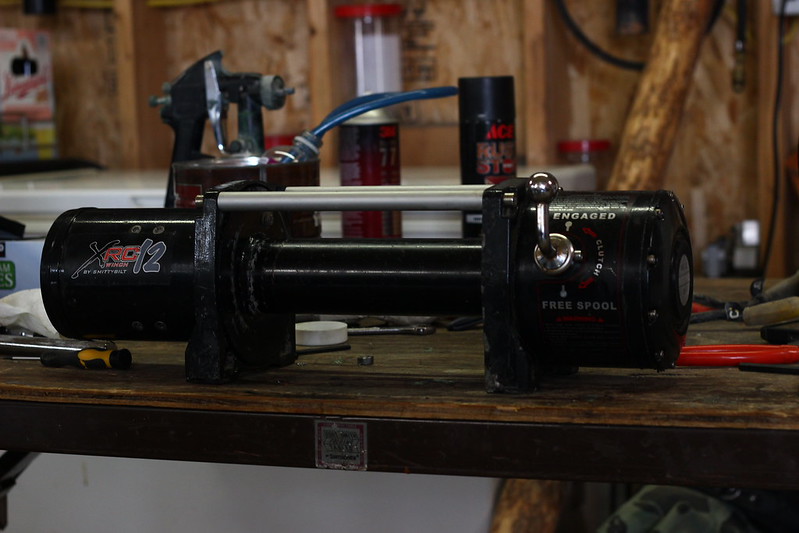
IMG_5582 by Phoenix Black, on Flickr

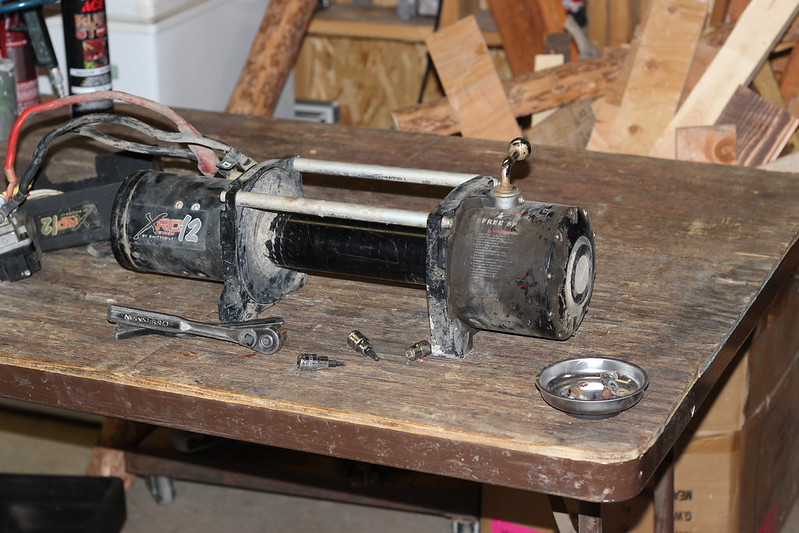
The winch with cable removed before I started the tear down.

IMG_5506 by Phoenix Black, on Flickr

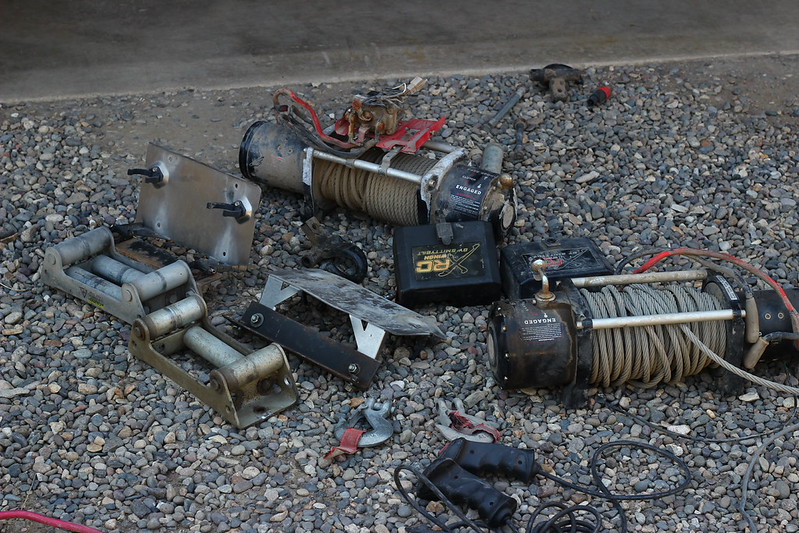
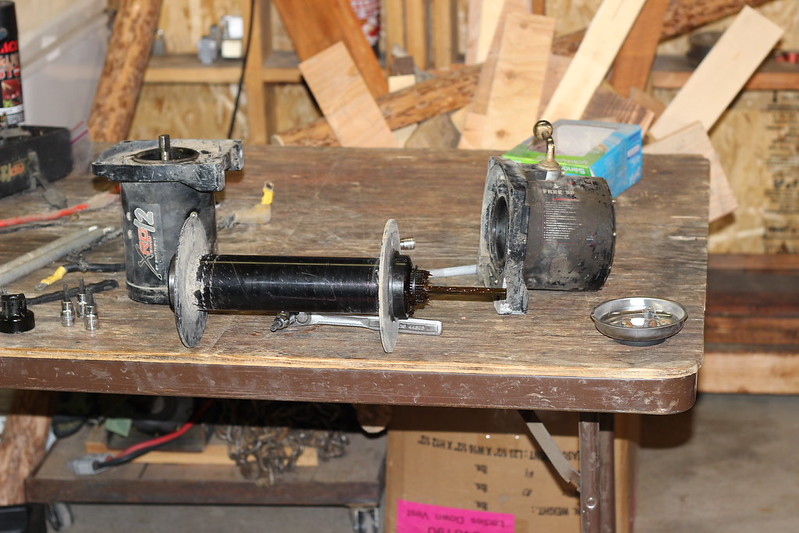
Cross bars, motor, and gear box separated...
IMG_5509 by Phoenix Black, on Flickr

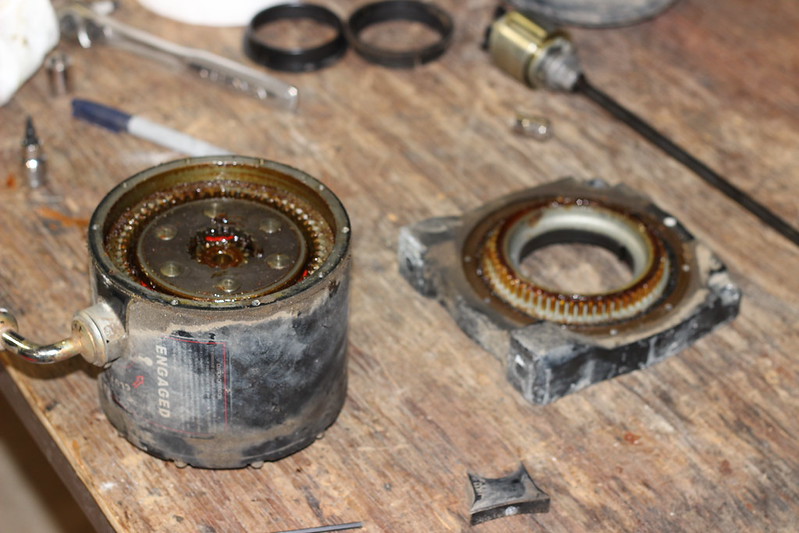
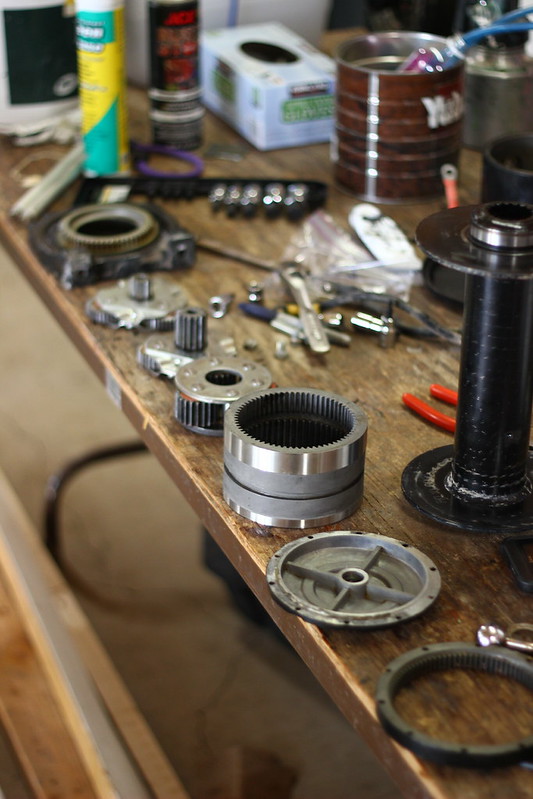
Next I began to disassemble the gear box, scraping off gobs of thick sticky grease as I went.
IMG_5514 by Phoenix Black, on Flickr
IMG_5517 by Phoenix Black, on Flickr

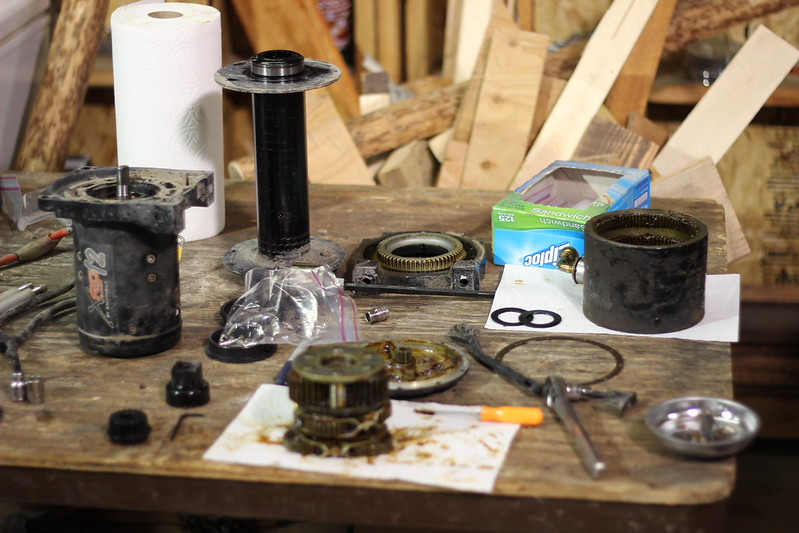
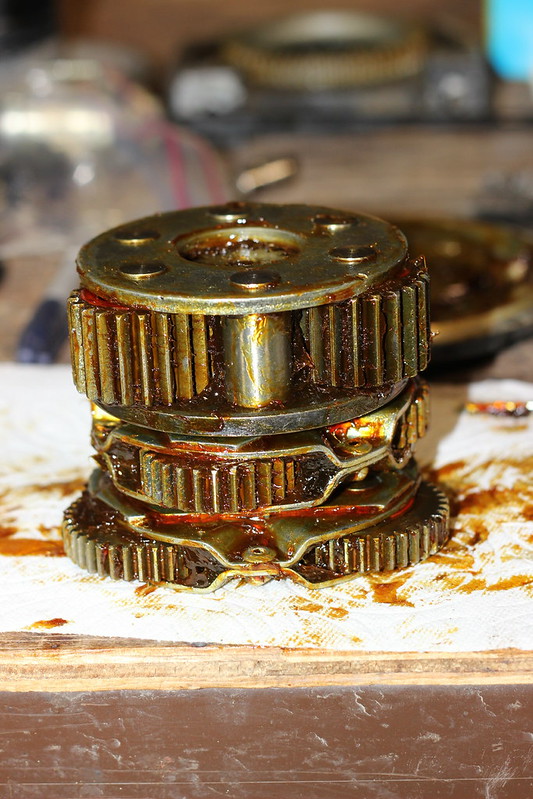
Planetary gear set...
IMG_5518 by Phoenix Black, on Flickr

After the gear disassembly I needed a break from the mess so I pulled the motor apart, inspected it, cleaned up some corrosion in the housing, and reassembled it making sure to waterproof all the wiring terminals and case joints with RTV. I also split the solenoid apart and sealed it up with RTV.

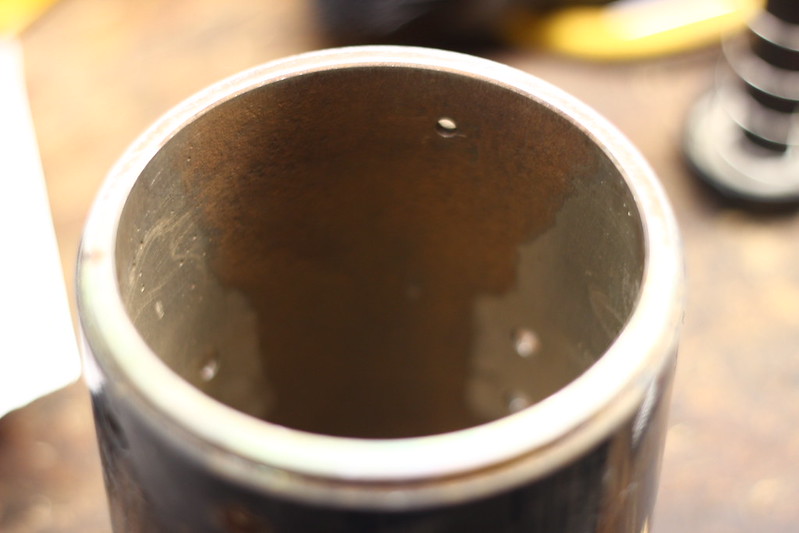
Inside of the motor case after removing corrosion...
IMG_5579 by Phoenix Black, on Flickr

Then it was back to degreasing. I picked up a gallon of purple power from autozone and used almost all of it but was surprised at how well the stuff broke the grease down.

After six hours of scrubbing, scraping, soaking, and wiping...
IMG_5581 by Phoenix Black, on Flickr

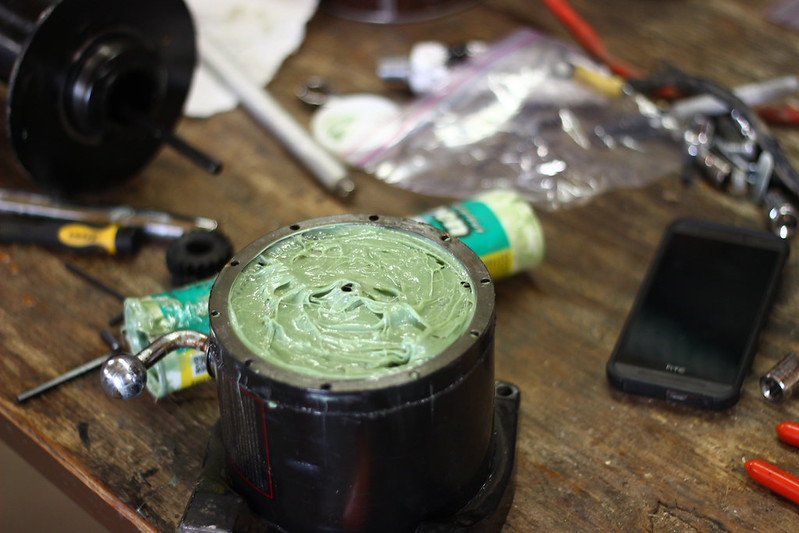
I then repacked all the gears and the box and reassembled it sealing all the joints with RTV. This was the messiest part and I only got one picture.

Freshly packed and ready for service...
IMG_5587 by Phoenix Black, on Flickr

All back together and cleaned up with everything working sooo much smoother...
IMG_5594 by Phoenix Black, on Flickr

After finishing this I went to get the XRC8 ready to resell, out of curiosity I tried freespooling it and was barley able to because the grease was so sticky. On the XRC 12 I can now spin the drum with one hand.

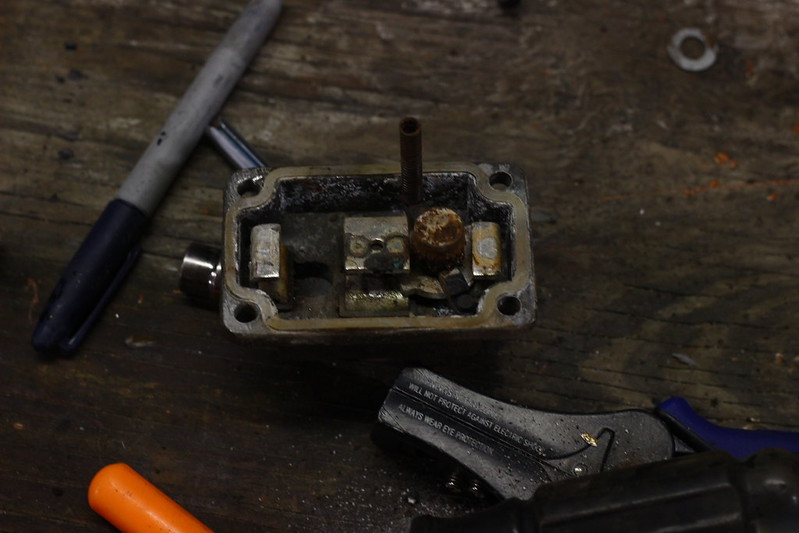
Unfortunately the XRC 8 solenoid leaked and it froze up completely so I hooked it up with the other solenoid and was able to make it run so I will be selling it without a solenoid. Oh well.

In side of the solenoid...
IMG_5597 by Phoenix Black, on Flickr

Phase 2 will be tackling the wiring so stay tuned
 
Last edited:
Winch Rebuild Phase 2

I got the electrical side of the winch completed and installed in the bumper this weekend. I did my best to upgrade everything I could to make it reliable and get the most performance.

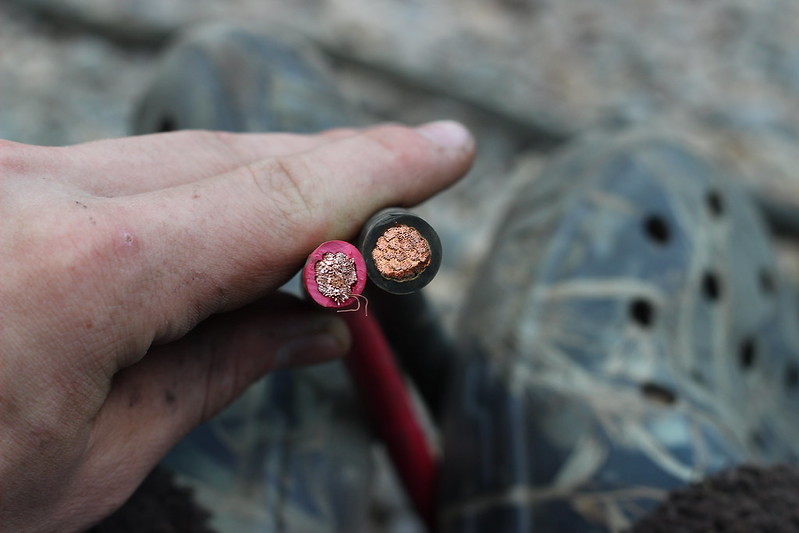
I opted to replace all the cables that carry the 300 plus amps that the winch draws at full pull because the guy who I bought the winch from did a poor job installing it so the cables had begun corroding inside the insulator for the entire length of the cable. Rather than buy new 2 gauge I decided to use the 1 gauge 600v flexaprene welding cable I had left over from a past project. It's a very high quality wire and should be more than overkill for this application.

Original 2 gauge on the left, new stuff on the right. and yes I am wearing crocs, theyre my go to wrenching shoes
IMG_5608 by Phoenix Black, on Flickr

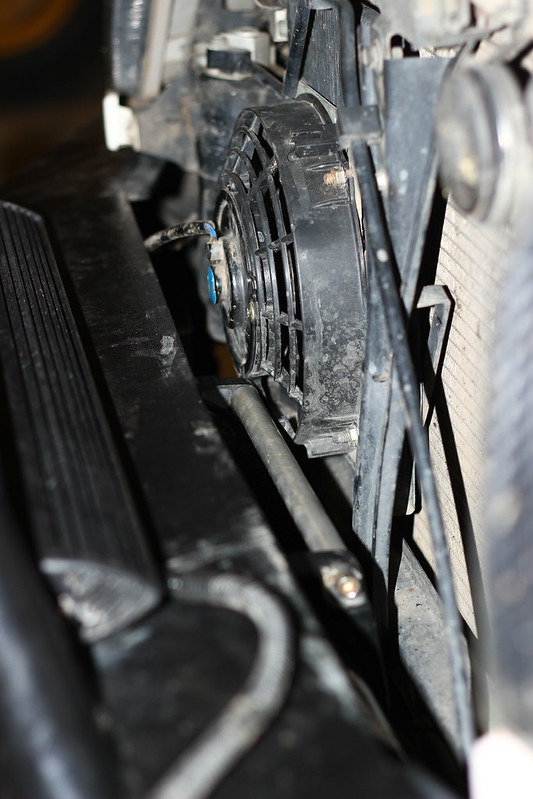
Before I could start on the wiring though I needed to make sure the winch was actually going to fit in the bumper. I ended up having to tweak the transmission fan location, clearance the fan guard slightly, and enlarge the access holes in the front of the bumper but nothing too major.

Clearance between the fan and winch, it's really tight...
IMG_5616 by Phoenix Black, on Flickr

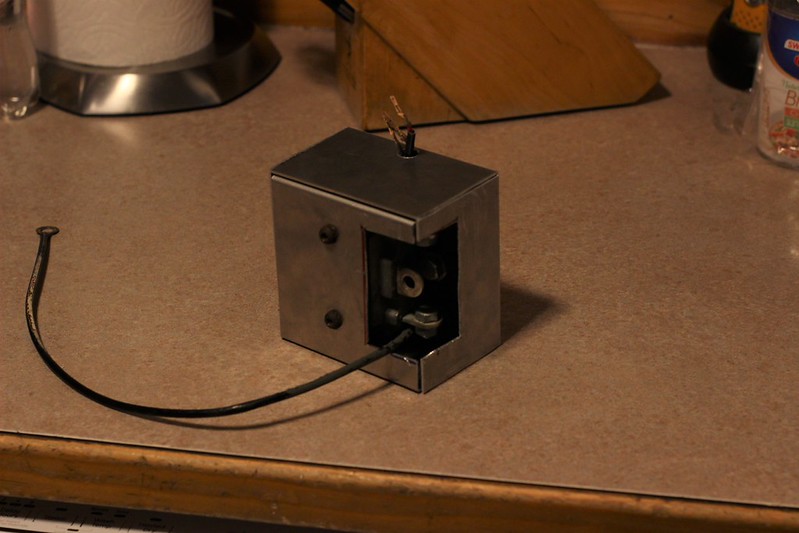
I then bolted the winch in and decided where I wanted to mount the solenoid. I decided on going right next to the passenger fog lamp but I needed a new solenoid box to mount it how I wanted. So I headed to the scap bin at work and sheared and bent up a quick box out of .063 aluminium.
IMG_5612 by Phoenix Black, on Flickr

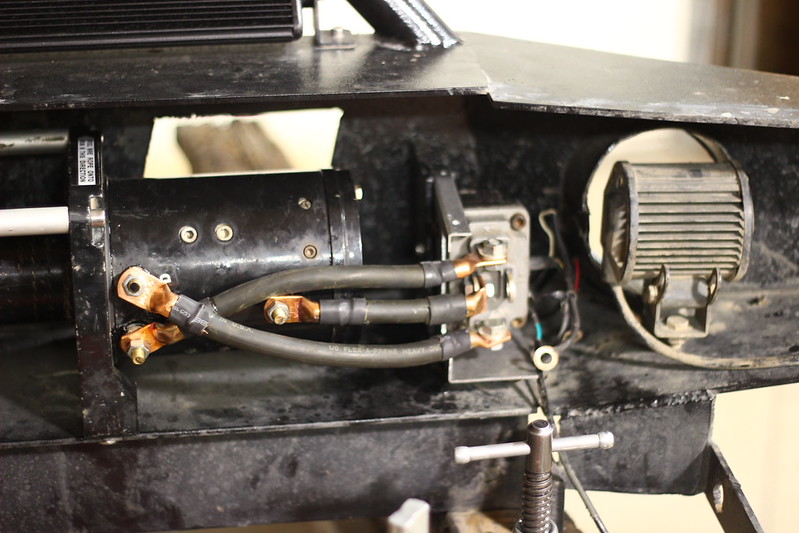
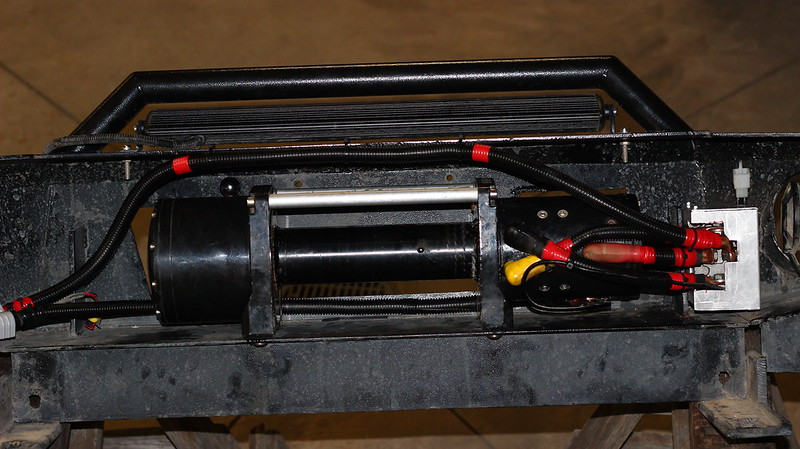
With the solenoid mounted and winch having a home secured in the bumper I started working on the wiring. First I made the short wires that go from the solenoid to the winch for the in and out controls. I followed the same process for all the connections, solder, punch set , shrink tube, electric tape, loom, one more layer of tape for color coding, and then a small zip tie to prevent the tape from unraveling
IMG_5621 by Phoenix Black, on Flickr

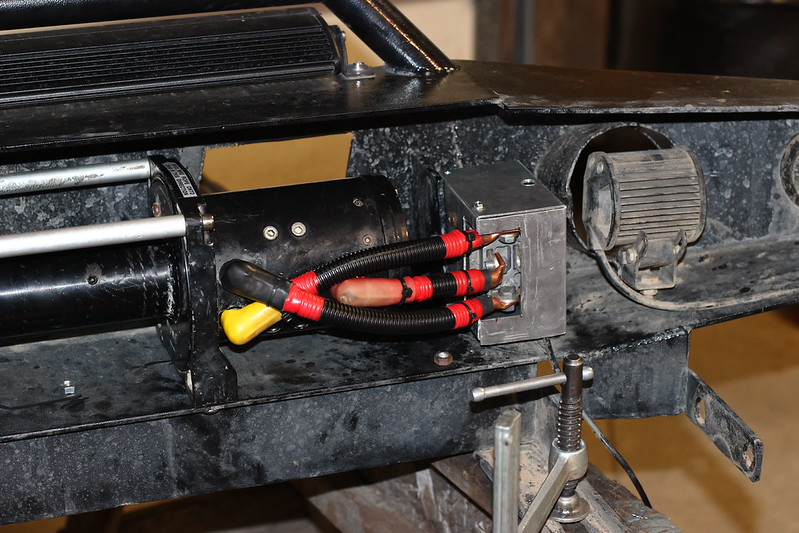
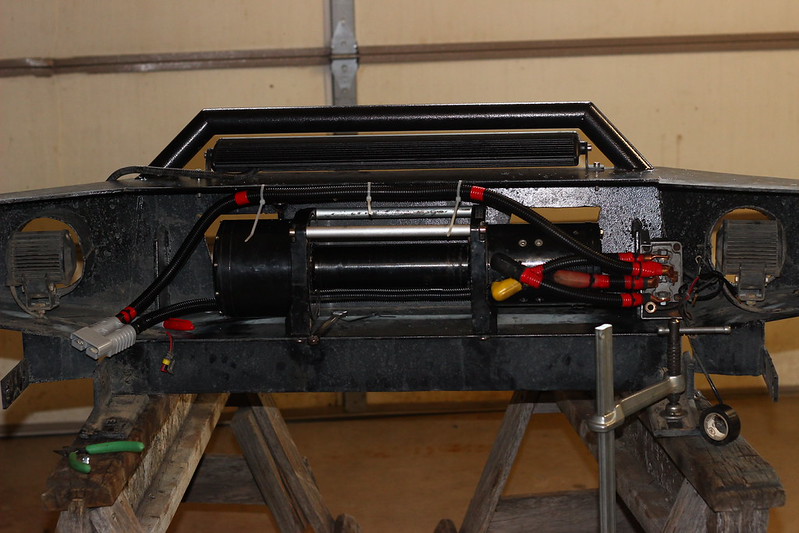
All wrapped in loom, color coded for positive, and I was still able to use the original terminal covers.
IMG_5627 by Phoenix Black, on Flickr

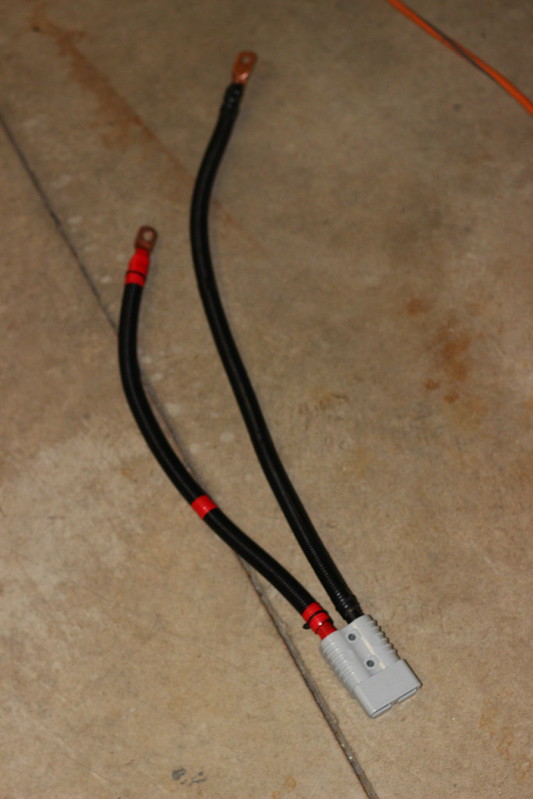
I then made the main positive and negative wires that run to the battery. I terminated them at the core support with an Anderson Power Products quick connector to make removing the bumper in the future easier.
IMG_5631 by Phoenix Black, on Flickr

Test fitting everything...
IMG_5629 by Phoenix Black, on Flickr

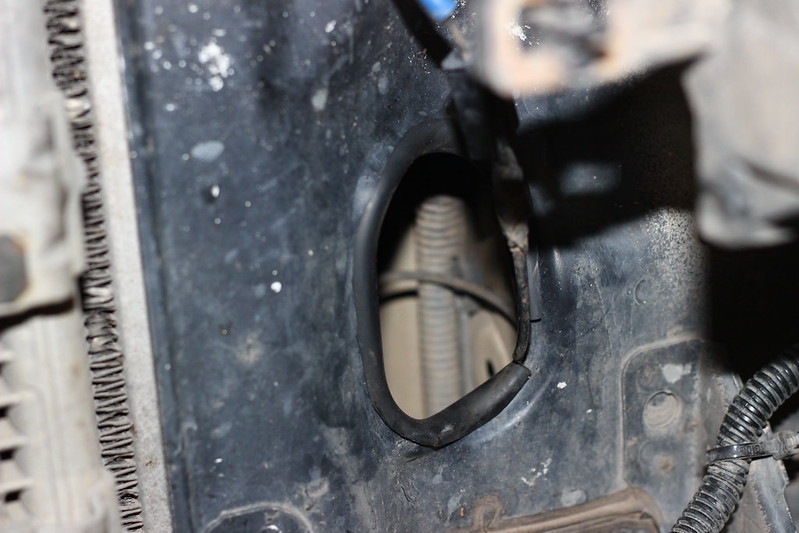
I also wrapped the hole in the core support with some rubber hose to add another layer of abrasion resistance.
IMG_5632 by Phoenix Black, on Flickr

I then did the final assembly making sure to give all the connectors a good coating of dielectric grease to prevent corrosion.
IMG_5634 by Phoenix Black, on Flickr

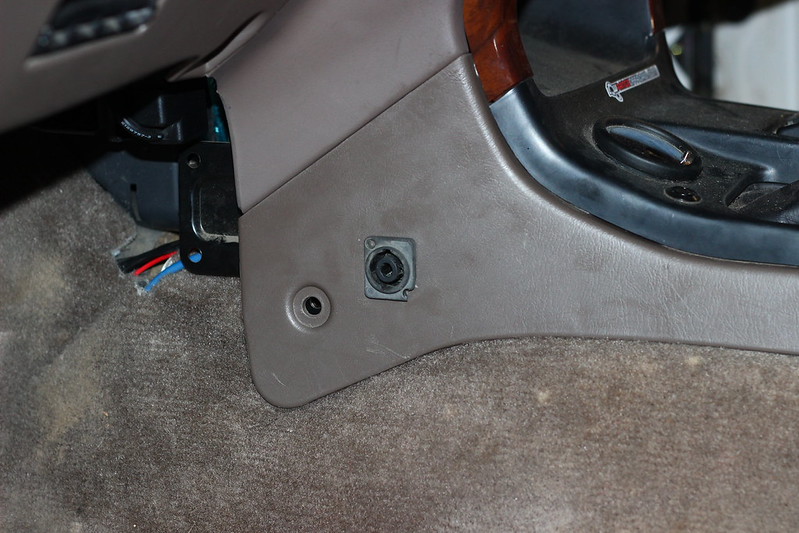
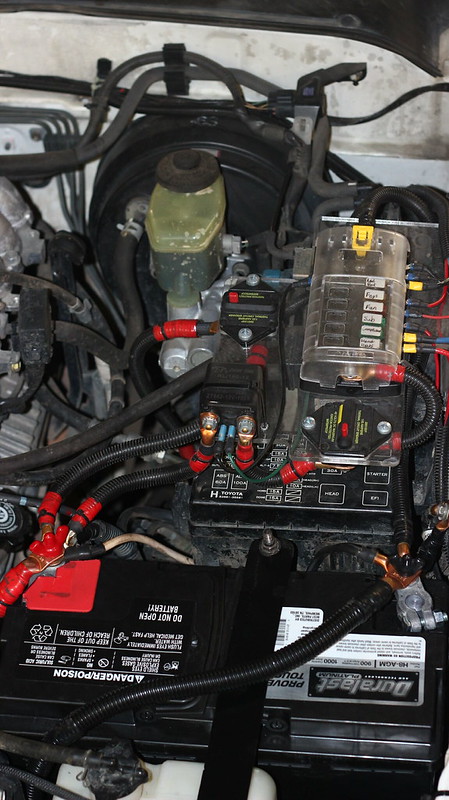
Lastly I ran the original remote connector into the cab giving me both in cab controls and out of the cab controls when needed. The winch runs like new and the added wiring from the big three really helps the alternator try and keep up, emphasis on the try. I think I am going to add a big deep cycle battery though to make the electrical a little more stable. Im looking at this one
IMG_5637 by Phoenix Black, on Flickr

Only thing left is to spool the line but I wont be able to do that for a while since its on back order
 
Last edited:
Thanks! I've been getting really lucky with finding some great deals lately. I just sold the xrc 8 and all the extra stuff from the xrc 12 that I didn't need for 120 so I basically got the winch itself for 55 dollars. Not bad. Now if only I could find a deal like that on an arb air locker.....
 
New Battery

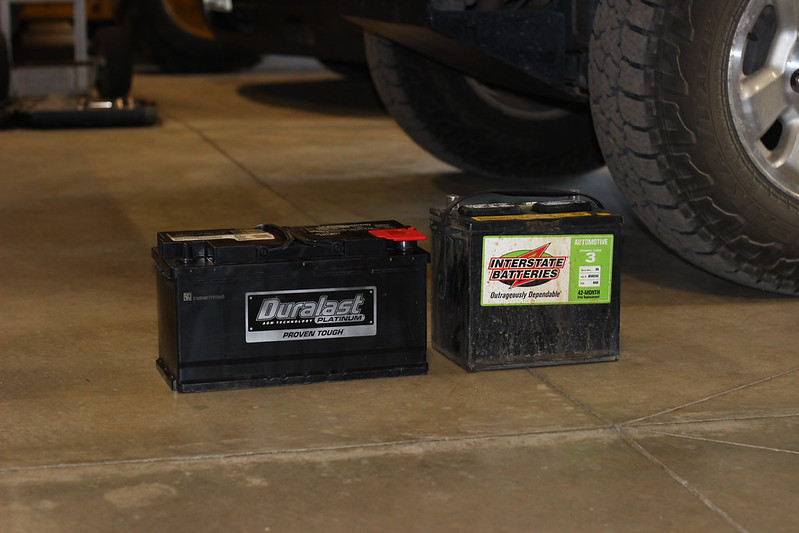
So I got a new battery, a big one, I got the new one because my one year old battery I had was already leaking from the lids and it was a little small to be running a winch off of. I decided on getting the Duralast Platinum AGM battery in the H8 group 49 variety because the price difference between this and the next size down was basically nothing, bigger is always better right? and I can get it replaced basically anywhere in the country. Its the same one [MENTION=67615]Dirtco[/MENTION] is running in his 99.

Heres the specs:

Stock:
CCA: 640
CA @32 degrees: 800
RC: 100

H8 AGM:
CCA: 900
CA @ 32 degrees: 1000
RC: 160

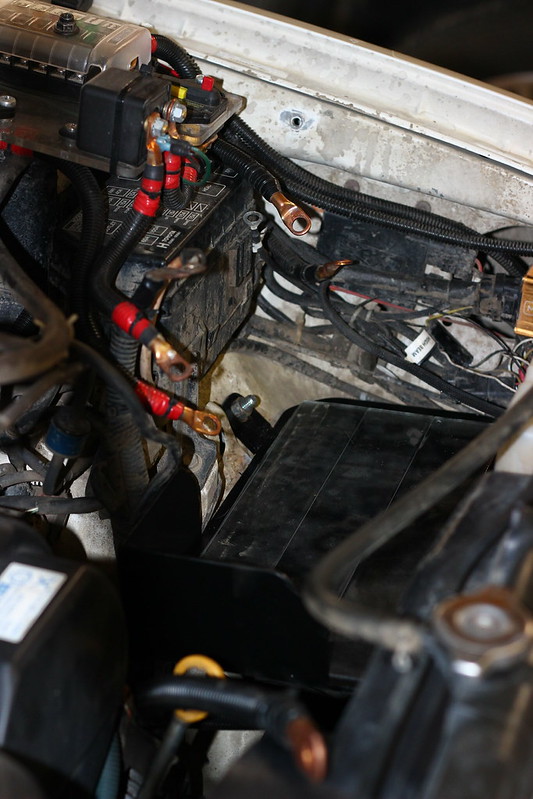
So it is a lot more powerful and wont leak but the downside is its a lot bigger so its a tight fit and I had to make a new tray for it but otherwise it went in nicely.

New VS Old...
IMG_5653 by Phoenix Black, on Flickr

New tray...
IMG_5655 by Phoenix Black, on Flickr

And installed...
IMG_5660 by Phoenix Black, on Flickr

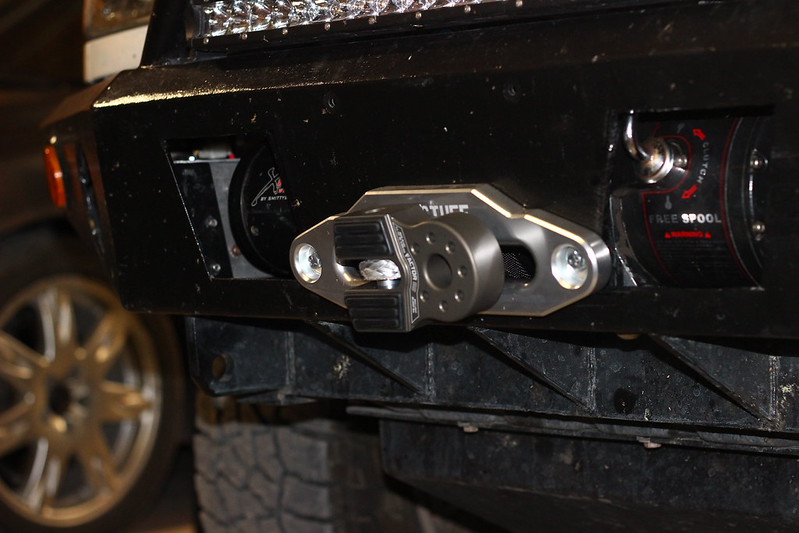
The winch line also showed up unexpectedly along with the Factor 55 Flatlink so I got those installed and was pleasantly surprised that when running the winch line on the voltage never went below 12.2 volts and the motor hardly got warm. Now I know it by no means had a heavy load on it but its a good sign that the electrical system is up to snuff. I also tried out the free spool and it is straight butter. So glad I changed out the grease.
IMG_5648 by Phoenix Black, on Flickr

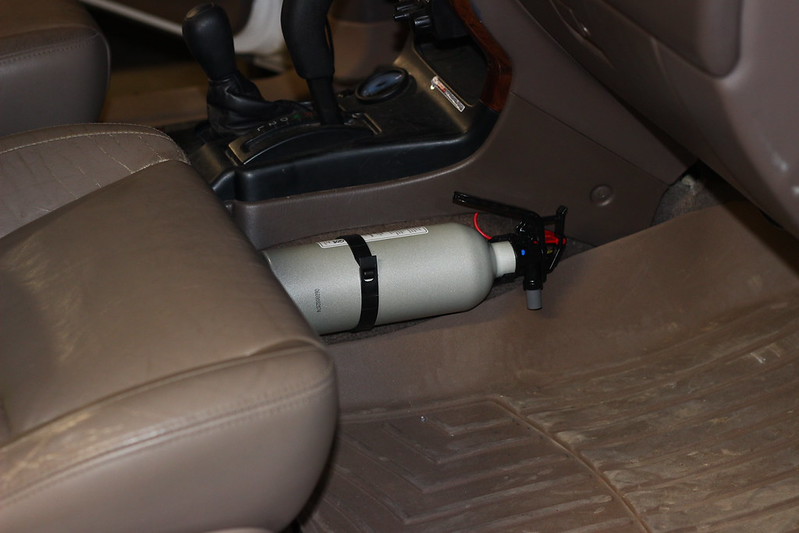
Also installed a fire extinguisher in the passenger foot well just for safety and a bit of cheap insurance should something ever happen.
IMG_5651 by Phoenix Black, on Flickr

Thats all for now but there are a few big things in the works right now so stay tuned for that.
 
Nice electrical upgrades. What did you use to mount your fire extinguisher? How is it secured to your truck? This is on my to-do list for this week hopefully.
 
I got a kiddie automotive fire extinguisher so it came with a plastic bracket and I just took some 1 1/2 self tapping screws and ran them into the transmission tunnel. So far its really solid but if it starts moving around Ill just swap the screws for some bolts but I dont see the need right now.
 
So a few weeks ago I started my first semester studying at Mechanical Engineering Technology at MSU. Ive been loving the life change but unfortunately the 4runner build has been pretty bland as of late. Just daily driving and the occasional maintenance. Up untill last weekend I hadnt even been out wheeling once sense returning from Colorado.

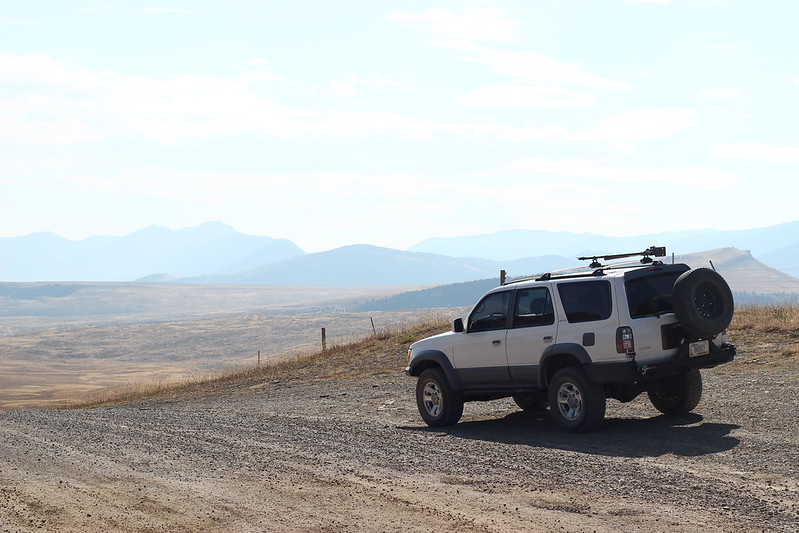
Last weekend though I took a trip down into the Boulder River Valley to go explore some new trails and scout some potential camping spots for a multi day trip Id like to do in the future. The trail itself was very mild but there was some good scenery and once I got into the trees I finally got a break from the nasty smoke that has been hanging around all summer.

Big open view after cresting out of a small valley...
IMG_5740 by Phoenix Black, on Flickr

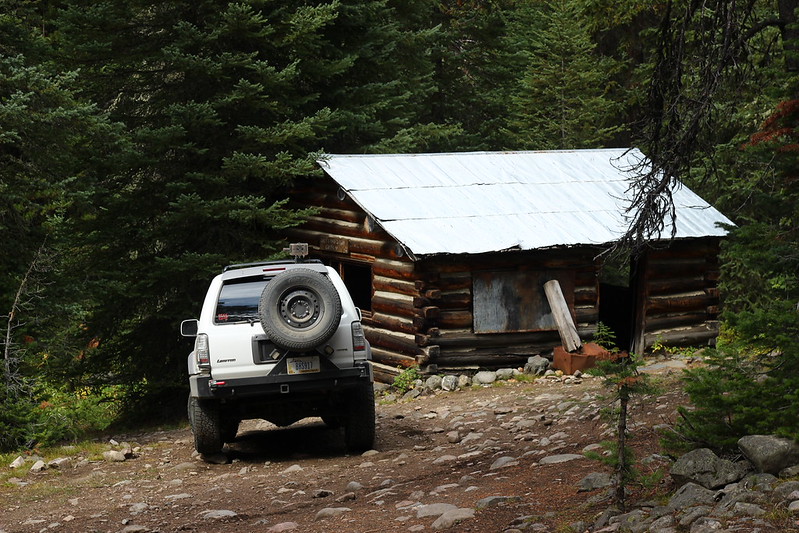
A cool old mining cabin that was my turn around point for the day.., and ended up covering a little over 100 miles of dirt in a day.
IMG_5744 by Phoenix Black, on Flickr

Had the skids off last weekend for an oil change. Really glad I made these, they have taken a beating but still look great
IMG_5746 by Phoenix Black, on Flickr

I also have been doing some more scouting closer to home as well in search of a decent snow wheeling spot for this winter and today I think I may have found one. So I am pretty excited for when the snow finally does fly.

I am now planning on doing some more suspension upgrades here in the future as well. Ive never been really pleased with the ride of the 4runner, its good, but not great. Espessially in the rear. On my last trip there were several times I had to stop and let the rear shocks cool off because theyre dampening was just becoming non existent so I would like to upgrade to some external resi kings with a custom mount and possibly swap the fronts to king as well with some wheelers super bumps so there is more of a controlled bottoming. I am still in the design stage but we will see what I come up with
 
Last edited:
I'm looking at doing very similar upgrades. Kings up front but I'm not sure what I'll put in the back. I've been looking into 4th gen rear shocks since they seem to have more options that are closer to the length I'm looking for in the rear.
 
That's one of the options I was considering. I have stock length 4th gen shocks now and the length is pretty much perfect. Plus I think the reservoir on the king 4th gen shocks will work better with the custom mount I have planned. My other option is going full custom with 10 inch stroke shocks but that might be too expensive for my taste.
 
That's one of the options I was considering. I have stock length 4th gen shocks now and the length is pretty much perfect. Plus I think the reservoir on the king 4th gen shocks will work better with the custom mount I have planned. My other option is going full custom with 10 inch stroke shocks but that might be too expensive for my taste.

King rears are too expensive for my blood unless I get a crazy deal, or buy used needing a rebuild or something. No one seems to want to sell their kings though...

I've been looking at Fox 2.0 reservoir shocks in the rear. 985-24-116 looks like it should be a length pretty close to the LC shocks I've got now. It's designed for a 0-1.5" lift on 2nd gen Tacomas. Beware though, Fox measure's their shocks strangely, you have to add 1.2" to get their true compressed/extended lengths. They don't measure from the center of the lower mount to between the upper bushings for some reason.
 
King rears are too expensive for my blood unless I get a crazy deal, or buy used needing a rebuild or something. No one seems to want to sell their kings though...

I've been looking at Fox 2.0 reservoir shocks in the rear. 985-24-116 looks like it should be a length pretty close to the LC shocks I've got now. It's designed for a 0-1.5" lift on 2nd gen Tacomas. Beware though, Fox measure's their shocks strangely, you have to add 1.2" to get their true compressed/extended lengths. They don't measure from the center of the lower mount to between the upper bushings for some reason.

Ill agree the Foxs are much cheaper which I like, but none of them that I could find have the compression adjuster knob which is something Id really like to have

Tell me more about this? Keeping things inboard or going outboard?

Ill be going outboard so I can fine tune the position to get better dampening. It isnt going to be anything too fancy, currently I am planning on using the King OEM series for the 96-02 4runner with the external resi and compression adjuster p/n 25001-334A. According to their spec sheet it matches my current shocks almost exactly so I will maintain the same amount of travel which I am fine with, I get 18 inches of travel and nothing rubs or binds so it works perfectly for my purposes.

Ill be keeping the stock stud type upper mount but Ill be spending a lot of time cycling the suspension to get the optimal angle as for where it should be. The only unknown I have it weather or not the tire will clear, which I think it will, but just barely...
 

Members online

Forum statistics

Threads
278,312
Messages
3,554,083
Members
248,016
Latest member
Advally Service

Trending content

Back
Top