
You are using an out of date browser. It may not display this or other websites correctly.
You should upgrade or use an alternative browser.
You should upgrade or use an alternative browser.
Blacking Out the Runner's Chrome
- Thread starter doodman
- Start date

emsmatt
New member
Questions for those who have Plastidip'd their emblems and such. I have been blacking out my chrome with Krylon Fusion and it just isnt holding up as well as I'd of liked. I originally di all the chrome about 1.5yrs ago and have had to do alot of touch-ups as well as completely repaint some stuff. It has faded and chipped. I was thinking of redoing all the chrome using Plastidip since folks seem to of had such great results with it. Anyone know if I'm gonna have to sand/remove all the Fusion paint before I can Plastidip or I can I Plastidip right over the fusion? Thanks.
rebelbowtie
New member
Plasti dip right over it, obviously make sure it's not dirty but the plasti dip will stick to the krylon no problems.

Will733
New member
Plastidipped for her 2 year Bday
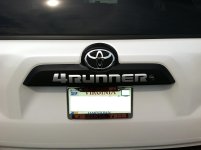
She turned 2 this month, so I finally decided to plastidip the chrome door handles, front & rear chrome lace along the bottom, and the under carriage to cover-up the exposed area from removing the rocker panels. I already had the TE grille, so I just need a TE rear end (Plastidipping that looks like a b*tch since I don't want the emblem or letters black). I'll probably do the roof rack next...


She turned 2 this month, so I finally decided to plastidip the chrome door handles, front & rear chrome lace along the bottom, and the under carriage to cover-up the exposed area from removing the rocker panels. I already had the TE grille, so I just need a TE rear end (Plastidipping that looks like a b*tch since I don't want the emblem or letters black). I'll probably do the roof rack next...
Will733
New member
Decided to try out the rear emblem after all...
http://www.toyota-4runner.org/5th-g...ition-rear-emblem-plasti-dip.html#post1135861
http://www.toyota-4runner.org/5th-g...ition-rear-emblem-plasti-dip.html#post1135861

mrvandelay
New member
Has anyone tried using Plastidip on the rear of a 5th gen TE without removing the emblems? I am wondering if it will peel off of the black plastic underneath the emblems since it isn't smooth or painted. I am thinking about trying it this weekend...
All my emblems on my TE are PlastiDipped with great success. Go for it!

arsonl45
New member
All my emblems on my TE are PlastiDipped with great success. Go for it!
Awesome! Thanks for the quick response!

FatTiresRollin
New member
Plasti-Dip Succesful
Took the plunge with Plasti-Dip. Love how it turned out. Ran out of time on Saturday during my 2 year olds naptime, but I got 3 more cans in the garage! Chrome strips are next...maybe a TE conversion w/ Plasti-Dip.
Took the plunge with Plasti-Dip. Love how it turned out. Ran out of time on Saturday during my 2 year olds naptime, but I got 3 more cans in the garage! Chrome strips are next...maybe a TE conversion w/ Plasti-Dip.
Attachments
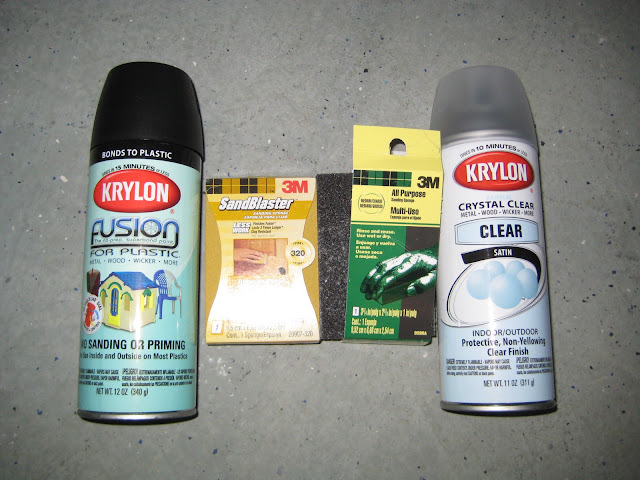
Step 1: Buy supplies shown below if you want to convert chrome to satin black. If you want flat black, go out and buy that instead (I recommend flat black but it's very hard to find in Krylon Fusion).
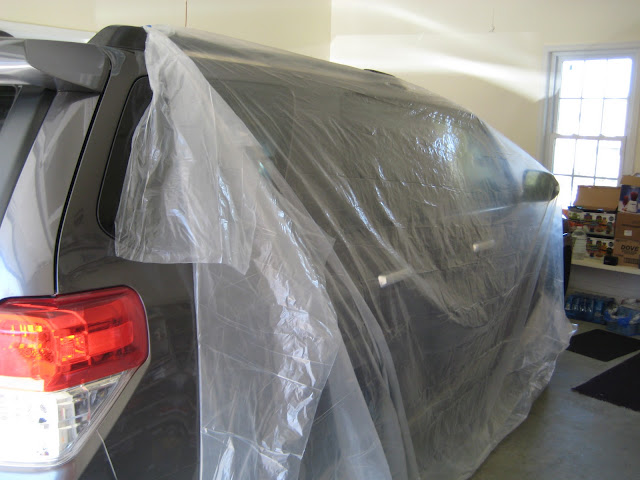
Step 2: Buy a plastic Dropcloth from Dollar Store for a buck and cover the entire side of truck. Then, cut out a piece of plastic so the handles are exposed through plastic.
Step 3: Using playing cards, insert them between the handle and actual door. For the most part, you should be able to wedge them in there. For the areas where you can't wedge them in there, just tape them in place. The cards serve as excellent protectors against paint on the actual door itself.

Step 4: Sand down the area to be painted using 320 sandpaper.
Step 5: Next, get a wet paper towel and wipe down the area well to remove all the sand filings and any loose dirt and grime.
Step 6: Shake can of paint for a minute and apply first coat being sure to start well off the door handle and ending well off the door handle. DO NOT douse the handle with the first coat. Even if the first coat appears very very light, that is OK. TRUST ME ON THIS ONE BECAUSE I SCREWED UP ON ONE DOOR HANDLE since I put a heavy coat on with the first coat. REMEMBER: put on LIGHT coats and you will need to put on 6-10 coats. I read somewhere that I needed about 3 coats of black paint. This was the mistake I made on the handle that I ended up screwing up. On all the other handles, I did a good 7-8 light coats, and the results were BEAUTIFUL.
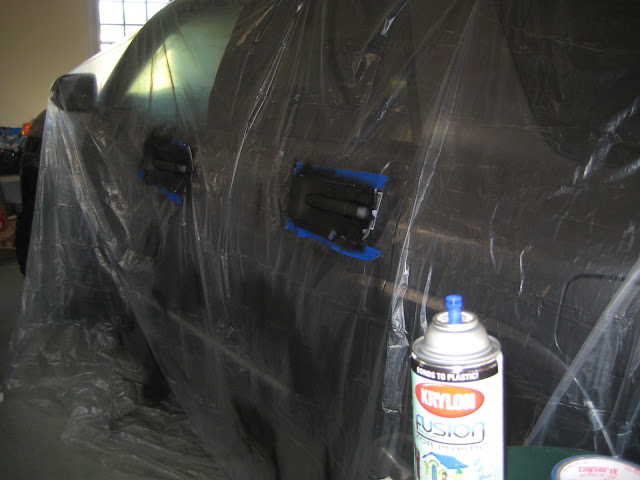
Step 7: That's pretty much it. Be careful removing the playing cards and plastic dropcloth as the newly painted surface is fragile for the next 7 days while the paint cures and bonds to the plastic door handles. I drove 3 hours on the highway at 70mph that same day that I finished these handles and thankfully didn't have any rocks fly up and chip away the paint.
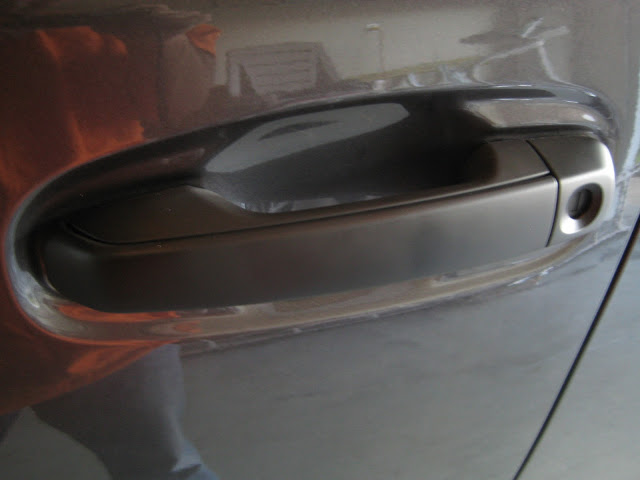
What I would do differently if I could go back in time or what I would recommend to you all:
*I would definitely put on 7-8 quick light coats instead of 3-4 medium coats. TRUST ME ON THAT ONE.
*I also would have used a paint thinner, mineral spirits, or some other chemical that would remove all the hidden grease and grime (per Harper's recommendation). This is because, on the one handle that I screwed up, I think I unsuspectingly left some of my finger oils on the handle and so the paint didn't stick well and then started chipping and cracking within 20min of paint application. Because of this, I now have to find a free day to sand that one handle down completely and re-do that handle.
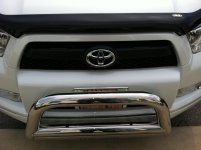
*I would use the Krylon Fusion Flat Black instead of the Satin Black. IMO, it just looks a LOT better (not that the satin black looks bad). I painted the front toyo logo and horizontal piece in satin black and will prolly repaint it to flat black.
*Wear a mask. I did not wear one. Instead I relied on holding my breath for 30 sec each time I went in to the garage to apply a coat. This stuff can irritate your throat pretty bad.
*I would do the painting indoors where you do NOT have a breeze going. This is because you don't want a breeze to blow dust and lint onto the freshly painted and wet surface.
I'm not done yet. I still have the rear '4RUNNER' logo, chrome strips, and fog light surrounds to do but here is a pic of the final product so far which I like MUCH better than with the chrome accents:

You don't need to use a primer first?
brandon13ke
New member
painting Limited edition
If you paint the touch sense thing on the handles will they still work??? has anyone confirmed this yet? (For the Limited)
If you paint the touch sense thing on the handles will they still work??? has anyone confirmed this yet? (For the Limited)

harper7
Senior Member
If you paint the touch sense thing on the handles will they still work??? has anyone confirmed this yet? (For the Limited)
The part where the touch sensors are is already the body color (silver in my case)and not chrome so I just left the top alone on all the handles. You can take the door handles off the truck and separate the pieces to get alot better paint job.
No idea if it would affect them .Probably depends on how thick the paint was .I doubt they would work with plasti-dip though.

Last edited:
The part where the touch sensors are is already the body color (silver in my case)and not chrome so I just left the top alone on all the handles. You can take the door handles off the truck and separate the pieces to get alot better paint job.
No idea if it would affect them .Probably depends on how thick the paint was .I doubt they would work with plasti-dip though.
The door handles still work (proximity sensor) if you plasti dip them, did it on mine. I put on six coats and have had no problems. You would need to have some serious layers to block the RF or metal flake in the paint to cause problems.

NorthWest 4R
New member
Ditto. I have tried Plastidip, Krylon Fusion, and Vinyl Wrap on my door handles and it doesn't affect the touch sensitivity feature.
Which one turned out the best, and was the most durable? Why did you do it so many different times?
brandon13ke
New member
Do any of you guys who plastidip, krylon fusion, or Vinyl wraped the handles have any more pictures of a full blacked out mag grey?? I want to see what it looks like when the chrome strips and front grill are de-chromed, can't find any pics of that
Last edited:
brandon13ke
New member
Did the badges!!! wooo
I did it! Thanks to this thread I followed some helpful tips and guides plus watched how to plasti-dip your emblems etc from DipYourCarcom. It was very very helpful!
Original 'Limited':

Covering:

(Make sure you leave about an inch from the letters so its easier to peel off, its MUCH EASIER LATER ON!!!)
2nd or 3rd coat:

Spraying tips with the Plasti-dip I strongly recommend:
- When spraying make sure you test/shoot a bit off to the side so it doesn't splatter on the badge - This is a MUST!!!
- Approach at all different angles each and every coat - aiming down, aiming up, left to right aiming and right to left aiming so you get in all the spots. I personally did very light coats and look my time with it, I highly recommend this because the quality of the finish is really even.
- Cover the entire area that you have marked off, it makes it easier to peel off later on.
- 1 more coat, 1 more coat, do it! I wish I had just slightly more thickness so the inside of the letters part would have been easier to peel.
Final coat (6th) all dry and ready to peel:

For this last coat go at it straight on, a nice solid coat getting everywhere -- You will want to start peeling about 15 minutes later or when it is dry to the touch, its much easier to peel this way.
Peeling in process:

Take your time, I accidently scratched my truck just a tiny tiny bit with a tiny flat head (For glasses) when I was trying to get in between the I and M, Ops! You don't need to touch the trucks paint at all actually, just keep forcing it away on the plasti-dip, take your time, theres no rush.
Final product close up after peeling:

Final side shot:

Going to start the 4 chrome strips tomorrow I think and maybe the handles.... I will post when I am done! Plus I have my Satoshi Grill Mod on the way from Grillcraft, so excited.
I did it! Thanks to this thread I followed some helpful tips and guides plus watched how to plasti-dip your emblems etc from DipYourCarcom. It was very very helpful!
Original 'Limited':
Covering:
(Make sure you leave about an inch from the letters so its easier to peel off, its MUCH EASIER LATER ON!!!)
2nd or 3rd coat:
Spraying tips with the Plasti-dip I strongly recommend:
- When spraying make sure you test/shoot a bit off to the side so it doesn't splatter on the badge - This is a MUST!!!
- Approach at all different angles each and every coat - aiming down, aiming up, left to right aiming and right to left aiming so you get in all the spots. I personally did very light coats and look my time with it, I highly recommend this because the quality of the finish is really even.
- Cover the entire area that you have marked off, it makes it easier to peel off later on.
- 1 more coat, 1 more coat, do it! I wish I had just slightly more thickness so the inside of the letters part would have been easier to peel.
Final coat (6th) all dry and ready to peel:
For this last coat go at it straight on, a nice solid coat getting everywhere -- You will want to start peeling about 15 minutes later or when it is dry to the touch, its much easier to peel this way.
Peeling in process:
Take your time, I accidently scratched my truck just a tiny tiny bit with a tiny flat head (For glasses) when I was trying to get in between the I and M, Ops! You don't need to touch the trucks paint at all actually, just keep forcing it away on the plasti-dip, take your time, theres no rush.
Final product close up after peeling:
Final side shot:
Going to start the 4 chrome strips tomorrow I think and maybe the handles.... I will post when I am done! Plus I have my Satoshi Grill Mod on the way from Grillcraft, so excited.

I did it! Thanks to this thread I followed some helpful tips and guides plus watched how to plasti-dip your emblems etc from DipYourCarcom. It was very very helpful!
Original 'Limited':
Covering:
(Make sure you leave about an inch from the letters so its easier to peel off, its MUCH EASIER LATER ON!!!)
2nd or 3rd coat:
Spraying tips with the Plasti-dip I strongly recommend:
- When spraying make sure you test/shoot a bit off to the side so it doesn't splatter on the badge - This is a MUST!!!
- Approach at all different angles each and every coat - aiming down, aiming up, left to right aiming and right to left aiming so you get in all the spots. I personally did very light coats and look my time with it, I highly recommend this because the quality of the finish is really even.
- Cover the entire area that you have marked off, it makes it easier to peel off later on.
- 1 more coat, 1 more coat, do it! I wish I had just slightly more thickness so the inside of the letters part would have been easier to peel.
Final coat (6th) all dry and ready to peel:
For this last coat go at it straight on, a nice solid coat getting everywhere -- You will want to start peeling about 15 minutes later or when it is dry to the touch, its much easier to peel this way.
Peeling in process:
Take your time, I accidently scratched my truck just a tiny tiny bit with a tiny flat head (For glasses) when I was trying to get in between the I and M, Ops! You don't need to touch the trucks paint at all actually, just keep forcing it away on the plasti-dip, take your time, theres no rush.
Final product close up after peeling:
Final side shot:
Going to start the 4 chrome strips tomorrow I think and maybe the handles.... I will post when I am done! Plus I have my Satoshi Grill Mod on the way from Grillcraft, so excited.
That's awesome. Looks good.
Similar threads

- Replies
- 8
- Views
- 3K


