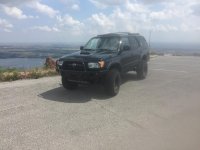
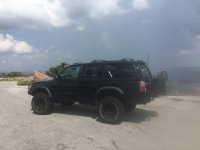
Building the Black Pearl...

I wouldn't preemptively pull the motor and replace a bunch of seals or redo the heads.

Anything could be wrong. At 240k miles it could have some lower block issues that have nothing to do with the heads.

Even if you were to do all the work yourself it would still be a huge investment to pull the motor (or don't pull it) and replace the heads. You could do all that work for nothing. There is no way to tell.

I figure if/when I do that, my 3rd gen won't be my dd. Everything appears to be solid. We all know appearances can be decieving. So I don't think that will be in my immediate future. The thought was just to replace all the gaskets and what not. Get it all buttoned up good.
 
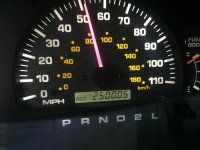
Just my opinion (influenced by my current situation) but at 250k miles any engine is in the upper end of its lifespan. Even with brand new heads that would be the case. Say you make it to 300k miles. That would be awesome. I think we could agree 300k with no major failures is pretty above average for this engine.

My point is if it runs fine then you should just drive until something major happens and then decide what to do at that point. Because it makes no sense to replace old but working fine heads with new gaskets only to throw a Rod at 300k or have some issue with the crank. If it is running fine then fix the major oil leaks and keep on trucking.

What did the black light reveal? How did the interior fare?
 
Last edited:
Just my opinion (influenced by my current situation) but at 250k miles any engine is in the upper end of its lifespan. Even with brand new heads that would be the case. Say you make it to 300k miles. That would be awesome. I think we could agree 300k with no major failures is pretty above average for this engine.

My point is if it runs fine then you should just drive until something major happens and then decide what to do at that point. Because it makes no sense to replace old but working fine heads with new gaskets only to throw a Rod at 300k or have some issue with the crank. If it is running fine then fix the major oil leaks and keep on trucking.

What did the black light reveal? How did the interior fare?

The 5vzfe short block is known to last 500k miles if maintained. Rebuildingmthe heads and replace all seals is not a big deal. I probably wouldn't pull the motor personally, I would just do it but leave the short block in the engine bay. It's typically better to be proactive in repairs to keep from being stranded due to a burned valve while on a road trip or something.
 
The 5vzfe short block is known to last 500k miles if maintained

All I can say dude is that here on T4R after browsing the 3rd gen section for years I can tell you that plenty of 5vzfe engines that were maintained have major issues of some kind after 250k miles. 300k miles on original engine components means you did really well. 250k miles on an engine is awesome. Hopefully everyone's lasts past that but don't be surprised if something comes up.

In related news my new used engine goes in next week. 99 with 110k miles. So ready for this swap.
 
Shrockworks bumper install

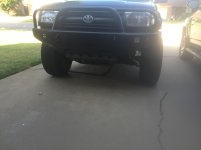
Ok, so I changed my mind a couple times after I ordered my bumper from Shrockworks. Decided it would be the best to have all 3 hoops on the front and that I did want it powder coated. Thanks to those guys for making it all happen for me.

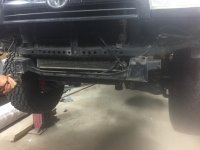
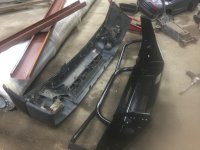
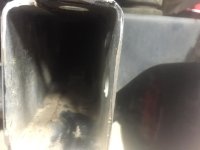
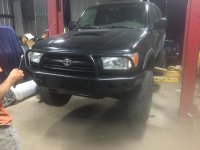
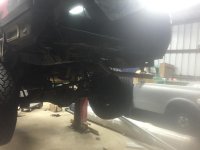
Friday drove to Shrockworks to pickup the entirety of my order. I didn't realize however that it would be in so many pieces and that it was so much stuff. I will say, my 3rd Gen bumper looked like a side by side bumper next to all the 5th Gen bumpers. It was a long drive, but not too bad into Texas, stopped by Voodoo Doughnuts in Austin. Barely made it to Shrockworks for pickup, (they even stayed late to help me). Their address is NOT GPS friendly. Got it all loaded up into the back of the pickup and headed out to the garage. Started putting it on at 6pm, and wrapped up getting the front on(no lights), the rear on(no swing out or anything else), all the skids minus the T-Case by 3 or 3:30 am. Then drove home. On the upside when we cut the frame open on the front, it was incredibly clean.

Bumper install- It was a little frustrating because it was considerably more difficult that I had anticipated. Thought it would be more bolt up friendly. If you have it powder coated just be aware you are going to lose about 1/4 inch on it. You can only grind the frame down a little bit. There is about 1/8 inch of powder coat on top of the bare metal. The brackets that went on the front of the rig to hold the bumper had to be no coaxed with a hammer, and some other tools. If they could leave those bare for others that would be great, or make the adjustment of about 1/4 inch. It was a real P.I.T.A., but I wasn't worried so much about breaking the bracket. With this being said, I also would like to see maybe a separate set of instructions if you don't have a welder, or don't plan on welding the cap on the end of the frame, versus if you do. I didn't plan on it till the guy I was working with rolled out a Hobart welder. I also wish that the bolts were labeled a bit better, even if it just means breaking down the hardware into steps. Like what you need for step 1, 2, 3, mounting the tire carrier, jerry can, etc, because none of it is mounted when you get it. The hardware for the front bumper was wrapped up into saran wrap the size of a baseball, the rear closer to the size of a soft ball. I still have a bunch of hardware I have left over, nuts and bolts. All of the hardware is there, but you just need to either one take the time before hand to separate it all, all your m12 bolts, m14 bolts, because you can't pick it up and just know what the bolt is, unless you are that good. If you are, good on you.

All the hardware seems to be good, solid, quality material. I am very happy with the purchase. I almost am wishing that I had someone worth a crap around me to be able just have sent my rig in and had them put it all together. I need to get the turn signals in and wired up today, and the Baja Designs Squadron Pros wired up to the fog stalk so it will be drivable without the hyper blink.

 

Attachments

  • IMG_9662.jpg
    IMG_9662.jpg
    124.8 KB · Views: 589
  • IMG_9663.jpg
    IMG_9663.jpg
    123.2 KB · Views: 575
  • IMG_9664.jpg
    IMG_9664.jpg
    135.7 KB · Views: 584
  • IMG_9666.jpg
    IMG_9666.jpg
    126.2 KB · Views: 548
  • IMG_9665.jpg
    IMG_9665.jpg
    123.1 KB · Views: 562
I will also say I am glad that I had 2 other sets of hands helping me with this. Someone that is even more mechanically inclined than I am was a real help. It didn't hurt that he had 2 welders, a two post lift, all the air tools I could imagine, and about 4, 6 foot tall tool boxes that had just about anything I could imagine. It was like working in a actual shop. I will start wiring things up today, and keep photo documenting as I go along.
 
Wiring question

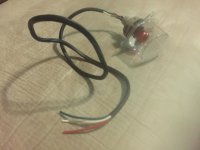
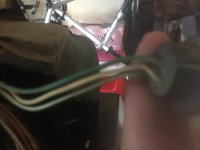
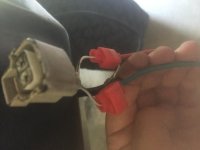
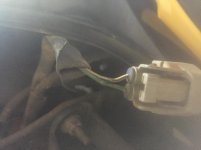
This has three wires, the pigtail only has two. How does this work? I'm very wiring stupid so I'm going to ask plenty of wiring questions as I do this.
 

Attachments

  • image.jpg
    image.jpg
    126.4 KB · Views: 552
That bumper looks sweet. More pics!

I'm working on it, think I'm going to take it off tomorrow and try to get the lights wired. The turn signals are giving me the hyper blink. I'm gonna see if I can wire up the markers too. Tomorrow I'll post more.
Edit- [MENTION=65101]BrianSD_42[/MENTION] tightened up a bunch of it and.....MORE PICS!!
 
Last edited:
Shrockorks bumper assembly cont'd

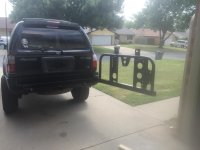
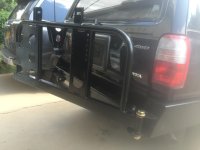
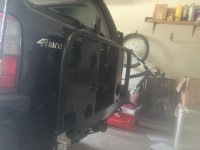
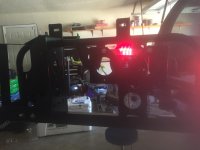
So this morning I got up, and started assembling the rear swing out. I went ahead and added the tire carrier, the jerry can holder, and wired up the rear license plate light to the passenger side tail light. Wires corresponded for the rear plate like this-
green wire- power when lights are on
green w/white stripe- brake light power
white with black- ground
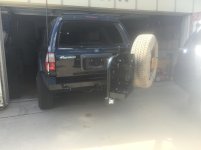
I then pulled the dirty spare out from under the Runner and tossed it on the back. Put my license plate on, made sure everything was nice and tight, and moved up to the front. This took me a good 3 hours.

The turn signals were a little bit of a pain. More because its a pain to bolt them in after you put the bumper on. Oops, but oh well didn't have time to wire them up at the time, and didn't want to mess with it. I got to it today though. I unbolted the front bumper because you can't pull the corner markers out with it bolted up. I unbolted all 4 bolts and manipulated the bumper around and got them out. Oddly enough the turn signal wiring on the drivers said didn't look the same as on the passenger side. On the whole it should go something to the effect of this.
Turn signal-truck
Green-turn signal ground/white w/black stripe
Red- turn signal hot/Green w/(maybe white maybe yellow) stripe
White- corner marker hot/ Solid green wire.
I wanted the turn signals to be on and amber when the lights were on, and wanted obviously the turn signals to work. Once I got the proper ground I didn't have the hyper flash. Shockingly on the signal wiring its not the white wire, its the green. Who would have thought of that. Got it all buttoned up and put back together. Took another 3 ish hours to do that half.
In reagards to how long it took, I found it to be much easier to deal with when I wasn't under so much of a time crunch. I still stand by what I said that some of it is a real PITA if you don't understand that if a bracket is supposed to slide on something, powder coating will add 1/8" thickness to EVERYTHING COATED!!!! In retrospect I wouldn't have had it powder coated at all. It made it more hassle than I wanted, and was pretty frustrating. Especially since initially getting the bumpers on the truck was under a time crunch. All in all I am happy with how it came out, just need to make some minor adjustments tomorrow.
Up next I need to get the Baja Designs Squadron Pro fog lights in. I am going to work them in and wire them up to the former fog light wiring. Anyone know what number plug that is? Id like to see the fogs I pulled off, but I may end up just clipping the plugs.

On to the good stuff.....
 

Attachments

  • IMG_9676.jpg
    IMG_9676.jpg
    124.6 KB · Views: 520
  • IMG_9677.jpg
    IMG_9677.jpg
    113.7 KB · Views: 518
  • IMG_9678.jpg
    IMG_9678.jpg
    127 KB · Views: 532
  • IMG_9681.jpg
    IMG_9681.jpg
    137.9 KB · Views: 521
  • IMG_9682.jpg
    IMG_9682.jpg
    125.9 KB · Views: 526
  • IMG_9683.jpg
    IMG_9683.jpg
    115.7 KB · Views: 513
  • IMG_9685.jpg
    IMG_9685.jpg
    153.8 KB · Views: 533
  • IMG_9686.jpg
    IMG_9686.jpg
    156.5 KB · Views: 521
Shrockworks bumper install cont'd

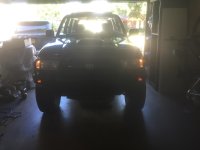
Finally the front complete.
 

Attachments

  • IMG_9688.jpg
    IMG_9688.jpg
    115.8 KB · Views: 521
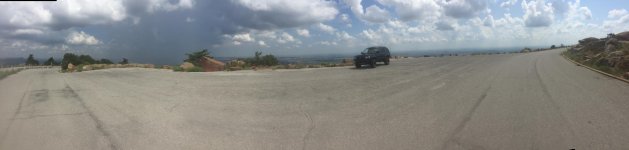
Went and washed it, and went for a ride. Of course its going to rain a little now.
 

Attachments

  • IMG_9692.jpg
    IMG_9692.jpg
    139.7 KB · Views: 517
  • IMG_9693.jpg
    IMG_9693.jpg
    136.9 KB · Views: 526
  • IMG_9694.jpg
    IMG_9694.jpg
    130.7 KB · Views: 505
So I ordered my White Knuckle Off Road sliders.....4-6 weeks, and I'll have them in time for the cove #5. [MENTION=65614]Antman[/MENTION] look out, I'm going over and through EVERYTHING THIS YEAR!
 
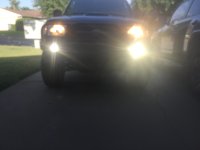
Wired up my Baja Designs Squadron Pros to my stalk. That way I can turn them off and on like stock. I did however have to sacrifice the old fogs for the plug, but they are now wired in and work just like the stock ones, just brighter. I don't have any night time pictures yet. I can tell they are bright, even in the daylight. I do have to credit my girlfriend with the soldering of the wires though. She does it better than me, so I get her to do all my soldering...hahaha.

Now I just need a winch for the bumper....
 

Attachments

  • IMG_9726.jpg
    IMG_9726.jpg
    121.9 KB · Views: 467
  • IMG_9727.jpg
    IMG_9727.jpg
    115.8 KB · Views: 461
Last edited:
So here is an update. I ordered and received my high heat primer, I have yet to have the time to take the skids off and paint all of them. I ordered it, then moved, Elk season happened(only 7 days to hunt where I hunt), then deer season started, finished moving. Amongst all the moving, and everything else, all of the additional armor has crushed the Radflo 2.0 coilovers I have. When I spend the money to fix it, I would like to do it right. Do it with Icon CDCV, or King's version of CDCV, or maybe even ADS. I don't know if they make something like that. As far as I know, they don't make a rear shock, and I am going to need those too! Just haven't had as much time as I would like. I think theres something up with it now. It has been cooler here lately, but its been lightly smoking now when I start it, and let it run for a bit. I have to daily drive it, and I just am kind of at a loss. Not really sure what to do at this point. Want to get it all fixed and get it where I want it, but man, it feels like a long road. Up to any input from you guys. I really don't think I want to sell it, but this is turning into an agonizing love/hate relationship.
 
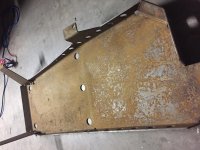
So this is what I get for getting a little lazy. I put the skids on when I got the rest of the armor and kept telling myself I have to take it off and prime and paint it. Well I guess now I have to take a wire wheel to it and then paint it, all of them.
 

Attachments

  • IMG_0361.jpg
    IMG_0361.jpg
    131 KB · Views: 492

Members online

Forum statistics

Threads
278,316
Messages
3,554,111
Members
248,016
Latest member
Advally Service

Trending content

Back
Top