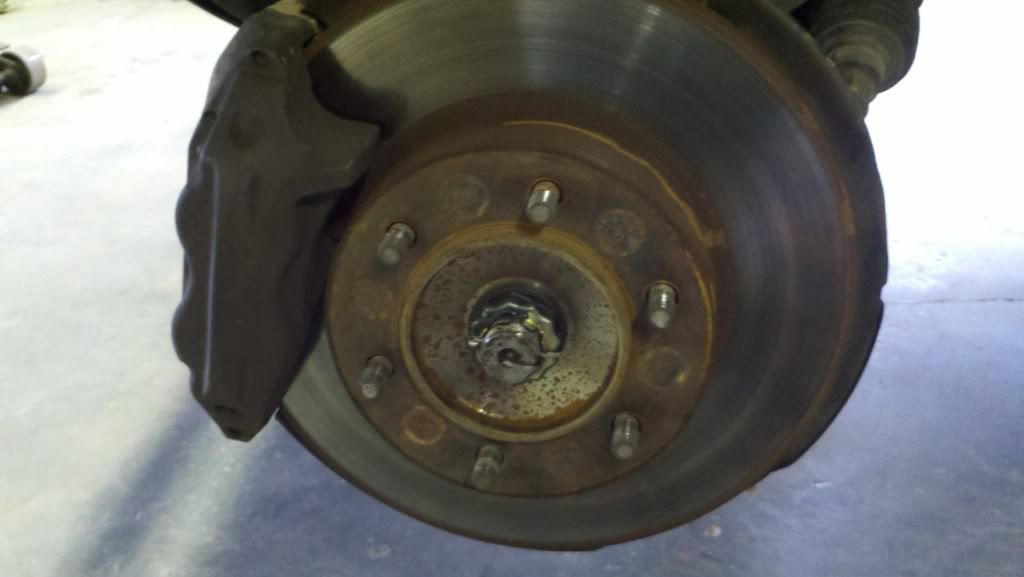
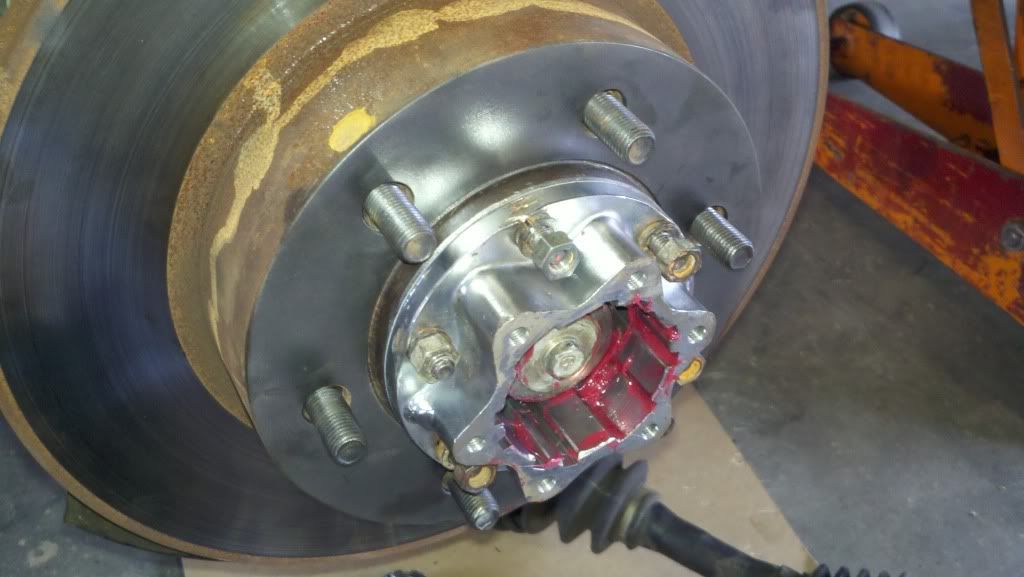
Does $240 to replace a front hub & bearing assembly sound right?

GVL

New member
I went ahead and bought the OEM hub assembly and wheel bearing for my front passenger wheel that has a bad bearing rather than messing with trying to pull the bearing alone. The local shop looked it up and said 3 hrs for labor for a total of $240 just to swap the assembly. Is it really that labor intensive to change this out? I watched a video on a Gen 4 and it looked like it might be in my skill zone (doing the TBU myself was about the most I have done).

Could someone who has done this on a gen 3 please rate this in difficulty compared to a brake job or similar? Not to get personal, but the wife just dropped a bomb on me (the bad kind) and I really need my Runner but funds are at a premium at the moment.

Thanks guys.
 
Register to hide this ad
That's too much. All you have to do is:
Jack the wheel and remove
Undo brakes
Remove tire rod nut
Remove lower ball joint nut
Remove cv axle nut (it's big 35mm I believe)
Remove upper ball joint nut

Aaand that's it
 
That's too much. All you have to do is:
Jack the wheel and remove
Undo brakes
Remove tire rod nut
Remove lower ball joint nut
Remove cv axle nut (it's big 35mm I believe)
Remove upper ball joint nut

Aaand that's it

Thanks for the info,

That sounds a bit different than the Gen 4 video I saw so I assuming there is a bit more to it on a Gen 3 or perhaps it was just a 2WD Gen 4? In the video he just removed the caliper and rotor, remove dust cap, remove the big nut behind the dust cap, then backed out the 4 bolts that mount the assembly and broke it free with a pry bar and then swap the part.

I'll look around for a gen 3 4WD video - I'm much better watching it done than reading instructions.
 
Hmmm, well that big nut was probably from a cv axle, so it should be 4wd? I'm not sure. But look around, it's really not hard at all!
 
If you have a 4wd 3rd Gen there is no hub, the wheel bearing is pressed into the knuckle.

So if you don't own at least a 20 ton press or have access to one, let someone else handle it.
 
4th gens are different from 3rd gens in that the hub bearing unit can be removed without removing the knuckle, as you've seen in videos. 3rd gens do not work that way. The bearing is pressed onto the knuckle, requiring the knuckle to come off for removal/reinstall of the bearing.
 
If you have a 4wd 3rd Gen there is no hub, the wheel bearing is pressed into the knuckle.

So if you don't own at least a 20 ton press or have access to one, let someone else handle it.

Well I'm pretty confused now, I thought if I bought the whole assembly rather than just the bearing the 20 ton press wouldn't be necessary. My rational was to spend money up front on the whole assembly to save money on the back end with labor - was I wrong and wasted $159 on the whole bit? Just what I needed right now :dammit:
 
Yep, there is no assembly. There is the wheel bearing with two seals. The old bearing must be pressed out and the new one pressed into the knuckle. Even the 4th Gen is done the same sort of, but it uses a hub. There is a company that is pressing in new Koyo bearings into 4th Gen hubs and selling them as one. This makes it pretty easy for DIY install.

Scroll back through the pages here on the forum and look for a topic headlined Wheel Bearings. Read through it. I'd say maybe on page 5 or farther back.
 
Well back to the original question then; since a press and a bit of labor is required would you say the 3hr estimate is within reason? There's 3 different auto shops nearby so I'll get a quote from each and just have them do it I suppose. Thanks again for the info everyone.
 
All the above info is correct. Once the knuckle is removed from the vehicle, the bearing and hub need to be pressed in/out. Those 4th gen guys have it easy!

As for pricing, I recently contacted a local Toyota shop about doing this job, and they quoted $600+ for both sides (labor only). For the heck of it, I got a quote from Toyota. They quoted about $900 for both sides. (also labor only)
 
Well back to the original question then; since a press and a bit of labor is required would you say the 3hr estimate is within reason? There's 3 different auto shops nearby so I'll get a quote from each and just have them do it I suppose. Thanks again for the info everyone.

I would say a 3 hour estimate is just about right on par with what I paid when I had to do mine.

All the above info is correct. Once the knuckle is removed from the vehicle, the bearing and hub need to be pressed in/out. Those 4th gen guys have it easy!

As for pricing, I recently contacted a local Toyota shop about doing this job, and they quoted $600+ for both sides (labor only). For the heck of it, I got a quote from Toyota. They quoted about $900 for both sides. (also labor only)

$600 is wayyy too much! My local shop did LBJ's, a gunked up o2, and the front wheel bearings for $354 in labor. I provided all the parts.
 
Read this.

Pay special attention to pressing out the bub and bearing.

You're going to be doing the same thing, minus adding the manual hub. You'll just replace your stock hub.


Looky looky , I just picked these up today.

2011-04-15_15-24-17_699.jpg~original


Now I have to get some bearings and seals...

Here are the step by step directions for the conversion to Manual locking hubs.


Remove wheel.

Here was my hub before the conversion. Note my wheel spacer.
AisinConversion3.jpg~original


My wheel spacer and stock hub.
AisinConversion4.jpg~original


Remove the wheel spacer, hub cap,cotter key, lock washer and 36mm nut.
AisinConversion5.jpg~original


Remove the 10mm and 12mm bolt that hold the brake line to the knuckle. Remove the 10mm bolt that hold the ABS speed sensor and pull sensor out.

Remove the Caliper and hang on the frame. I used a S hook from a bungee cord and hung it up.

Remove the Rotor
AisinConversion9.jpg~original


Remove the upper and the 4 lower ball joint bolts and remove Knuckle.


Put knuckle assembly in vise and remove bolts that hold splash shield.
AisinConversion11.jpg~original


Use a puller (I am using a 7-ton two jaw puller from sears, works great) and push the spindle out.
AisinConversion16.jpg~original


Remove the giant E-clip that holds the bearing in the knuckle and press out knuckle.
AisinConversion17.jpg~original


Press in a new bearing, install your giant e-clip, splash shield, and outer seal (I had bought new ones but the old ones were good enough to re use)
AisinConversion20.jpg~original


Now you can press in the Manual lock spindle into you knuckle. I pressed it back together and brought the knuck back to the vise for further assembly.
AisinConversion21.jpg~original


Now you install the ABS Hall generator.
AisinConversion23.jpg~original


Now the locking nut. Tighten it down to 204 foot pounds. I used the 4 pin tool.
AisinConversion25.jpg~original

asisinlock4.jpg~original


Stake the lock nut using a hammer and punch then Install inner seal.
AisinConversion27.jpg~original


Pull the old CV axle out and install the manual locking axles. Grease the axle generously.
AisinConversion28.jpg~original


Install the knuckle assembly back onto your upper and lower ball joints. I install the broached washer along with a circle clip.
AisinConversion29.jpg~original


Bolt in the Aisin Locker body and the 12mm bolt that locks the Aisin Cog to the axle.
AisinConversion30.jpg~original


Bolt Aisin Outer body to the hub using 6 - 10mm bolts. These bolts are marked 7, so they are quite weak, do not over tighten.
AisinConversion31.jpg~original


Bolt Spacer back on. 83 foot pounds and use locktite to prevent the spacers from loosening up.
AisinConversion32.jpg~original


Bolt wheel back on.
AisinConversion34.jpg~original


Back to OEM look. with the hub cap installed.


Sorry but I had to cut some photos out. The Forum only allows 20 photographs.

 
So consider this your opportunity to buy a new tool. Harbor freight has the 12 ton and 20 ton presses for $110 to $200 shipped with coupon. I bought a press last year for a control arm bushing and have since used it again for wheel bearing hub assembly. I keep saving money with every repair now because it paid for itself on the very first job.

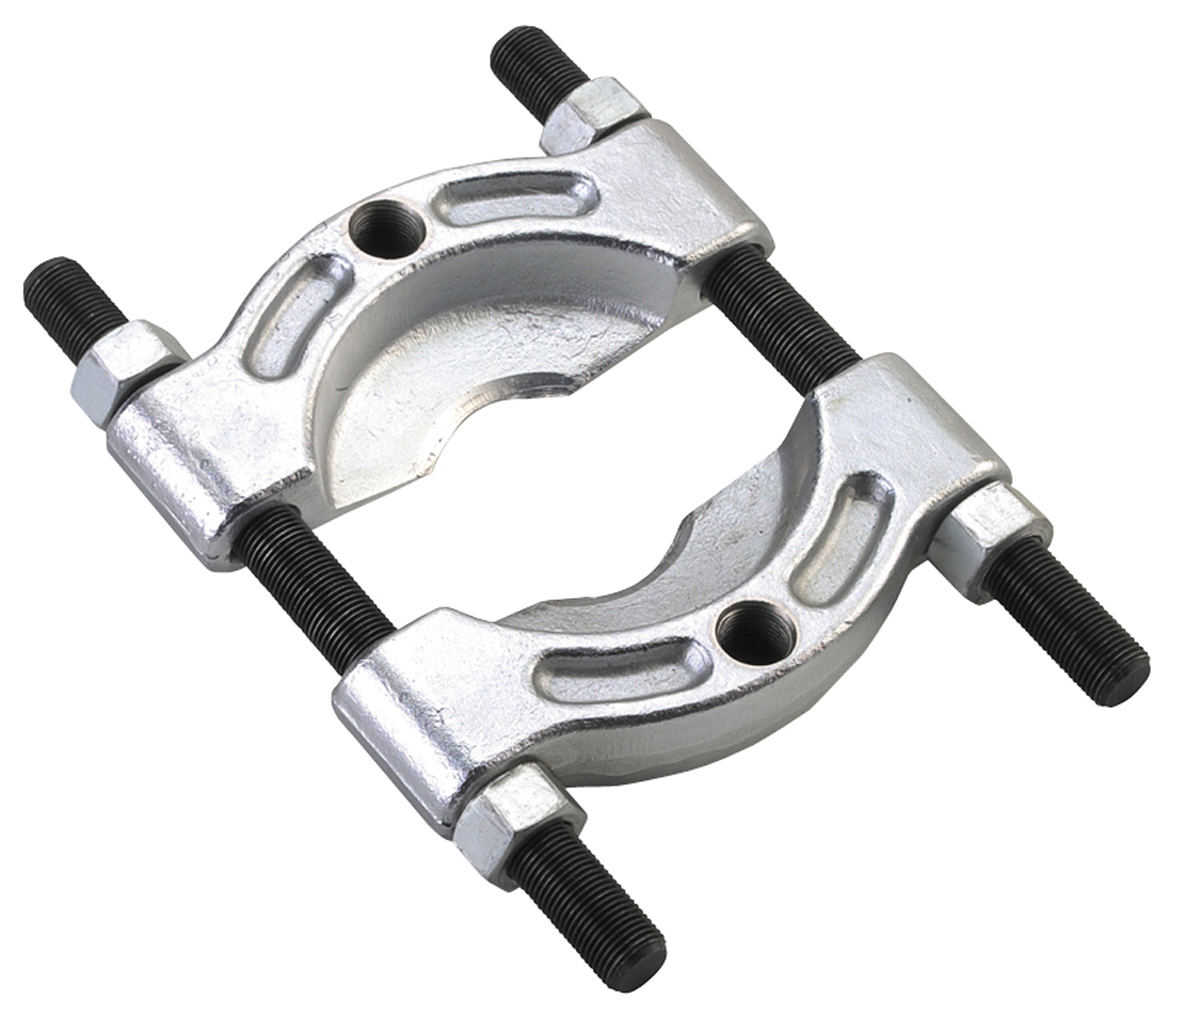
BTW its not overly difficult to do. Just need a bearing splitter which can be rented for free from autozone. Or buy one for $30 at harbor freight

http://t.harborfreight.com/12-ton-a-frame-industrial-heavy-duty-floor-shop-press-1667.html

1123_4518_0.jpg
 
Last edited:
Wow, lots of wrong info here...

Little Cesar has it correct, and Singtoe's pictures are correct (though he has manual locking hubs, so your likely looks a bit different).

Check out my build thread for some info on when I replaced mine, I don't have tons of pictures and detail, but I show what you have to do to disassemble the hub and do it all at home if that's what you want to go through.

On my 5th Gen I could swap both in under 3 hours. Really is not a hard job. I can't imagine the 3rd Gen is much different.

3rd gen is completely different. 4th and 5th gen have no semblance to the 3rd gen process.

That's too much. All you have to do is:
Jack the wheel and remove
Undo brakes
Remove tire rod nut
Remove lower ball joint nut
Remove cv axle nut (it's big 35mm I believe)
Remove upper ball joint nut

Aaand that's it

That's if you're replacing the entire knuckle as an assembly. No one does that as the knuckle is pretty expensive.

Oh, if you're staying with your stock lower ball joint, add 4 bolts to the equation

Always buy new LBJ bolts, consider replacing all chassis bolts unless they are some of the huge honking ones. The bolts are not super hard/strong (by design), so they can get damaged fairly easily if a shop just hits them with an air gun. Don't get cheap on $20 worth of bolts when you're spending so much on the other parts and your life depends on it.

Thanks for the info,

That sounds a bit different than the Gen 4 video I saw so I assuming there is a bit more to it on a Gen 3 or perhaps it was just a 2WD Gen 4? In the video he just removed the caliper and rotor, remove dust cap, remove the big nut behind the dust cap, then backed out the 4 bolts that mount the assembly and broke it free with a pry bar and then swap the part.

I'll look around for a gen 3 4WD video - I'm much better watching it done than reading instructions.

Again, that is for the entire knuckle perhaps, but the bearing and hub need to be pressed in and out.

BTW, if you saw the EricTheCarGuy 4th gen video, he's an idiot and did a number of things wrong, and used the wrong tools. It could have been super easy in a shop like his, but he made it stupid hard. Plus it's the 4th gen design which uses a bolt on bearing carrier, which makes it much easier.

If you have a 4wd 3rd Gen there is no hub, the wheel bearing is pressed into the knuckle.

So if you don't own at least a 20 ton press or have access to one, let someone else handle it.

Good advice. If you are not ready to buy a press and really *cough* "learn a lot in the process", then I'd say $240 for replacing the bearing isn't a terrible price for being able drive it in and drive it away.

4th gens are different from 3rd gens in that the hub bearing unit can be removed without removing the knuckle, as you've seen in videos. 3rd gens do not work that way. The bearing is pressed onto the knuckle, requiring the knuckle to come off for removal/reinstall of the bearing.

Correct, 4th gen and I assume 5th as well use a bearing carrier. You could probably buy a carrier/hub assembly and just bolt off/bolt on for a 4th gen. 3rd gen not so much.

If you want to tackle it, here's my recommendation:
1. Buy a press (20 ton from HF is good, I have the 12 ton and it worked just fine too, though I did break it... see my thread). Use it to press the bearing out and press everything back in.
2. Buy a 2 or 3 jaw puller to remove the hub. You can do this with a press if you have the ability to weld up your own custom jig, but if not, you need a STRONG puller. As you can see in my build thread, I used a cheap HF one and had to mod it to make it much stronger then it originally was. I recommend just buying a quality one from the beginning.
3. Buy all the parts you need in advance, including seals, bearing, and new bolts. And make sure you have all the sockets and what not that you need. You will need some big sockets if you are going to use a press so that you don't damage the hub (at least it is a good practice to use them).
4. Study up on the fiche pictures, FSM, and the threads from guys that have done it here, then you;ll be ready to do this all in one day.

It's definitely a pretty big job, and very intimidating. If you're uncomfortable with any of this, then I'd say take it to a shop.

You can also just remove the entire knuckle, and take it and the replacement parts to a shop and have them just press out the old bearing and press in the new one. If it is off your vehicle and ready to go they should charge significantly less than the normal rate. Then you would just have to do all the bolting off and on yourself.

I hope that clarifies it a bit.
 
Read this.

Pay special attention to pressing out the bub and bearing.

You're going to be doing the same thing, minus adding the manual hub. You'll just replace your stock hub.

Great write-up, I really appreciate the info and pics.
[MENTION=56021]Nelsonmd[/MENTION] I will take your advice and let the shop do it since I need my rig back ASAP and don't have time to learn on the job for this one. I will have them replace the bolts down there as well - thanks for the tip.

Everyone else - thank you for taking the time to chime in.
 
Last edited:
Minor point but important, As Singtoe alluded to, the bolts are soft, and they are so by design. They are meant to strip out instead of stripping out the threads on the knuckle (they same way the lug nuts are softer than the lugs, so that the lug can't be damaged by cross threading, etc.).

If you take it to a shop, I highly suggest providing them with replacement toyota bolts, the torque specs in writing for every bolt; and in a way that won't make you look like you have a stick up your @$$, be sure they will use a torque wrench on them and not just hit them with the air gun. Mostly I mean the LBJ bolts as they are pretty small and surprisingly low torque spec. Most shops will just hit chassis bolts with the air gun, even when I was watching them do it, and asking them about it.

The same goes for the axle bolt. The axle nut is what preloads the bearing, so overtorquing it can damage your brand new bearings and cause premature failure.

But again, try not to look like a dick when bringing it up with them, otherwise they may kind of hate you.
 

Members online

Forum statistics

Threads
278,315
Messages
3,554,104
Members
248,016
Latest member
Advally Service

Trending content

Back
Top