
You are using an out of date browser. It may not display this or other websites correctly.
You should upgrade or use an alternative browser.
You should upgrade or use an alternative browser.
Extreme 3rd Gen Build! Insane!
- Thread starter NotKewl
- Start date
meRockboost
New member
Your build so far has been great, it's lacking LBJ questions and weather tech mats though...(heavy on the sarcasm)
I respect you more as a person with the picture of the bunghole.
Hehe... bunghole
Can't wait to see it in action!
I respect you more as a person with the picture of the bunghole.
Hehe... bunghole
Can't wait to see it in action!

Tyler James Inc
Senior Member
Killin the progress man [emoji1360]
Why didn't you just take the back of the Rear Shock hoop to the main back half? You could keep the top of the hoop/upper shock mount in the same location, and it wouldn't look funky from the back.
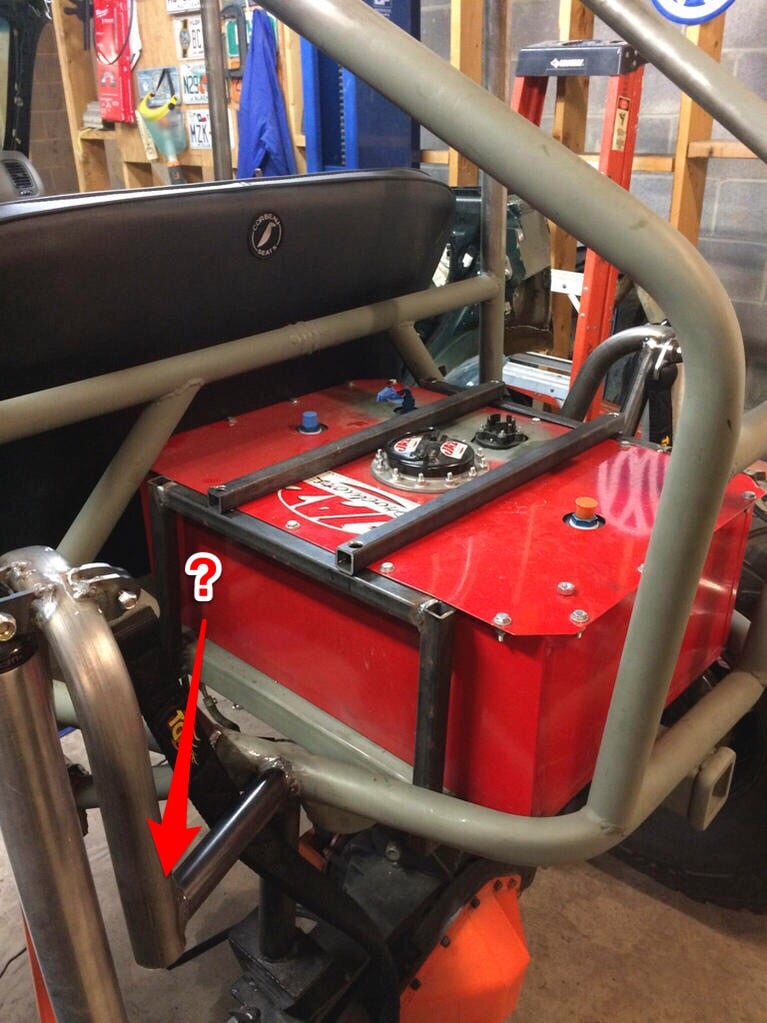
I did similar hoops on the rear of my buddies custom cab
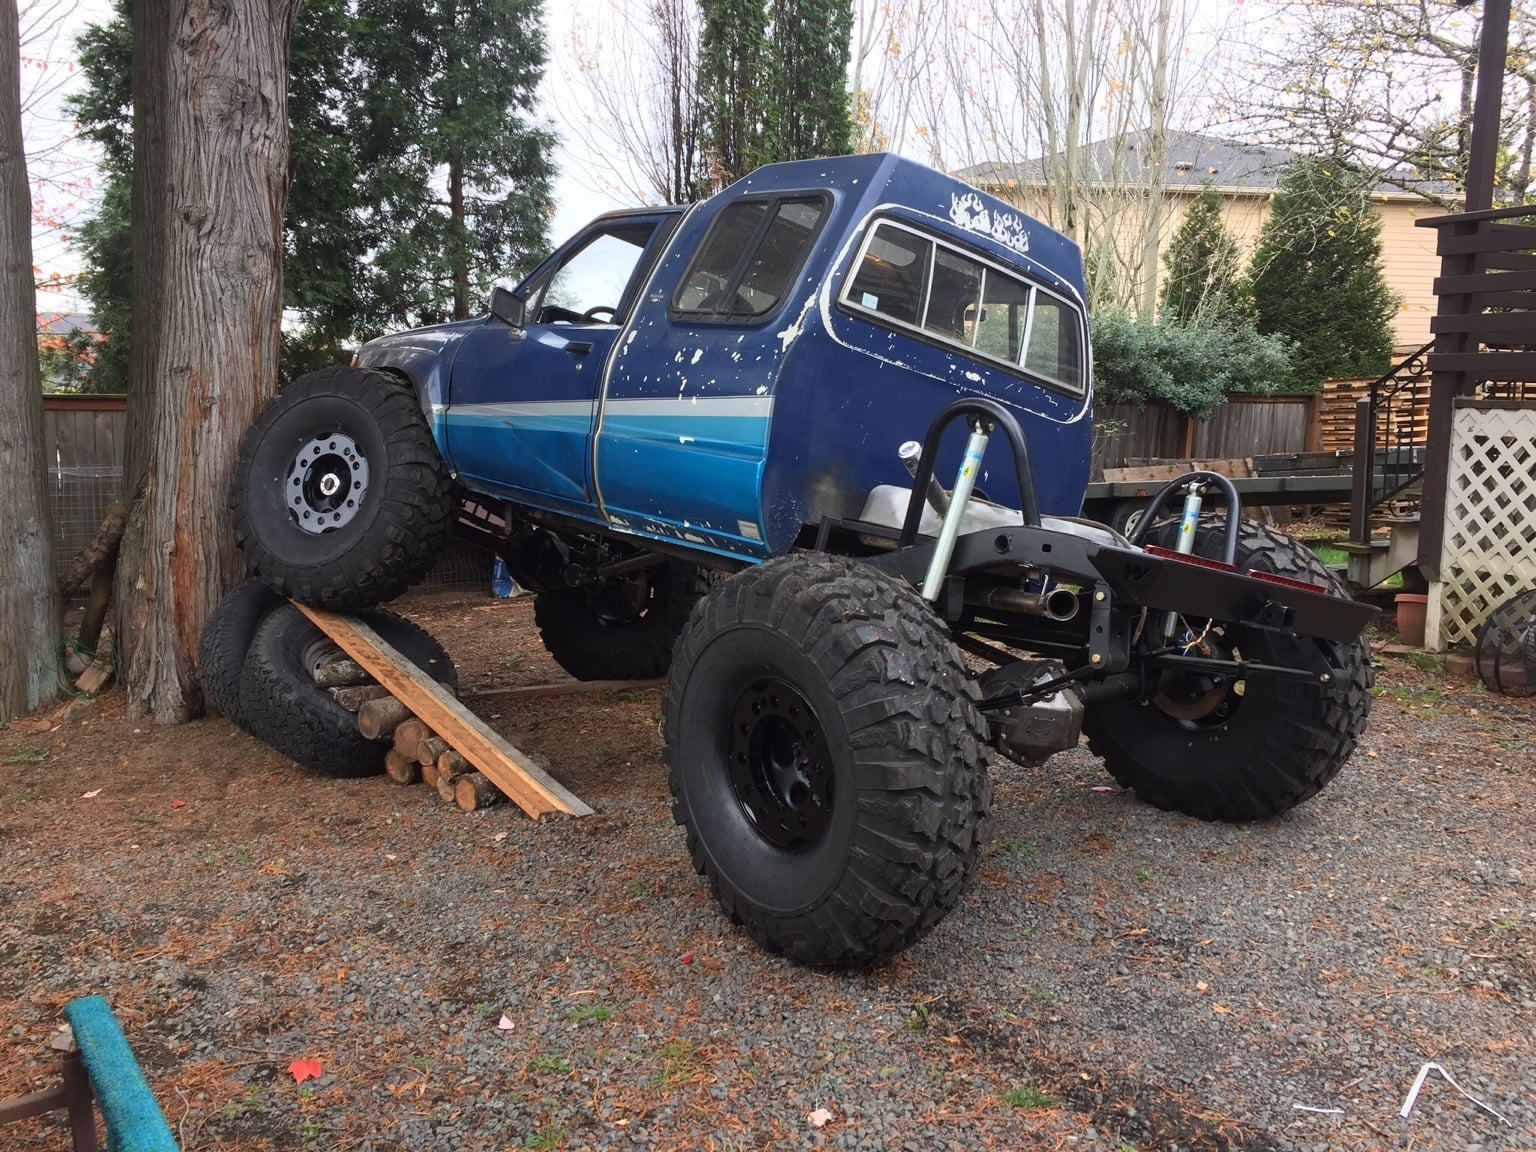
Why didn't you just take the back of the Rear Shock hoop to the main back half? You could keep the top of the hoop/upper shock mount in the same location, and it wouldn't look funky from the back.
I did similar hoops on the rear of my buddies custom cab

NotKewl
New member
I have other plans. you'll see soon.Killin the progress man [emoji1360]
Why didn't you just take the back of the Rear Shock hoop to the main back half? You could keep the top of the hoop/upper shock mount in the same location, and it wouldn't look funky from the back.
Last edited:
NotKewl
New member
The front suspension is done! Front driveshaft is fabbed up and installed too. Now all I have left is to fab up the rear driveshaft, install all the brake lines, cooling hoses, fuel lines, shifters, center console... OMG so much left to do and so little time to do it all... Time to stop typing and get BACK TO WORK! :doh:
Front drive shafts fabbed up. Yes, square driveshafts! For offroad slow speeds only!
Front suspension complete!
Shock hoop cross-brace fabbed up. Removable of course!
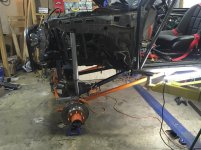
Semi sitting on its own. Tomorrow it will be all on its own.
Front drive shafts fabbed up. Yes, square driveshafts! For offroad slow speeds only!
Front suspension complete!
Shock hoop cross-brace fabbed up. Removable of course!
Semi sitting on its own. Tomorrow it will be all on its own.
Attachments





Last edited:

Now that's a beautiful sight
Either that, or we are sick, sick humans. lol.
If I showed that to my wife she'd probably ask where's the rest of it?
This build is hilarious and kind of draws on the talent spectrum here on T4R. Some of us replace our oil on our T4'rs.... others fab their driveshafts in garage. lol.
Last edited:
NotKewl
New member
She's got LEGS!
Well, yesterday was the moment I have been waiting for in this build. The day this rig can come off the lift and stand up all on her own! :guitar2:
It's the first time the old girl has stood on her own four wheels in over six months!
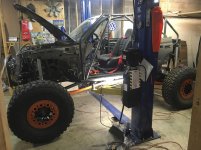
With the front limiting straps installed, I put the tires on and lowered the lift. Then got all giddy inside! Cracked open a cold beer, sat back and just absorbed what I had accomplished so far.... Ok, break's over, get back to work Brent! So, because she still has no brakes, no functioning steering, and the shocks were not aired up yet, I promptly put her back on the lift to take the weight off the bump stops.
These are the BEEFIEST limiting straps I could find! 6-Ply! And they were priced ok through Summit Racing too.
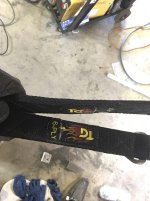
Checking the limit straps are set correctly. Whoops! Got the one on the passenger side too loose. :doh: Guess I'll fix that later.
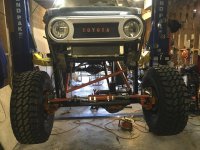
Resting on the bumps!
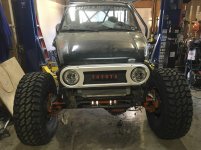
Notice the lift pads. :thumb:
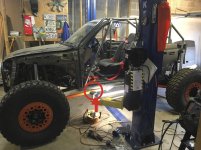
Well, yesterday was the moment I have been waiting for in this build. The day this rig can come off the lift and stand up all on her own! :guitar2:
It's the first time the old girl has stood on her own four wheels in over six months!
With the front limiting straps installed, I put the tires on and lowered the lift. Then got all giddy inside! Cracked open a cold beer, sat back and just absorbed what I had accomplished so far.... Ok, break's over, get back to work Brent! So, because she still has no brakes, no functioning steering, and the shocks were not aired up yet, I promptly put her back on the lift to take the weight off the bump stops.
These are the BEEFIEST limiting straps I could find! 6-Ply! And they were priced ok through Summit Racing too.
Checking the limit straps are set correctly. Whoops! Got the one on the passenger side too loose. :doh: Guess I'll fix that later.
Resting on the bumps!
Notice the lift pads. :thumb:
Attachments




NotKewl
New member
After I savored the awesomeness of getting this rig standing up, I decided to tackle a job that has been bugging me, one I've kind of been avoiding because I can't decide on the design I want. That's the center console / shifter mounts.
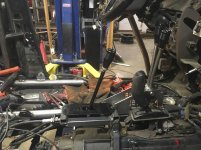
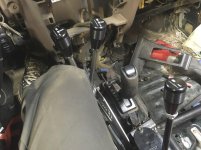
So I just jumped right in. Designed a simple bracket I could weld to the seat supports/ cage and reused (ironically) the bolts that held in parts of the original console to mount the twin stick for the NP205 right next to the tranny shift gate. Which, incidentally, I modified the gate on the tranny shifter to allow me to slam back and forth from drive to reverse without pushing the button. (That's so when going up a steep incline if the truck starts to flip backward I can slam it into reverse and power out to push the rear out and front down.)
Tonight maybe I'll get the BlackBox shifter installed too.
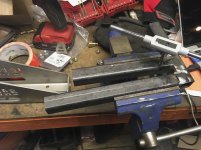
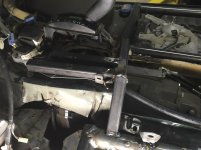
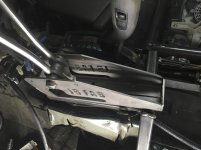
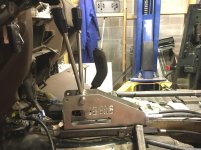
So I just jumped right in. Designed a simple bracket I could weld to the seat supports/ cage and reused (ironically) the bolts that held in parts of the original console to mount the twin stick for the NP205 right next to the tranny shift gate. Which, incidentally, I modified the gate on the tranny shifter to allow me to slam back and forth from drive to reverse without pushing the button. (That's so when going up a steep incline if the truck starts to flip backward I can slam it into reverse and power out to push the rear out and front down.)
Tonight maybe I'll get the BlackBox shifter installed too.
Attachments





eatpasta
New member
With the front limiting straps installed, I put the tires on and lowered the lift. Then got all giddy inside! Cracked open a cold beer, sat back and just absorbed what I had accomplished so far.... Ok, break's over, get back to work Brent! So, because she still has no brakes, no functioning steering, and the shocks were not aired up yet, I promptly put her back on the lift to take the weight off the bump stops.
These are the BEEFIEST limiting straps I could find! 6-Ply! And they were priced ok through Summit Racing too.
View attachment 242910
Checking the limit straps are set correctly. Whoops! Got the one on the passenger side too loose. :doh: Guess I'll fix that later.
View attachment 242912
Resting on the bumps!
View attachment 242914
Notice the lift pads. :thumb:
View attachment 242916
Congrats on getting it on its' own tires!!
:banana:
I'm reading through this in awe of how cool this is! Amazing, actually.
It always blows me away at how much I don't know about building/welding/fabrication and how much I want to learn.... and how much I want a proper garage!!!
...and time to work on something like this....and money to put into it.
:naughty:
I do have a question for NotKewl - since you essentially took the 4Runner down to the frame, you could have started with any truck. Other than your affections for the 3rd gen 4Runner, why did you go with the Toyota? Most of the truck is your work anyways - just curious.
I cannot wait to see the finished product! I wished I lived closer so I could help out...

NotKewl
New member
Congrats on getting it on its' own tires!!
:banana:
I'm reading through this in awe of how cool this is! Amazing, actually.
It always blows me away at how much I don't know about building/welding/fabrication and how much I want to learn.... and how much I want a proper garage!!!
...and time to work on something like this....and money to put into it.
:naughty:
Thanks! It's been fun so far. I've only really been welding for less than two years. It's easy to learn how. My woodworking buddy, who's never welded, picked up the basic technique in a matter of about ten minutes. But it's time, practice, and the little lessons you learn along the way that allow you to master it. It is definitely NOT a cheap hobby to get into. Good gear costs money. Not sure how much is tied up in my shop, but it's in the 5 digits for sure. So is the 4Runner. :tape:
I do have a question for NotKewl - since you essentially took the 4Runner down to the frame, you could have started with any truck. Other than your affections for the 3rd gen 4Runner, why did you go with the Toyota? Most of the truck is your work anyways - just curious.
I cannot wait to see the finished product! I wished I lived closer so I could help out...
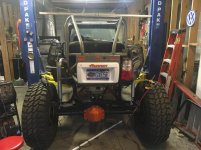
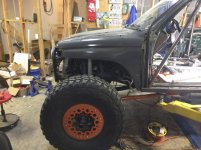
Yes, I could have started with any truck frame. Technically I could have started from scratch and built a tube buggy, but I wanted the 4Runner to have a new life. I have a 1976 Ford F-100 and 1988 Suzuki Sami sitting in my back yard too (my wife calls it the car garden) that will get this treatment. The Sami is next and that's for my daughter (will be 9 this year) to wheel.
This one will still be a 4Runner when I'm done. The "skin," if you will, is being remounted so it still looks like a 4runner with a different (better) frame. The roof will go back on too. You will be able to tell it is a 4Runner.
I love the little 5VZFE V6 too. Reliable as all hell. Not to mention the good rule of thumb when doing hard-core offroading is to under power and over axle. Then you rarely break things.
Attachments
Last edited:
eatpasta
New member
Thanks! It's been fun so far. I've only really been welding for less than two years. It's easy to learn how. My woodworking buddy, who's never welded, picked up the basic technique in a matter of about ten minutes. But it's time, practice, and the little lessons you learn along the way that allow you to master it. It is definitely NOT a cheap hobby to get into. Good gear costs money. Not sure how much is tied up in my shop, but it's in the 5 digits for sure. So is the 4Runner. :tape:
Yes, I could have started with any truck frame. Technically I could have started from scratch and built a tube buggy, but I wanted the 4Runner to have a new life. I have a 1976 Ford F-100 and 1988 Suzuki Sami sitting in my back yard too (my wife calls it the car garden) that will get this treatment. The Sami is next and that's for my daughter (will be 9 this year) to wheel.
This one will still be a 4Runner when I'm done. The "skin," if you will, is being remounted so it still looks like a 4runner with a different (better) frame. The roof will go back on too. You will be able to tell it is a 4Runner.
I love the little 5VZFE V6 too. Reliable as all hell. Not to mention the good rule of thumb when doing hard-core offroading is to under power and over axle. Then you rarely break things.
Understood!
I ran into a guy once out Gorman (OHV area near LA) and he had an F250 that he did up kind of (not nearly as well) like this but he had a propane tank on it. It was interesting - looks like so much fun to build.
I actually have some welding experience via my uncle when I was in high school. Many years ago admittedly but he taught me a lot - I just have no place to apply what I know to work.
Someday I'll have a proper garage of my own so I can take on a project like this one!
Thanks for the inspiration and please.... carry on!!



NotKewl
New member
Understood!
I ran into a guy once out Gorman (OHV area near LA) and he had an F250 that he did up kind of (not nearly as well) like this but he had a propane tank on it. It was interesting - looks like so much fun to build.
I thought about running propane, but it's not as efficient as gasoline cost wise. Easy to fill up in the field though if you have a spare tank. a bit like a forklift.

MN4runnerman
Senior Member
Got the shifters installed tonight. They work too, so BONUS! :biggrin2
Those are cheater sticks and I'm so jealous. Everything looks great! Triple sticks bring me back to this mud pit that I was trying to get out of in my 87 Jeep Wrangler(35s, rear locker, 4" lift). I was going nowhere and had to back out. Then 10 min later this dude with a tube truck on 40s with a 350 and triple sticks just rolled up and said that he was gonna do this in 2wd. Took him like 2 minutes to go in and out.
eatpasta
New member
Got the shifters installed tonight. They work too, so BONUS! :biggrin2:
:biggrin2:
That always helps

eatpasta
New member
Not sure how I've missed this build. This thing is insane!
He only has a few more weeks to finish it so hopefully we are in for some beefy updates here soon
 op2:
op2:
NotKewl
New member
Those are cheater sticks and I'm so jealous. Everything looks great! Triple sticks bring me back to this mud pit that I was trying to get out of in my 87 Jeep Wrangler(35s, rear locker, 4" lift). I was going nowhere and had to back out. Then 10 min later this dude with a tube truck on 40s with a 350 and triple sticks just rolled up and said that he was gonna do this in 2wd. Took him like 2 minutes to go in and out.
Ha! That's funny. I saw something like that once in FL when we lived there (nothing but deep mud and sand down there). Buddy got his 96' Tacoma (brand new that day) stuck in a huge mud pit (a small pond really) thinking he would waltz right through. It was deeper than we expected. I took a running start at it in a beat-up 1968 VW beetle (my mud skimmer I called it) and skimmed across the whole thing and then got buried at the end. I thought I hydro locked the engine, but nope. Drained the water out and she fired right up. He got pulled out by a guy in a big mud truck with cheater sticks that walked across the same pit.
NotKewl
New member
Not sure how I've missed this build. This thing is insane!
He only has a few more weeks to finish it so hopefully we are in for some beefy updates here soon
Here's what's left to finish before my deadline of April 15. I chose Tax day to give me a week or so to iron out any bugs during the break-in runs before the big event the first week of May. So basically 4 whole weeks left, which is about a week of my availability (Sigh). And to top it off, it's due to run the hill climb competition the first night there.
The MUST DO List before Trail Fest 2017 (basically the required to run well and be safe things)
In no particular order...
- Fab up the center console
- Put the interior back together so it's at least functional.
- Wire up the new gauges and switches
- Wire up the fuel pumps (yes two for redundancy, though I may just mount one for now)
- Plumb the fuel lines, fuel rail, fuel filters, return lines, etc.
- Plumb the cooling system hoses and burp the system
- Build front bumper
- Install Winch
- Run the battery cables to the engine management system and harness (relocating Battery to rear since no room up front anymore)
- Install the kill switches and fire extinguishers
- Wire up the lights and replace the parts of the rear body harness I accidently cut through. (Well, I do need taillights.)
- Finish creating the cage and tube work.
- Finish weld everything everywhere that's just tacked in, which is about everything! (that's about 12+ hours alone! Pretty sure that will be the day I actually hit the duty cycle limit on my Welder)
- Install the brakes and brake lines then bleed the system
- Install all the fluids EVERYWHERE. Oil, Gear oil, Tranny fluid, etc.
- Inspect the wiring harnesses EVERYWHERE. Good way to cause a short and have things NOT work by cutting through something and not finding it in time.
- Install Seats
- Install Seat harnesses
- Make sure all loose wires and hoses are not coming in contact with wheels, suspension parts, bump stops, etc.
- Cycle suspension one last time with shocks aired up to see if they bind or rub anywhere in thier cycle.
- OH yeah! Fill shocks with Nitrogen, duh. Almost forgot that important one.
- Install muffler
- Install rock and offroad lighing
- Test drive it in my neighborhood and tear up some lawns...
 ok test drive it at least.
 - Breath and drink some more beer.
The rest of the stuff if I have time List, or the AFTER Trail Fest list (basically cosmetic or nice to have things)
- Finish welding the hood and all the bodywork
- Fill, sand, and prime bodywork and tubing
- Reinstall roof panels
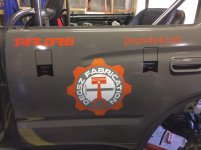
- Install logos and stickers
- Paint it
- Truck-bed line the interior floors and metal parts
- Any other cosmetic things.
Wheew! :scared:
OMG, that's so much to do and so little time to do it. I think I'm going to have to take a few days off of work again.
Last edited:
Similar threads

- Replies
- 2
- Views
- 3K

- Replies
- 1
- Views
- 13K

- Replies
- 10
- Views
- 13K


