Extreme 3rd Gen Build! Insane!

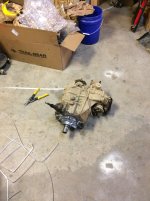
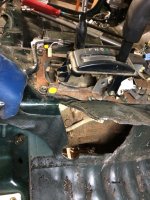
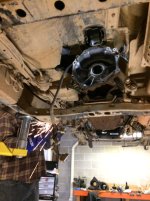
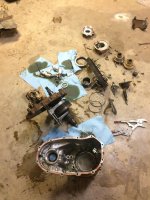
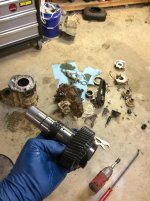
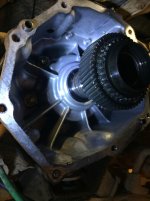
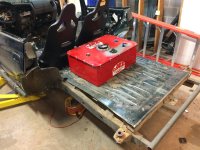
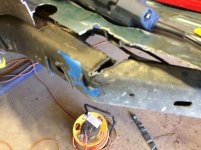
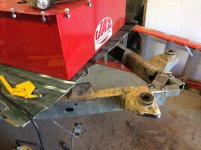
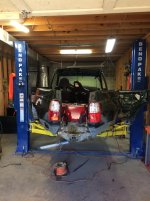
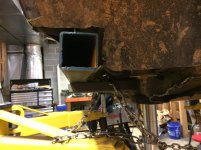
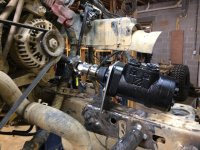
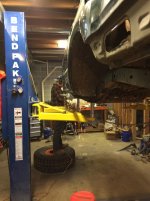
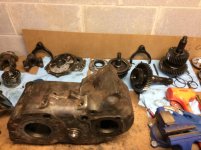
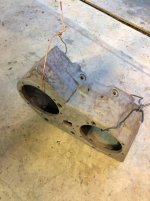
My buddy came over and helped me today and he brought beer too! Managed to get a lot of cutting and grinding done. Tedious work but required, unfortunately. Got the stock transfer case out too. It was a bear due to the rusty bolts, which has been the largest hold up on progress thus far. I cut through the tunnel to get to the very tight top bolts. All that is going to get re-fabbed anyway to make room for the NP203-205 setup. Got it out and torn down to salvage the input shaft for the tranny. Now I'm ready to start mocking up the new drivetrain once I get the NP205 put back together.
 

Attachments

  • IMG_7189.jpg
    IMG_7189.jpg
    112 KB · Views: 789
  • IMG_7206.jpg
    IMG_7206.jpg
    109.8 KB · Views: 804
  • IMG_7193.jpg
    IMG_7193.jpg
    127.8 KB · Views: 778
  • IMG_7207.jpg
    IMG_7207.jpg
    118.5 KB · Views: 779
  • IMG_7224.jpg
    IMG_7224.jpg
    122.3 KB · Views: 823
  • IMG_7220.jpg
    IMG_7220.jpg
    117.2 KB · Views: 742
  • IMG_7223.jpg
    IMG_7223.jpg
    95.2 KB · Views: 791
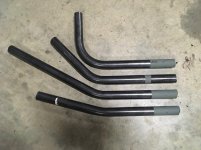
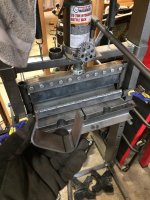
More body mods today as I wait for the last few remaining parts I need. I spent the morning shopping for steel and various other items I need. Then while I was waiting between coats of paint on the transfer case parts I bent some guide tubes at 15, 30, 45, and 90-degree angles.
IMG_3817.jpg
It's one hell of an accurate bender if set up properly.
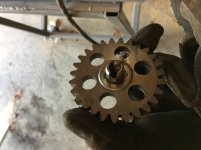
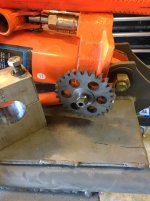
Then I made a part for my bender out of one of the gears I took out of the 4Runner transfer case. Coolest part I think I've ever built.! :first:
IMG_7227.jpg
IMG_7229.jpg

Then it was back to more bodywork DESTRUCTION!!!!! :whoo:
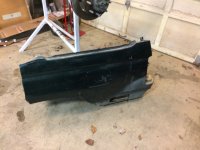
Chopped the rear quarters off in two separate pieces (left and right) so I could narrow and bob the frame easier. I also cut just behind the C-pillars so the rear doors would still function. I'll finish that up tomorrow. It's really starting to scare my wife, who doesn't have the ability to visualize something in her head like I can, so she's afraid it can't be put back together to form anything resembling a 4Runner. I look at it like Michelangelo, I'm just chipping away anything that doesn't look like my future very unique 3rd gen 4Runner. :lol:
IMG_7234.jpg

IMG_7236.jpg

IMG_7237.jpg

IMG_7238.jpg
 

Attachments

  • IMG_7227.jpg
    IMG_7227.jpg
    82.3 KB · Views: 754
  • IMG_7229.jpg
    IMG_7229.jpg
    115.8 KB · Views: 732
  • IMG_7234.jpg
    IMG_7234.jpg
    127 KB · Views: 741
  • IMG_7236.jpg
    IMG_7236.jpg
    125.3 KB · Views: 741
  • IMG_7237.jpg
    IMG_7237.jpg
    139 KB · Views: 723
  • IMG_7238.jpg
    IMG_7238.jpg
    137.6 KB · Views: 722
  • IMG_3817.jpg
    IMG_3817.jpg
    96.2 KB · Views: 761
Last edited:
Are you familiar with BleepinJeep on Youtube? He did a similar thing with a XJ. Narrowed front and rear, chopped body, full cage, gears, lockers, built axles, and 39.5" tires
 
Are you familiar with BleepinJeep on Youtube? He did a similar thing with a XJ. Narrowed front and rear, chopped body, full cage, gears, lockers, built axles, and 39.5" tires

Yeah, I know Matt's work. He inspired this build's design, but I'm going Toyota V6 (reliable) over Jeep XJ I6 (not so much reliable). And I'm keeping my doors and pillars. Well duh on the pillars, because the doors.
 
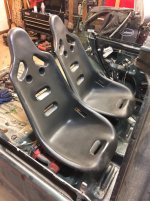
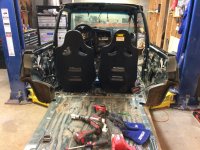
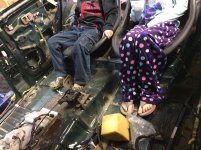
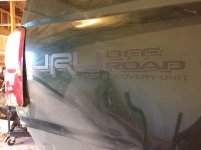
More body mods today. Spent some time cutting and tacking in the rear quarters. My little helpers came down to the shop to help me measure the rear seat placement too. And since I'm a member of Jeep's & Wrenches Offroad Club having a Jeep Recovery Unit is a good thing, right?

IMG_7244.jpg

IMG_7245.jpg

IMG_7253.jpg

IMG_7247.jpg

IMG_7254.jpg
 

Attachments

  • IMG_7244.jpg
    IMG_7244.jpg
    108.5 KB · Views: 696
  • IMG_7245.jpg
    IMG_7245.jpg
    108.1 KB · Views: 714
  • IMG_7253.jpg
    IMG_7253.jpg
    120.3 KB · Views: 677
  • IMG_7247.jpg
    IMG_7247.jpg
    140.3 KB · Views: 665
  • IMG_7254.jpg
    IMG_7254.jpg
    94.4 KB · Views: 682
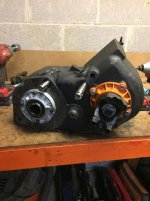
NP205 All cleaned up and ready to mate to the underdrive.

IMG_7008.jpg

IMG_7137.jpg

IMG_7302.jpg
 

Attachments

  • IMG_7008.jpg
    IMG_7008.jpg
    108.6 KB · Views: 616
  • IMG_7137.jpg
    IMG_7137.jpg
    105.5 KB · Views: 615
  • IMG_7302.jpg
    IMG_7302.jpg
    118.3 KB · Views: 627
I thought I was finally getting my head round what could be done to a 4runner. This is blowing me away to say the least. Maybe it's cos I'm just a rookie. Either way, thank you for letting us follow/share the journey!

Also, of far more importance: 10/10 for those PJ pants!
 
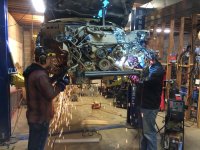
More progress this weekend. I mentioned I had lots of BEER in the shop, and amazingly two of my friends showed up to help work on this beast. AWESOME!
IMG_7374.jpg

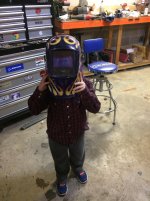
My little helper came downstairs to visit the fun for a while too.
IMG_7379.jpg

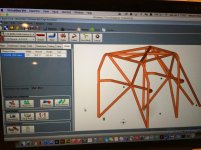
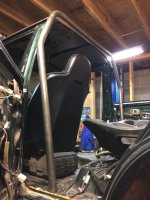
Got the roll cage designed. This is all internal here. This is built for strength and safety not looks. The cosmetic tube comes later.

IMG_7401.jpg
IMG_7390.jpg

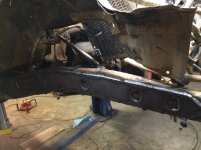
Got started on the boat sides / rock sliders and the frame stiffeners too.

IMG_7392.jpg
IMG_7394.jpg
 

Attachments

  • IMG_7374.jpg
    IMG_7374.jpg
    143.4 KB · Views: 627
  • IMG_7379.jpg
    IMG_7379.jpg
    122.2 KB · Views: 623
  • IMG_7401.jpg
    IMG_7401.jpg
    120.8 KB · Views: 619
  • IMG_7390.jpg
    IMG_7390.jpg
    122.6 KB · Views: 616
  • IMG_7392.jpg
    IMG_7392.jpg
    117.7 KB · Views: 638
  • IMG_7394.jpg
    IMG_7394.jpg
    107.9 KB · Views: 606
Oh yeah, Got the steering shaft installed and tacked in the orbital for the full hydro setup.
IMG_7395.jpg
 

Attachments

  • IMG_7395.jpg
    IMG_7395.jpg
    137.2 KB · Views: 625
I thought I was finally getting my head round what could be done to a 4runner. This is blowing me away to say the least. Maybe it's cos I'm just a rookie. Either way, thank you for letting us follow/share the journey!

Also, of far more importance: 10/10 for those PJ pants!

Based on my research, this is the most extreme modification list done to a 3rd gen 4Runner to date. Thus I had to share.
 
I don't think it's been asked or mentioned by you so I'll ask. Are you keeping the engine stock or stuporcharging it? Or do something else and do a LS swap? There's a second gen on mpls Craigslist with a swapped 350 out of a corvette that looks pretty clean. I'm just hoping that if you do go that route,if the budget allows, that there would be a crap ton of pics.
 
I don't think it's been asked or mentioned by you so I'll ask. Are you keeping the engine stock or stuporcharging it? Or do something else and do a LS swap? There's a second gen on mpls Craigslist with a swapped 350 out of a corvette that looks pretty clean. I'm just hoping that if you do go that route,if the budget allows, that there would be a crap ton of pics.

Unfortunately, my budget is already blown. When I started this project I planned on using junkyard and used parts and leaf springs... but then I decided that links would be better, so why not just go all out. Before I knew it, this beast was full-on custom and all new parts (minus transfer case and axles). I originally planned to keep the stock Toyota engine. Using the rule of thumb to over axle and under power so as not to break things as frequently. I would LOVE to do an LS swap, and might do so later on (after this project is long finished and I save some more money), but as of right now it's just not in the budget.

I search the junk yards looking for an LS every time I go out near one for whatever reason. I always travel to Nashville (closest big junk yards) with tools, just in case. Even when I'm there on business. I'm hoping to find a gem for less than $200. And, yes it can be had.
 
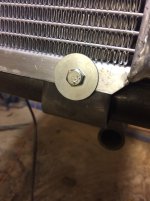
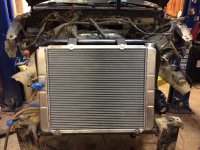
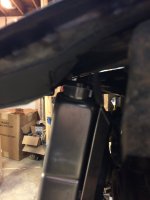
Custom radiator mounts fabbed up and installed.
IMG_7407.jpg

The radiator is a dual core universal aluminum radiator from Summit (Part number SUM-380425) complete with an aluminum shroud and new 16" electric fan to help keep things cool at idle and low speeds on the trail. The stock engine-driven fan just didn't have enough oomph to draw air through the radiator, condenser, and trans cooler.

The tube mount behind the radiator has tube couplers at the base to allow the radiator to be removed. You know, for that eventual LS swap. :biggrin2:


IMG_7413.jpg

IMG_7411.jpg

IMG_7416.jpg

IMG_7417.jpg
 

Attachments

  • IMG_7407.jpg
    IMG_7407.jpg
    124.1 KB · Views: 601
  • IMG_7413.jpg
    IMG_7413.jpg
    104.3 KB · Views: 599
  • IMG_7411.jpg
    IMG_7411.jpg
    99.7 KB · Views: 585
  • IMG_7416.jpg
    IMG_7416.jpg
    141.9 KB · Views: 606
  • IMG_7417.jpg
    IMG_7417.jpg
    103.9 KB · Views: 597
Do you have more pics of the boat sides you put in? Also when you welded in your frame stiffeners did you make a box over the existing frame or did you just cut and weld plate to the sides of the frame?
 
Do you have more pics of the boat sides you put in? Also when you welded in your frame stiffeners did you make a box over the existing frame or did you just cut and weld plate to the sides of the frame?

The frame on these Toyotas are already boxed in. It's just 3/16" plate welded to the outside of the frame. That's all you need for leafs and you don't really even need that for Linked suspension because links won't stress that part of the frame. But, I already had the frame stiffening plates, so I went ahead and put them in just for the sake of it.
 
The frame on these Toyotas are already boxed in. It's just 3/16" plate welded to the outside of the frame. That's all you need for leafs and you don't really even need that for Linked suspension because links won't stress that part of the frame. But, I already had the frame stiffening plates, so I went ahead and put them in just for the sake of it.

I didn't word my question right. When I patched an 18" long section of my frame the only feasible way for me to make sure it was safe was to actually build a box that slid over the top of the frame and then I welded the 4th side of the box along the bottom of the frame. I was just wondering if you did that which sounds like you didn't.
 

Members online

Forum statistics

Threads
278,312
Messages
3,554,089
Members
248,016
Latest member
Advally Service

Trending content

Back
Top