
You are using an out of date browser. It may not display this or other websites correctly.
You should upgrade or use an alternative browser.
You should upgrade or use an alternative browser.
Extreme 3rd Gen Build! Insane!
- Thread starter NotKewl
- Start date

Chuckles89
New member
I might be down for some wrenching on a weekend in the future

Rockdawg84
Active member
Anyone know what the GPM or PSI rating the stock 5VZ-FE water pumps produce? I can shorten my wheelbase by 6" if I relocate the radiator to the rear and want to know if the stock pump will handle the extra pressure I will need to push through the extra pipe. Has anyone gone with a rear mounted radiator on one of these engines with success?
Why would you want to shorten your wheelbase? you'll end up at 97"'s and will dodge trees well but won't be able to climb anything.

NotKewl
New member
Suspension setup begins!
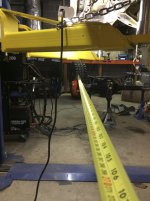
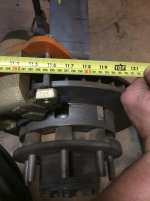
Started getting the suspension components welded up tonight! I'm pooped, though. Remind me to give you an idea of my day sometime shortly. The wheelbase is right at 117" (297.6 CM), the same as a Jeep JKU (that's the 4 door Wrangler for you non-Jeep nomenclature knowing folks).
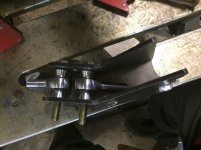
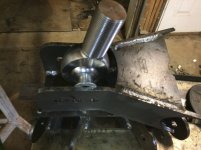
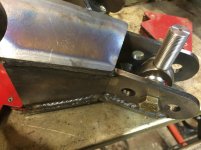
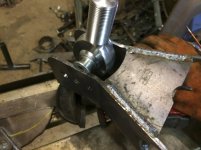
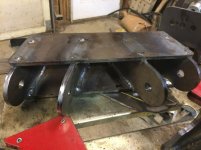
What to do when you run out of MIG wire, you switch to TIG of course! Though I'm not a fan of TIG for this kind of work. Sure, it works, very well in fact, but it's too slow and time consuming for me.
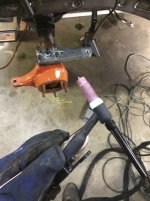
Started getting the suspension components welded up tonight! I'm pooped, though. Remind me to give you an idea of my day sometime shortly. The wheelbase is right at 117" (297.6 CM), the same as a Jeep JKU (that's the 4 door Wrangler for you non-Jeep nomenclature knowing folks).
What to do when you run out of MIG wire, you switch to TIG of course! Though I'm not a fan of TIG for this kind of work. Sure, it works, very well in fact, but it's too slow and time consuming for me.
Attachments








Last edited:
Rockdawg84
Active member
Started getting the suspension components welded up tonight! I'm pooped, though. Remind me to give you an idea of my day sometime shortly. The wheelbase is right at 117", the same as a Jeep JKU (that's the 4 door Wrangler for you non-Jeep nomenclature knowing folks).
I hadn't realized that you had stretched that far already. 111" is nice. Carry on :lookout:
NotKewl
New member
Why would you want to shorten your wheelbase? you'll end up at 97"'s and will dodge trees well but won't be able to climb anything.
I want it at 111 min to 117 max. The problem is with the current position of the front axle (set now at 117") I still have a winch and crap sticking out giving me a 25 to 30-degree approach angle. Also the oil pan and crap interfere with the steering ram and the bump stop. I'd like to keep it as low as possible for stability and I'd prefer a 0-degree approach. But, after contemplating it tonight, I decided I don't have the time to mess with it if I want to get this thing finished on time. I'll set it for 117" and fiddle with it later. I can always relocate the radiator and bob the rear more if needed.
Last edited:
NotKewl
New member
When I was little, I would get my dad tools when he was under the 4Runner. Now he gets tools for me haha! I guess I was about 15 when I started doing everyone's oil changes and it all went from there
That's what my youngest does. That kid has gotten pretty good at grabbing the correct size I need. lol. I did the same thing with my grandfather waaaay back when I was a kid too. From about the time I was 6, or 7 years old I guess. My dad was (isn't) mechanically inclined, but his dad was a genius when it came to anything mechanical. Taught me most of what I know, well at least what I got started with. It's good you got to have that experience with your dad! I wish my oldest son (he's 17) had an interest in cars. He got the science / math (computer) geek part of me (and his mom), but not the mechanical engineering part I guess.
NotKewl
New member
Started building the seat mounts for the cage. The first set was too high, so I had to lower them about 1.5 inches. I'll need to fab up some brackets to weld over the tube ends behind the seat, but it looks like it will work. I tested it out and feels good. Right at stock seat height. I'll tack on several seat tabs so I can move the seat forward for my kid to drive it. Don't want sliders, I want the seats to be solid mounted.
The first iteration. Too tall when in-line connected to the main hoop.
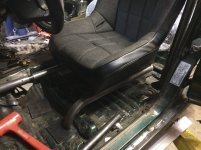
Lowered it down underneath the main hoop, which is why I need to make a support bracket that goes over the tube and locks it in place. Mostly because there isn't enough room to get a good weld just tube to tube.
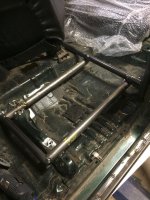
The final result.
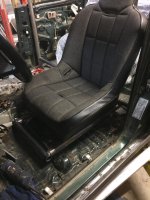
The first iteration. Too tall when in-line connected to the main hoop.
Lowered it down underneath the main hoop, which is why I need to make a support bracket that goes over the tube and locks it in place. Mostly because there isn't enough room to get a good weld just tube to tube.
The final result.
Attachments



NotKewl
New member
More cage work. Finished the seat rails for the passenger side, installed the front halo and the driver side down bar. Not sure I like the headroom, so I may end up changing it. The passenger side of the 4Runner has the rear heating unit under the seat, so I got lucky with the seat rail placement. Fits like a glove thankfully.
Braces for the tubing. Just 1/8" plate cut to fit.
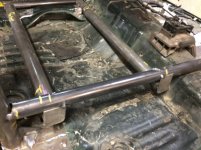
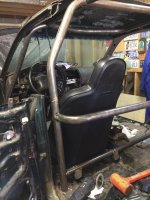
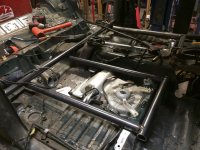
Braces for the tubing. Just 1/8" plate cut to fit.
Attachments



Last edited:
NotKewl
New member
Well, I had to cut the whole roof off. I wasn't satisfied with the amount of headroom I had up front with the cage tucked under it, so I tore it all apart and rebuilt everything from the main hoop forward. I'm 6'-4" so, not exactly a small person and I really don't feel like bumping my head on the cage after every bounce. It all fits together much better now and I have tons of headroom.
I re-bent the main hoop too. It was crooked anyway. Now it's perfectly straight and square.
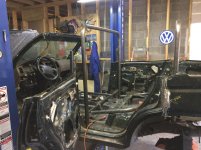
I made some clever anchors for the B-pillars that tie into the main hoop to keep them steady and allow the rear doors to not bind. Just extra stability.
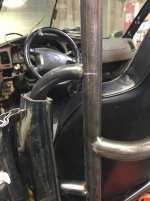
The progress after a ton of work today. Pleased with the outcome so far. Sooooo much left to do, including making it all pretty. Yes, that front down bar is supposed to be at that angle. It's for strength, is in the exact right spot to protect the driver's hands while on the wheel, and when filled in with sheet metal below the dash and across the bottom quarter of the door opening, will keep mud and crap off of me. You'll see what I'm planning soon.
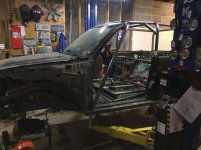
I re-bent the main hoop too. It was crooked anyway. Now it's perfectly straight and square.
I made some clever anchors for the B-pillars that tie into the main hoop to keep them steady and allow the rear doors to not bind. Just extra stability.
The progress after a ton of work today. Pleased with the outcome so far. Sooooo much left to do, including making it all pretty. Yes, that front down bar is supposed to be at that angle. It's for strength, is in the exact right spot to protect the driver's hands while on the wheel, and when filled in with sheet metal below the dash and across the bottom quarter of the door opening, will keep mud and crap off of me. You'll see what I'm planning soon.
Attachments




Last edited:

MN4runnerman
Senior Member
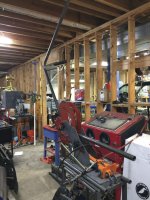
I like all the free magnetic dishes and lights from harbor freight on your lift. I have a crap ton of those too.
NotKewl
New member
I like all the free magnetic dishes and lights from harbor freight on your lift. I have a crap ton of those too.
Heck yeah! When they run a coupon for them free (with or without purchase), I stop by on my way home every day the sale runs and grab one since I drive by it anyway. The lights are great in the shop trying to see in tight spaces and you can NEVER have too many magnetic parts trays when working on cars.
MN4runnerman
Senior Member
Heck yeah! When they run a coupon for them free (with or without purchase), I stop by on my way home every day the sale runs and grab one since I drive by it anyway. The lights are great in the shop trying to see in tight spaces and you can NEVER have too many magnetic parts trays when working on cars.
I had to drive 15 miles to get to one until they built a new harbor freight less than a mile from me. Now I'm in there at least once a week.
NotKewl
New member
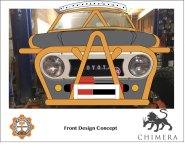
Made a quick diagram of what I'm planning to do to the rest of the exo-cage up front. For the front door area, I am basically building a tub instead of using half doors. Low enough to climb in and out no problem, but high enough so you don't get mud kicked up on you by the tires too badly.
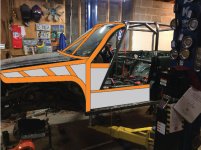
Attachments

Last edited:
NotKewl
New member
Not much progress tonight. I only have a few hours after work to work on this project during the week. I mostly measured and engineered the front of the exo-cage with those measurements using Bend Tech Pro (awesome application BTW, worth every penny). Yeah, I could use AutoCAD or Sketch-Up, but why when Bend Tech is made specifically for this reason! No, they did not pay me to say that. The only real complaint I have of the software is it is Microsoft .NET based so it requires a Windows OS. Being a software engineer, I like .NET, but I'm really a MAC guy, always have been and always will be (Once you go MAC, you never go back). I have to run a virtual machine with Windows 7 on it to get it to work on my MAC... but I digress.
I got my new shifter in today. :dancin: The Offroad design model wouldn't work with the way I plan to clock the transfer case up so I picked up a JB Custom Fab unit. It's a cable shifter, so I can have more flexibility in mounting the transfer case and the shifter. I also managed to get back to my tube bender (Rogue Fab - Best bender ever!!! No, they didn't pay me to say that either) to start working on the exo-cage which is 1.5" .120 wall tubing (The roll cage itself is 1.75" .120 wall DOM) and bend the front grill hoop to start the exo. Can you guess what it's going to be? No, not a Jeep... Think Toyota!
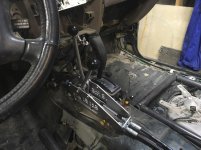
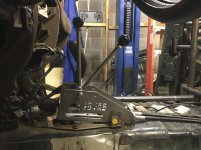
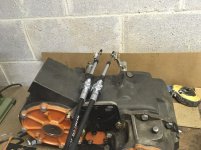
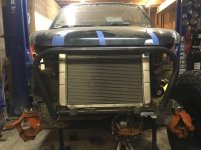
I got my new shifter in today. :dancin: The Offroad design model wouldn't work with the way I plan to clock the transfer case up so I picked up a JB Custom Fab unit. It's a cable shifter, so I can have more flexibility in mounting the transfer case and the shifter. I also managed to get back to my tube bender (Rogue Fab - Best bender ever!!! No, they didn't pay me to say that either) to start working on the exo-cage which is 1.5" .120 wall tubing (The roll cage itself is 1.75" .120 wall DOM) and bend the front grill hoop to start the exo. Can you guess what it's going to be? No, not a Jeep... Think Toyota!
Attachments





NotKewl
New member
My Blackbox Titan showed up today! Along with a crap ton of other things I've ordered in the last few days. Northwest Fab take forever and a day to ship anything, but it finally arrived! The Black Box was ordered way before Christmas and it just now shows up. The rest of the stuff was ordered two days ago from Summit, Rockauto.com, and Ebay and BAM! at my door two days later! NWF could learn a thing or two from Summit et al. I love it when I get home from work and there are a bunch of boxes waiting for me!
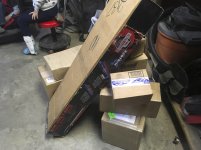
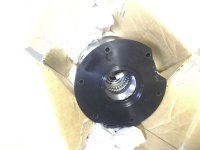
My new Blackbox underdrive from Northwest Fab in :canada:
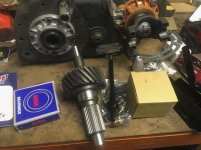
The rest of the kit that came with the BB. Need to install the new beefy input shaft into the NP205 tomorrow to install the BB.
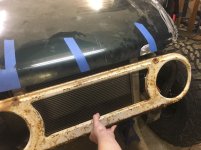
The original 1976 FJ40 Grille shell for my Chimera I ordered from a guy on eBay. Need to clean it up and either cut and reweld it some to fit my grill bar or re-bend the grill bar to match the grille dimensions.
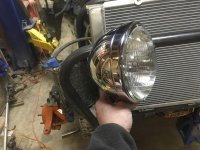
Hotrod 1932 Ford coupe headlight assemblies that came with stock sealed beam halogens.
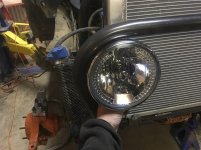
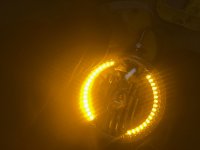
Retrofitted new headlights with integrated LED strips for halo effect, or use as a parking light / turn signal.
My new Blackbox underdrive from Northwest Fab in :canada:
The rest of the kit that came with the BB. Need to install the new beefy input shaft into the NP205 tomorrow to install the BB.
The original 1976 FJ40 Grille shell for my Chimera I ordered from a guy on eBay. Need to clean it up and either cut and reweld it some to fit my grill bar or re-bend the grill bar to match the grille dimensions.
Hotrod 1932 Ford coupe headlight assemblies that came with stock sealed beam halogens.
Retrofitted new headlights with integrated LED strips for halo effect, or use as a parking light / turn signal.
Attachments







NotKewl
New member
Blackbox Titan Install
Took the day off of work today to get the Blackbox installed on the NP205 and the get the transmission prepped for installation of the transfer case tomorrow.
We start by tearing down the NP205 on the input and rear output shaft side.
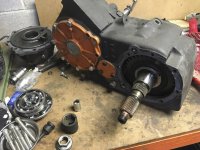
The underdrive box comes apart next.
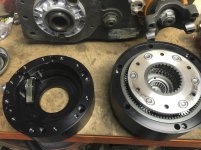
Installed the base of the black box underdrive.
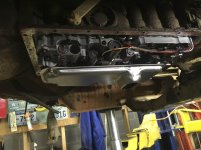
Since I had to lift the transmission, remove the transmission mount and remove the rear tail housing so I could press out the tail housing bearing and install the new seal box, I went ahead and did a transmission service. New filter and cleaned up the cover a lot.
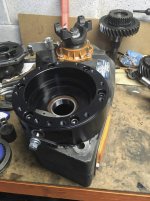
Removed the tail housing.
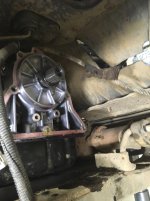
Take out the snap ring that holds the bearing in place.
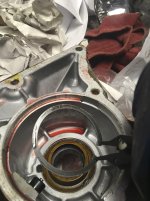
Press out the bearing (we don't need it anymore with the Advanced Adapter kit).
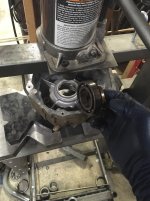
Then we press in the new seal adapter then reinstall the tail housing.
Took the day off of work today to get the Blackbox installed on the NP205 and the get the transmission prepped for installation of the transfer case tomorrow.
We start by tearing down the NP205 on the input and rear output shaft side.
The underdrive box comes apart next.
Installed the base of the black box underdrive.
Since I had to lift the transmission, remove the transmission mount and remove the rear tail housing so I could press out the tail housing bearing and install the new seal box, I went ahead and did a transmission service. New filter and cleaned up the cover a lot.
Removed the tail housing.
Take out the snap ring that holds the bearing in place.
Press out the bearing (we don't need it anymore with the Advanced Adapter kit).
Then we press in the new seal adapter then reinstall the tail housing.
Attachments








NotKewl
New member
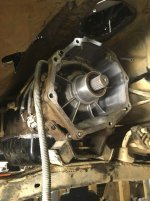
Well, I spent damn near all day fabbing up a few cross-members and (with a buddy) trying to get the transfer case mounted... But Nooooooo of course not. There is ONE stupid bolt that needs more clearance at the transmission housing before it will go all the way in. :frusty:
But at least the clocking I have set for it fits up in the housing perfectly, and the xfer case doesn't hang down past the cross-members.
Grrrrrrrr. I'll have to take it off again and make room for the bolt. :crybaby: :violin:
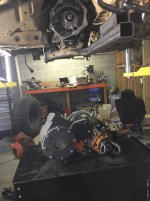
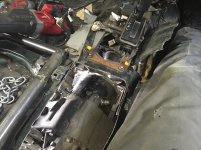
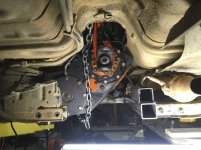
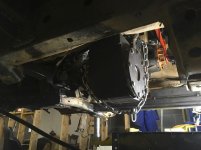
But at least the clocking I have set for it fits up in the housing perfectly, and the xfer case doesn't hang down past the cross-members.
Grrrrrrrr. I'll have to take it off again and make room for the bolt. :crybaby: :violin:
Attachments




Last edited:
Similar threads

- Replies
- 2
- Views
- 3K

- Replies
- 1
- Views
- 13K

- Replies
- 10
- Views
- 13K


