
You are using an out of date browser. It may not display this or other websites correctly.
You should upgrade or use an alternative browser.
You should upgrade or use an alternative browser.
Extreme 3rd Gen Build! Insane!
- Thread starter NotKewl
- Start date


NotKewl
New member
I haven't looked at this thread in a while, nice freakin work! Love that your doing a retro hot rod grill & headlight look.
Thanks! It's a ton of work, but going to be well worth it in the end.... I hope! :thumb3:
NotKewl
New member
I didn't get much done today, unfortunately. I had some housework to do for the wife (because you need a happy wife to keep wrenching like this) and helped the kids with some projects for school. However, I did manage to get to Northwest Tool to pick up a high-rise transmission jack. I decided that yesterday was a PITA and having the right tool for the job is too important. Now I don't need two buddies and a crane with holes cut in the tunnel to reinstall the transfer case.
I need to fab up something to fix the shift mount for the Blackbox. Not sure why Northwest fab sent me one that doesn't fit my NP205 setup. Maybe this is an oddball 205? Dunno. Either way, I'll need to make or modify the bracket to get it to work properly. The shifter linkages and cables all need to be installed before the transfer case goes in for good. There simply is no room in the tunnel to do it once the case is installed.
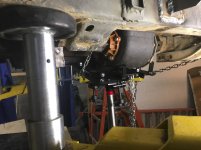
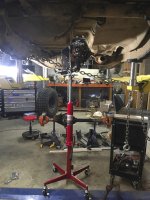
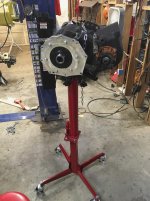
Even getting the transfer case on and off this high jack is a feat in and of itself.
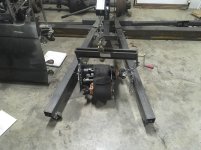
This bracket is supposed to mount to the Blackbox, but the 205 is kinda in the way where the bracket doesn't line up. Northwest Fab's instructions are crap, disjointed information, and incomplete. So screw it, I'll make something myself.
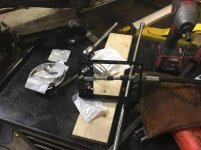
Look close and you can see where the bolt on the adapter was interfering with the transmission bell housing. I will need to clearance the housing to make room for the bolt.
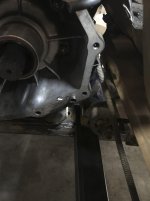
I need to fab up something to fix the shift mount for the Blackbox. Not sure why Northwest fab sent me one that doesn't fit my NP205 setup. Maybe this is an oddball 205? Dunno. Either way, I'll need to make or modify the bracket to get it to work properly. The shifter linkages and cables all need to be installed before the transfer case goes in for good. There simply is no room in the tunnel to do it once the case is installed.
Even getting the transfer case on and off this high jack is a feat in and of itself.
This bracket is supposed to mount to the Blackbox, but the 205 is kinda in the way where the bracket doesn't line up. Northwest Fab's instructions are crap, disjointed information, and incomplete. So screw it, I'll make something myself.
Look close and you can see where the bolt on the adapter was interfering with the transmission bell housing. I will need to clearance the housing to make room for the bolt.
Attachments
-
 xfercase-install2 (1 of 7).jpg97.8 KB · Views: 869
 -
 xfercase-install2 (2 of 7).jpg121.7 KB · Views: 851
 -
 xfercase-install2 (4 of 7).jpg123.9 KB · Views: 862
 -
 xfercase-install2 (5 of 7).jpg103.4 KB · Views: 851
 -
 xfercase-install2 (6 of 7).jpg107.2 KB · Views: 870
 -
 xfercase-install2 (7 of 7).jpg65.7 KB · Views: 839
NotKewl
New member
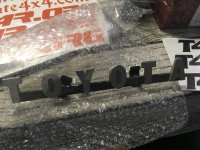
Tis the season for sickness I guess. Been home with a sick kid so haven't gotten any more work done. I did get some goodies, though. I ordered an authentic TOYOTA grille script emblem off eBay for an old FJ40 to go with my FJ40 grille. I'll need to do a little restoration work on the grille and script.
I also want to list the build threads on the side of the vehicle (rear quarters where all the product stickers will go). I couldn't find any T4R.org decals, so I drew some up in Adobe Illustrator, and had a friend of mine who can print and cut vinyl print up some T4R.org and Pirate4x4.com decals, as well as, some QR code surrounds. That way folks on the trails can scan the code and see the build pages if I'm not around to answer questions. Really it's just a geeky thing to do, which is why I'm doing it.
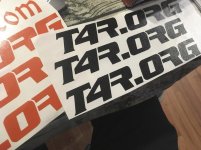
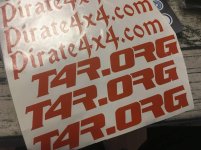
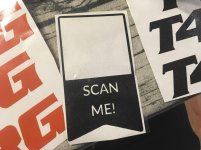
I also want to list the build threads on the side of the vehicle (rear quarters where all the product stickers will go). I couldn't find any T4R.org decals, so I drew some up in Adobe Illustrator, and had a friend of mine who can print and cut vinyl print up some T4R.org and Pirate4x4.com decals, as well as, some QR code surrounds. That way folks on the trails can scan the code and see the build pages if I'm not around to answer questions. Really it's just a geeky thing to do, which is why I'm doing it.
Attachments





185Runner
New member
I also want to list the build threads on the side of the vehicle (rear quarters where all the product stickers will go). I couldn't find any T4R.org decals, so I drew some up in Adobe Illustrator, and had a friend of mine who can print and cut vinyl print up some T4R.org and Pirate4x4.com decals, as well as, some QR code surrounds. That way folks on the trails can scan the code and see the build pages if I'm not around to answer questions. Really it's just a geeky thing to do, which is why I'm doing it.
THIS! Is an awesome idea
NotKewl
New member
THIS! Is an awesome idea
Thanks! I thought it would be a neat and modern way to tell this rigs story.

wake_rider
New member
QR codes. That's genius. Good way to keep from repeating yourself ad nauseum.
NotKewl
New member
Grille gets a shot... of paint that is!
The FJ40 grille I got off eBay is off of a late 70's (76 I think) model so it was a bit rusty and dented. I stuck it in the blast cabinet to strip the old paint and hopefully remove most of the rust but alas, some parts were too pitted. To restore it completely (had it been a restoration or show car) I would have filled the pits, holes, and such with the welder, hammered out all the dents, then applied a special filler compound to smooth everything out. However, since this isn't a resto of an FJ but rather a usable hardcore crawler, I don't really care about the "Patina." In fact, I think the dents and pits give is a rustic character. One that fits the persona of this project.
Sandblasted first with a little remedial hand sanding.
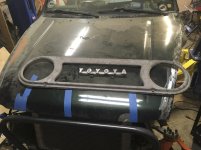
A shot of self-etching primer from Rust-oleum.
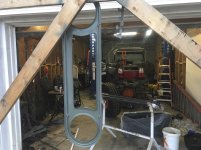
A few coats of semi-gloss white for the perfect look. The Toyota script will match the bodywork in either Gray, or most likely Orange!
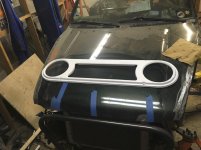
The FJ40 grille I got off eBay is off of a late 70's (76 I think) model so it was a bit rusty and dented. I stuck it in the blast cabinet to strip the old paint and hopefully remove most of the rust but alas, some parts were too pitted. To restore it completely (had it been a restoration or show car) I would have filled the pits, holes, and such with the welder, hammered out all the dents, then applied a special filler compound to smooth everything out. However, since this isn't a resto of an FJ but rather a usable hardcore crawler, I don't really care about the "Patina." In fact, I think the dents and pits give is a rustic character. One that fits the persona of this project.
Sandblasted first with a little remedial hand sanding.
A shot of self-etching primer from Rust-oleum.
A few coats of semi-gloss white for the perfect look. The Toyota script will match the bodywork in either Gray, or most likely Orange!
Attachments




MN4runnerman
Senior Member
This is probably a bit down the road of thinking for you, but I've got a question about your exhaust setup. Are you sticking with the stock setup just moving it around a bit? Or are you cutting the cat out and just have a pipe with muffler? Straight pipe? True dual exhaust? Or some cross between everything?
Ok it was more than one question......
Ok it was more than one question......
NotKewl
New member
This is probably a bit down the road of thinking for you, but I've got a question about your exhaust setup. Are you sticking with the stock setup just moving it around a bit? Or are you cutting the cat out and just have a pipe with muffler? Straight pipe? True dual exhaust? Or some cross between everything?
Ok it was more than one question......
In order for the engine management system to work properly (e.g. air/fuel mixture, fuel consumption, etc.) you need the mass airflow sensor and the O2 sensors, which are just before and after the catalytic converter (cat). The use of a muffler is an option, but I will put one back on to keep things quiet in the passenger compartment. There is no room for headers or duel exhaust, so the stock collector, cat, and an aftermarket muffler will be used in the stock location except where the exit point is. Instead of going all the way to the rear of the vehicle, I will exit the exhaust just inside the rear right wheel well.

lhsoulrebel
New member
My Blackbox Titan showed up today! Along with a crap ton of other things I've ordered in the last few days. Northwest Fab take forever and a day to ship anything, but it finally arrived! The Black Box was ordered way before Christmas and it just now shows up. The rest of the stuff was ordered two days ago from Summit, Rockauto.com, and Ebay and BAM! at my door two days later! NWF could learn a thing or two from Summit et al. I love it when I get home from work and there are a bunch of boxes waiting for me!
View attachment 238445
My new Blackbox underdrive from Northwest Fab in :canada:
View attachment 238443
The rest of the kit that came with the BB. Need to install the new beefy input shaft into the NP205 tomorrow to install the BB.
View attachment 238444
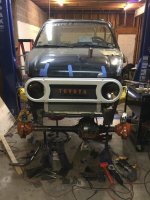
The original 1976 FJ40 Grille shell for my Chimera I ordered from a guy on eBay. Need to clean it up and either cut and reweld it some to fit my grill bar or re-bend the grill bar to match the grille dimensions.
View attachment 238447
Hotrod 1932 Ford coupe headlight assemblies that came with stock sealed beam halogens.
View attachment 238448
Retrofitted new headlights with integrated LED strips for halo effect, or use as a parking light / turn signal.
View attachment 238449
View attachment 238450
I'm following all this closely! Very unique build! Those light strips look fantastic, what brand are they, and where did you get them?
NotKewl
New member
Those light strips look fantastic, what brand are they, and where did you get them?
The are United Pacific Headlight assemblies. The LED's are integrated into the headlight unit. I got them from Summit Racing in Atlanta, well McDonough, GA. actually. Here's the link. https://www.summitracing.com/parts/upd-31378

NotKewl
New member
Transfer case is in for good!
Finally installed the transfer case and fabbed up the cross-member.
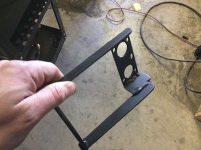
The Northwest Fab shift cable bracket didn't fit at all!!!, so I had to cut it and weld in a new piece to offset it enough to fit properly. Worked like a charm! :reddance:
Installed the shift cables before installing the transfer case. There isn't any room to install them after the transfer case goes in.
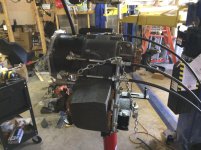
The transfer case is clocked to allow the case to be above the frame but also allow the front driveshaft to not be at a steep angle. Thus I had to make a mount to put it on the tranny jack in the correct orientation. Just used a Harbor Freight Wheel chock by drilling a hole in the tranny jack plate and screwing the chock in place to keep it from flopping over.
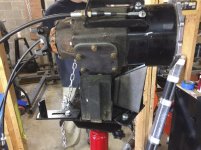
Installed.
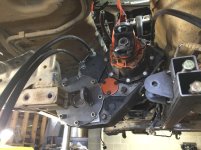
Complete with cross-member and attachment points all welded up and painted.
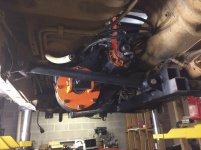
The view from the cab looking down.
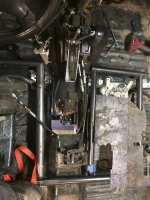
Finally installed the transfer case and fabbed up the cross-member.
The Northwest Fab shift cable bracket didn't fit at all!!!, so I had to cut it and weld in a new piece to offset it enough to fit properly. Worked like a charm! :reddance:
Installed the shift cables before installing the transfer case. There isn't any room to install them after the transfer case goes in.
The transfer case is clocked to allow the case to be above the frame but also allow the front driveshaft to not be at a steep angle. Thus I had to make a mount to put it on the tranny jack in the correct orientation. Just used a Harbor Freight Wheel chock by drilling a hole in the tranny jack plate and screwing the chock in place to keep it from flopping over.
Installed.
Complete with cross-member and attachment points all welded up and painted.
The view from the cab looking down.
Attachments







1985taylor1925
Senior Member
There's some crazy stuff going down in this thread. Can't wait to see the final product
NotKewl
New member
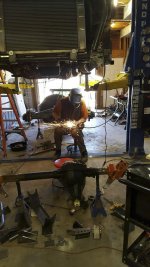
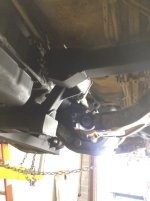
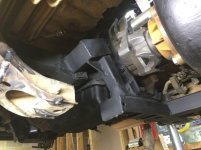
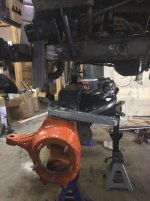
Got the tranny cross-member cut and notched to allow the front drive shaft to articulate. Then started to tack on all the front suspension components to the front axle. Had to move it forward two inches to clear the oil pan. I'll suck up the extra wheelbase (total of 119" now) to keep the hydraulic cylinder in the back and off the rocks. I'll see if I can pull the rear axle in an inch or two and chop more of the rear off to shorten the wheelbase back to 117"
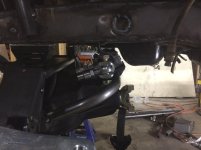
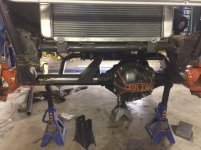
Attachments






NotKewl
New member
Only had a few hours to work today, so I started organizing and welding up the suspension links. Lower links front and rear are four feet long 2" diameter .5" wall DOM. Super strong! The uppers are a little thinner. 1.75" diameter .25" wall DOM.
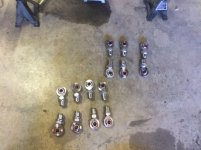
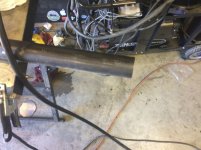
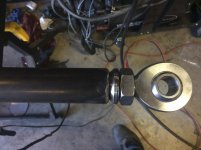
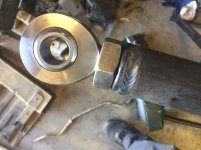
Attachments




Last edited:
NotKewl
New member
Had to move the steering ram to the front, which I didn't want to do, but It gave me the clearance I needed to lower this rig and shorten up the wheelbase back to a manageable 117". Also trial fit some of the exo-cage. Not sure I'm happy with the rear design yet, so I might start over there.
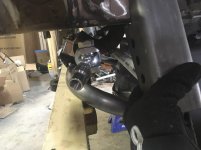
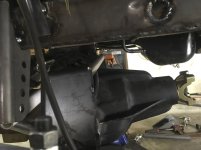
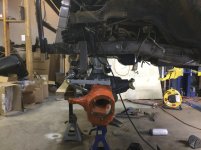
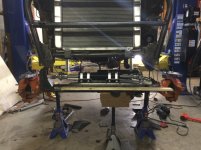
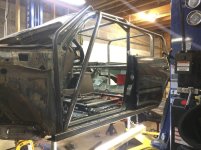
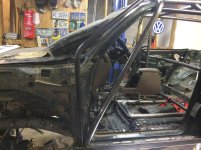
Attachments






NotKewl
New member
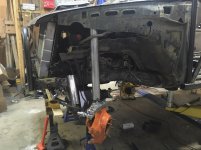
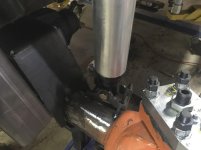
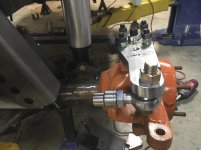
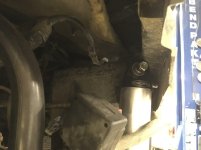
Got my steering ram configured and measured tonight. New grade-8 bolts came in today too. I had to order them specifically for the thread count on the WFO Dana 60 high steer arms I have. I also put the front end at full bump (notice the crushed bump-stop) to measure the shock hoop height. It's always best to build your suspension at full bump with a completely compressed shock/strut/Coilover (without the coil), etc. It ensures you will have adequate clearance when the suspension cycles up to a full stop, a hard hit and so on. Do this with the tires in place too and the axle center at the radius of the tire size. e.g. 40" tire, the axle center (notice I said center) should be set on stands at 20" high max. All looks good and I'm off of work the next two days so I will be in the shop doing as much as I can to get this beast finished up. I'm just over 6 weeks away from my deadline to finish...well get it working. By Trail Fest 2017 it will be running and driving safely, but cosmetically it will still probably look like a great big pile of :toilet:... yeah that!
Attachments




NotKewl
New member
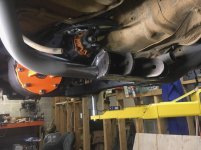
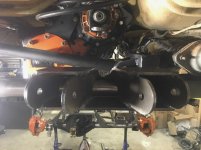
Started on the rear link mounts today. Getting the lower mount cross-member was a bit of a pain but it turned out great. Used 1.75" .25" wall DOM for the cross-member.
Also hacked the front upper link tower in half to move the link location to the driver side. The lower half will become a bump stop mount for the right side.
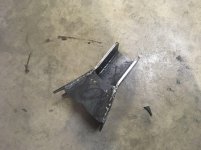
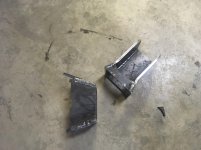
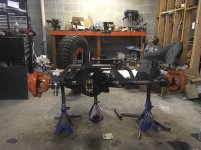
Also hacked the front upper link tower in half to move the link location to the driver side. The lower half will become a bump stop mount for the right side.
Attachments





Similar threads

- Replies
- 2
- Views
- 3K

- Replies
- 1
- Views
- 13K

- Replies
- 10
- Views
- 13K


