fiberglass 1/4 install here

guido4512

New member
All right all you dood it yourselfers..... here it is . An install of full quarter panels from toyotafiberglass.com on my Moms 1988 4runner.


This is the ONLY way to go if your gonna revitalize that rusted out runner. Metal patches and bondo are only temporary.

Let me first say that Corey is TOP Notch people and has a Top notch product to boot. Very professional and friendly.

The install went very smoothly ( I have never worked with automotive fiberglass before) and had no problems with it after I read the toyotafiberglass instructional page a few times. There are some "tricks" there that must be looked at!

Tools I used:

Angle grinder with thin cutting wheels and regular grinding wheel
air chisel
die grinder
various hammers including rubber mallet
drill - you can get by without a spot weld cutter
Mig welder (for inner panel patch work)
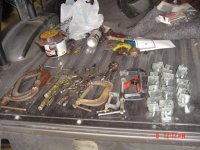
c clamps many many c clamps
various shop tools

So lets take a look at what I was working with:
I'll try to exlpain each photo as I go along so ask if something looks kooky........

:cool:

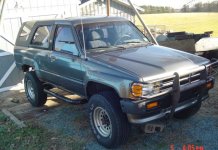
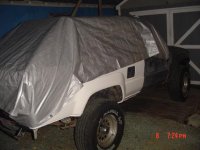
1988 Toyota 4Runner - rusty 1/4 panels.
:(
 

Attachments

  • pics from camera 285.jpg
    pics from camera 285.jpg
    68.2 KB · Views: 7,968
Register to hide this ad
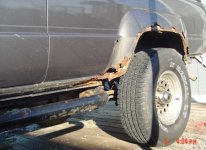
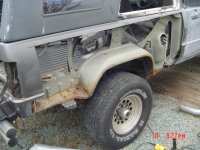
Start by removing the old quarters - use cutting wheel to cut the large sections out (Don't cut too deep here!!! there's wires in there ! just skim the surface ) then take a drill and drill out the spot welds. Use an air chisel to remove the rest.

Oh yeah don't forget to remove the top!
And also you need to remove all the interior in the back....
 

Attachments

  • pics from camera 315.jpg
    pics from camera 315.jpg
    69 KB · Views: 15,689
Last edited:
Most of the spot welds popped pretty easy. there are some tricky ones around the door above the door catch.
Also the sail panels will need to be removed. A note : most if not all of the connectors will break on this. Don't worry toyotafiberglass has more....
 

Attachments

  • pics from camera 320.jpg
    pics from camera 320.jpg
    52.3 KB · Views: 7,654
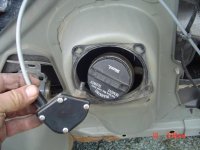
don't forget the gas lid popper here you'll need that later.....:p
 

Attachments

  • pics from camera 316.jpg
    pics from camera 316.jpg
    51.2 KB · Views: 7,579
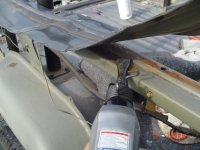
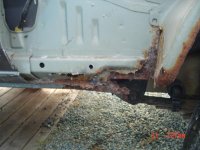
Here's the worst of the inner rust.. I just cut out the bad stuff and mig welded some sheet in there .....
 

Attachments

  • pics from camera 319.jpg
    pics from camera 319.jpg
    56.2 KB · Views: 7,649
After all the patch work, I prepped and painted the inners with KBS anti-Rust coating. Very similar to POR15 rust preventive paint.
I topped that with Duplicolor truck bed coating. This is pretty versatile stuff as you will see later.....

mmmm nice.....
 

Attachments

  • pics from camera 324.jpg
    pics from camera 324.jpg
    69.1 KB · Views: 7,843
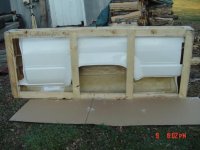
Heres the panels after I got em home from work where they were shipped. A nice sturdy crate around the panels gave em a cushy ride all the way from western Canada to Virginia.

A #2 square bit removes the screws and were ready to start trial fitting one side!!
 

Attachments

  • pics from camera 307.jpg
    pics from camera 307.jpg
    53.6 KB · Views: 7,541
First trial fitting.....

At first I thought " there no way this is going to fit!" but, if you take your time and have a lil patience they fit like a glove!
The trick is to start at the back hooking the bottom around the tail light area and work the panel forward clipping the top lip along the way then work the wheel well and forward to the door area. After a few "fittings" it was a piece of cake!
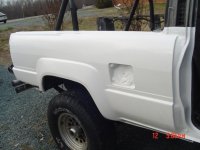
I had to trim at the top of the door post and at the bottom door area. You can see how the original shape was embossed in the gel coat to use as a guide. The holes are all marked this way too. ....so it was easy to see where to drill for the door catch, the top bolt holes, and the gas door holes.

The fiberglass is thicker than the sheet that came off so expect a little to show at the bottom of the door. Looks good though.....
 

Attachments

  • pics from camera 326.jpg
    pics from camera 326.jpg
    51.1 KB · Views: 9,603
Ok- once I had the fit where I wanted it was time to glue.

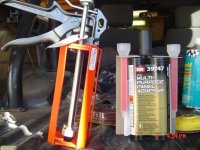
I used SEM panel adhesive recommended by my paint guy.
He loaned (for a deposit) this dual ram gun that shoots the epoxy thru a mixing tube. The guns are very expensive!

The glue maker and my paint guy said to apply the epoxy only to bare metal. It was not guaranteed to stick to paint, only metal and fiberglass. So I had to delicately grind away the paint around the edges where the glue would be. As long as it was covered in glue there should be no rust issues.
 

Attachments

  • pics from camera 331.jpg
    pics from camera 331.jpg
    67.2 KB · Views: 7,537
Before gluing get the clamps together. Many Many clamps.....and then get a few more.!!

I did the driver side first ...

Just apply the epoxy around the perimeter of the body where the panel will meet the metal and put it on . Use as many clamps as possible but the gluing instuctions said to not apply too much pressure as it will squeeze the glue out completely and not work as well.
 

Attachments

  • 002.jpg
    002.jpg
    66.3 KB · Views: 7,531
Last edited:
The passenger side was next. It has the fuel filler door.
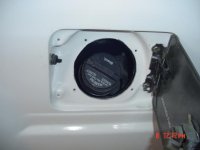
You have to cut out the round hole and mount you old door to the new panel. I just thru bolted it on. Drill the holes for the rubber grommet , the opener , and the rubber bumpers -The spots are there where you need to drill.
 

Attachments

  • 003.jpg
    003.jpg
    33.4 KB · Views: 7,519
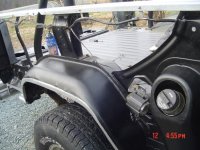
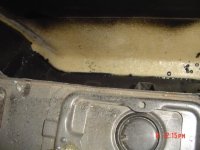
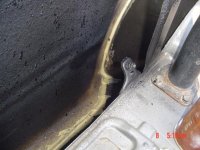
Here's a shot of the glued seam looking down at behind the wheel well. Here I used more of the bed liner material to hopefully sound deaden the compartment. Seam sealer is next.
 

Attachments

  • 006.jpg
    006.jpg
    51 KB · Views: 7,491
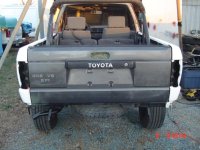
She looks like a truck again Cap'n!

Here is the rear after both panels installed.

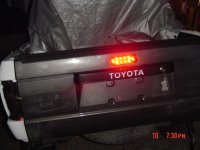
I also am working on a 3rd brake light for the inattentive drivers!!!!!!
 

Attachments

  • 013.jpg
    013.jpg
    66 KB · Views: 9,515
I just finished a trial wire up of the light .....its a super brite LED flush mount. What do ya think?

Any way......... here is a short version of how I replaced the 1/4's on my Moms 4runner.
I think anyone with good mech skillz should be able to achieve the same results in a few hours as I did.

If anyone has any ??? feel free to ask.

Next, is light body work, then epoxy primer and paint.
I also re fabricated the smittybuilt nerf bars and fabbed up a rear tube bumper.
 

Attachments

  • 015.jpg
    015.jpg
    43.5 KB · Views: 2,665

Members online

Forum statistics

Threads
278,309
Messages
3,554,068
Members
248,016
Latest member
Advally Service

Trending content

Back
Top