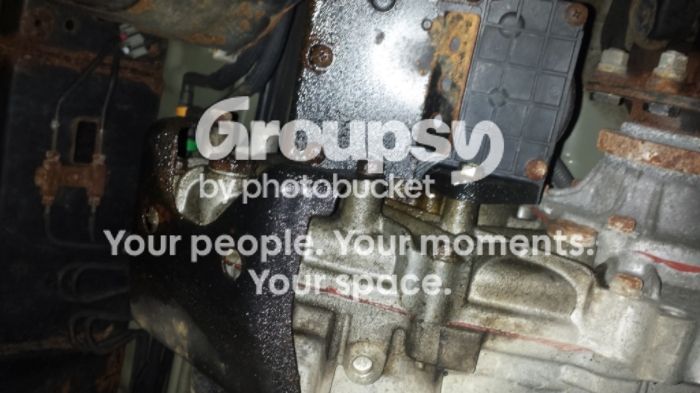
Fixing the transfer case shift motor leak from within..

Excellent write up. This will surely be very helpful to a lot of folks.. Props for posting it..
 
So let me get this straight. Did you do the procedure the OP posted? Or did you try the short cut of messing with the actuator?

Just to clairify, I have a new actuator on the way. I'm trying to make sure I have everything I need.

[MENTION=66389]BlackWorksInc[/MENTION] I hate to have to call on you yet again, but I've searched the FSM's, and i'm still confused on what I need. As I mentioned, I have the actuator coming,
36410-60093
Also it was suggested that I get qty 3 of
90520-13002 (some snap ring that can break)

I'm still waiting to see if they have:
90301-56009 But i'm not sure what that does either. My plan was to figure it out when I started wrenching.

I'm mildly terrified by this process, but my actuator is shot... I have no 4Lo and no Center Diff Lock.

I can tell you that the teeth on the rods will cut the shizzle out of the o-rings if they are pulled through. Best thing you can do is not touch the actuator until the transfer case is in half. Then remove the two bolts on the rod. Then the bolts holding actuator on. The tolerance between rods and transfer case is insane and is what pulls the rods out when you pull actuator out by its black box vice pushing on rods while pulling box. But in your situation since you have a new actuator make sure you lube up the new rods to slide in transfer case. You do not want to mess with movement on new actuator. Your old actuator, if the rods don't get pulled out, can you take it apart carefully and photograph the gear placement. The timing gears are smaller white ones if i recall. ***Also do not run the actuator with the transfer case apart. I did this to figure out timing and one of the rods will just fall out because the lil dc motor will keep pushing it out since its stop is a piece on other half of case (in case you get that wild hair to op check it before installation. Give the sealant a day to dry before filling it up with gear oil too, worth the wait in my opinion.
 
To get those lil snap runs off use two flat head screw drivers. To put on on i used vice grips on snap ring middle then whacked with my hand. If you knick the rods, like where the snap rings are, and you might, the knick must be removed or the rod won't slide out transfer case, its that tight - 2003 (AUG 2002) SE for reference
 
Your old actuator, if the rods don't get pulled out, can you take it apart carefully and photograph the gear placement. The timing gears are smaller white ones if i recall.

Concerning all the folks need to know the timing..... The fact that mine would be timed correctly has crossed my mind.

I'll see if I can gain some insight. I believe my actuator has mud and crud inside, hence the reason i'm replacing it. So i'm not certain what i'll find when I open it up.

I've considered opening it, cleaning it, trying to test it, and selling it as a used part assuming it functions properly.
 
Concerning all the folks need to know the timing..... The fact that mine would be timed correctly has crossed my mind.

I'll see if I can gain some insight. I believe my actuator has mud and crud inside, hence the reason i'm replacing it. So i'm not certain what i'll find when I open it up.

I've considered opening it, cleaning it, trying to test it, and selling it as a used part assuming it functions properly.

Sooooooo here's the problem - if your rods come out the timing is messed up and essentially any info derived from taking it apart is useless. When the rod is forced out it moves the gears. The best case scenerio is take it out without rod movement. It would be interesting to know if yours seized from gear oil pentetrating the rod orings, the large oring failing or friction on the locking mechanism over the large gears in transfer case. I'm still mad at mine because it worked fine and I took it apart to fix a crack in transfer case and a rod fell out. My mind is blown still too over no instructions from the company on how to retime it. It is very uncomplicated inside the assy, just where the gears make the connection to start/stop rod movement.
 
Sooooooo here's the problem - if your rods come out the timing is messed up and essentially any info derived from taking it apart is useless. When the rod is forced out it moves the gears. The best case scenerio is take it out without rod movement. It would be interesting to know if yours seized from gear oil pentetrating the rod orings, the large oring failing or friction on the locking mechanism over the large gears in transfer case. I'm still mad at mine because it worked fine and I took it apart to fix a crack in transfer case and a rod fell out. My mind is blown still too over no instructions from the company on how to retime it. It is very uncomplicated inside the assy, just where the gears make the connection to start/stop rod movement.

It's because it's a "non-servicable" part which means they expect you to replace it when it goes bad, not fix it. I imagine because retiming them is so much of an effort to get right and there's larger potential to get it wrong they decided it was better to replace them than deal with comebacks. At least that's my guess since some pretty smart people have tried to retime them (I even gave it a half effort once) and they still don't work right.
 
I completely agree, and to clarify I meant I'm surprised no instructions have popped up on the net from the maker of the actuator, like a technician or worker at the plant posting them or selling them. I'm sure the know these things are failing by user error or worn seals because Toyota keeps ordering em up for replacements.
 
I completely agree, and to clarify I meant I'm surprised no instructions have popped up on the net from the maker of the actuator, like a technician or worker at the plant posting them or selling them. I'm sure the know these things are failing by user error or worn seals because Toyota keeps ordering em up for replacements.

Not a lot of people seem to buy the actuators, they just never use it again or dump the vehicle on another hapless person.
 
I knocked this out last weekend. Took about 8 hours but there were a few trips to the parts store.

My notes on top of OP's DIY post:
You need a 30mm socket to get the nut off the output shaft. So if you're planning on doing this get one of those in advance.

If you have aftermarket skids, especially RCI gas tank skid, it'll be A LOT easier if you take it off. Which is a PITA but... it is what it is.

Also, make sure you have plenty of brake clean or other degreaser to clean the oil out of one half of the case. Otherwise, when you go to stab the cases together, the oil runs out and will compromise the effectiveness of your RTV seal. We had to do it twice because we thought we had it clean but oil ran out. I didn't want to find out the hard way that it leaks so we split them again, cleaned the RTV off, cleaned one half of the case (larger half) and re-did those steps.

Another note: If you buy a new motor, that motor will probably be in a different orientation than the one you remove. IDK what the proper method of re-aligning it is, but when I tried to get it out of 4LO (where it was set when we installed it) I ended up hearing a brief grinding noise. And it was only brief because I immediately shifted it into Neutral the moment I heard the sound.

As mentioned in the thread below, I killed my shift motor because mud got into the breather nipple on the motor. Make sure you reconnect the hose.

http://www.toyota-4runner.org/4th-gen-t4rs/206770-save-yourself-$xxxx-your-4x4-zip-tie.html


OP's how to was MASSIVELY helpful. Thank you so much for taking the time to write this up. I litterally printed the entire post and we used it as a guide.

 
Last edited:
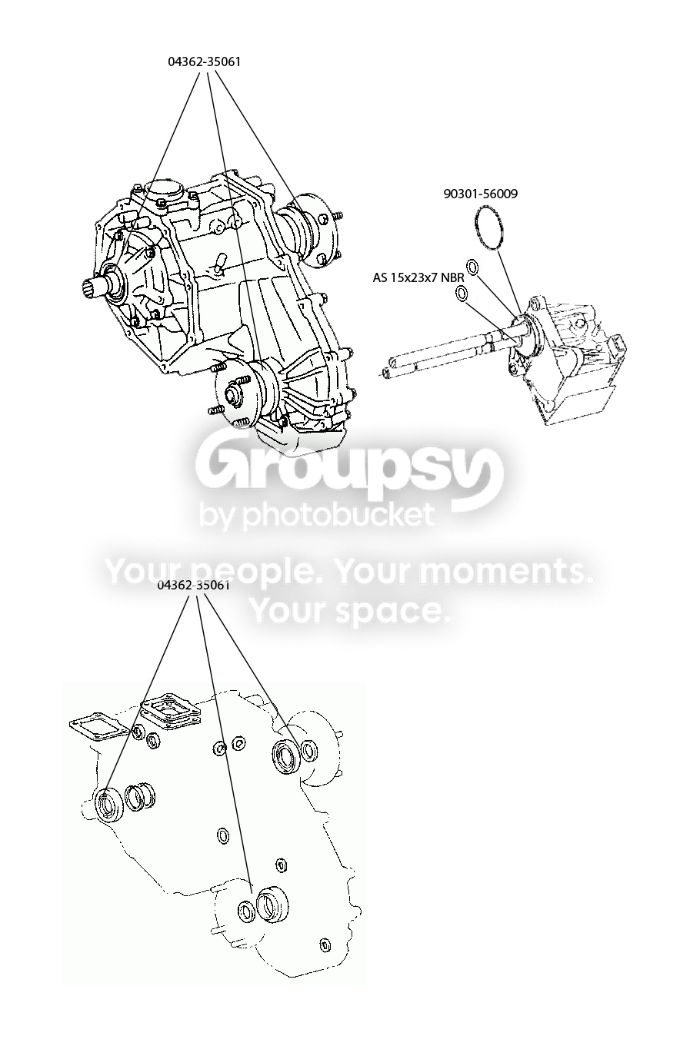
I had this done last weekend (in addition to a bunch of other work). I bought the car from NJ and drove it back 250 miles and put it in the garage. A week later I took a look under and found a nice puddle of gear oil. Seems previous owner never engaged the actuator so me doing it may have cause it to finally leak. I did my research and came upon this thread. I acquired the parts, printed this thread out in addition to a custom parts diagram I made and handed it to my mechanic. He followed it to the T and now the undercarriage is as dry as Cali. Thanks for a great DIY.

20150915_195318_zpsk5kpsttd.jpg~original

20150915_195344_zps3qopvt4h.jpg~original

20150917_181039_zps2gzvkwrb.jpg~original

Seals_Diagram_zpsxbty1vyq.jpg~original
 
So I just wanted to clarify something for members looking to tackle this on their own that [MENTION=131710]TheGrayBeast[/MENTION] sort of beat me to the punch on.

My transfer case actuator is leaking as well and I am gonna go ahead and deal with it soon; I wanted to point out that if you're going to go through the hassle of tearing the case apart you may want to spend the extra $30~40 and get the gasket/seal kit for the transfer case to replace them while you have it apart.

Here's the part numbers for the gasket/seal kit, transfer case actuator O-ring, and Toyota "Orange" FIPG (Form In Place Gasket) we use at work:

04362-35070 [VF4BM and VF4AM Transfer Case Gasket/Seal Kit]

90301-56009 [Transfer Case Actuator O-Ring]

00295-1281 [Orange FIPG for Transmissions/Transfer Cases/Differentials]
 
Just finished this today. Waiting for the FIPG to dry before I fill it with oil and drive it. Took about 4-5 hours start to finish. Nothing complicated or fancy about this job. Spent a lot of time cleaning the sealing surface so I don't have to do the job again.

As some started, the new one came in a different poison thn my old one I took out. I think it comes in 4Lo and I pulled mine out and it was in 4hi. Hopefully that does not matter. I'll post up soon as I drive it!
 
Everything seems to be working great exept for some flake in the oil... no leaks, 4lo goes right in, diff lock works like a charm. I have about 400-500 miles on it now. Took it to the mountain today and played a little.

I changed the oil after maybe 50 miles just to change it, after it had been open I figured I would change it to get any contamination out. I found a good amount of metallic in the oil though. I drove about 100 miles then changed it again, same amount of metallic. I than drove maybe 200 miles and changed it, same amount. Then after going to the mountain today I got home, dumped it. A little less, but it was still there for sure. I'm worried I did something wrong, but have no clue what, there is nothing to mess up as long as the needle bearing made it back in place right? Seems like if I was sloppy when I cleaned it, it would go away after an oil change or 2 ( I was not sloppy, super careful to not get anything in the cases). There is no sounds, play in the drivelines or big flake. It's super fine metallic looking with maybe a few bigger (by bigger I mean 1/2mm maybe). After 500 miles if I messed something up I would think it would also be more obvious by now too...

Any suggestions? Really dont wanna take it apart again
 
Last edited:
Hey guys, glad this thread has helped a few people out! I just got an email today asking me for an update on how my fix is holding up and thought I should update here too.

I've got about 16000 miles on the truck since I changed the seals and am happy to report no leaks! Its mostly highway driving and towing with some off road mixed in, but the 4wd gets cycled every couple months no matter what.


Thanks!
 

Members online

Forum statistics

Threads
278,312
Messages
3,554,089
Members
248,016
Latest member
Advally Service

Trending content

Back
Top