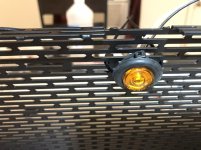
I want to see your Satoshi Grill!

I want to play

I like the look of the Satoshi. Nice update to a dated front end.
 

Attachments

  • 2014-03-10 17.10.45.jpg
    2014-03-10 17.10.45.jpg
    130.4 KB · Views: 1,104
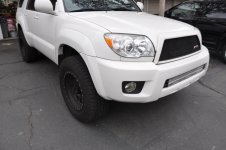
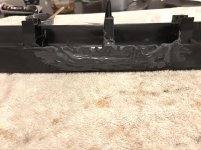
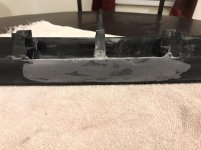
Finally did mine. With much trial and error. I used thick hard plastic to fill the gaps on the sides and top. Used JB metal weld to fill the holes.
 

Been meaning to comment on you Satoshi, looks great! Funny, because that was the same grille Center portion I was wanting to use. Hadn’t seen that type on a Satoshi 4Runner yet, it just helps to confirm my decision. I have been wanting to do mine as well but seems so labor intensive and since it’s my daily driver I plan to buy another first to do so I can just swap them once complete provided it turns out ok. Plus if I screw up, I’ll still have a grille on.
 
Been meaning to comment on you Satoshi, looks great! Funny, because that was the same grille Center portion I was wanting to use. Hadn’t seen that type on a Satoshi 4Runner yet, it just helps to confirm my decision. I have been wanting to do mine as well but seems so labor intensive and since it’s my daily driver I plan to buy another first to do so I can just swap them once complete provided it turns out ok. Plus if I screw up, I’ll still have a grille on.


Exactly what I did! Allowed me to take my time and get it right. I'm pondering modifying my original grill now...maybe TRD Pro style?
 
Been meaning to comment on you Satoshi, looks great! Funny, because that was the same grille Center portion I was wanting to use. Hadn’t seen that type on a Satoshi 4Runner yet, it just helps to confirm my decision. I have been wanting to do mine as well but seems so labor intensive and since it’s my daily driver I plan to buy another first to do so I can just swap them once complete provided it turns out ok. Plus if I screw up, I’ll still have a grille on.


There’s a how-to linked in my sig that may be helpful & I am always happy to answer questions as best I can.
 
There’s a how-to linked in my sig that may be helpful & I am always happy to answer questions as best I can.

Yeah I had actually just read your thread the other day. I’ve looked at many, but liked the way you mounted with the self adhesive and used the zip ties. I liked the advice you gave as well after learning from your mistakes. I appreciate it! I’ll do mine sometime, hopefully sooner than later.

Just too danged many projects I’m already behind on that I’ve already purchased stuff for lol. Maybe only like 70% done with what I have sitting in reserve that already paid for, not to mention other stuff I’m getting ready to pull the trigger on to continue to take me deeper down the rabbit hole. I love it, but takes so much time.
 
Took me a while

A lot more work than I ever thought.
 

Attachments

  • DCB1FEB8-3E94-4035-BECD-878525A1AC41.jpg
    DCB1FEB8-3E94-4035-BECD-878525A1AC41.jpg
    44.5 KB · Views: 455
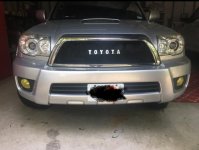
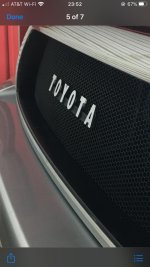
Not too hot on my badge choice.... has an angle to it.
 

Attachments

  • E6C67E1A-13A3-41DA-BF2F-5771D7FFE324.jpg
    E6C67E1A-13A3-41DA-BF2F-5771D7FFE324.jpg
    99.5 KB · Views: 446
These look amazing, cant wait to do it on mine. Does anyone know how feasible it'd be to install some raptor lights with a satoshi grill on a post facelift 4th gen? I was thinking either cutting the mesh around the lights as precisely as possible, or somehow fitting them to the grille and leaving them behind the mesh. So far, all I've seen in the way of raptor lights on 4th gens are on the pre facelift, and none with a satoshi grill. I also have only seen the round lights which I'm not the biggest fan of, I prefer the rectangular style ones you see on most 5th gens.

I'd love to try to get 3 of these wired up and working with the satoshi grill!
Amazon.com: Grand General 77650 Amber Thin Line 6-LED Marker and Clearance Sealed Light, Amber/Amber: Automotive
 
Question for you guys that have done the Satoshi mod. Just an FYI, I have an 08 so it has the updated front grille. I had read a couple people had bought aftermarket non OEM front grilles do do the mod. It seemed fine so I ordered one of these. I figured it’s just the perimeter anyways so hopefully would be fine? TO1200297 NEW Grille Fits 2006-2009 Toyota 4Runner | eBay

It’s different in that it is super heavy (ABS plastic), not light weight. The center horizontal piece isn’t 2 pieces and doesn’t remove like the OEM one does. Wondering who all used a Non-OEM for this and did it fit and work fine? Also it doesn’t look like the weatherstrip is adhered real well to this, maybe it will be better when put on and sandwiched between grille and hood? Wondering if I should use it, the existing one on truck, or look at ordering a new OEM piece?

I am wanting to paint it 1D4 to match my paint and I have a questions for those that have painted theirs to match other than black. So on the factory painted ones and chromed it has just the face painted, not the whole recess inside and black in between bottom horizontal piece. Did you guys just paint the whole things or just try to tape off those portions and leave the rest black? It seems like that would be a lot harder to paint just part and was just considering painting the entire thing 1D4. What do you guys think?
 
Last edited:
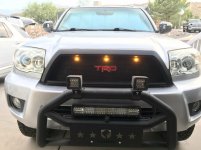
Here’s my Satoshi after many hours of work. My color match 1D4 paint hadn’t come in and I was tired of messing with it and needed a break. Painted flat black for now and wanted to just get it on. I’ll pull it back off and paint the face in 1D4 hopefully in the next couple weeks.

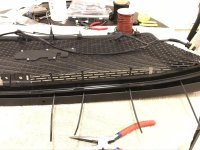
I used the method used by [MENTION=114846]Bluesky 07[/MENTION] of attaching with zip tie bases and zip ties. Worked out well and a great idea! Especially since I’ll need to take back apart soon.

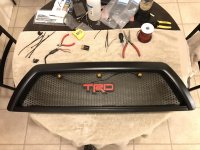
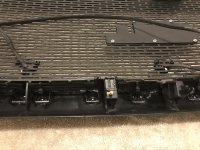
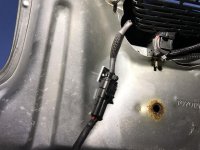
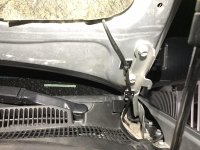
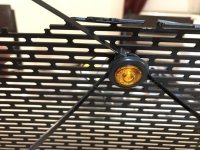
Went with the Raptor style lights and tied into a 12V+ ignition wire in my driver side door sill. I was torn between the BIG TOYOTA letters or the simple clean red TRD letters. I went with the latter and was afraid the large letters getting glued on would not be evenly spaced and get crooked. This TRD emblem just bolts on so easy to move and center.
 

Attachments

  • F5AC5965-391A-47C0-94CB-C050CD692C32.jpg
    F5AC5965-391A-47C0-94CB-C050CD692C32.jpg
    131.3 KB · Views: 671
  • F866B7E5-7B28-4E50-9768-3D1BDCE6A573.jpg
    F866B7E5-7B28-4E50-9768-3D1BDCE6A573.jpg
    137 KB · Views: 664
  • 5AF166BE-DC31-4F1E-9077-70DA8891340B.jpg
    5AF166BE-DC31-4F1E-9077-70DA8891340B.jpg
    136.6 KB · Views: 649
  • 3C20CAD1-6955-48A7-8B9A-5A396CD5303B.jpg
    3C20CAD1-6955-48A7-8B9A-5A396CD5303B.jpg
    131.4 KB · Views: 664
  • 80BE242A-EEDE-4A9D-967F-F5C9FB6F30F3.jpg
    80BE242A-EEDE-4A9D-967F-F5C9FB6F30F3.jpg
    131.3 KB · Views: 652
  • FD9988D4-051B-4A51-A472-8D854A81524A.jpg
    FD9988D4-051B-4A51-A472-8D854A81524A.jpg
    123.2 KB · Views: 715
Last edited:
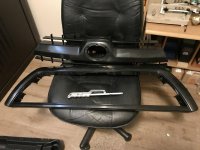
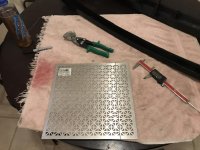
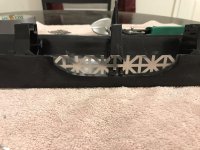
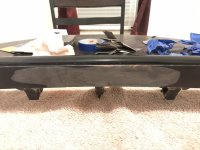
Wanted to try and find some aluminum expanded metal to avoid corrosion, this is the closest I could find at Home Depot and wanted to get started. I wound up using JB weld for the body filler since I already had it, what a pain in The butt to work with and sand! I wouldn’t use again, at least not the regular dry time. Too runny and tacky. The fast dry may be ok, which is what I used at the end as a topper. I was told Bondo may crack with that big of a gap and Ive never worked with fiberglass. At least it will be very strong lol.
 

Attachments

  • F55C672A-453E-4FAB-AFC9-BC2D4C293427.jpg
    F55C672A-453E-4FAB-AFC9-BC2D4C293427.jpg
    151.2 KB · Views: 652
  • E646AAD1-69F4-47B2-8211-DE2F7B4D6FFA.jpg
    E646AAD1-69F4-47B2-8211-DE2F7B4D6FFA.jpg
    132.8 KB · Views: 648
  • D5FDA2D1-B057-45C7-B447-452AF6671C74.jpg
    D5FDA2D1-B057-45C7-B447-452AF6671C74.jpg
    126.7 KB · Views: 641
  • 4F2505D6-A036-4886-AD3C-1F5916A46AE3.jpg
    4F2505D6-A036-4886-AD3C-1F5916A46AE3.jpg
    130.2 KB · Views: 640
  • 09051834-3500-4A4F-AF5E-9B65A2B8FCA4.jpg
    09051834-3500-4A4F-AF5E-9B65A2B8FCA4.jpg
    129.3 KB · Views: 644
  • 8BB6AD2D-6E2D-43C2-87A3-029C65A37A5B.jpg
    8BB6AD2D-6E2D-43C2-87A3-029C65A37A5B.jpg
    126.1 KB · Views: 642
  • BEE5122D-C371-4A06-9D12-B00D9EE83554.jpg
    BEE5122D-C371-4A06-9D12-B00D9EE83554.jpg
    127.5 KB · Views: 639
  • 2E0E3176-3E96-4449-B749-C5A00D5E6DE3.jpg
    2E0E3176-3E96-4449-B749-C5A00D5E6DE3.jpg
    128.8 KB · Views: 659
Last edited:
Here’s my Satoshi after many hours of work. My color match 1D4 paint hadn’t come in and I was tired of messing with it and needed a break. Painted flat black for now and wanted to just get it on. I’ll pull it back off and paint the face in 1D4 hopefully in the next couple weeks.

I used the method used by [MENTION=114846]Bluesky 07[/MENTION] of attaching with zip tie bases and zip ties. Worked out well and a great idea! Especially since I’ll need to take back apart soon.

Went with the Raptor style lights and tied into a 12V+ ignition wire in my driver side door sill. I was torn between the BIG TOYOTA letters or the simple clean red TRD letters. I went with the latter and was afraid the large letters getting glued on would not be evenly spaced and get crooked. This TRD emblem just bolts on so easy to move and center.


Looks great & it’s very rewarding to know my thread helped. :cheers:
 

Members online

Forum statistics

Threads
278,316
Messages
3,554,121
Members
248,016
Latest member
Advally Service

Trending content

Back
Top