

You are using an out of date browser. It may not display this or other websites correctly.
You should upgrade or use an alternative browser.
You should upgrade or use an alternative browser.
Jhalko's 2011 Limited build/travel thread
- Thread starter Jhalko
- Start date
mrfobbyaccent
New member
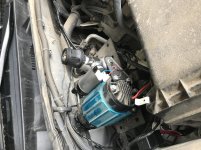
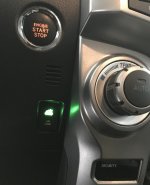
Prepping for heading out on the road, finally finished up wiring for under hood compressor.
Also turned Party Mode into Compressor Mode!
WOW do you have a DIY on how you changed your key start to push button? I'm assuming you had to get a new key fob and reprogram it to the car.
That's super cool!
Jhalko
New member
WOW do you have a DIY on how you changed your key start to push button? I'm assuming you had to get a new key fob and reprogram it to the car.
That's super cool!
Um, it’s a Limited Edition. Came stock with that.

Galdarn
Member
Thanks for posting your build experiance. Your truck looks great!
I am considering a used 2011-13 LE 4Runner and want to build it up similar to yours. I had front and rear bumpers on my short list ( wheels, tires & sliders as well ). I was just wondering why you decided not to upgrade the front bumper as well. I looked online for the bumpers but they don't list them specifically for the limited. Did you every look for one?
Thanks
Edit: Just kidding I found it Front Bumpers
Its good thread & very through but a little old some, of the links dont work any more and at least one of the companies is no longer in business.
My guess is you did not want the the huge bumper look or the extra weight.
I am considering a used 2011-13 LE 4Runner and want to build it up similar to yours. I had front and rear bumpers on my short list ( wheels, tires & sliders as well ). I was just wondering why you decided not to upgrade the front bumper as well. I looked online for the bumpers but they don't list them specifically for the limited. Did you every look for one?
Thanks
Edit: Just kidding I found it Front Bumpers
Its good thread & very through but a little old some, of the links dont work any more and at least one of the companies is no longer in business.
My guess is you did not want the the huge bumper look or the extra weight.
Last edited:
Finished stage 1 of the fridge slide... I think this will work great for my needs, while still being removable for the occasional 3rd row use and in winter when I don't keep the fridge in. Enough room on the side for me to sleep if I wanted as well.
This is carpeted mount with fridge slide attached before going into truck, not light but easy to move myself.
<a
Placed into truck with tie down through the slots I cut.
With fridge empty, I can pull slide out and have no issues just given the weight and tie down
Perfect to open lid all the way...
Enough room and height works so that if I roll back window down I can access top stuff towards back, room pt>
What carpet did you use?
What thickness plywood?
What is holding it down? I cant imagine tie downs through plywood, even if tight, hold it down if the fridge is fulk.
Thanks!
Jhalko
New member
What carpet did you use?
What thickness plywood?
What is holding it down? I cant imagine tie downs through plywood, even if tight, hold it down if the fridge is fulk.
Thanks!
Hey link below on carpet, it’s speaker box carpet, I did use spray adhesive then stapled the edges. It worked really well and was easy to trim with a sharp knife. This was easier than I thought and really makes it blend inside well.
It was 1/2 inch, which is what I used for both versions I did. I cut holes for the limited tie down and haven’t needed any additional support. I thought I would witha full fridge but it’s in so tight it’s never budged. I believe depending on your model those tie downs are in a different spot. Most use the type of clamps I used for my first version which was onl half wide so I could use one side of third row. I forget what those are called but like turnbuckle thingies.
Let me know if you need any other help.
From amazon Absolute speaker carpet:
https://www.amazon.com/gp/product/B0058OKSMS/ref=ppx_yo_dt_b_search_asin_title?ie=UTF8&psc=1
Jhalko
New member
Sorry I missed your question, I don’t really update this thread much since I haven’t done anything to the truck, other than get out and enjoy! I didn’t want to add the weight of a front bumper and winch, as the time as my daily driver comes to a close I’m looking at bumpers and my next suspension.Thanks for posting your build experiance. Your truck looks great!
I am considering a used 2011-13 LE 4Runner and want to build it up similar to yours. I had front and rear bumpers on my short list ( wheels, tires & sliders as well ). I was just wondering why you decided not to upgrade the front bumper as well. I looked online for the bumpers but they don't list them specifically for the limited. Did you every look for one?
Thanks
Edit: Just kidding I found it Front Bumpers
Its good thread & very through but a little old some, of the links dont work any more and at least one of the companies is no longer in business.
My guess is you did not want the the huge bumper look or the extra weight.
Jhalko
New member
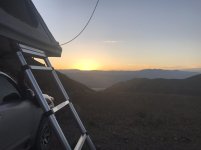
Hey link below on carpet, it’s speaker box carpet, I did use spray adhesive then stapled the edges. It worked really well and was easy to trim with a sharp knife. This was easier than I thought and really makes it blend inside well.
It was 1/2 inch, which is what I used for both versions I did. I cut holes for the limited tie down and haven’t needed any additional support. I thought I would witha full fridge but it’s in so tight it’s never budged. I believe depending on your model those tie downs are in a different spot. Most use the type of clamps I used for my first version which was onl half wide so I could use one side of third row. I forget what those are called but like turnbuckle thingies.
Let me know if you need any other help.
From amazon Absolute speaker carpet:
https://www.amazon.com/gp/product/B0058OKSMS/ref=ppx_yo_dt_b_search_asin_title?ie=UTF8&psc=1
Thanks. I cant believe it stays put without any sort of hardware. I have an sr5 with the third row and my tie downs look the same. The simplicity of yours is tempting, again, just surprised it stays although some basic peices would be easy to add. I really want to find a way to get the slide closer to the side but probably not possible because the slide rail is too wide compared to where the tie down is.
Jhalko
New member
I have been surprised but I had some perfect cuts so when it’s in, it’s solid. I also don’t really try to test it much, usually all my gear is next to the fridge which adds weight to help it stay as well. I like opening the rear window and reaching into the fridge that way. I don’t advocate for my lay it in and see what happens approach, just to be safe!Thanks. I cant believe it stays put without any sort of hardware. I have an sr5 with the third row and my tie downs look the same. The simplicity of yours is tempting, again, just surprised it stays although some basic peices would be easy to add. I really want to find a way to get the slide closer to the side but probably not possible because the slide rail is too wide compared to where the tie down is.

Alaska_4Runner
Member
3rd Row Seat
Awesome fridge slide! how are you securing the plate system to the 3rd row?
Awesome fridge slide! how are you securing the plate system to the 3rd row?
Finished stage 1 of the fridge slide... I think this will work great for my needs, while still being removable for the occasional 3rd row use and in winter when I don't keep the fridge in. Enough room on the side for me to sleep if I wanted as well.
This is carpeted mount with fridge slide attached before going into truck, not light but easy to move myself.
<a data-flickr-embed="true" href="https://www.flickr.com/photos/140489411@N02/33649807904/in/dateposted-public/" title="IMG_0383"><img src="https://c1.staticflickr.com/5/4180/33649807904_757235d622_z.jpg" width="480" height="640" alt="IMG_0383"></a><script async src="//embedr.flickr.com/assets/client-code.js" charset="utf-8"></script>
Placed into truck with tie down through the slots I cut.
<a data-flickr-embed="true" href="https://www.flickr.com/photos/140489411@N02/33649806834/in/dateposted-public/" title="IMG_0384"><img src="https://c1.staticflickr.com/5/4194/33649806834_439217f854_z.jpg" width="480" height="640" alt="IMG_0384"></a><script async src="//embedr.flickr.com/assets/client-code.js" charset="utf-8"></script>
With fridge empty, I can pull slide out and have no issues just given the weight and tie down pressure
<a data-flickr-embed="true" href="https://www.flickr.com/photos/140489411@N02/33649805724/in/dateposted-public/" title="IMG_0385"><img src="https://c1.staticflickr.com/5/4183/33649805724_a091732abf_z.jpg" width="480" height="640" alt="IMG_0385"></a><script async src="//embedr.flickr.com/assets/client-code.js" charset="utf-8"></script>
Perfect to open lid all the way...
<a data-flickr-embed="true" href="https://www.flickr.com/photos/140489411@N02/33649804234/in/dateposted-public/" title="IMG_0386"><img src="https://c1.staticflickr.com/5/4186/33649804234_8200a2eff1_z.jpg" width="480" height="640" alt="IMG_0386"></a><script async src="//embedr.flickr.com/assets/client-code.js" charset="utf-8"></script>
Enough room and height works so that if I roll back window down I can access top stuff towards back, room to spare!
<a data-flickr-embed="true" href="https://www.flickr.com/photos/140489411@N02/33649802654/in/dateposted-public/" title="IMG_0387"><img src="https://c1.staticflickr.com/5/4165/33649802654_91388fba96_z.jpg" width="480" height="640" alt="IMG_0387"></a><script async src="//embedr.flickr.com/assets/client-code.js" charset="utf-8"></script>
Reserved... work in progress. In no particular order...
Mods:
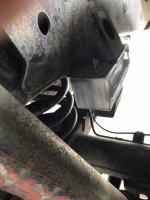
- RCI steel skid plates front to back
- Toytec Boss suspension-Now running Superflex HD rear springs, previously SAW
- Shrockworks step sliders
- OE Trail Edition Rocker and front cap
- Camelback Metal Gear roof rack (drabbits)
- Gobi ladder with HD struts for lift gate
- Trasharoo sometimes mounted to ladder...
- Tepui Kukenam Sky RTT
- ARB 2500 awning and room
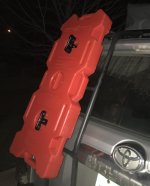
- Rotopax 2 gallon water jugs...
- Rigid Industries upper and lower front grill- SR20 and Amber D2 Driving
- CBI rear bumper, no swingout, Rigid Dually floods
- Spod for power mgmt-Behind fuse box on driver side
- 3 Switch Contura panel installed below factory switches
- Indel B 12v Fridge 40L
- Constant hot 12v on driver side of cargo area with 8g ARB wiring straight to the batter for fridge
- LE w/ third row cheap and fast removable fridge mount
- Bearcat 980SSB mounted inside the center console
- Camburg Moog Ball Joint UCA
- Hi Lift jack
- Rigid Radiance 40" (white) in garage waiting to be installed
- CBI single passenger ditch bracket with Firestick 2 mounted for CB
- ARB CKMA 12 sitting in the garage waiting to be installed...
I really appreciate your pics showing how your ARB 12v refrigerator harness is routed. I was thinking of wiring my ARB 37qt fridge with the ARB 12v harness in a similar manner.
Um, it’s a Limited Edition. Came stock with that.
I bought a 2015 Limited for the heated and air conditioned front leather seats. Air conditioned seats will be handy on 105 degree days.
Awesome fridge slide! how are you securing the plate system to the 3rd row?
My 2015 T4R is equipped with the factory slide out tray. It comes in handy for not having to reach over the rear bumper to reach stuff up behind its 2nd row eats.

jrandom
New member
I really appreciate your pics showing how your ARB 12v refrigerator harness is routed. I was thinking of wiring my ARB 37qt fridge with the ARB 12v harness in a similar manner.
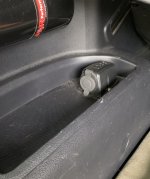
Not to thread jack, just throw this out there, since I did one similar. I ran mine from a bussmann relayed & fused distro and used the always hot pole, through the firewall grommet, below the driver side kick plates in the factory channels, driver side passenger kick plate up into the wheel storage "tray". I coiled the end there too, I have enough to switch sides and run to the passenger side 12v accessory plug in case I want to change it.
Attachments
Jhalko
New member
Awesome fridge slide! how are you securing the plate system to the 3rd row?
Just snug fit and camping boxes and it hasn’t moved. With the second row seats in place it can’t come out, but in theory could move a little, but it hasn’t ever.

Antman
Elite Member
Just snug fit and camping boxes and it hasn’t moved. With the second row seats in place it can’t come out, but in theory could move a little, but it hasn’t ever.
:fishing:Chevy forever! :fishing:
(or at least until it breaks, lol)
Jhalko
New member
:fishing:Chevy forever! :fishing:
(or at least until it breaks, lol)
Chevy, yuck... :spam2:
Last edited:


