Kurtis T4R Build Thread

haha, nice, i could see the rest of the truck crumpling around the skid instead of the other way around, BEEFY! how much for another one, materials provided? haha:loco:

Some day I'd really like to start building and selling armor but I am still learning how to weld. I really need a better welder to take it to the next level. My fluxcore makes shit stick together and is strong enough but it is a pain in the ass to work with. Beside steel is not cheap. $320 for that 3/16" 5'x8'.
 
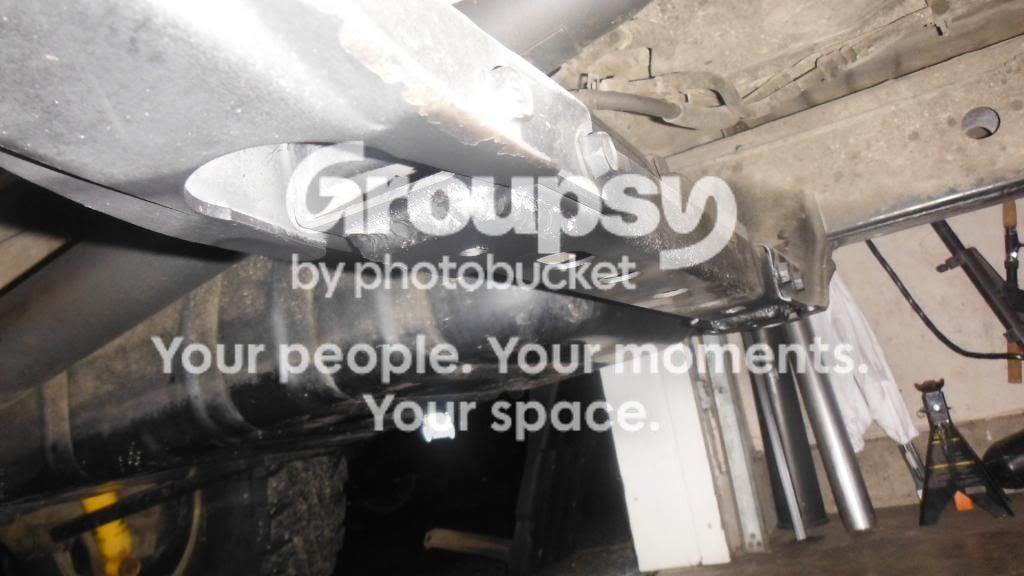
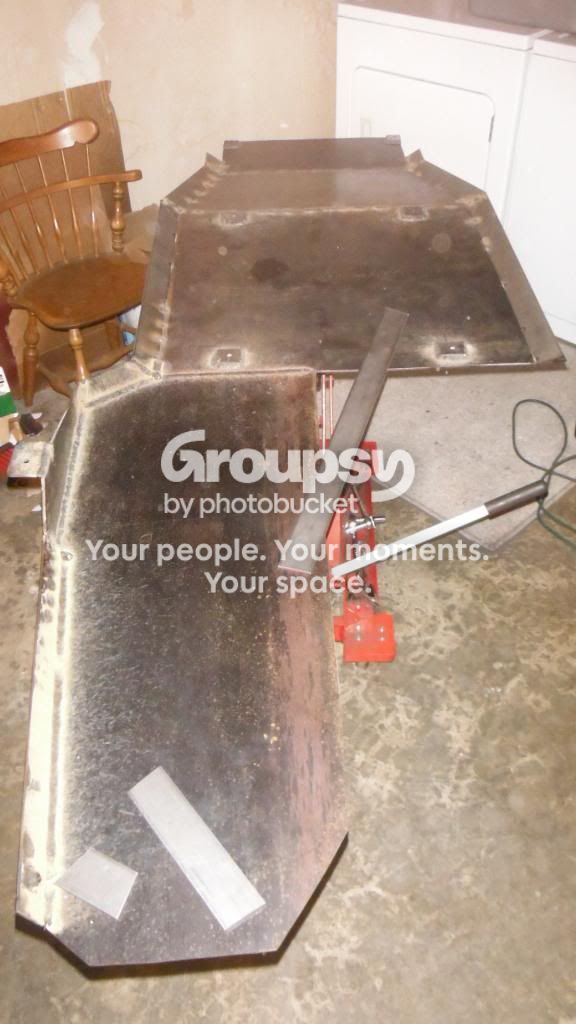
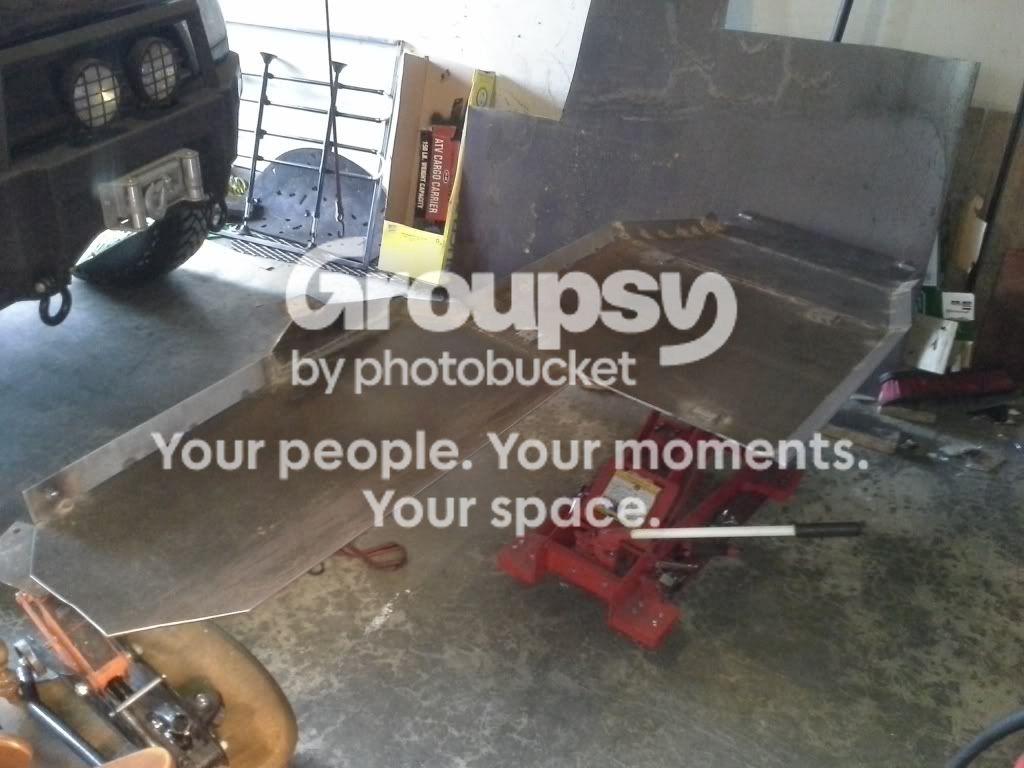
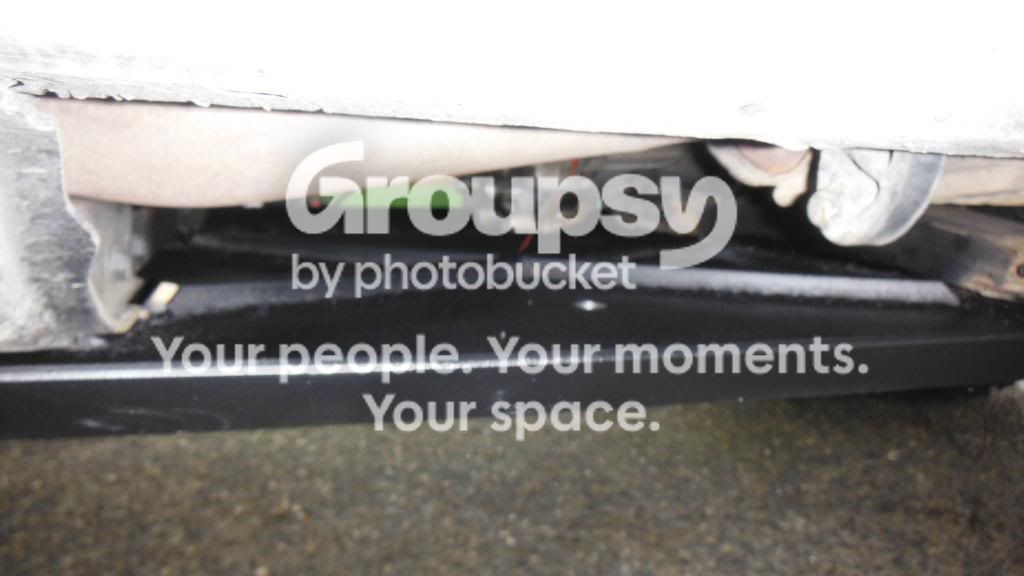
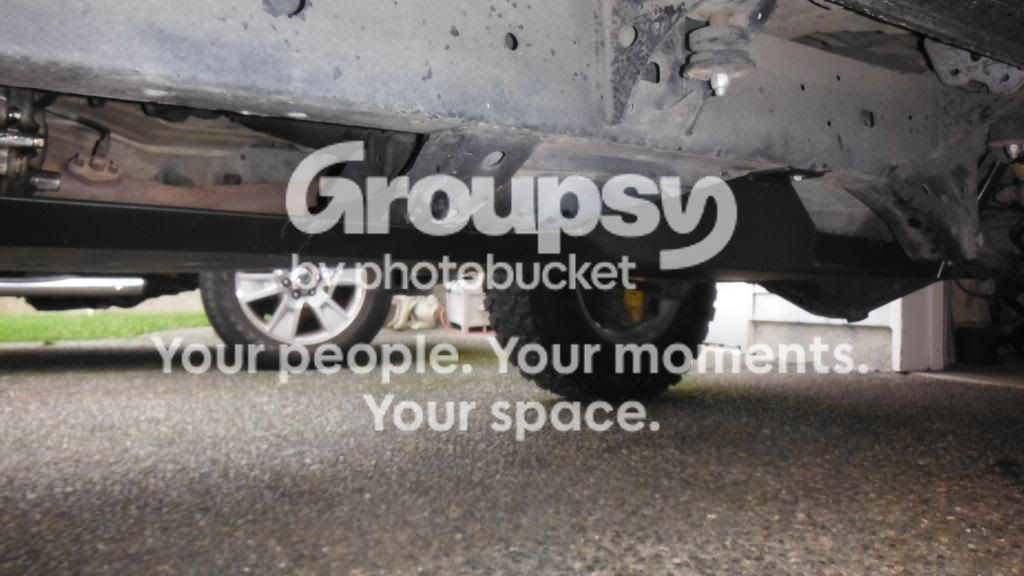
Skid plate is done. He some pics:

DSCF0151_zpsae45948f.jpg~original


DSCF0160_zps83e446ba.jpg~original


20130204_140409_zpsb8519412.jpg~original


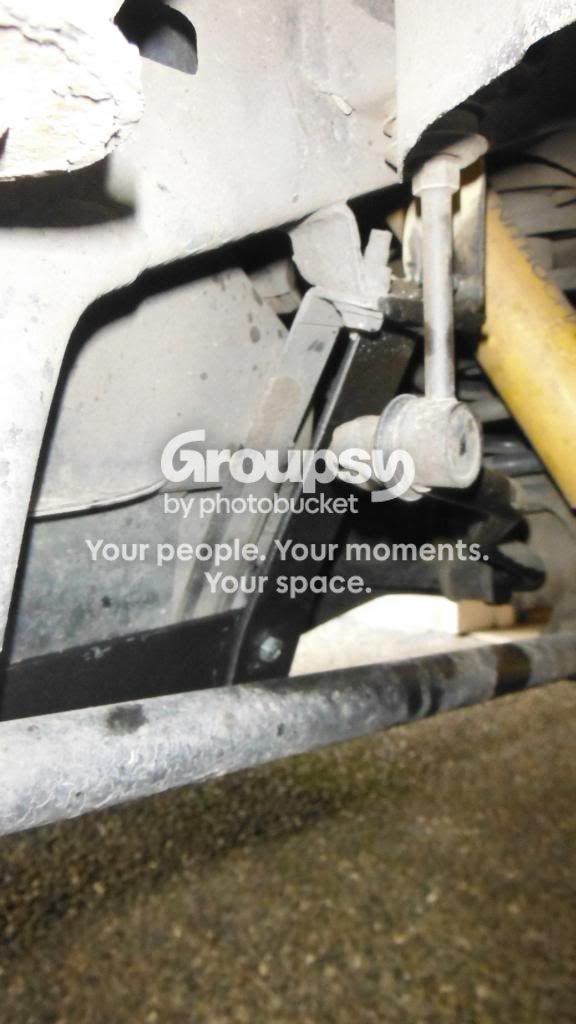
Added a cross support for added strength.
DSCF0168_zps38ea453b.jpg~original


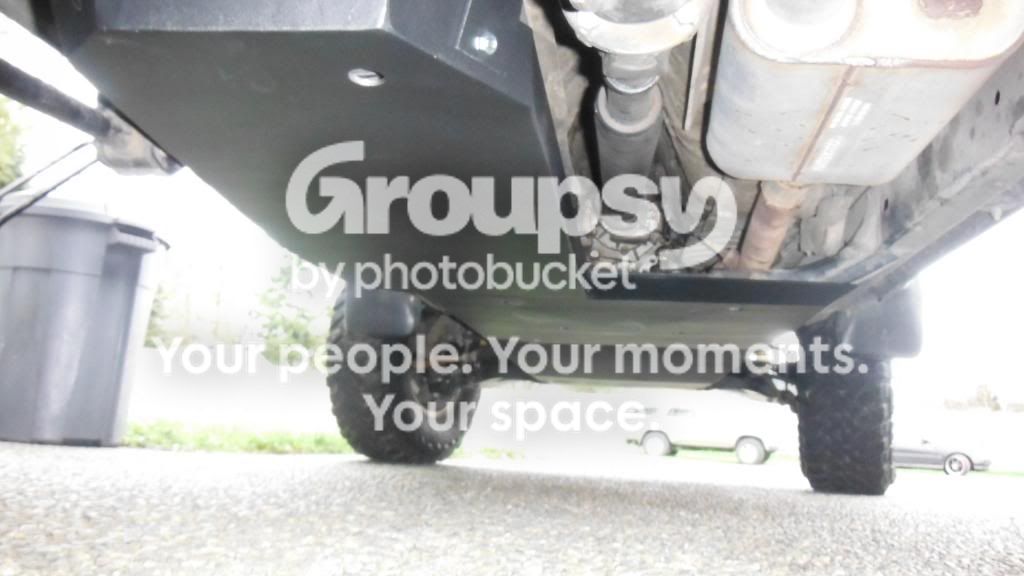
Tied the belly skid directly to the gas tank skid.
DSCF0172_zps5694da65.jpg~original


Rear gas tank mounting. It is plenty strong. Especially with the belly skid and gas tank skid welded together as one.
DSCF0174_zpsa65d26f8.jpg~original


From the rear.
DSCF0175_zpsbeb28d6a.jpg~original


From the front.
8e7bbfeb-f529-48b0-8605-6d3700efc553_zps6475e57e.jpg~original


This is the last project for a while because we are moving. It just a pause for now. But believe me there is plenty more projects on the list. Including a re-gear, rear bumper, front locker and 35s later this year.
 
Last edited:
Really like those skids. They look strong! Have you considered putting more drain holes? Looks like they could hold a lot of crud.
 
Really like those skids. They look strong! Have you considered putting more drain holes? Looks like they could hold a lot of crud.

I have thought about it. I really wanted to keep it the least amount of holes in it. If I have any problems with I plan on drilling some more holes. We will see how its goes though.
 
Looks awesome! love how the belly skid is one long piece. It must be an absolute ***** to get mounted up... thing would flatten you on the ground lol.
 
Looks awesome! love how the belly skid is one long piece. It must be an absolute ***** to get mounted up... thing would flatten you on the ground lol.

Thanks for the compliments guys.

I can't explain the value in my transmission jack...
 
Last edited:
are you worried about heat building up with that massive skid.
i would watch tranny temps, but looks sexy from underneath. now you need some scars in it.
 
are you worried about heat building up with that massive skid.
i would watch tranny temps, but looks sexy from underneath. now you need some scars in it.

I'm not too worried about transmission temperatures. I was going to go from frame rail to frame rail but I left a little open for air movement. If it was an automatic I might worry about it a little but I don't have one of those things. 5 Speed.
 
Last edited:
And it's done. Here are the rest of the pictures:

kurtis-albums-more+stuff-picture15068-20121114-170726.jpg

kurtis-albums-more+stuff-picture15069-20121114-204337.jpg

kurtis-albums-more+stuff-picture15070-20121114-204402.jpg

Are these the switches you used?

Product ID: V1D1J66B-00000-000
Manufacturer: Carling Technologies
V-Series sealed rocker switch, body
only, no rocker

Details

SPST ON/OFF switch.
Two incandescent lights.
Upper light is ON when switch is turned ON.
Lower light independently wired
No rear barriers between terminals. VCH housing
connectors can be used.
Same lighting configuration as ARB.
Rated 20A @12V.

Price: $9.45
 
Are these the switches you used?

Product ID: V1D1J66B-00000-000
Manufacturer: Carling Technologies
V-Series sealed rocker switch, body
only, no rocker

Details

SPST ON/OFF switch.
Two incandescent lights.
Upper light is ON when switch is turned ON.
Lower light independently wired
No rear barriers between terminals. VCH housing
connectors can be used.
Same lighting configuration as ARB.
Rated 20A @12V.

Price: $9.45

It appears to be the same but I order the switch and Laser Etched Covers together.

Here is the Receipt from the order:


Shipping Method: Priority Mail
--------------------------
Product ID: VM6-01
Product Name: Six position V-Series Switch Holder
Quantity: 1
Unit Price: $9.30
> > > VM6-01 : Add one actuator tool (+$1.25)
--------------------------
Product ID: VVPZC58-5AL
Product Name: V-series Contura V sealed rocker switch, LEFT ALLEY LIGHT
Quantity: 1
Unit Price: $5.00
> > > Switch Selection : V1D1FBBB-BLUE/BLUE (+$11.50)
--------------------------
Product ID: VVPZC58-5AR
Product Name: V-series Contura V sealed rocker switch, RIGHT ALLEY LIGHT
Quantity: 1
Unit Price: $5.00
> > > Switch Selection : V1D1FBBB-BLUE/BLUE (+$11.50)
--------------------------
Product ID: VVPZCG2-50R
Product Name: V-series Contura V sealed rocker switch, OFF-ROAD LIGHTS
Quantity: 1
Unit Price: $5.00
> > > Switch Selection : V1D1FBBB-BLUE/BLUE (+$11.50)
--------------------------
Product ID: VVPZCTP-5RK
Product Name: V-series Contura V sealed rocker switch, ROCK LIGHTS
Quantity: 1
Unit Price: $5.00
> > > Switch Selection : V1D1FBBB-BLUE/BLUE (+$11.50)
--------------------------
Product ID: VVPZCRR-5A4
Product Name: V-series Contura V sealed rocker switch, REAR ROOF LIGHTS
Quantity: 1
Unit Price: $5.00
> > > Switch Selection : V1D1FBBB-BLUE/BLUE (+$11.50)
--------------------------
Product ID: VVPZCRL-513
Product Name: V-series Contura V sealed rocker switch, ROOF LIGHTS
Quantity: 1
Unit Price: $5.00
> > > Switch Selection : V1D1FBBB-BLUE/BLUE (+$11.50)
--------------------------
Order Total : $109.55
Shipping : $8.05
Handling : $1.75
Grand Total : $119.35

 
It appears to be the same but I order the switch and Laser Etched Covers together.

Here is the Receipt from the order:


Shipping Method: Priority Mail
--------------------------
Product ID: VM6-01
Product Name: Six position V-Series Switch Holder
Quantity: 1
Unit Price: $9.30
> > > VM6-01 : Add one actuator tool (+$1.25)
--------------------------
Product ID: VVPZC58-5AL
Product Name: V-series Contura V sealed rocker switch, LEFT ALLEY LIGHT
Quantity: 1
Unit Price: $5.00
> > > Switch Selection : V1D1FBBB-BLUE/BLUE (+$11.50)
--------------------------
Product ID: VVPZC58-5AR
Product Name: V-series Contura V sealed rocker switch, RIGHT ALLEY LIGHT
Quantity: 1
Unit Price: $5.00
> > > Switch Selection : V1D1FBBB-BLUE/BLUE (+$11.50)
--------------------------
Product ID: VVPZCG2-50R
Product Name: V-series Contura V sealed rocker switch, OFF-ROAD LIGHTS
Quantity: 1
Unit Price: $5.00
> > > Switch Selection : V1D1FBBB-BLUE/BLUE (+$11.50)
--------------------------
Product ID: VVPZCTP-5RK
Product Name: V-series Contura V sealed rocker switch, ROCK LIGHTS
Quantity: 1
Unit Price: $5.00
> > > Switch Selection : V1D1FBBB-BLUE/BLUE (+$11.50)
--------------------------
Product ID: VVPZCRR-5A4
Product Name: V-series Contura V sealed rocker switch, REAR ROOF LIGHTS
Quantity: 1
Unit Price: $5.00
> > > Switch Selection : V1D1FBBB-BLUE/BLUE (+$11.50)
--------------------------
Product ID: VVPZCRL-513
Product Name: V-series Contura V sealed rocker switch, ROOF LIGHTS
Quantity: 1
Unit Price: $5.00
> > > Switch Selection : V1D1FBBB-BLUE/BLUE (+$11.50)
--------------------------
Order Total : $109.55
Shipping : $8.05
Handling : $1.75
Grand Total : $119.35

Thanks! That helps alot. I didn't understand that you could buy it all together. I thought you had to buy the switch separately.
 
How much fab work was involved in getting the switch panel to fit under the radio?

I could of just crammed it in there but I took my time and epoxied some extra piece of plastic on the sides to give it a more finished look. For the main support I used an old dash pocket. You can find them on ebay for decently cheap. I just happened to have that one floating around the garage. Getting it all lined up wasn't too bad but the wiring was a PITA.
 
I could of just crammed it in there but I took my time and epoxied some extra piece of plastic on the sides to give it a more finished look. For the main support I used an old dash pocket. You can find them on ebay for decently cheap. I just happened to have that one floating around the garage. Getting it all lined up wasn't too bad but the wiring was a PITA.

I saw in another thread that you used your clock power for the independent LEDs on the switch. Does that power all 6 switches?

I was planning on using the wire for the ashtray bulb but I don't know if that could power all 6 switches. I'm trying to learn as I go. Right now Im a newbie at wiring so any info would help me a ton.
 
I saw in another thread that you used your clock power for the independent LEDs on the switch. Does that power all 6 switches?

I was planning on using the wire for the ashtray bulb but I don't know if that could power all 6 switches. I'm trying to learn as I go. Right now Im a newbie at wiring so any info would help me a ton.


Now that I think of it though I think I did use my ash tray 12V lead. You could use either. I used the 12V lead to run through a relay and allow another switched 12V to come from the fuse block under the drivers dash. That way I didn't have to worry about what was already on that circuit.

I've had a couple questions on this. Let me see if I can give a quick electronics lesson.

Relay-
Noun 1. electrical relay - electrical device such that current flowing through it in one circuit can switch on and off a current in a second circuit
relay
circuit, electric circuit, electrical circuit - an electrical device that provides a path for electrical current to flow
electrical device - a device that produces or is powered by electricity
electromagnet - a temporary magnet made by coiling wire around an iron core; when current flows in the coil the iron becomes a magnet​

Below is a picture of a relay.

sscully-albums-misc-picture20636-aux-lamps-simple-drawing.jpg


The purpose of this relay is to turn on a pair of lights. There are 2 circuits here. One that turns on the relay (Pin 85 and 86) and the other that passes through the relay and powers the lights (Pin 30 and 87). Pin 87a is not connected to anything.

You can use the same concept with Pin 85 being your Ash Tray 12V, Pin 86 going to ground. Pin 30 would go to your power (Fused 12V like I did from the fuse block under the driver side dash.) And Pin 87 that would go to your independent LEDS.

I don't know where I will get around to it but I have been thinking about building a basic electrical thread for folks. It would include different properties of electricity and how to install lights, accessories, electronics, etc safely.
 
Now that I think of it though I think I did use my ash tray 12V lead. You could use either. I used the 12V lead to run through a relay and allow another switched 12V to come from the fuse block under the drivers dash. That way I didn't have to worry about what was already on that circuit.

I've had a couple questions on this. Let me see if I can give a quick electronics lesson.

Relay-
Noun 1. electrical relay - electrical device such that current flowing through it in one circuit can switch on and off a current in a second circuit
relay
circuit, electric circuit, electrical circuit - an electrical device that provides a path for electrical current to flow
electrical device - a device that produces or is powered by electricity
electromagnet - a temporary magnet made by coiling wire around an iron core; when current flows in the coil the iron becomes a magnet​

Below is a picture of a relay.

sscully-albums-misc-picture20636-aux-lamps-simple-drawing.jpg


The purpose of this relay is to turn on a pair of lights. There are 2 circuits here. One that turns on the relay (Pin 85 and 86) and the other that passes through the relay and powers the lights (Pin 30 and 87). Pin 87a is not connected to anything.

You can use the same concept with Pin 85 being your Ash Tray 12V, Pin 86 going to ground. Pin 30 would go to your power (Fused 12V like I did from the fuse block under the driver side dash.) And Pin 87 that would go to your independent LEDS.

I don't know where I will get around to it but I have been thinking about building a basic electrical thread for folks. It would include different properties of electricity and how to install lights, accessories, electronics, etc safely.

I've never been one to have multiple lights on my truck but I'm trying to add atleast a large lightbar and set of fogs for starters using the space under my single din headunit just like yours. I like that setup a lot.

2nd phase of this project is to move my rear window switch and ect power switch under my headunit (I upgraded to a 99 center console). I would think the ect power switch would just need to be a SPST. The rear window up down control would need to be a DPDT and I would need to switch polarity so the window motor would run in forward and reverse from what I understand.
 

Members online

Forum statistics

Threads
278,310
Messages
3,554,078
Members
248,016
Latest member
Advally Service

Trending content

Back
Top