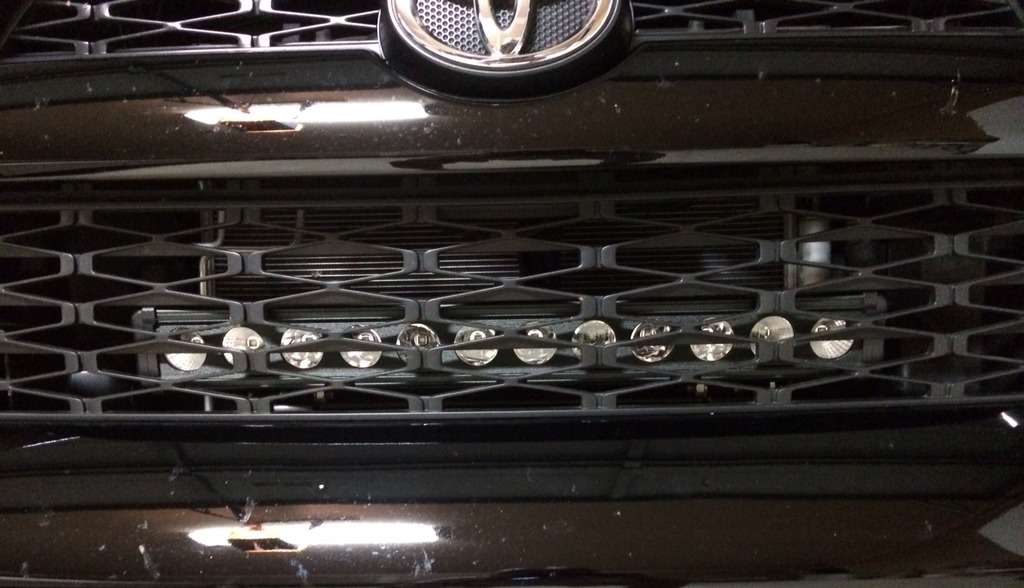
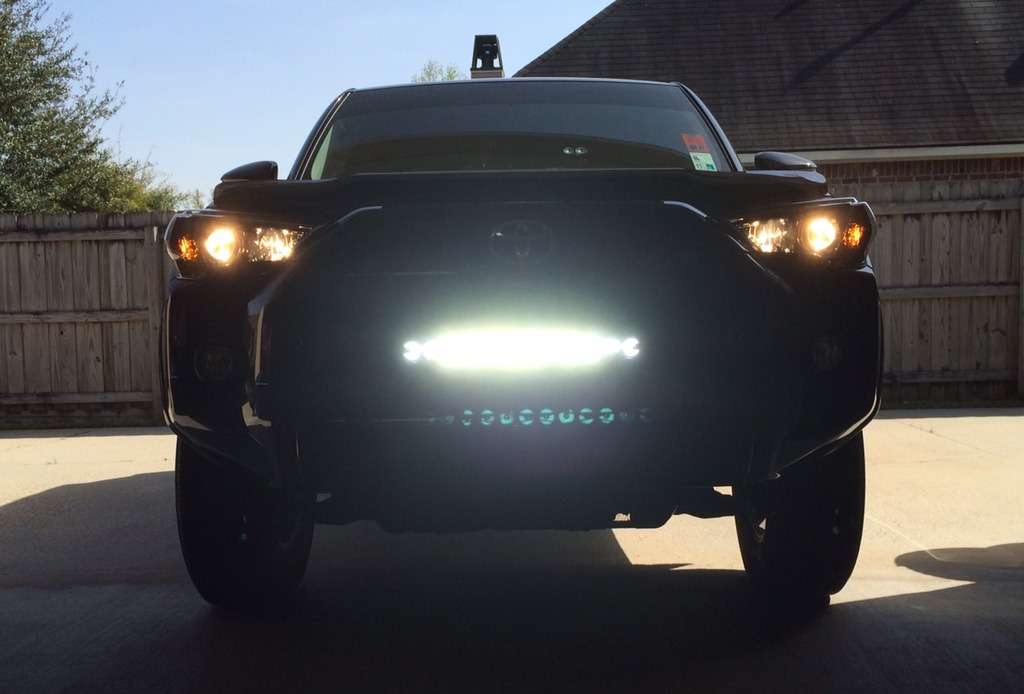
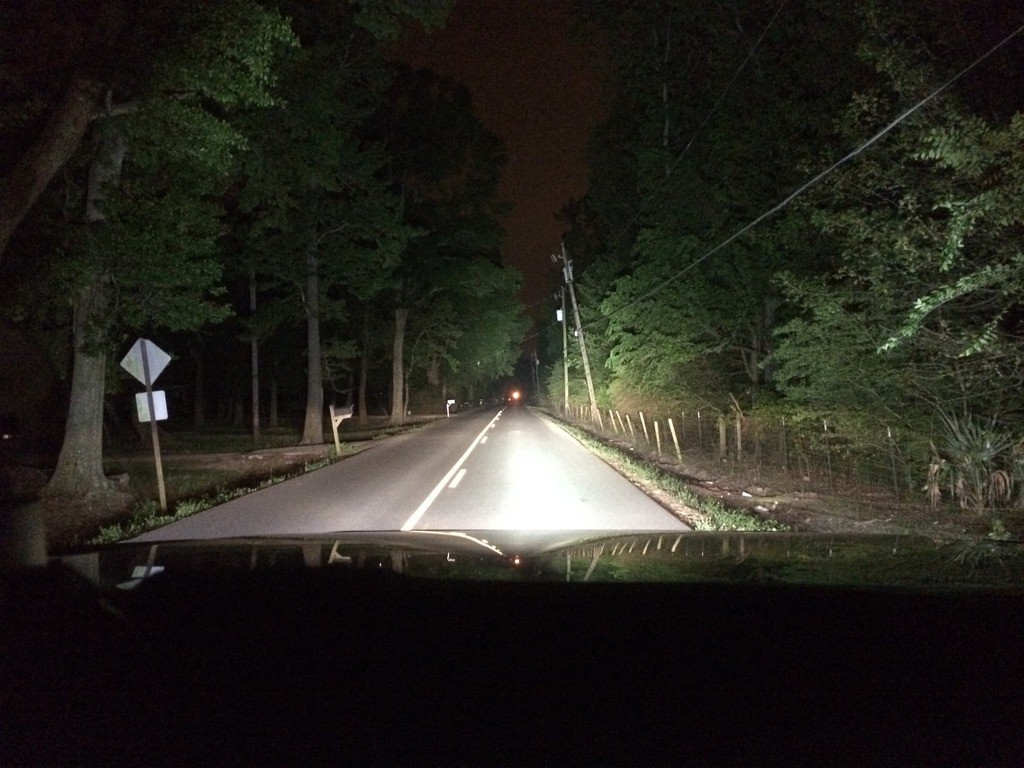
LED LIGHT BAR INSTALL on a 2014 T4R

Just got my AOB switch, and the 4 wires coming out of it are noticeably thinner than the 3 wires coming in from my light bars harness.

Is this normal?

Yes, that's normal!

I assume you are NOT hooking the switch directly to the light bar, and are using a relay and fused properly......

If you look at the photos of the switch in my 1st post, you will see they are same size as the ones on your switch.
 
Last edited:
Yes, that's normal!

I assume you are NOT hooking the switch directly to the light bar, and are using a relay and fused properly......

If you look at the photos of the switch in my 1st post, you will see they are same size as the ones on your switch.

Yeah, I have the OPT7 harness, which has a relay/fuse.

Plan is to connect to the battery and ground the relay. Run the wires to the inside through the driver side firewall grommet. And then connect the AOB switch to the harnesses positive/negative wires using butt connectors. I forget the exact color to color right now, but I know it's in this thread, and Cymons thread.

I don't care to have the switch illuminated when the interior lights are on, and don't want to mess with any of the OEM wiring, so I will have a few unneeded wires to deal with. Plan is to just tape up the ends, roll them up, and keep them out of the way.

Sound about right? My only real question is do I connect all three harness wires to the AOB switch, or just the two of them? I believe that I won't have to connect the AOB ground, but am not 100% sure on that.

If I leave the light on and kill the battery, I'm a jackass and will have to learn my lesson.
 
Last edited:
Yeah, I have the OPT7 harness, which has a relay/fuse.

Plan is to connect to the battery and ground the relay. Run the wires to the inside through the driver side firewall grommet. And then connect the AOB switch to the harnesses positive/negative wires using butt connectors. I forget the exact color to color right now, but I know it's in this thread, and Cymons thread.

I don't care to have the switch illuminated when the interior lights are on, and don't want to mess with any of the OEM wiring, so I will have a few unneeded wires to deal with. Plan is to just tape up the ends, roll them up, and keep them out of the way.

Sound about right? My only real question is do I connect all three harness wires to the AOB switch, or just the two of them? I believe that I won't have to connect the AOB ground, but am not 100% sure on that.

If I leave the light on and kill the battery, I'm a jackass and will have to learn my lesson.


I'll have to check when I hook it up, but I'm pretty sure if you're not going to hook into the wiper switch with the AOB you will use all 3 on the opt7 so you can ground the AOB switch. I can check on Monday when I get back from a family trip.

A couple threads to check...see what works for you, I'll be doing my install and write up sometime this week.

http://www.toyota-4runner.org/5th-gen-t4rs/218150-led-light-bar-install-unused-connector-tap-switch-into.html

http://www.toyota-4runner.org/5th-gen-t4rs/211802-wiring-lightbar-independent-harness-aob-switch.html
 
I'll have to check when I hook it up, but I'm pretty sure if you're not going to hook into the wiper switch with the AOB you will use all 3 on the opt7 so you can ground the AOB switch. I can check on Monday when I get back from a family trip.

A couple threads to check...see what works for you, I'll be doing my install and write up sometime this week.

http://www.toyota-4runner.org/5th-gen-t4rs/218150-led-light-bar-install-unused-connector-tap-switch-into.html

http://www.toyota-4runner.org/5th-gen-t4rs/211802-wiring-lightbar-independent-harness-aob-switch.html

Viewing this post:
http://www.toyota-4runner.org/5th-g...dependent-harness-aob-switch.html#post2218938

It says:

I'm going to assume 3 wires coming from relay are 1) Hot lead (12 volt positive +), 2) Relay trigger wire (connecting hot lead to this wire would engage/trigger relay turning on light bar), 3) Ground wire (negative -) would be ground for illumination on switch when turned on. Wire is not needed when interfacing with AOB in this case.

AOB Switch Wires;
Black - Connect to gray factory wire (- dimming) outlined in link
Blue - Connect to green factory wire (+) outlined in link
Red - Connect to relay trigger wire (power out of switch to relay when switch is engaged/turned on)
Green - Connect to hot lead from relay (power into switch)

So, my understanding is that I'll be connecting AOBs red, green, and black wires, to their respective OPT7 wires.
 
Well, the bar is installed and working! Only ran into one real hiccup with the wiring. I forget now which color combo I did for the switch on the first try but when I connected everything up, the switch was illuminated constantly, regardless of if the light was on or off. Obviously an issue as it would kill the battery eventually.

I swapped the two wires, and problem solved. Works as expected.

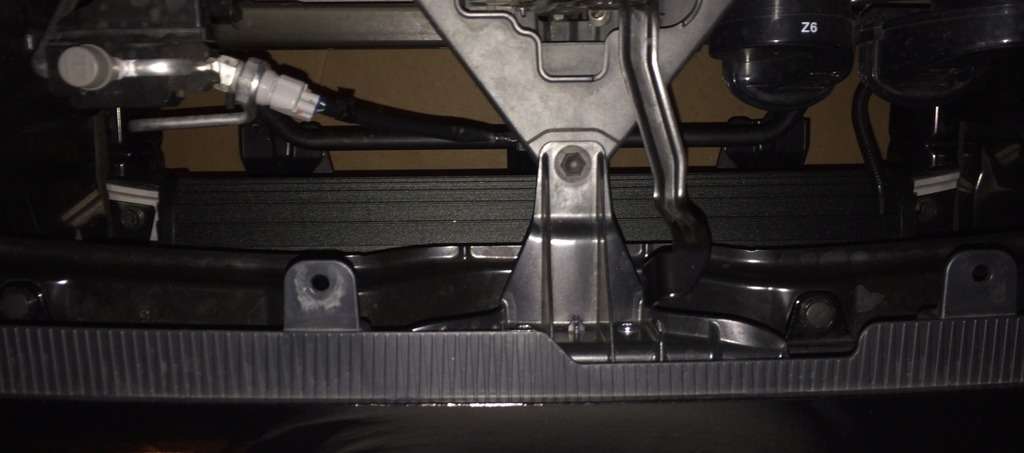
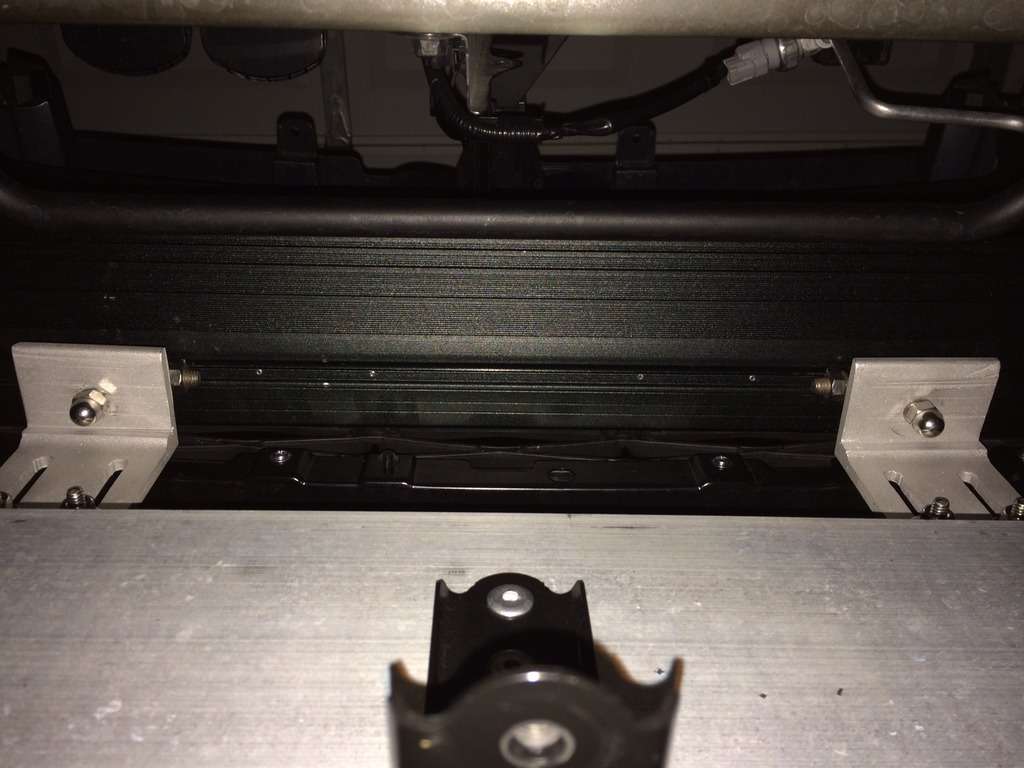
Outside of that, it was pretty painless. The concrete angle brackets I got were the exact perfect height for what I wanted, and worked using the two bolts on the bottom bumper bracket. Had to rig some shit up with some rubber washers to get it to sit correctly, but it worked surprisingly well. In retrospect, I wish I took pictures of the whole process, but it was 92 degrees today, I had a solid hangover, and I was baking in the sun the whole time.

Can't give enough thanks to [MENTION=103267]Saker[/MENTION], [MENTION=120701]Cymon[/MENTION], [MENTION=83083]rigtec[/MENTION], and [MENTION=81322]barryhiram[/MENTION]. Between all your threads and relevant posts, I had zero fear going after this, even having never done anything like it before.

 
Last edited:
Well, the bar is installed and working! Only ran into one real hiccup with the wiring. I forget now which color combo I did for the switch on the first try but when I connected everything up, the switch was illuminated constantly, regardless of if the light was on or off. Obviously an issue as it would kill the battery eventually.

I swapped the two wires, and problem solved. Works as expected.

Outside of that, it was pretty painless. The concrete angle brackets I got were the exact perfect height for what I wanted, and worked using the two bolts on the bottom bumper bracket. Had to rig some shit up with some rubber washers to get it to sit correctly, but it worked surprisingly well. In retrospect, I wish I took pictures of the whole process, but it was 92 degrees today, I had a solid hangover, and I was baking in the sun the whole time.

Can't give enough thanks to [MENTION=103267]Saker[/MENTION], [MENTION=120701]Cymon[/MENTION], [MENTION=83083]rigtec[/MENTION], and [MENTION=81322]barryhiram[/MENTION]. Between all your threads and relevant posts, I had zero fear going after this, even having never done anything like it before.


Congrats! :cheers:
 
Well, the bar is installed and working! Only ran into one real hiccup with the wiring. I forget now which color combo I did for the switch on the first try but when I connected everything up, the switch was illuminated constantly, regardless of if the light was on or off. Obviously an issue as it would kill the battery eventually.

I swapped the two wires, and problem solved. Works as expected.

Outside of that, it was pretty painless. The concrete angle brackets I got were the exact perfect height for what I wanted, and worked using the two bolts on the bottom bumper bracket. Had to rig some shit up with some rubber washers to get it to sit correctly, but it worked surprisingly well. In retrospect, I wish I took pictures of the whole process, but it was 92 degrees today, I had a solid hangover, and I was baking in the sun the whole time.

Can't give enough thanks to [MENTION=103267]Saker[/MENTION], [MENTION=120701]Cymon[/MENTION], [MENTION=83083]rigtec[/MENTION], and [MENTION=81322]barryhiram[/MENTION]. Between all your threads and relevant posts, I had zero fear going after this, even having never done anything like it before.

Well done, sir!

Post a photo when you get a chance.
 
Well, the bar is installed and working! Only ran into one real hiccup with the wiring. I forget now which color combo I did for the switch on the first try but when I connected everything up, the switch was illuminated constantly, regardless of if the light was on or off. Obviously an issue as it would kill the battery eventually.

I swapped the two wires, and problem solved. Works as expected.

Outside of that, it was pretty painless. The concrete angle brackets I got were the exact perfect height for what I wanted, and worked using the two bolts on the bottom bumper bracket. Had to rig some shit up with some rubber washers to get it to sit correctly, but it worked surprisingly well. In retrospect, I wish I took pictures of the whole process, but it was 92 degrees today, I had a solid hangover, and I was baking in the sun the whole time.

Can't give enough thanks to [MENTION=103267]Saker[/MENTION], [MENTION=120701]Cymon[/MENTION], [MENTION=83083]rigtec[/MENTION], and [MENTION=81322]barryhiram[/MENTION]. Between all your threads and relevant posts, I had zero fear going after this, even having never done anything like it before.

Congrats! Pictures or it didn't happen..............:bolt:
 
Thanks [MENTION=81322]barryhiram[/MENTION]. If the grille wasn't 100% wedged in place and hopefully never coming out again, I would take it out to get some mount photos.

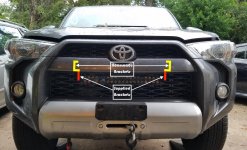
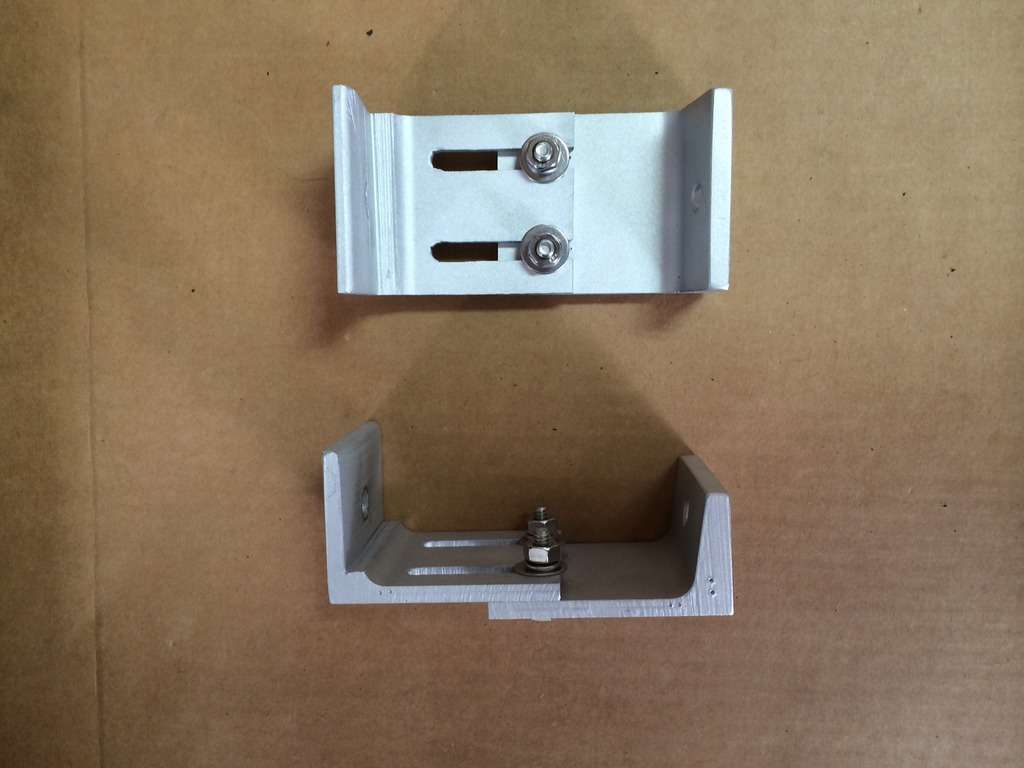
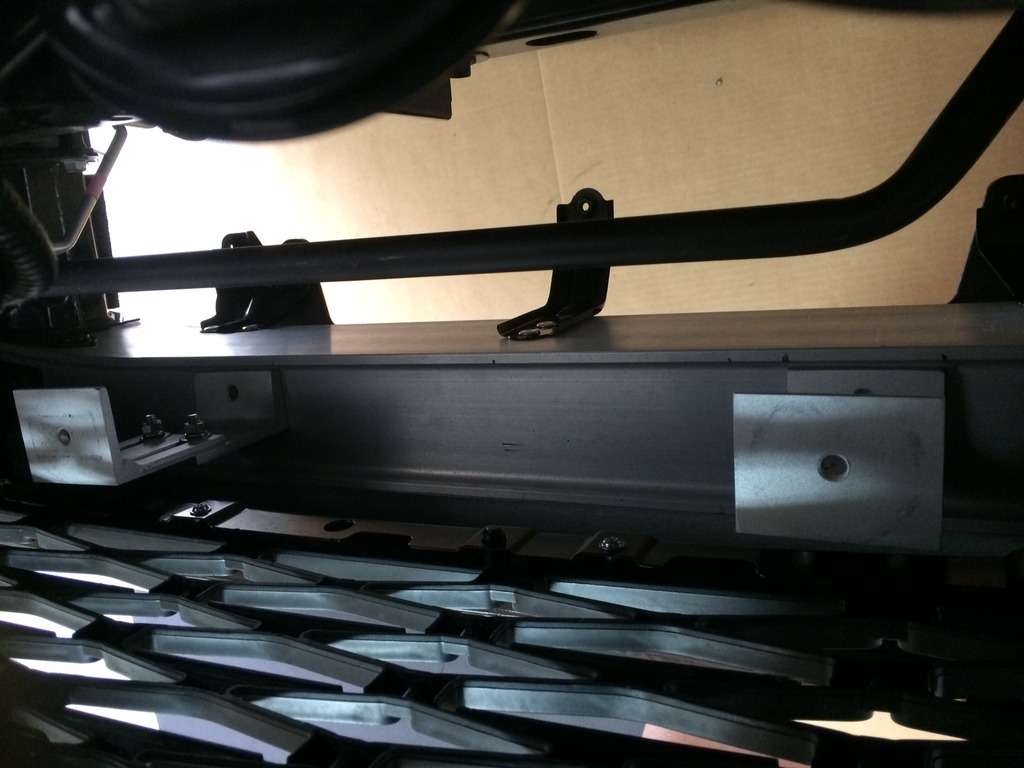
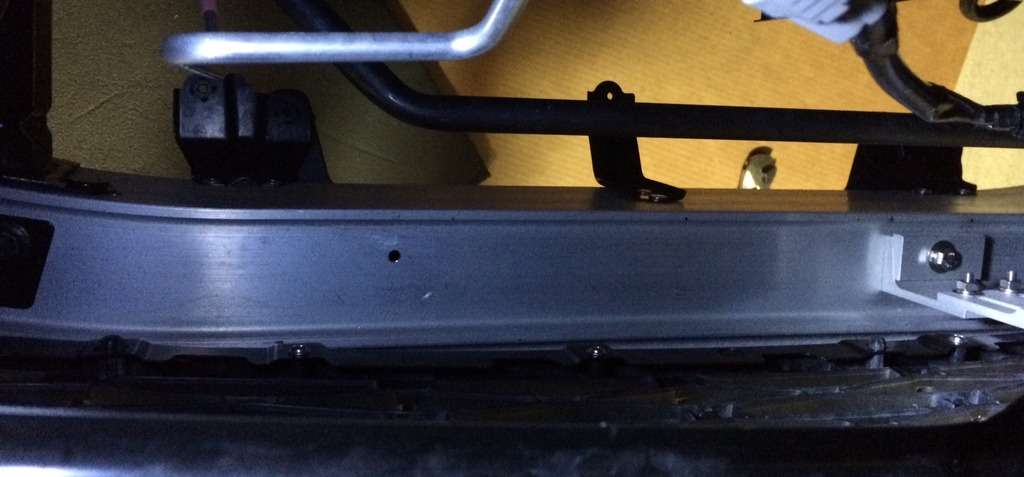
The concrete angle brackets I got worked perfectly with these two existing bolts in the bumper support to accommodate the 32" bar, both in height and width. I didn't have to drill or cut anything.

Was shocked at how well it worked out.

edit: Link to said brackets: http://www.lowes.com/pd/USP-2-in-x-5-187-in-Steel-Concrete-Angle/3692046
 
Last edited:
Thanks [MENTION=81322]barryhiram[/MENTION]. If the grille wasn't 100% wedged in place and hopefully never coming out again, I would take it out to get some mount photos.

The concrete angle brackets I got worked perfectly with these two existing bolts in the bumper support to accommodate the 32" bar, both in height and width. I didn't have to drill or cut anything.

Was shocked at how well it worked out.

I love it when a plan accidently comes together :eyebrows:
 
Awesome job. Took me forever to my bar turn on with my vehicle Hi-beams. Found a fuse under the hood that controls Hibeam and triggered the relay. Only thing I did was I took this fuse wire and put in to a switch. This allows me to always have it come on with Hi-beams or I can shut off the switch and have no bar, but normal hibeams. I can send a pic of the fuse if anyone else is interested. Quick easy mod.


Sent from my iPhone using Tapatalk
 
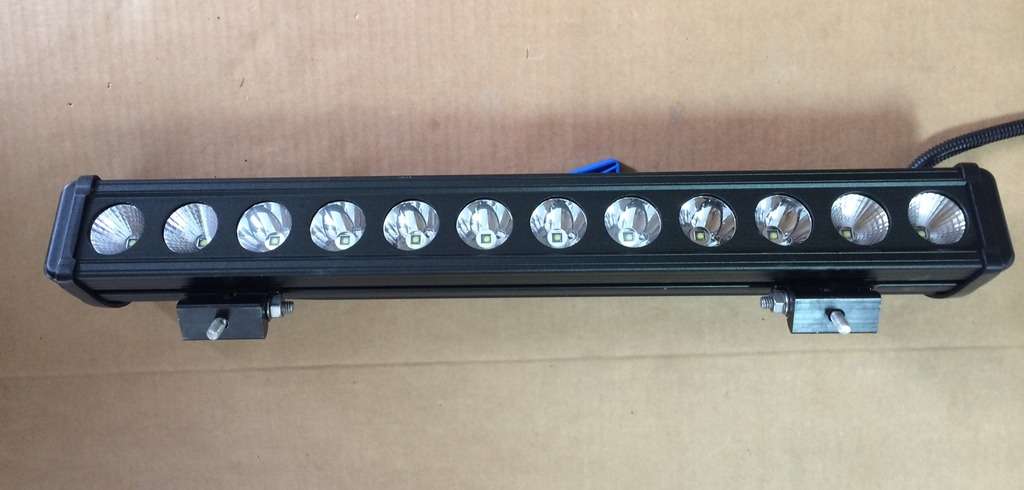
Finally got mine installed! 22" bar with combo flood and spotlights. Works great even though I went the budget route. The one downside is that the bar didn't come with a wiring harness. Lots of fun wiring and waterproofing! Credit to Saker for the great walk through!

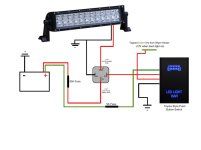
Here is the wiring I used:
LED Light Bar Wiring.jpg

Sorry I didn't get an image of the brackets I made. Basically a "C" bracket hanging from the bumper support. No drilling. Here is an approximation of what's going on:
20160904_185827.jpg
 

Attachments

  • LED Light Bar Wiring.jpg
    LED Light Bar Wiring.jpg
    42.8 KB · Views: 51,456
  • 20160904_185827.jpg
    20160904_185827.jpg
    141.8 KB · Views: 8,633
Can you guys who have light bars in the upper front grill area please post more pics. What brand bar are you using in the spot, and what's the biggest length/height that will fit there?

I have a trail premium, and I'm debating getting the TRD pro grill and just removing the entire upper grill and filling the spot with a light bar. Thanks for your help.
 
[MENTION=138336]Cozen89[/MENTION],

Let me make a suggestion to you since you may get very few responses to your post.
Edit your post and place a "@" sign in front of the people/members you are directing the question to. They will respond more than likely than to a generic " you guys who have light bars in the upper front grill " question.

This is kind of a how to thread that evolved and not an ask all about all light bar related items.

Even a separate thread may get more answers to your questions.
 
this might be a stupid question.

but using the high beam wire as a trigger wire, do you need to have the high beams on to turn on the led light bar? can i trigger it straight from the battery?


LED LIGHT BAR INSTALL

The purpose of this write-up is to help people that are interested in installing a light bar behind the grill of their 2014 Toyota 4Runner. I will list the parts used as well as pictures.

For the cleanest install, I'd recommend a full relay harness. TRS makes a nice one, and it's actually got two relays which might be nice if you want to add another light in the future.
HD Relay: H1/H3 - Wire Harnesses - Components
To make things easy, I'd also get these and I'll explain why later:
9006 Extension Cords - Accessories from The Retrofit Source

If you go with a relay harness like the one above, you'll simply connect the power connector to the battery, connect the ground connector to a ground, run the light plugs towards the light in the grill and connect the switch wire to the signal wire in the relay harness. The first three are very easy, the last one takes a bit more work.
In this case, the relay harness has an H1/H3 and you won't need that, so you can cut that connector off. When you cut that connector off, the wire left (orange insulated wire) is where you'll connect the switch wire to. Of course, you'll need to extend that wire from the switch to wherever you mount the relay harness. The other wire (black insulated wire) is a ground wire that will need a terminal.

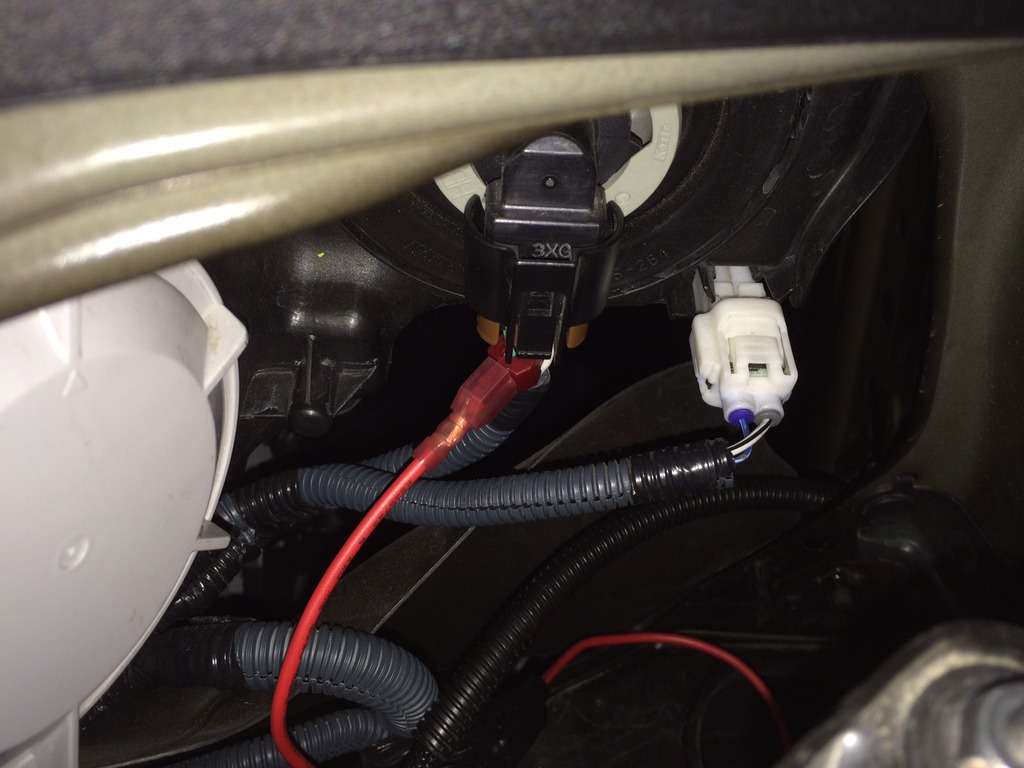
Now, you'll need to connect a wire from the high beam or fuse to the trigger wire on the switch to provide it with power. This is the questionable part. By connecting to a fuse, you'll have to hit the switch every time you want to turn the lights on. Honestly, it's a pain in the butt if you plan on using your lights on back roads at night. Connecting to the high beam is much more convenient since you can leave the switch on and every time you turn the high beams on, the eBay bar will light up without having to hit the switch. Very handy. If you choose to connect the eBay bar to a fuse and not the high beams, you have two choices. One, you connect it to a fuse that's always hot. Two, you connect to a fuse that is only on when the ignition is on. The advantage of the first option is that you can turn the light on any time, whether the truck is on or off. That's also the disadvantage because it's easy to accidentally leave on. I'm going to suggest you run the trigger wire on the switch to the driver's side headlight and connect it to the high beam wire. (Don't forget to install a Mini Waterproof 3 or 5 Amp In Line Standard Blade Type Fuse Holder on this circuit!) This should work whether you have the DRL or not.

This should give you an operational switch, an operation harness and the only thing left is to connect the light to the relay harness. This is where those 9006 extension cords come in. Plug those extensions into the end of the relay harness at the light, cutoff the part you don't need and splice your light's wires into that extension cord. Basically, it'll leave you with a nice clean plug so it's easy to remove the light in the future.

I'd do all of this in a few stages. You'll need two provide two wires of your own, so you can simply use a speaker wire or something like that that already has two wires in it. They're both going to the switch on one end, and close to the headlight on the other. Run that wire first, through an existing rubber grommet on the firewall near the master cylinder. Do the switch next. Relay harness after that. Attach the lights. Fire it up and make sure everything works. Finally, clean up the wiring, make it pretty, attach the relay where you want it and enjoy the lighting.

Things you'll need:

The switch. Mine came from AirOnBoard USA
TOYOTA 4RUNNER Replacement Switches -Air On Board
The relay harness I linked to, or something like it.
A length of wire as discussed. I used 18-2 gauge stranded speaker wire.
At least three 18-22 gauge t-taps (one at headlight, one at illumination wire on existing switch in dash) A few extra won't hurt since those things are temperamental at best.
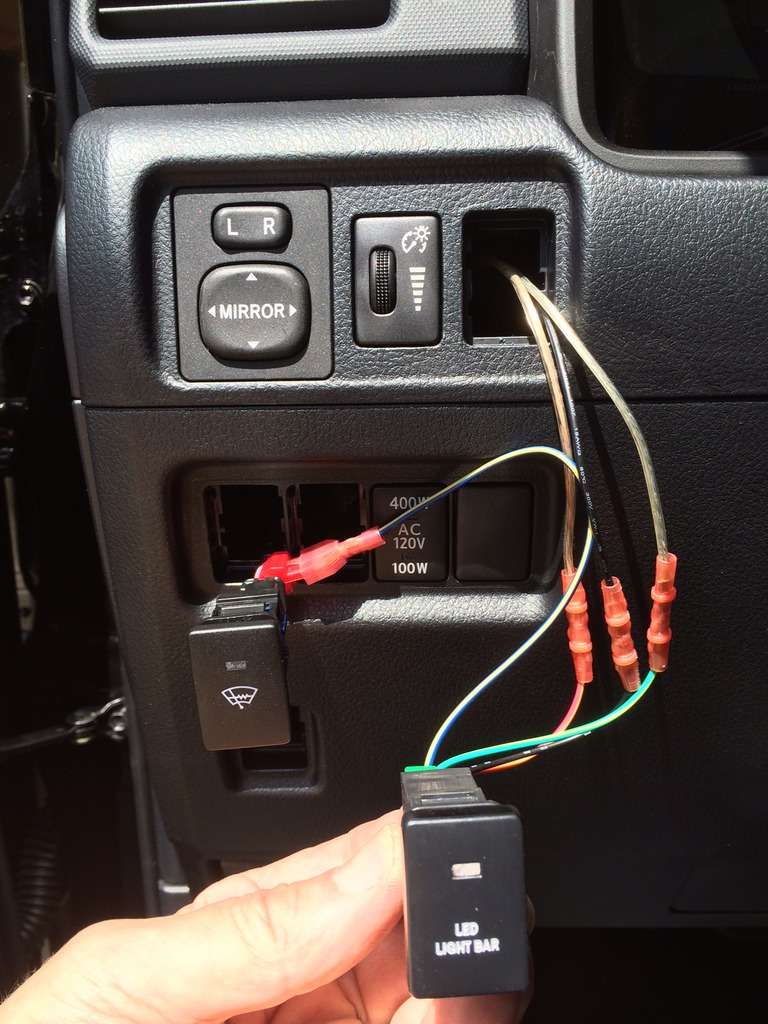
Butt connectors, at least 5 for the new switch ( (1)ground, (2)power and (2)trigger wire (solder and heat shrink tubing is preferred if you're capable)
Mini Waterproof Amp In Line Standard Blade Type Fuse Holder (comes with a 10 or 20 amp fuse change to a 3 or 5 amp) This goes on the trigger circuit!

I hope this help someone wanting to install something similar!


Simple Aux Light Wiring Dia for 4Runner
196154d1458356165-2014-2016-behind-grill-light-bar-mounts-aux-light-wiring.png

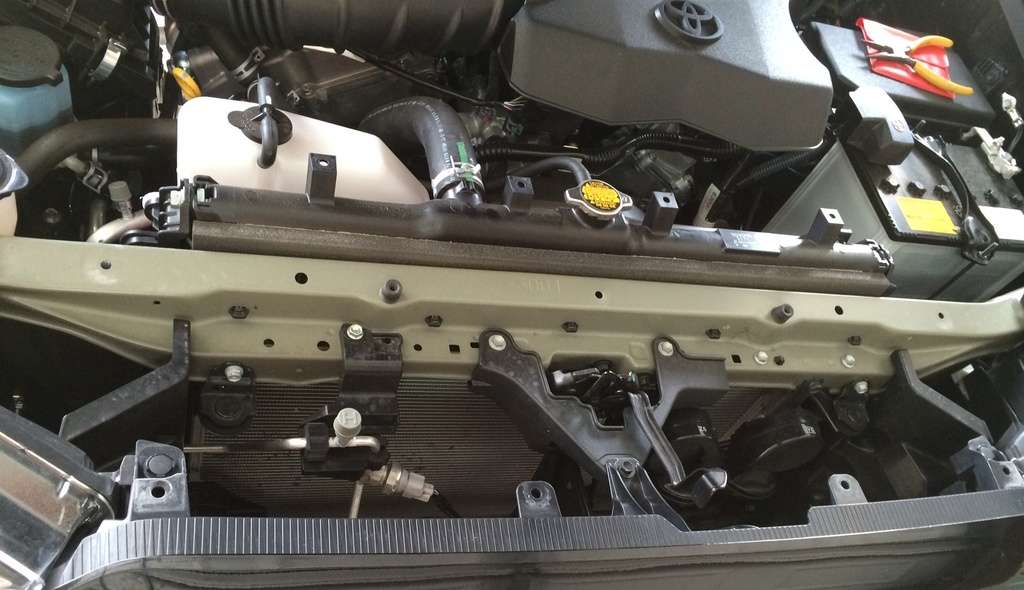
Upper Access Cover - Removed
fjkr.jpg


Lower Access Cover - Removed
13xw.jpg


Aluminum Brackets Fabricated
z3su.jpg


eBay 22inch 120 Watt LED Light Bar
kshw.jpg


Positioning Brackets
ac4e.jpg


Bumper Drilled and Tapped for Brackets
mpsk.jpg


LED Light Bar Mounted
d04d.jpg


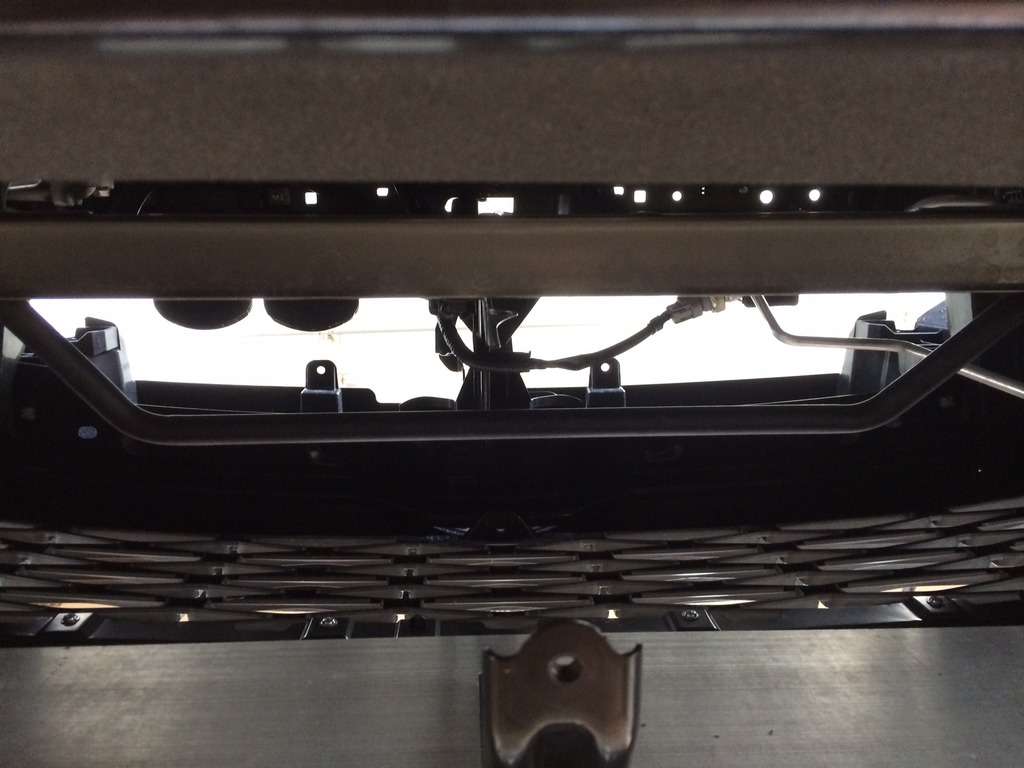
LED Light Bar Mounted Underside View
nppt.jpg


LED Light Bar Mounted Grill View
2ttk.jpg


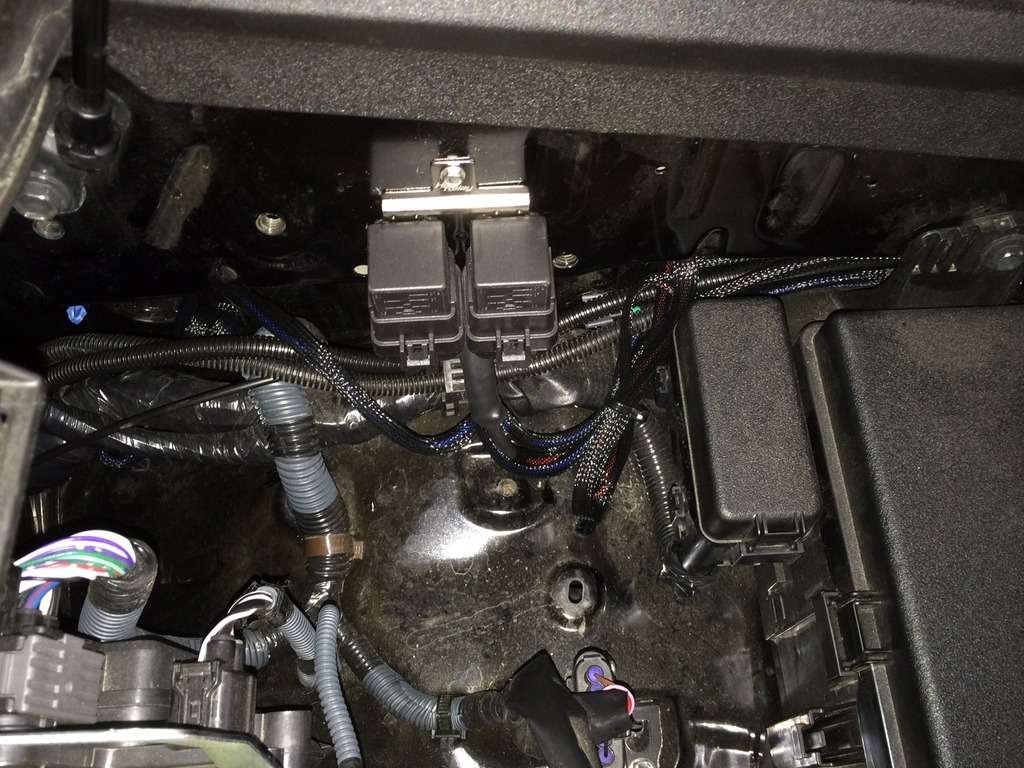
Wiring Harness and Relays Installed
fvcx.jpg


LED Light Bar Trigger Wire Connected to High Beam Wire
gpdu.jpg


LED Light Bar Switch Wired Up
(Obviously, the blue/white wire will be run thru the switch hole and connected back to the T-tap)
dpja.jpg


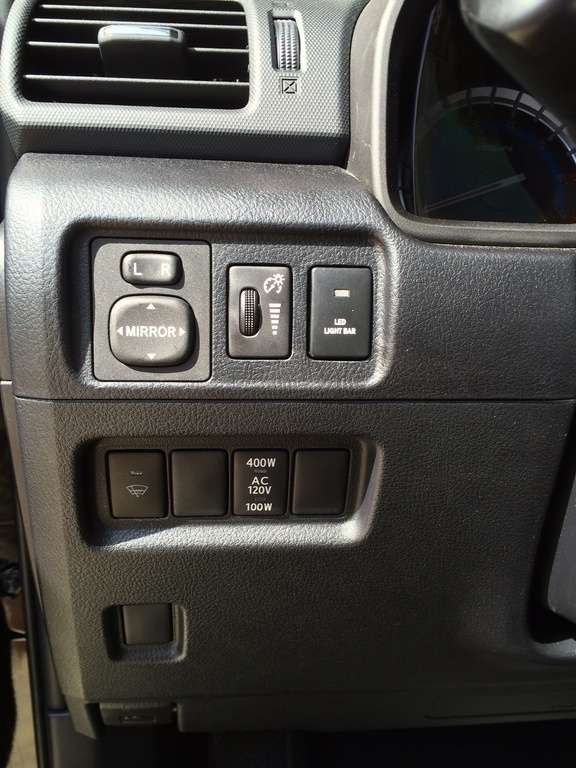
LED Light Bar Switch
ixei.jpg


LED Light Bar_1
42ld.jpg


LED Light Bar_2
1l2f.jpg


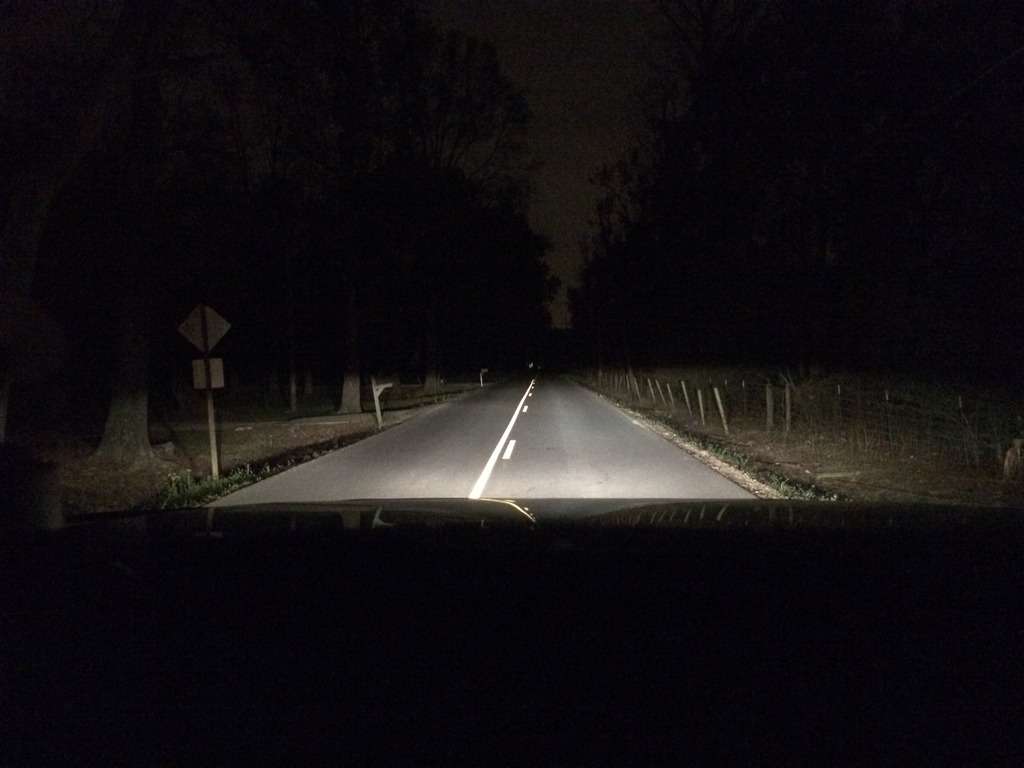
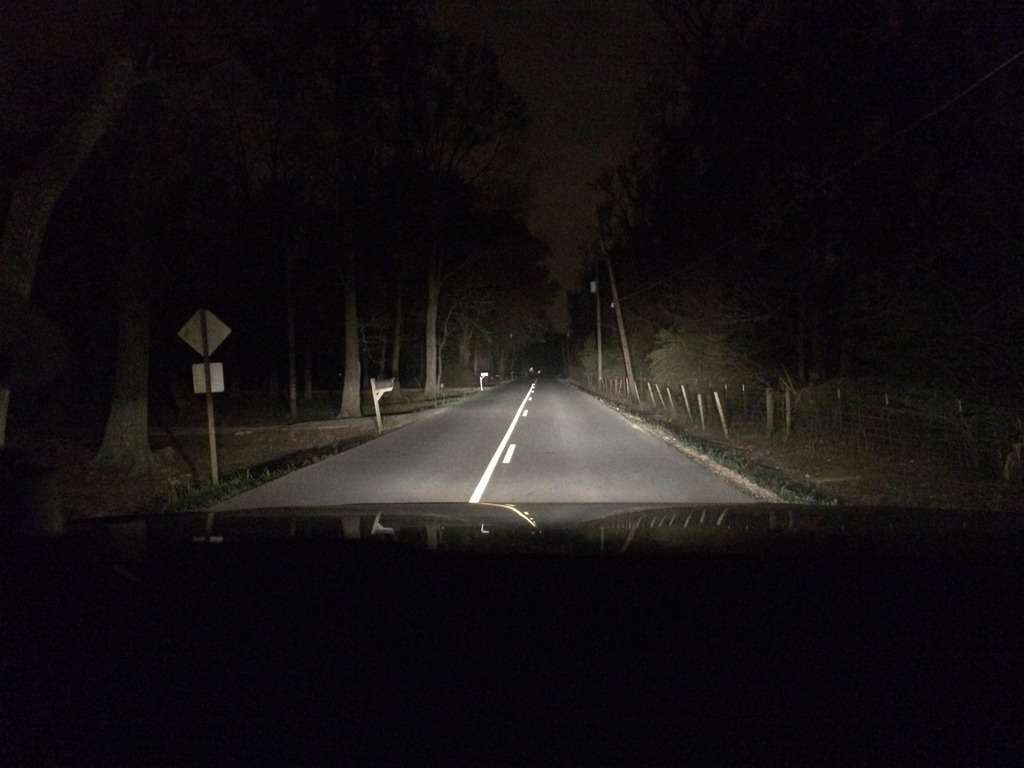
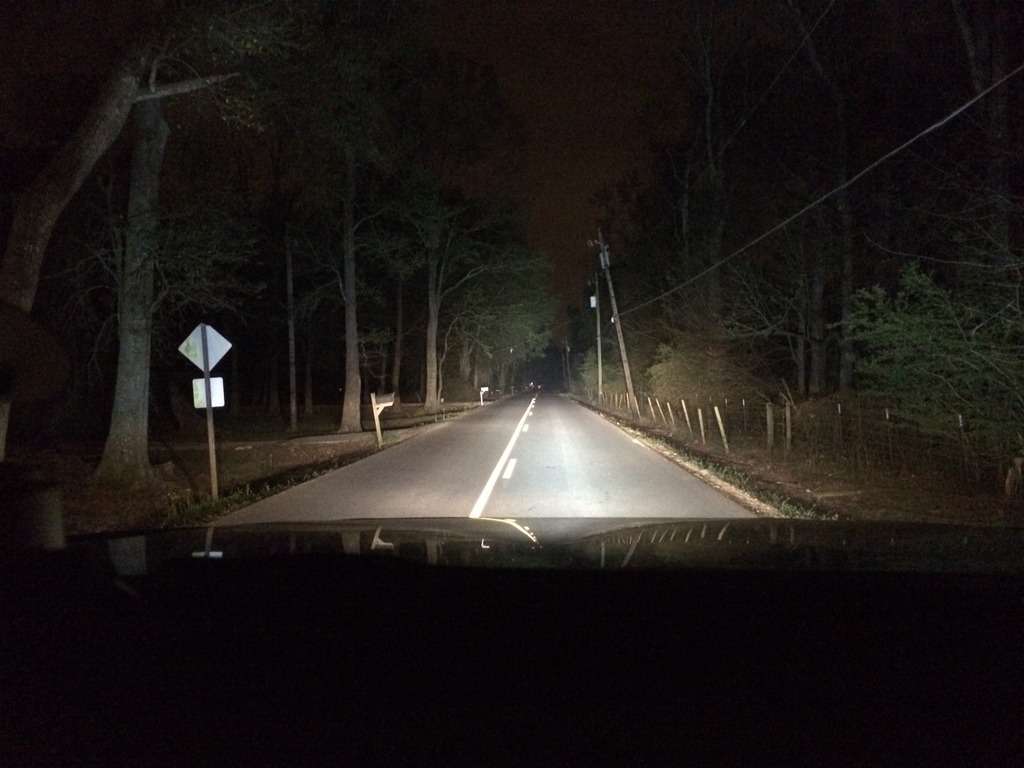
As requested, Light Output Pics Added


Low Beams
m35v.jpg


Low and High Beams
f924.jpg


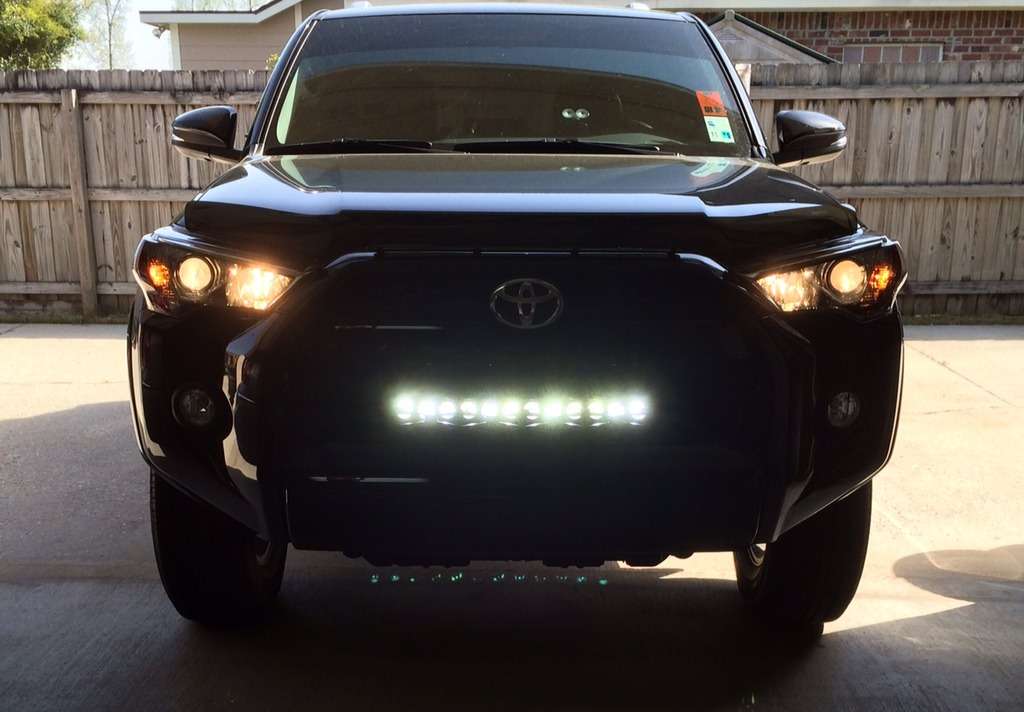
Full Beams with LED Light Bar
(Keep in mind, output is partially blocked by grill, haven't decided whether to cut it or not!)
ym54.jpg


Picture after the grill opened up!
Huge Difference!


maiqp.jpg
 

Members online

Forum statistics

Threads
278,312
Messages
3,554,089
Members
248,016
Latest member
Advally Service

Trending content

Back
Top