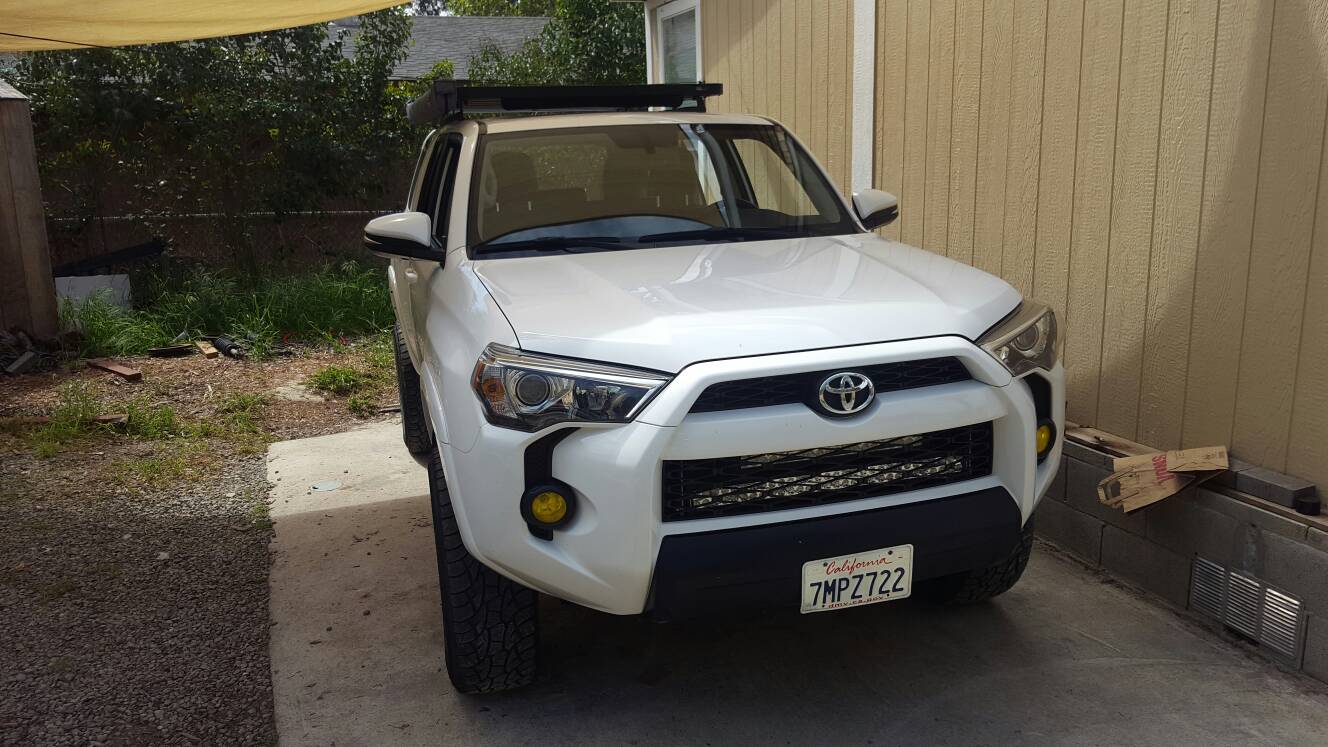
LED LIGHT BAR INSTALL on a 2014 T4R

Thanks [MENTION=81322]barryhiram[/MENTION]. If the grille wasn't 100% wedged in place and hopefully never coming out again, I would take it out to get some mount photos.

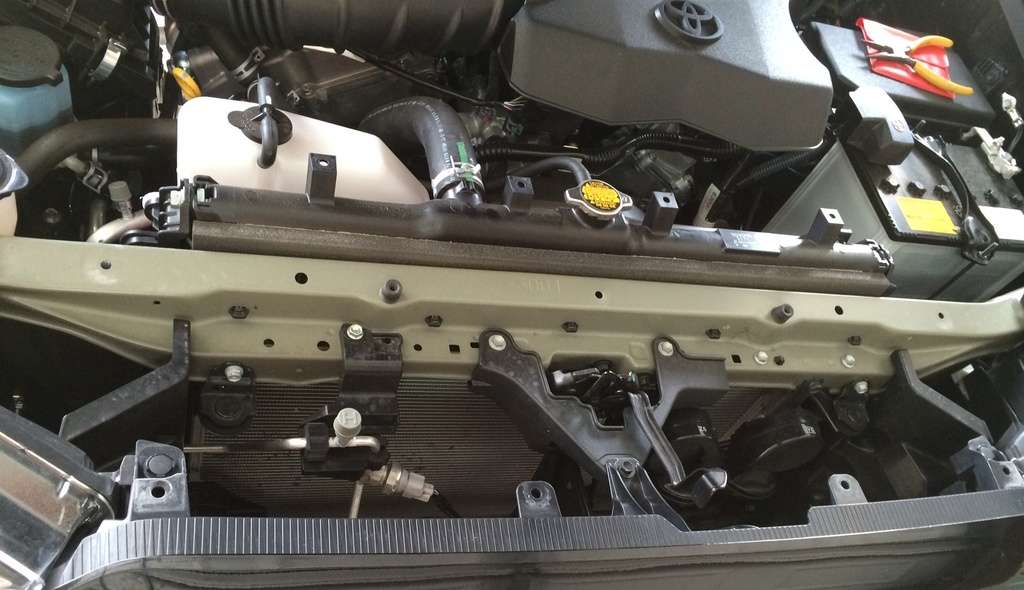
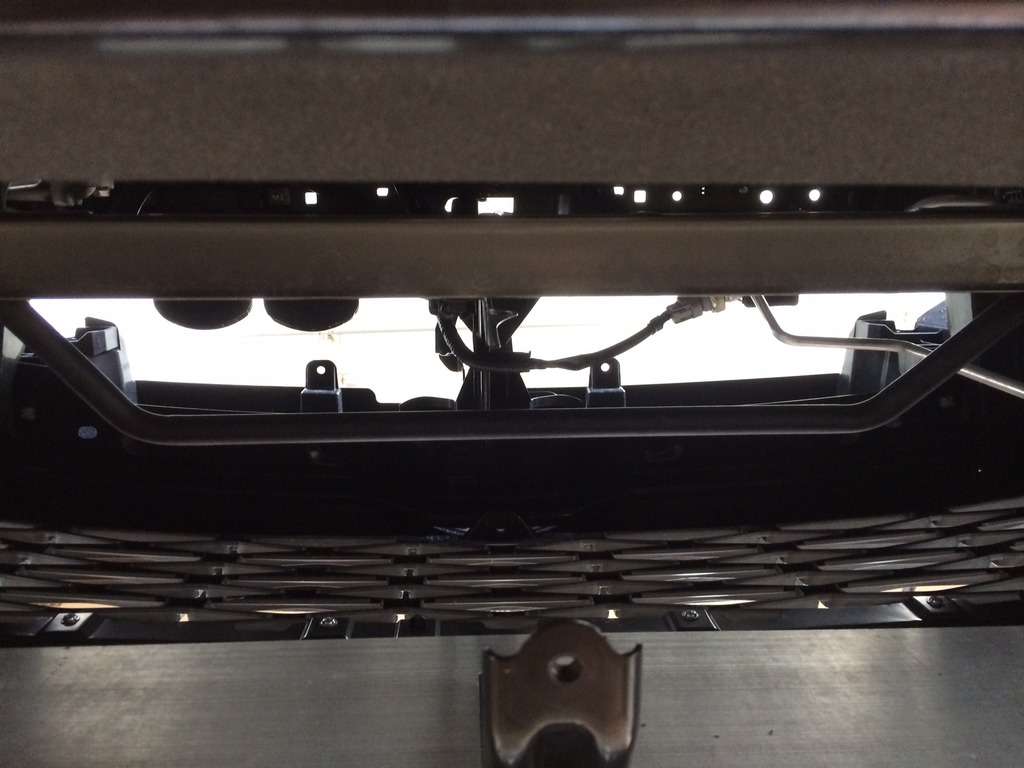
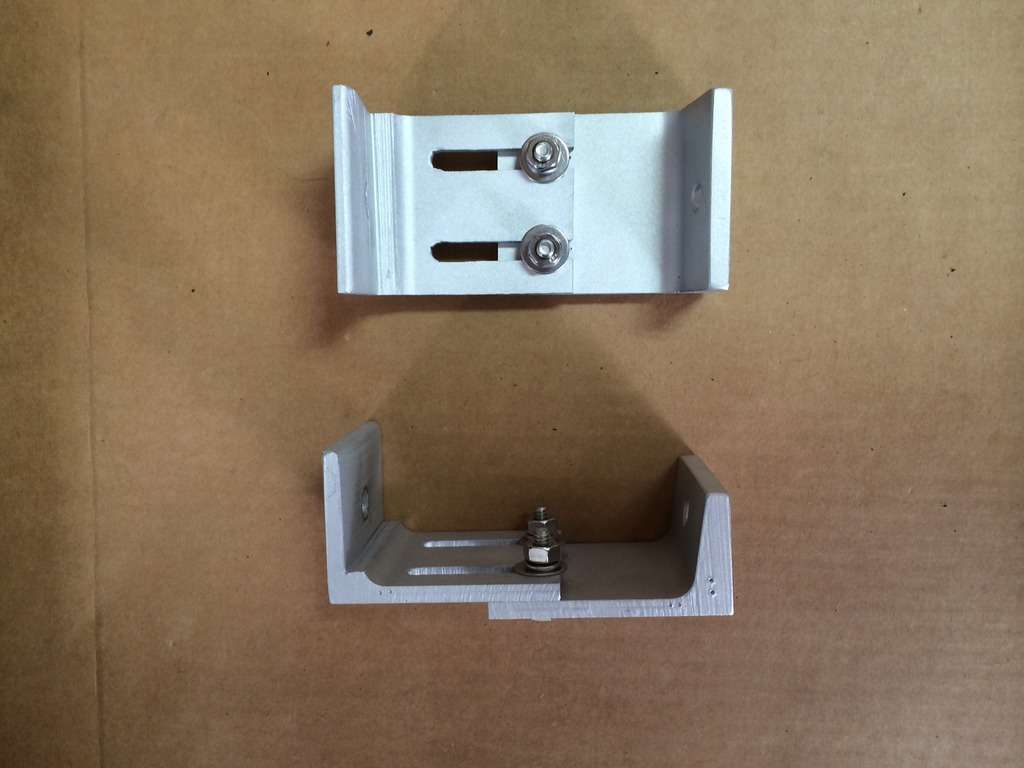
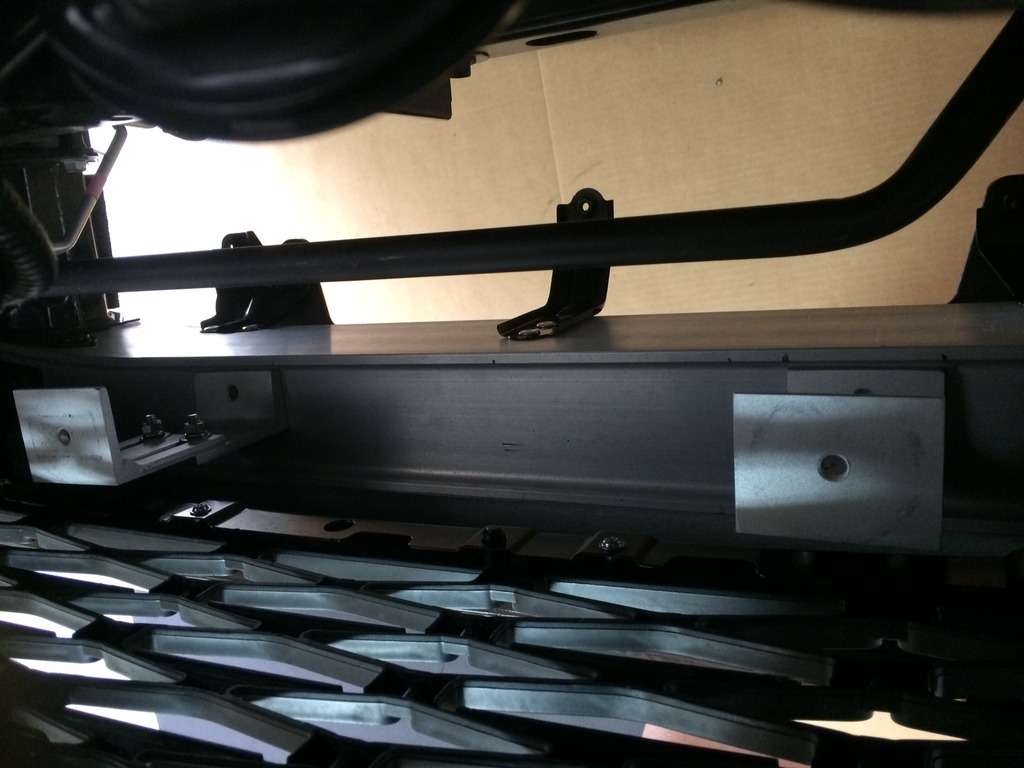
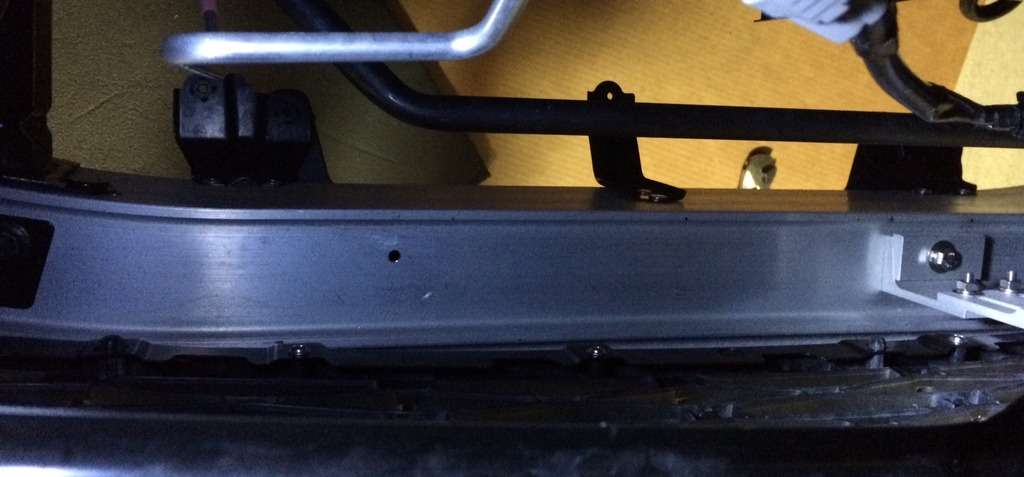
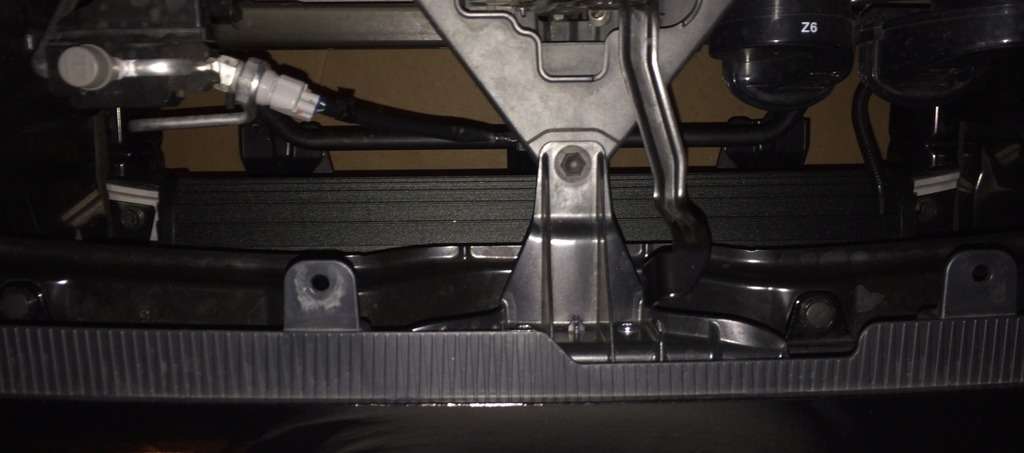
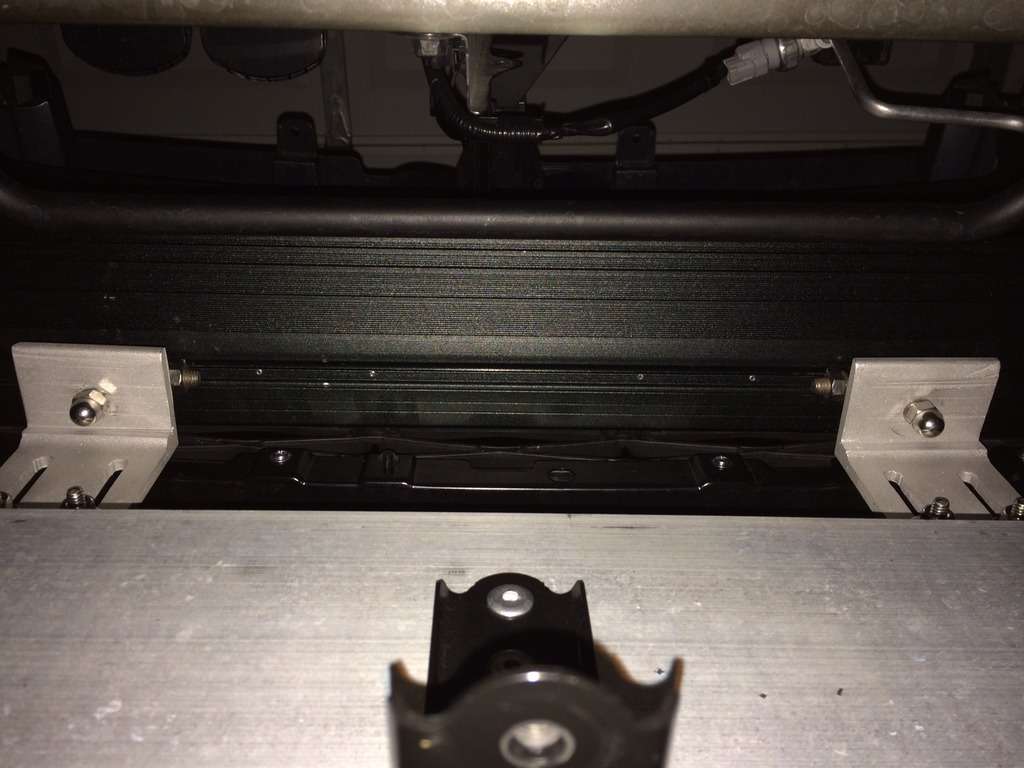
The concrete angle brackets I got worked perfectly with these two existing bolts in the bumper support to accommodate the 32" bar, both in height and width. I didn't have to drill or cut anything.

Was shocked at how well it worked out.

edit: Link to said brackets: http://www.lowes.com/pd/USP-2-in-x-5-187-in-Steel-Concrete-Angle/3692046
I ended up doing the same a few months ago. I love it

Sent from my SAMSUNG-SM-G890A using Tapatalk
 
[MENTION=148344]walstylez[/MENTION]

x4lT3hlh.jpg


Only one I can find right now.

Paint the brackets black and you'll barely be able to see them. They look a hell of a lot better than some hacked up aluminum stock held together by a handful of hardware, that's for sure.

Well, if you are directing the comment towards me, I'm not offended in the least. The way mine were done and with the trim piece on the grill area, they aren't even visible and I assure you they are a lot more sturdy than concrete brackets.
IIRC, I was the first one to at least document installing a light bar behind the grill. No one was making brackets yet, except us hacking up aluminum stock.
 
Well, if you are directing the comment towards me, I'm not offended in the least. The way mine were done and with the trim piece on the grill area, they aren't even visible and I assure you they are a lot more sturdy than concrete brackets.
IIRC, I was the first one to at least document installing a light bar behind the grill. No one was making brackets yet, except us hacking up aluminum stock.

It was directed at the "fab something up" comment, as if the standard fab up job is somehow better than a 5" stainless L-bracket.

The concrete angles aren't flimsy. They are 12ga steel. And, they are designed to support wood posts against concrete floors. They are more than adequate for supporting a LED light bar against a bumper.

If it had slotted holes instead of circles, it'd look nearly identical to one of the companies products who make brackets for the same application now.

Quick spray of some black paint, and I really cannot understand how a simple L bracket could look any better or worse here....
 
Last edited:
It was directed at the "fab something up" comment, as if the standard fab up job is somehow better than a 5" stainless L-bracket.

The concrete angles aren't flimsy. They are 12ga steel. And, they are designed to support wood posts against concrete floors. They are more than adequate for supporting a LED light bar against a bumper.

If it had slotted holes instead of circles, it'd look nearly identical to one of the companies products who make brackets for the same application now.

Quick spray of some black paint, and I really cannot understand how a simple L bracket could look any better or worse here....

Copy that Matt....
 
Well....waited for the brackets from Rago Fabrication...got them today, was all excited since my install is scheduled for tomorrow...except they shipped me the wrong brackets!!! Uggghhh

What the. Now I'm about to tell them to cancel it and go get those concrete brackets!!!
 
Well....waited for the brackets from Rago Fabrication...got them today, was all excited since my install is scheduled for tomorrow...except they shipped me the wrong brackets!!! Uggghhh

What the. Now I'm about to tell them to cancel it and go get those concrete brackets!!!

Curious....... if you "got them today", how are you going to "tell them to cancel it"?

Are they willing to make it good and send you some priority mail since they messed up?

I would probably wait a few more days.... YMMV :boink:
 
Nope, I use to wait for regular shipping...brought the concrete brackets in...but they don't raise the light bar high enough? Ughhh, annoyed
 
Really? That doesn't sound right.

They are more than high enough coming off the bumper.

http://www.toyota-4runner.org/2307312-post188.html

This post is where I got the idea to use the brackets. He drilled a hole to lower it since he has a limited, but it should give a bit more insight. Maybe they are using the brackets in the wrong orientation?

The height is more than enough.. in fact, in hindsight I would have liked to have lowered mine by maybe an inch or so.
 
Really? That doesn't sound right.

They are more than high enough coming off the bumper.

http://www.toyota-4runner.org/2307312-post188.html

This post is where I got the idea to use the brackets. He drilled a hole to lower it since he has a limited, but it should give a bit more insight. Maybe they are using the brackets in the wrong orientation?

The height is more than enough.. in fact, in hindsight I would have liked to have lowered mine by maybe an inch or so.

Looked at the pics, I think it's bc I have a '16 Trail...my bumper doesn't look like that...I sure hope those Rago Fab brackets work...
 
[MENTION=148344]walstylez[/MENTION], ya neither do i. That post was just for reference. Unless there was some drastic change to the bumper from 15 to 16, which there wasn't, they are doing something silly like trying to use them in the wrong direction.

When the ragos show up, measure them. I'm interested to know the dimensions.
 
Last edited:
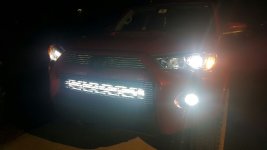
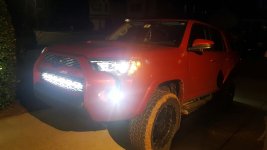
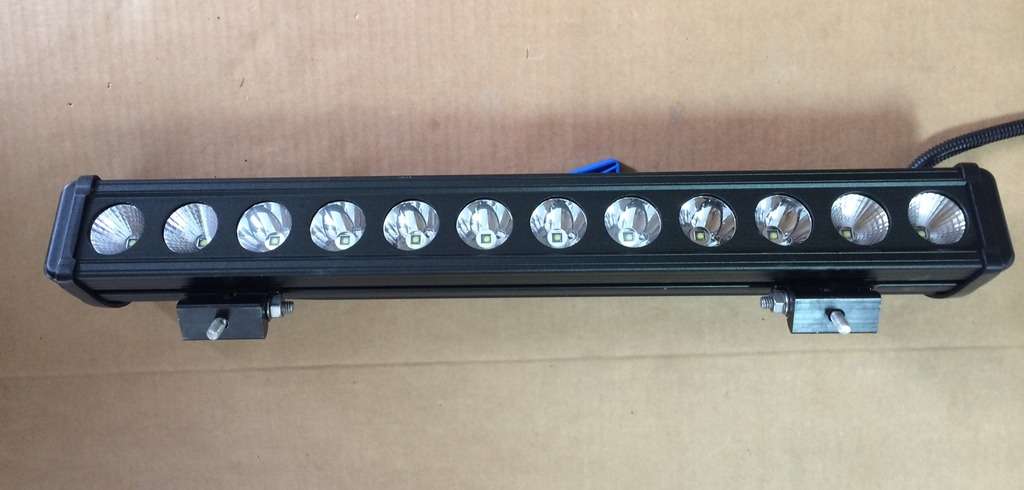
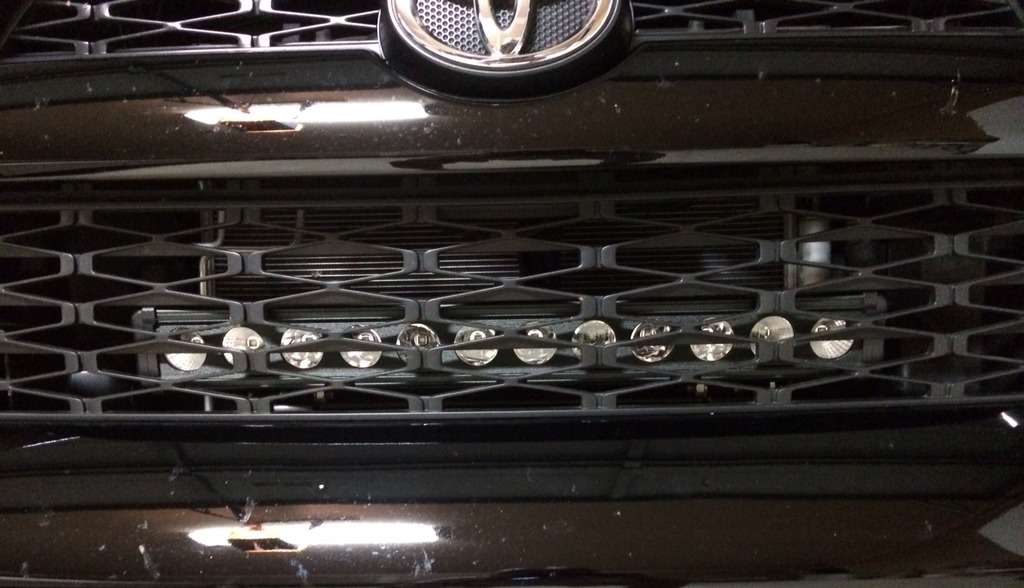
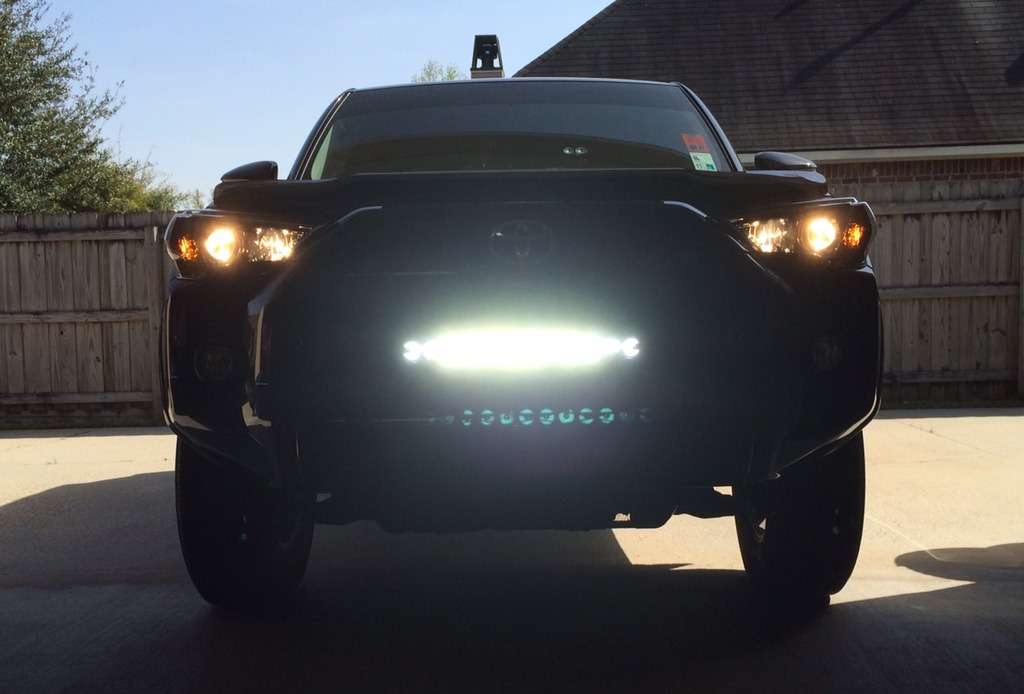
Finally got the 32" Opt7 C2 mounted behind the grill, ended up needing the Rago brackets. Looks pretty nice, and at first I thought the grill would block too much light, but it's plenty bright. I love it...combined with my Opt7 low beams and high beams and the LED Fog/DRL option from the factory...I can see most anything!
 

Attachments

  • Resized_20170315_211308.jpg
    Resized_20170315_211308.jpg
    103.7 KB · Views: 737
  • Resized_20170315_211341.jpg
    Resized_20170315_211341.jpg
    136.6 KB · Views: 722
LED LIGHT BAR INSTALL

The purpose of this write-up is to help people that are interested in installing a light bar behind the grill of their 2014 Toyota 4Runner. I will list the parts used as well as pictures.

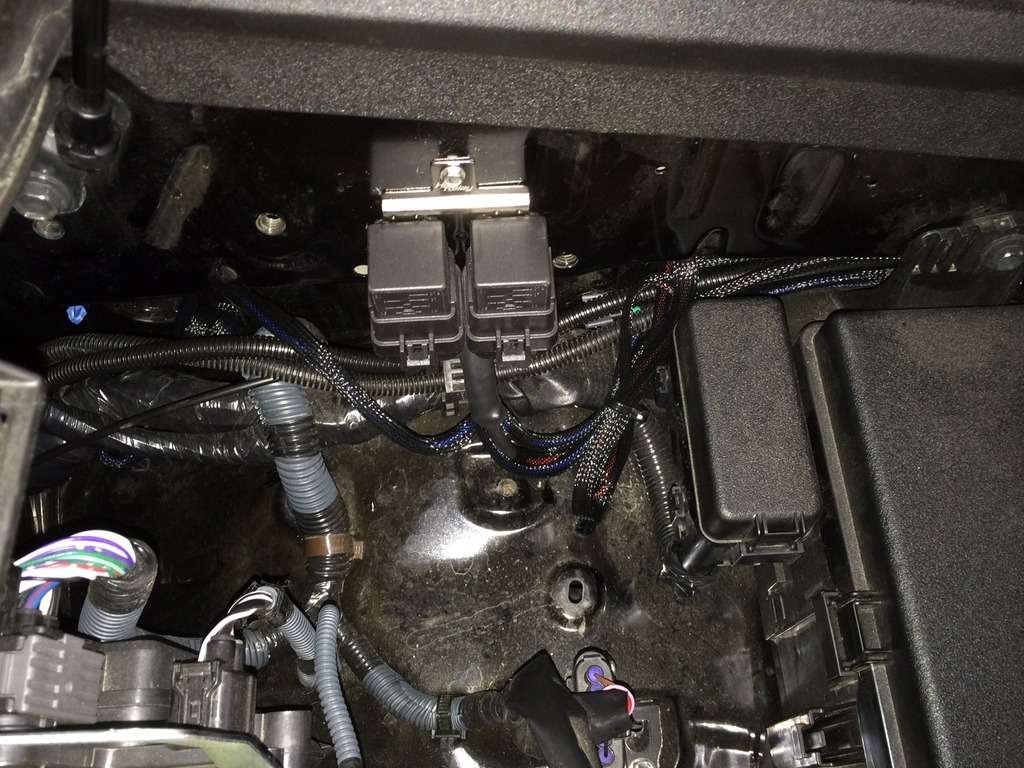
For the cleanest install, I'd recommend a full relay harness. TRS makes a nice one, and it's actually got two relays which might be nice if you want to add another light in the future.
HD Relay: H1/H3 - Wire Harnesses - Components
To make things easy, I'd also get these and I'll explain why later:
9006 Extension Cords - Accessories from The Retrofit Source

If you go with a relay harness like the one above, you'll simply connect the power connector to the battery, connect the ground connector to a ground, run the light plugs towards the light in the grill and connect the switch wire to the signal wire in the relay harness. The first three are very easy, the last one takes a bit more work.
In this case, the relay harness has an H1/H3 and you won't need that, so you can cut that connector off. When you cut that connector off, the wire left (orange insulated wire) is where you'll connect the switch wire to. Of course, you'll need to extend that wire from the switch to wherever you mount the relay harness. The other wire (black insulated wire) is a ground wire that will need a terminal.

Now, you'll need to connect a wire from the high beam or fuse to the trigger wire on the switch to provide it with power. This is the questionable part. By connecting to a fuse, you'll have to hit the switch every time you want to turn the lights on. Honestly, it's a pain in the butt if you plan on using your lights on back roads at night. Connecting to the high beam is much more convenient since you can leave the switch on and every time you turn the high beams on, the eBay bar will light up without having to hit the switch. Very handy. If you choose to connect the eBay bar to a fuse and not the high beams, you have two choices. One, you connect it to a fuse that's always hot. Two, you connect to a fuse that is only on when the ignition is on. The advantage of the first option is that you can turn the light on any time, whether the truck is on or off. That's also the disadvantage because it's easy to accidentally leave on. I'm going to suggest you run the trigger wire on the switch to the driver's side headlight and connect it to the high beam wire. (Don't forget to install a Mini Waterproof 3 or 5 Amp In Line Standard Blade Type Fuse Holder on this circuit!) This should work whether you have the DRL or not.

This should give you an operational switch, an operation harness and the only thing left is to connect the light to the relay harness. This is where those 9006 extension cords come in. Plug those extensions into the end of the relay harness at the light, cutoff the part you don't need and splice your light's wires into that extension cord. Basically, it'll leave you with a nice clean plug so it's easy to remove the light in the future.

I'd do all of this in a few stages. You'll need two provide two wires of your own, so you can simply use a speaker wire or something like that that already has two wires in it. They're both going to the switch on one end, and close to the headlight on the other. Run that wire first, through an existing rubber grommet on the firewall near the master cylinder. Do the switch next. Relay harness after that. Attach the lights. Fire it up and make sure everything works. Finally, clean up the wiring, make it pretty, attach the relay where you want it and enjoy the lighting.

Things you'll need:

The switch. Mine came from AirOnBoard USA
TOYOTA 4RUNNER Replacement Switches -Air On Board
The relay harness I linked to, or something like it.
A length of wire as discussed. I used 18-2 gauge stranded speaker wire.
At least three 18-22 gauge t-taps (one at headlight, one at illumination wire on existing switch in dash) A few extra won't hurt since those things are temperamental at best.
Butt connectors, at least 5 for the new switch ( (1)ground, (2)power and (2)trigger wire (solder and heat shrink tubing is preferred if you're capable)
Mini Waterproof Amp In Line Standard Blade Type Fuse Holder (comes with a 10 or 20 amp fuse change to a 3 or 5 amp) This goes on the trigger circuit!

I hope this help someone wanting to install something similar!


Simple Aux Light Wiring Dia for 4Runner
196154d1458356165-2014-2016-behind-grill-light-bar-mounts-aux-light-wiring.png

Upper Access Cover - Removed
fjkr.jpg


Lower Access Cover - Removed
13xw.jpg


Aluminum Brackets Fabricated
z3su.jpg


eBay 22inch 120 Watt LED Light Bar
kshw.jpg


Positioning Brackets
ac4e.jpg


Bumper Drilled and Tapped for Brackets
mpsk.jpg


LED Light Bar Mounted
d04d.jpg


LED Light Bar Mounted Underside View
nppt.jpg


LED Light Bar Mounted Grill View
2ttk.jpg


Wiring Harness and Relays Installed
fvcx.jpg


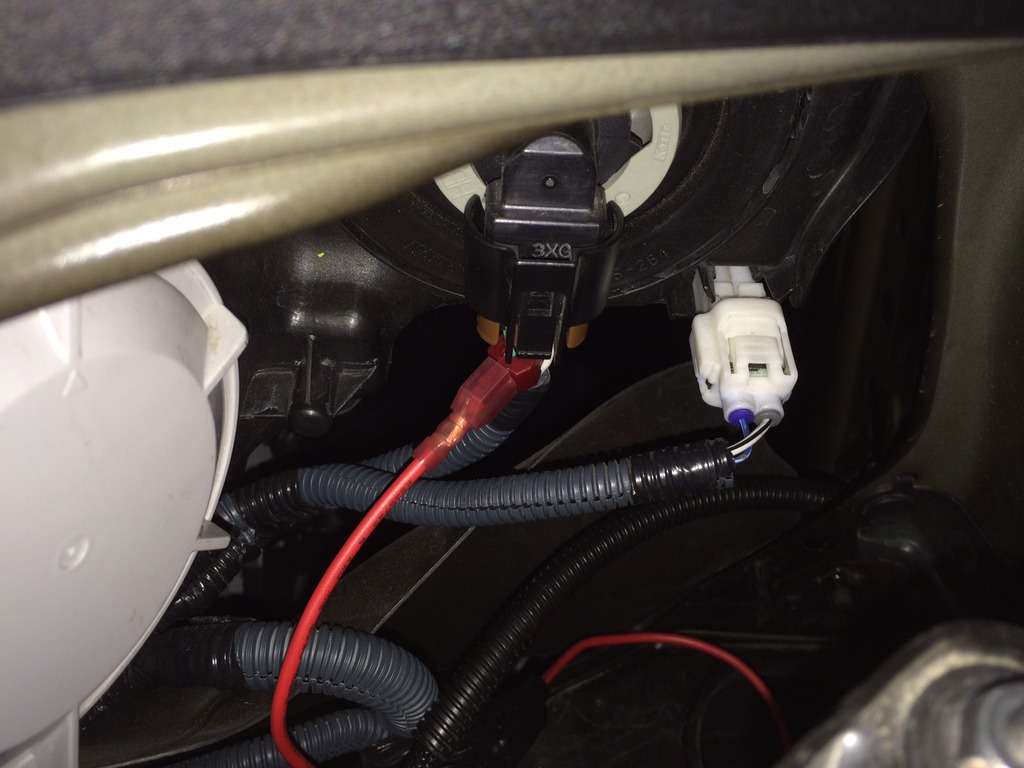
LED Light Bar Trigger Wire Connected to High Beam Wire
gpdu.jpg


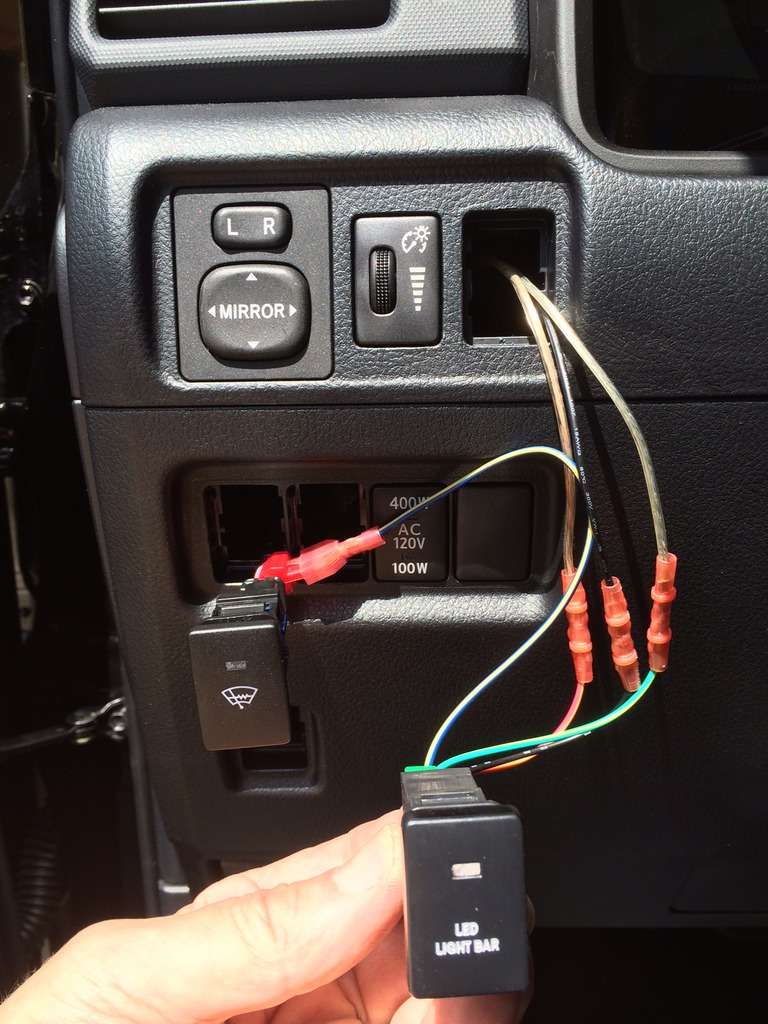
LED Light Bar Switch Wired Up
(Obviously, the blue/white wire will be run thru the switch hole and connected back to the T-tap)
dpja.jpg


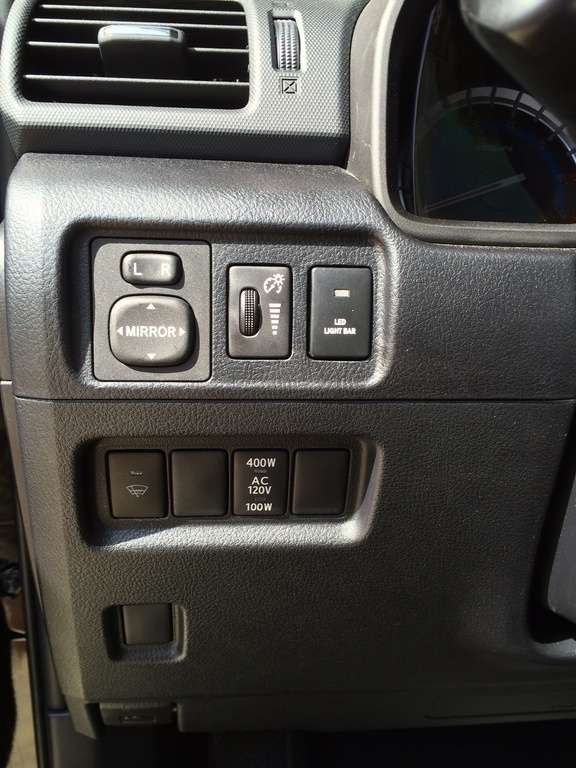
LED Light Bar Switch
ixei.jpg


LED Light Bar_1
42ld.jpg


LED Light Bar_2
1l2f.jpg


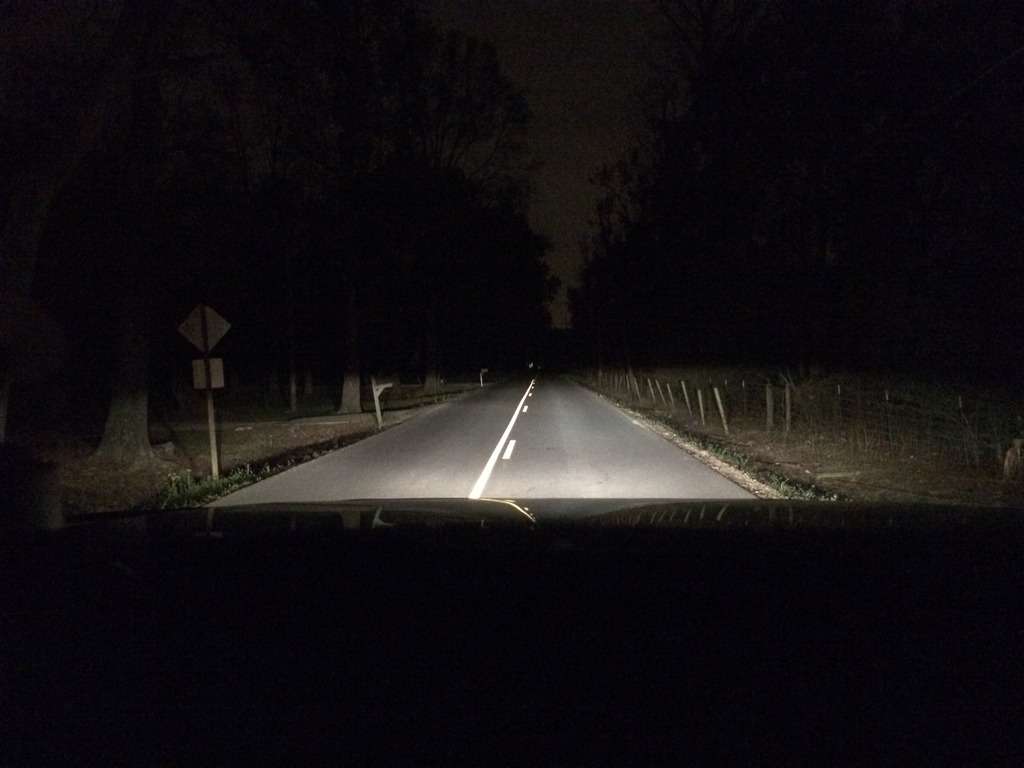
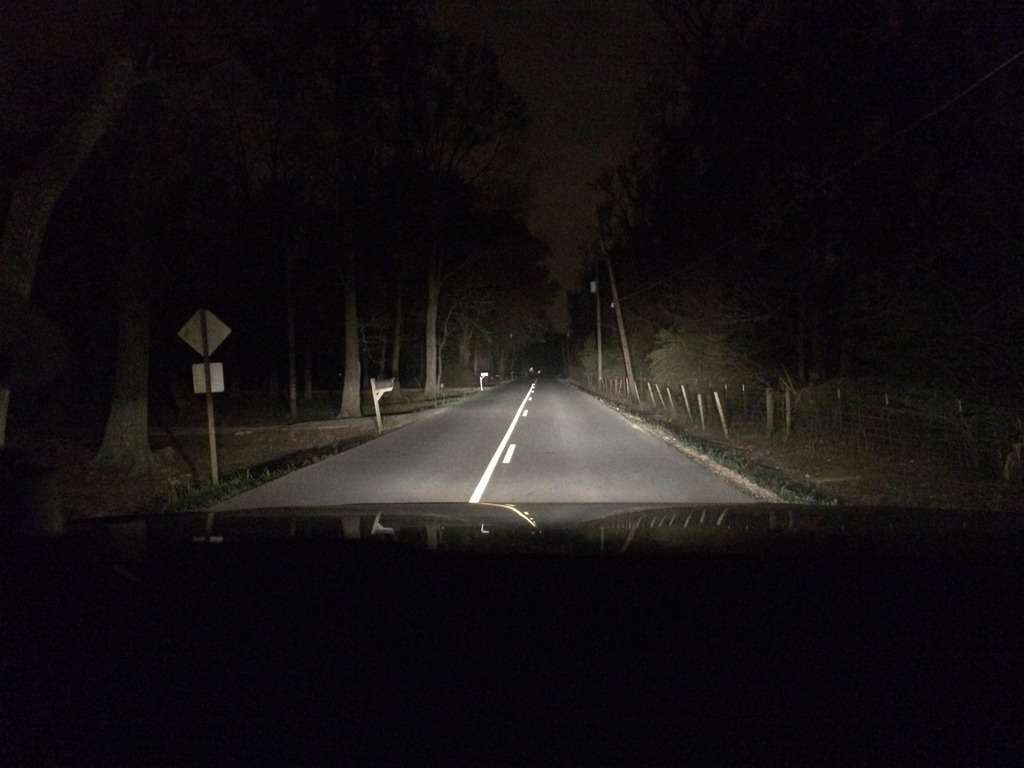
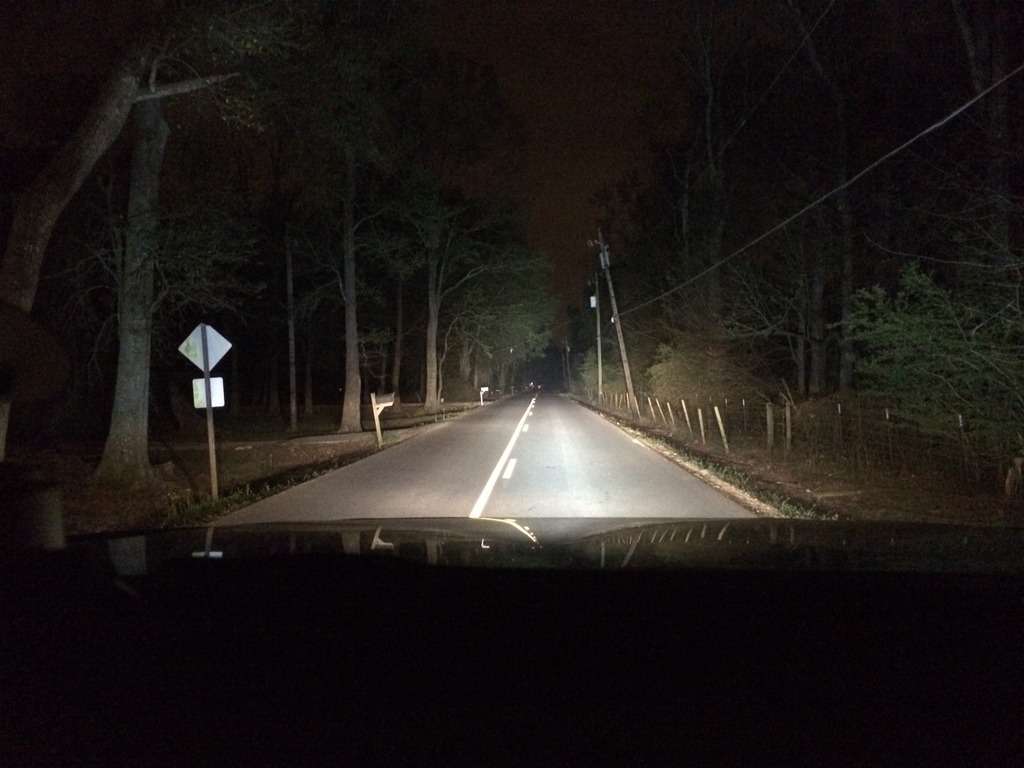
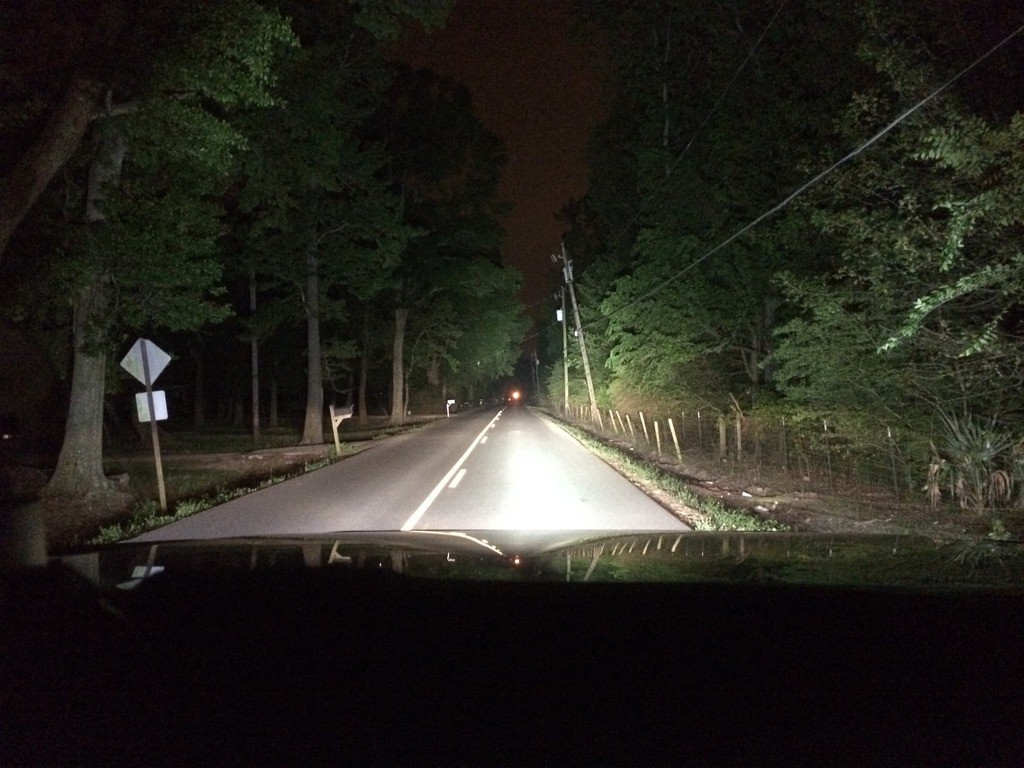
As requested, Light Output Pics Added


Low Beams
m35v.jpg


Low and High Beams
f924.jpg


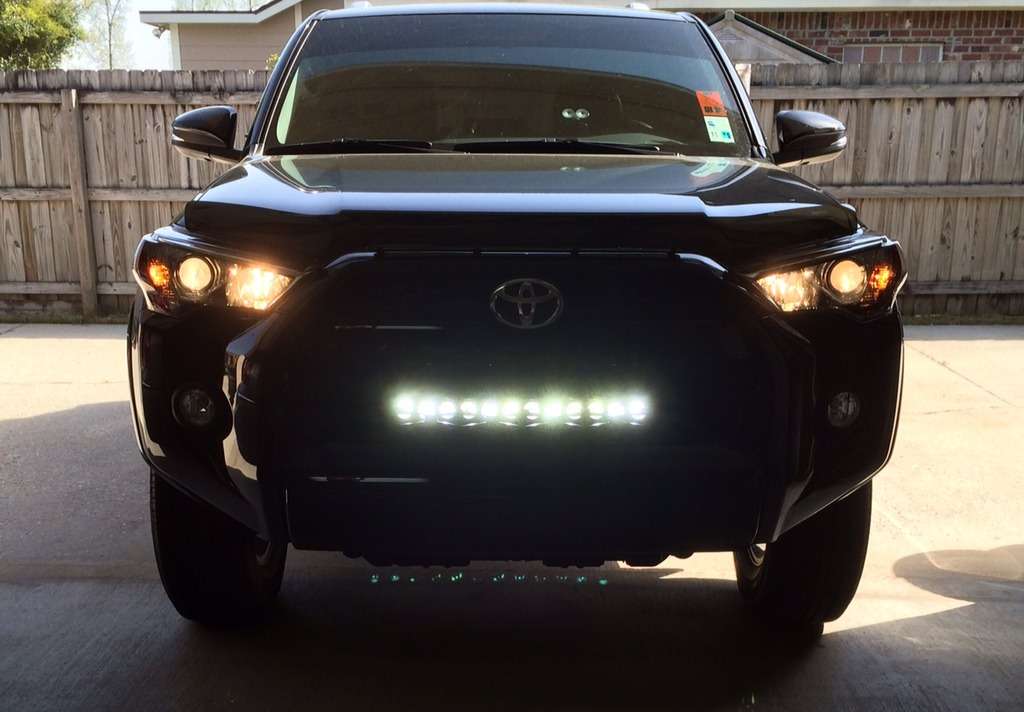
Full Beams with LED Light Bar
(Keep in mind, output is partially blocked by grill, haven't decided whether to cut it or not!)
ym54.jpg


Picture after the grill opened up!
Huge Difference!


maiqp.jpg

Thank you! Definitely doing this.
 
LED LIGHT BAR INSTALL

The purpose of this write-up is to help people that are interested in installing a light bar behind the grill of their 2014 Toyota 4Runner. I will list the parts used as well as pictures.

For the cleanest install, I'd recommend a full relay harness. TRS makes a nice one, and it's actually got two relays which might be nice if you want to add another light in the future.
HD Relay: H1/H3 - Wire Harnesses - Components
To make things easy, I'd also get these and I'll explain why later:
9006 Extension Cords - Accessories from The Retrofit Source

If you go with a relay harness like the one above, you'll simply connect the power connector to the battery, connect the ground connector to a ground, run the light plugs towards the light in the grill and connect the switch wire to the signal wire in the relay harness. The first three are very easy, the last one takes a bit more work.
In this case, the relay harness has an H1/H3 and you won't need that, so you can cut that connector off. When you cut that connector off, the wire left (orange insulated wire) is where you'll connect the switch wire to. Of course, you'll need to extend that wire from the switch to wherever you mount the relay harness. The other wire (black insulated wire) is a ground wire that will need a terminal.

Now, you'll need to connect a wire from the high beam or fuse to the trigger wire on the switch to provide it with power. This is the questionable part. By connecting to a fuse, you'll have to hit the switch every time you want to turn the lights on. Honestly, it's a pain in the butt if you plan on using your lights on back roads at night. Connecting to the high beam is much more convenient since you can leave the switch on and every time you turn the high beams on, the eBay bar will light up without having to hit the switch. Very handy. If you choose to connect the eBay bar to a fuse and not the high beams, you have two choices. One, you connect it to a fuse that's always hot. Two, you connect to a fuse that is only on when the ignition is on. The advantage of the first option is that you can turn the light on any time, whether the truck is on or off. That's also the disadvantage because it's easy to accidentally leave on. I'm going to suggest you run the trigger wire on the switch to the driver's side headlight and connect it to the high beam wire. (Don't forget to install a Mini Waterproof 3 or 5 Amp In Line Standard Blade Type Fuse Holder on this circuit!) This should work whether you have the DRL or not.

This should give you an operational switch, an operation harness and the only thing left is to connect the light to the relay harness. This is where those 9006 extension cords come in. Plug those extensions into the end of the relay harness at the light, cutoff the part you don't need and splice your light's wires into that extension cord. Basically, it'll leave you with a nice clean plug so it's easy to remove the light in the future.

I'd do all of this in a few stages. You'll need two provide two wires of your own, so you can simply use a speaker wire or something like that that already has two wires in it. They're both going to the switch on one end, and close to the headlight on the other. Run that wire first, through an existing rubber grommet on the firewall near the master cylinder. Do the switch next. Relay harness after that. Attach the lights. Fire it up and make sure everything works. Finally, clean up the wiring, make it pretty, attach the relay where you want it and enjoy the lighting.

Things you'll need:

The switch. Mine came from AirOnBoard USA
TOYOTA 4RUNNER Replacement Switches -Air On Board
The relay harness I linked to, or something like it.
A length of wire as discussed. I used 18-2 gauge stranded speaker wire.
At least three 18-22 gauge t-taps (one at headlight, one at illumination wire on existing switch in dash) A few extra won't hurt since those things are temperamental at best.
Butt connectors, at least 5 for the new switch ( (1)ground, (2)power and (2)trigger wire (solder and heat shrink tubing is preferred if you're capable)
Mini Waterproof Amp In Line Standard Blade Type Fuse Holder (comes with a 10 or 20 amp fuse change to a 3 or 5 amp) This goes on the trigger circuit!

I hope this help someone wanting to install something similar!


Simple Aux Light Wiring Dia for 4Runner
196154d1458356165-2014-2016-behind-grill-light-bar-mounts-aux-light-wiring.png

Upper Access Cover - Removed
fjkr.jpg


Lower Access Cover - Removed
13xw.jpg


Aluminum Brackets Fabricated
z3su.jpg


eBay 22inch 120 Watt LED Light Bar
kshw.jpg


Positioning Brackets
ac4e.jpg


Bumper Drilled and Tapped for Brackets
mpsk.jpg


LED Light Bar Mounted
d04d.jpg


LED Light Bar Mounted Underside View
nppt.jpg


LED Light Bar Mounted Grill View
2ttk.jpg


Wiring Harness and Relays Installed
fvcx.jpg


LED Light Bar Trigger Wire Connected to High Beam Wire
gpdu.jpg


LED Light Bar Switch Wired Up
(Obviously, the blue/white wire will be run thru the switch hole and connected back to the T-tap)
dpja.jpg


LED Light Bar Switch
ixei.jpg


LED Light Bar_1
42ld.jpg


LED Light Bar_2
1l2f.jpg


As requested, Light Output Pics Added


Low Beams
m35v.jpg


Low and High Beams
f924.jpg


Full Beams with LED Light Bar
(Keep in mind, output is partially blocked by grill, haven't decided whether to cut it or not!)
ym54.jpg


Picture after the grill opened up!
Huge Difference!


maiqp.jpg

In the picture with the wiring to your windshield wiper switch for the t tap, do you remember which wire you tapped into from the windshield wiper switch to make the LIGHT BAR portion of the button lights up when the headlights come on?
 
In the picture with the wiring to your windshield wiper switch for the t tap, do you remember which wire you tapped into from the windshield wiper switch to make the LIGHT BAR portion of the button lights up when the headlights come on?

I am really not trying to be flip or ugly here......but did you even look at the wiring diagram in the quote?

It's written there for you.... :pop2:
 
69449714f1a6dc6c2bd18fdce6b45e8b.jpg

I'm running 2 bars right now
The bottom is a 32 in and the top is a 24in
Sent from my SAMSUNG-SM-G890A using Tapatalk
 
Last edited:
I am really not trying to be flip or ugly here......but did you even look at the wiring diagram in the quote?

It's written there for you.... :pop2:

Never mind now I see it in the beginning of your write up, I just didn't see it on the picture portion
 
Last edited:
For the switch power (green wire off switch) says to go to 12v or another power source.

Did anyone find an easier power source for the switch other then running it back to the battery?

Fuse tap?
another wire? (if so what color and where?)

Thanks in advance.
 
For the switch power (green wire off switch) says to go to 12v or another power source.

Did anyone find an easier power source for the switch other then running it back to the battery?

Fuse tap?
another wire? (if so what color and where?)

Thanks in advance.

That is the trigger wire. You can fine a switched 12V or a constant 12V in the fuse box under the dash if you desire.....
 

Members online

Forum statistics

Threads
278,316
Messages
3,554,113
Members
248,016
Latest member
Advally Service

Trending content

Back
Top