My 3 point slow rebuild

bluewavecaptain

New member
20120223_102814 (640x480).jpg
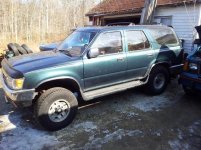
I picked up this 95 for 500 bucks through my dad's friend. It had a fairly decent tick. After replacing rod bearings, it still had a tick. Pulled the valve covers, couldn't find anything. I started pulling one spark plug at a time to determine the problem cylinder, and it was number 6. On this site, I found out that sometimes a valve will burn out because of the exhaust setup. So, I pulled the heads...valves were fine... Then I came across 'piston slap.' I never heard the term before, so I researched it. Went out to the truck, and sure enough, I could rock number 6 piston back and forth with my fingers. At this point, I figured I would have to rebuild the engine. I didn't get any pics of the the teardown, but I am taking them of the rebuild. I will post as I go.

 

Attachments

  • 20120223_102814 (640x480).jpg
    20120223_102814 (640x480).jpg
    64.9 KB · Views: 1,032
Register to hide this ad
The Results

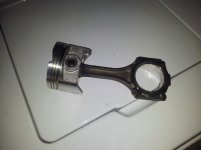
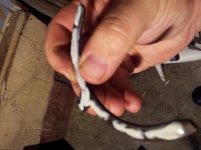
After pulling the pistons, I found 3 of them scored to hell. The cylinder walls were OK. Number 6 was the worst. The oil scraper ring was actually fused to the piston. Not sure if was overheated once or ran out of oil. The bearings were fine when I pulled them, so I'm assuming it might have been overheated.
 
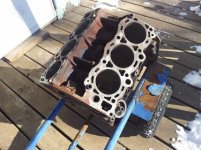
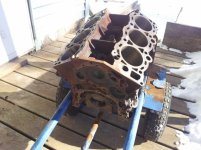
The First Time

20120212_102818 (640x480).jpg
20120212_102828 (640x480).jpg
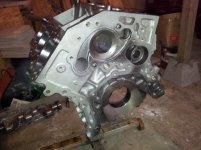
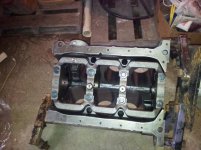
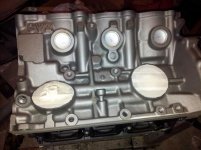
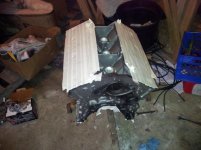
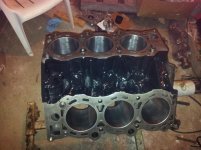
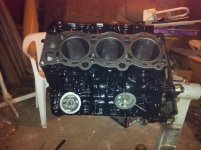
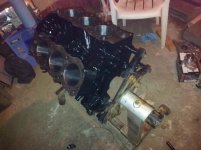
This is the block when I got it back the first time. I planned on painting it and decided I wasn't happy with the rust, so I decided to have it acid washed. I ordered new standard pistons and rings since the shop I got it hot tanked at said the cylinders were OK.
 

Attachments

  • 20120212_102818 (640x480).jpg
    20120212_102818 (640x480).jpg
    57.4 KB · Views: 938
  • 20120212_102828 (640x480).jpg
    20120212_102828 (640x480).jpg
    50.9 KB · Views: 954
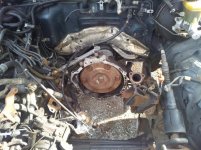
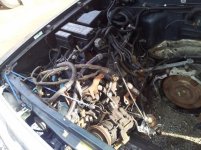
Engine Bay

20120220_112323 (640x480).jpg20120220_112329 (640x480).jpg
20120220_112335 (640x480).jpg
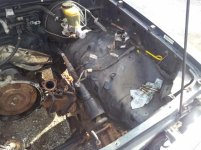
Here's the engine bay after pulling the engine. What a mess. These were taken before I pressure washed it with Simple Green. I managed to kink the tube on the power steering reservoir so I'll have to replace it.
 

Attachments

  • 20120220_112323 (640x480).jpg
    20120220_112323 (640x480).jpg
    65 KB · Views: 988
  • 20120220_112329 (640x480).jpg
    20120220_112329 (640x480).jpg
    60.7 KB · Views: 958
  • 20120220_112335 (640x480).jpg
    20120220_112335 (640x480).jpg
    53.2 KB · Views: 972
The Bad News

20120301_152536 (640x480).jpg20120301_152546 (640x480).jpg
20120301_152551 (640x480).jpg20120301_152606 (640x480).jpg
20120301_152657 (640x480).jpg20120301_152710 (640x480).jpg
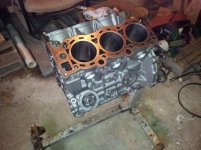
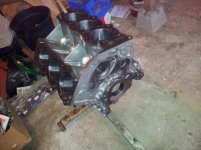
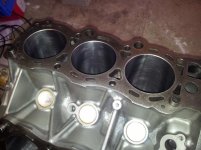
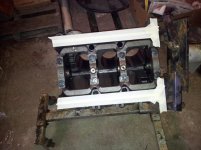
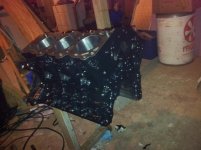
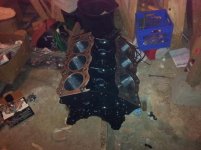
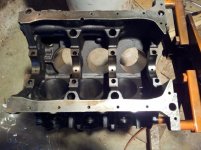
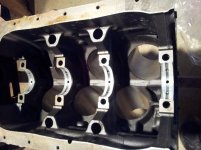
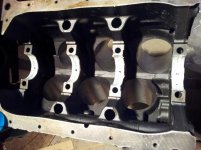
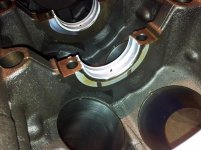
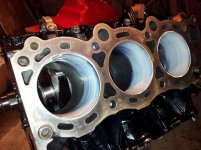
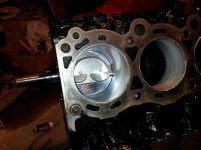
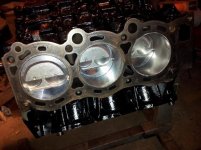
After taking the block to yet another shop, I get a call telling me my cylinders are tapered and are out of spec. tolerances. Not wanting to half-ass it, I go ahead and have it bored .75 mm over and order another set of pistons and rings. This is what the block looked like when I got it back! Looks like new!
 

Attachments

  • 20120301_152536 (640x480).jpg
    20120301_152536 (640x480).jpg
    53.4 KB · Views: 947
  • 20120301_152546 (640x480).jpg
    20120301_152546 (640x480).jpg
    48.4 KB · Views: 947
  • 20120301_152551 (640x480).jpg
    20120301_152551 (640x480).jpg
    43.7 KB · Views: 946
  • 20120301_152606 (640x480).jpg
    20120301_152606 (640x480).jpg
    44.4 KB · Views: 951
  • 20120301_152657 (640x480).jpg
    20120301_152657 (640x480).jpg
    52.1 KB · Views: 950
  • 20120301_152710 (640x480).jpg
    20120301_152710 (640x480).jpg
    45.4 KB · Views: 947
Before and After Paint

20120301_153231 (640x480).jpg

20120301_154623 (640x480).jpg

20120301_163557 (640x480).jpg

20120301_173536 (640x480).jpg

20120301_173552 (640x480).jpg

20120301_173600 (640x480).jpg

20120301_173607 (640x480).jpg

20120301_173619 (640x480).jpg
 

Attachments

  • 20120301_153231 (640x480).jpg
    20120301_153231 (640x480).jpg
    46.1 KB · Views: 944
  • 20120301_154623 (640x480).jpg
    20120301_154623 (640x480).jpg
    46.3 KB · Views: 932
  • 20120301_163557 (640x480).jpg
    20120301_163557 (640x480).jpg
    42.5 KB · Views: 941
  • 20120301_173536 (640x480).jpg
    20120301_173536 (640x480).jpg
    39.7 KB · Views: 959
  • 20120301_173552 (640x480).jpg
    20120301_173552 (640x480).jpg
    41.6 KB · Views: 945
  • 20120301_173600 (640x480).jpg
    20120301_173600 (640x480).jpg
    46.5 KB · Views: 939
  • 20120301_173607 (640x480).jpg
    20120301_173607 (640x480).jpg
    46.9 KB · Views: 934
  • 20120301_173619 (640x480).jpg
    20120301_173619 (640x480).jpg
    41.5 KB · Views: 926
You're getting to discover first-hand why these things blow head gaskets--the exhaust cooks that one corner, which is why it looks so bad. Eventually that would lead to the failure of the gasket. I'm kind of surprised you didn't need to go up one size on the pistons, but if the shop says it's good. If you could swing it, this would be a great time to add some headers, to move all that heat away from the heads--unfortunately, they cost more than your original vehicle purchase price (yikes!). Best of luck on the rebuild!

EDIT: Sure, go ahead and change the story while I'm typing (LOL)--so your pistons DO need resized after all. That's more like it. I would be wary of that first shop--that was a major miss that would've caused you problems on the finished product. Block looks great!
 
Last edited:
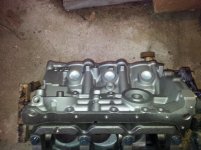
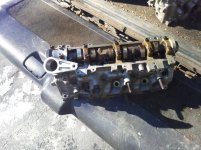
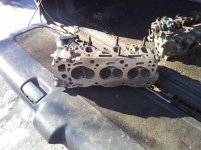
I had the heads shaved, the valves redone, and the heads pressure tested. Unfortunately, dingbat put the wrong cams on the wrong heads when I got them back, so I had to swap them. I changed regular shops. :mad:
20120212_102859 (640x480).jpg

20120212_102909 (640x480).jpg
 

Attachments

  • 20120212_102859 (640x480).jpg
    20120212_102859 (640x480).jpg
    63.3 KB · Views: 914
  • 20120212_102909 (640x480).jpg
    20120212_102909 (640x480).jpg
    55.5 KB · Views: 935
You're getting to discover first-hand why these things blow head gaskets--the exhaust cooks that one corner, which is why it looks so bad. Eventually that would lead to the failure of the gasket. I'm kind of surprised you didn't need to go up one size on the pistons, but if the shop says it's good. If you could swing it, this would be a great time to add some headers, to move all that heat away from the heads--unfortunately, they cost more than your original vehicle purchase price (yikes!). Best of luck on the rebuild!

EDIT: Sure, go ahead and change the story while I'm typing (LOL)--so your pistons DO need resized after all. That's more like it. Block looks great!

I actually had to have the block bored "30" over. I ordered new pistons as well.
 
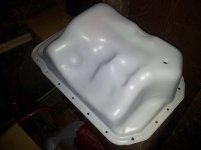
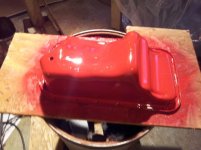
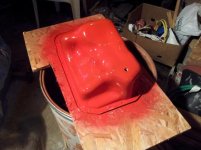
The oil pan had some pitting. I took it to my NEW preferred shop where he bead blasted it, checked it for holes and then painted it with primer. He also straightened out the edge I bent trying to get it off. Word of advice: The one minute epoxy by Permatex WORKS REALLY GOOD. I used it the first time I pulled the pan and it required an act of God to get it off the second time.
20120301_110407 (640x480).jpg

20121013_102551 (640x480).jpg

20121013_102615 (640x480).jpg
 

Attachments

  • 20120301_110407 (640x480).jpg
    20120301_110407 (640x480).jpg
    22.1 KB · Views: 906
  • 20121013_102551 (640x480).jpg
    20121013_102551 (640x480).jpg
    34.5 KB · Views: 916
  • 20121013_102615 (640x480).jpg
    20121013_102615 (640x480).jpg
    39.6 KB · Views: 913
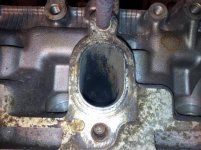
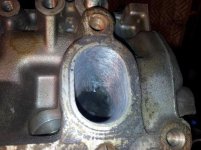
My futile attempt at port polishing....
20120220_141908 (640x480).jpg

20120220_141848 (640x480).jpg
 

Attachments

  • 20120220_141908 (640x480).jpg
    20120220_141908 (640x480).jpg
    62.7 KB · Views: 929
  • 20120220_141848 (640x480).jpg
    20120220_141848 (640x480).jpg
    53.7 KB · Views: 919
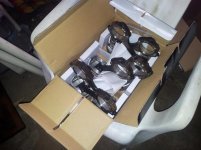
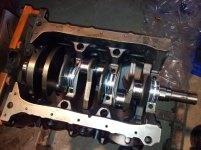
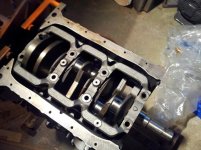
Installing the bearings. The bearings come in two different "sets." Four of them have oil holes. These go on the block. The other four are just smooth. These go on the main bearing cap carriage. USE A LOT OF ASSEMBLY LUBE. The phrase "less is more" does not apply here. It will prevent any damage during the break in.
20121013_102853 (640x480).jpg

20121013_103203 (640x480).jpg

20121013_103746 (640x480).jpg
 

Attachments

  • 20121013_102853 (640x480).jpg
    20121013_102853 (640x480).jpg
    48.8 KB · Views: 941
  • 20121013_103203 (640x480).jpg
    20121013_103203 (640x480).jpg
    44.1 KB · Views: 935
  • 20121013_103746 (640x480).jpg
    20121013_103746 (640x480).jpg
    44 KB · Views: 912
I almost forgot these! I had the crank set and the bearing carriage on when I realized I forgot them! These are the thrust bearings. They keep the crank from sliding front to back. For the ones on the bearing carriage, apply some assembly lube to the back of them before setting them on the carriage. This will keep them from falling off when you set the carriage on.
20121013_112258 (640x480).jpg

20121013_112922 (640x480).jpg
 

Attachments

  • 20121013_112258 (640x480).jpg
    20121013_112258 (640x480).jpg
    53.9 KB · Views: 918
  • 20121013_112922 (640x480).jpg
    20121013_112922 (640x480).jpg
    35.7 KB · Views: 908
20121013_161328 (640x480).jpg
Be sure to lube up the cylinders!
20121013_161338 (640x480).jpg
Lube the rod bearings as well
20121013_161348 (640x480).jpg
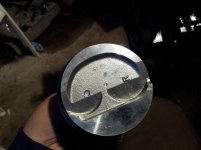
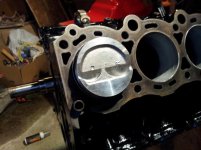
Pay attention to the piston marks. The dot should face the front of the engine and the pistons are labeled "R" and "L." R is the passenger side bank and L is the driver side bank.
20121013_161754 (640x480).jpg
20121013_161818 (640x480).jpg
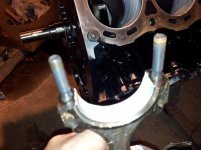
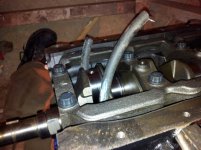
Use 5/8 fuel line to prevent the rod bolts from damaging the crank.
20121013_161946 (640x480).jpg
Piston ring compressor in place
20121013_162047 (640x480).jpg
One piston installed
20121013_165912 (640x480).jpg
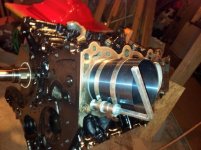
One bank installed
 

Attachments

  • 20121013_161328 (640x480).jpg
    20121013_161328 (640x480).jpg
    55 KB · Views: 580
  • 20121013_161338 (640x480).jpg
    20121013_161338 (640x480).jpg
    43.6 KB · Views: 567
  • 20121013_161348 (640x480).jpg
    20121013_161348 (640x480).jpg
    31.9 KB · Views: 578
  • 20121013_161754 (640x480).jpg
    20121013_161754 (640x480).jpg
    41.4 KB · Views: 580
  • 20121013_161818 (640x480).jpg
    20121013_161818 (640x480).jpg
    48.5 KB · Views: 573
  • 20121013_161946 (640x480).jpg
    20121013_161946 (640x480).jpg
    48.5 KB · Views: 574
  • 20121013_162047 (640x480).jpg
    20121013_162047 (640x480).jpg
    42.2 KB · Views: 576
  • 20121013_165912 (640x480).jpg
    20121013_165912 (640x480).jpg
    52.4 KB · Views: 592
You're getting to discover first-hand why these things blow head gaskets--the exhaust cooks that one corner, which is why it looks so bad. Eventually that would lead to the failure of the gasket. I'm kind of surprised you didn't need to go up one size on the pistons, but if the shop says it's good. If you could swing it, this would be a great time to add some headers, to move all that heat away from the heads--unfortunately, they cost more than your original vehicle purchase price (yikes!). Best of luck on the rebuild!

EDIT: Sure, go ahead and change the story while I'm typing (LOL)--so your pistons DO need resized after all. That's more like it. I would be wary of that first shop--that was a major miss that would've caused you problems on the finished product. Block looks great!

LOL. Not my fault you broke for glasses mudding. Thanks! Yeah, the first shop was a family favorite and he used to be good, but now he's getting older and I think he's getting burnt out working on stuff.
 
LOL. Not my fault you broke for glasses mudding. Thanks! Yeah, the first shop was a family favorite and he used to be good, but now he's getting older and I think he's getting burnt out working on stuff.

ah that sucks. that does happen though.

hey perfect thread for me to watch though! I'm grabbing my spare 3.0 with a cracked #6 piston this Friday. its already .020 so I'm taking it .040.

where did you get a piston/rod set or was that with the old rods on it?
 

Members online

No members online now.

Forum statistics

Threads
278,312
Messages
3,554,083
Members
248,016
Latest member
Advally Service

Trending content

Back
Top