
You are using an out of date browser. It may not display this or other websites correctly.
You should upgrade or use an alternative browser.
You should upgrade or use an alternative browser.
My 4gunner restore, refurb and re-work
- Thread starter Jhelms
- Start date


ajonesnv
New member
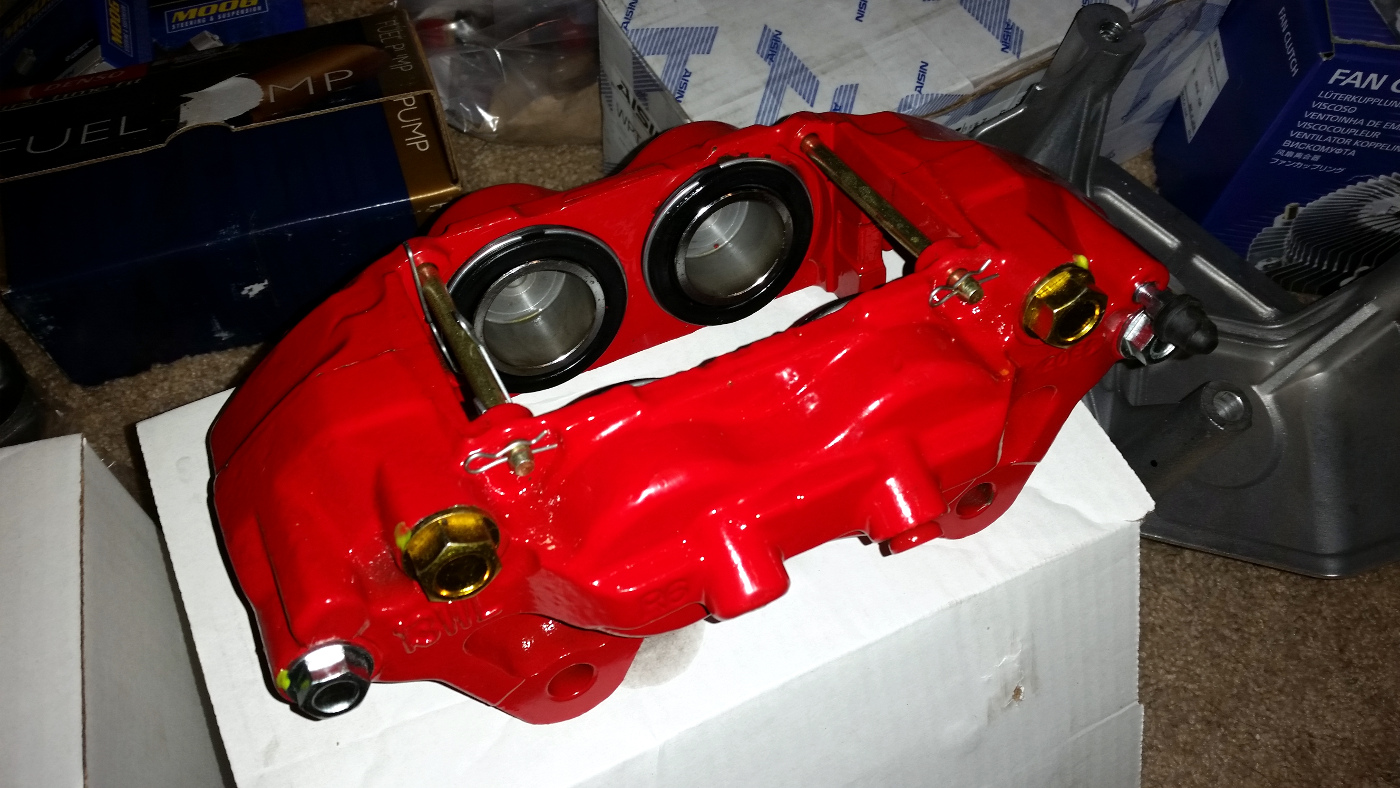
Loads more parts on the list in. Almost thereLordy the 13WL calipers are big! First I look at the pile and say WOOHOO! Just like always when car parts come in... Then reality hits on how much work I have ahead of me and... ohhhhhh crap is my next thought.
My first thought is...you must be single :behindsofa:
well sir, I must say something.
In my few years of browsing build threads here and reading a lot of maintenance threads, this is honestly the FIRST one where someone is replacing the oil and fuel pumps as part of maintenance. You were right about that OCD -- thumbs up.
I thought of one I don't see on here though.. rear axle seals / rear pinion seal(s)... You are good on those?
In my few years of browsing build threads here and reading a lot of maintenance threads, this is honestly the FIRST one where someone is replacing the oil and fuel pumps as part of maintenance. You were right about that OCD
-- thumbs up.I thought of one I don't see on here though.. rear axle seals / rear pinion seal(s)... You are good on those?


Jhelms
New member
well sir, I must say something.
In my few years of browsing build threads here and reading a lot of maintenance threads, this is honestly the FIRST one where someone is replacing the oil and fuel pumps as part of maintenance. You were right about that OCD
I thought of one I don't see on here though.. rear axle seals / rear pinion seal(s)... You are good on those?
I was eyeballing rear drum shoes / spring kit, pinion seal kit and axles seals tonight - good thinking
That will be a part of the next volley of parts after I get all this madness finished up. Currently no leaks thoughNot sure why I started doing oil pumps on my cars. I normally do it at the 2nd timing belt interval. Never had one fail in any of my toys, but just in case - cheap insurance.
With fuel pumps, I also try to replace them at the 2nd timing belt interval and if the old pump is still working and rocking away, I put it in the tool kit in the car in case the new one ever fails out in the sticks. I will likely cut an opening under the back seats for a quick change and make a custom cover.
Some other goodies that will be here which I forgot to list (will edit the front page)
- Roca rear sway bar bushings and end links
- Whiteline / new style LCA bushings. LBJ's were already replaced by toyota not that many miles ago under the recall
Jhelms
New member
This thread is so much win, and an inspiration. So much more I want to do with my truck now. Don't know whether to love you or hate you. Cheers!
Also, your wife sounds like a keeper if she puts up with all that. Treat her right, my man!
She is for sure - makes me BLT's for lunch while I wrench or she helps out! :naughty:
Last edited:
She is for sure - makes me BLT's for lunch while I wrench or helps out! :naughty:
nice man!
are you a wrencher by trade?
Jhelms
New member
Amalik, notta. Just well versed in anything mechanical. Actually a vehicle electronics instructor / hardware guy / electronics nerd + other things. If I did this for a living, I would likely never work on my own vehicles unless they fell apart and would not roll any longer
Well, since I have broken every cheap spring compressor known to man on past suspension jobs... I received a new toy today. Supposed to work VERY well and can be mounted in a vise according to a bud that picked one up. If this guy fails on me, I am going to by a hydraulic unit. Looking forward to trying it out soon!
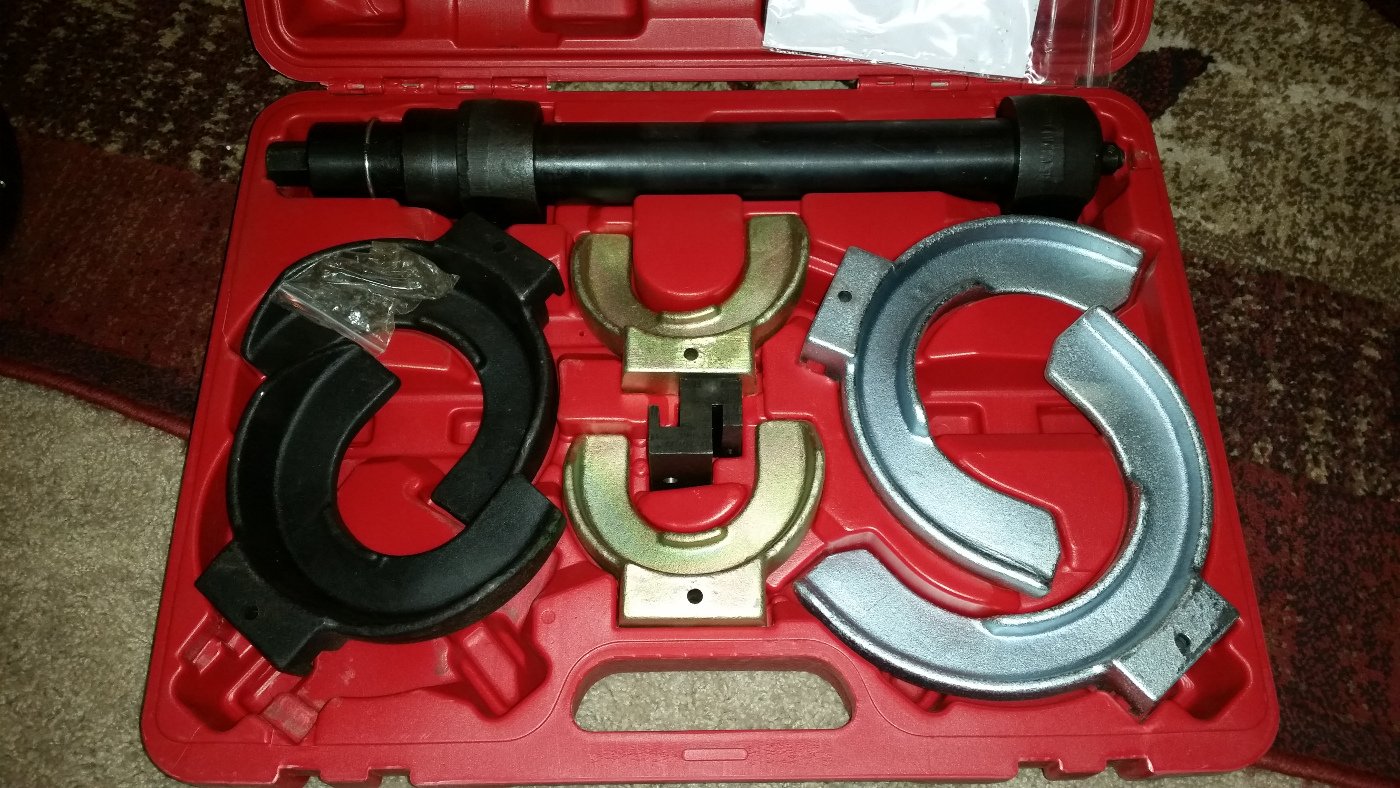
Well, since I have broken every cheap spring compressor known to man on past suspension jobs... I received a new toy today. Supposed to work VERY well and can be mounted in a vise according to a bud that picked one up. If this guy fails on me, I am going to by a hydraulic unit. Looking forward to trying it out soon!

Unner
New member
That's a nice pile of parts there haha. Make sure if you do the rear drum brakes to get Toyota shoes, apparently the aftermarket ones don't fit well and can cause issues. I've got a set of new Toyota ones sitting here waiting for when I decide to to my brakes. How is the finish on those powerstop calipers? Does it seem durable, or cheap and likely to flake off quickly?
Jhelms
New member
Will do - was reading about issues with other shoes and that the OEM are the way to go as they come with pins pressed in and new clips / no fitment issues.
Never even tested the e-brake on this thing since I purchased the car and it pulled all the way to the top. So either the rears are toast (likely at this mileage) or they are simply way out of adjustment. Could be both! So yeah... that is going to happen soon.
The coating seems very well done on the calipers. These were done by callihan which is technically owned by powerstop.
Never even tested the e-brake on this thing since I purchased the car and it pulled all the way to the top. So either the rears are toast (likely at this mileage) or they are simply way out of adjustment. Could be both! So yeah... that is going to happen soon.
The coating seems very well done on the calipers. These were done by callihan which is technically owned by powerstop.
Last edited:
Jhelms
New member
Spent just a little time on the gunner tonight. Upon rolling around the underside - I was quite pleasantly surprised that both front and rear sway-bar bushings were new or at least very new. I know it was dealer maintained but usually these are always neglected. Also the rack bushings were new too! Guess I can skip installing the poly mounts for now. Never in my dreams would I have guessed the gunner would have new bushings. Very cool
- Replaced both O2 sensors. Fuel mileage was not terrible at 17 average in city and I did not check them electrically but went ahead anyways. Sensors looked to be Bosch as they had orange tape on them... Not really a fan (hate their spark plugs... just sayin) so put denso back in. At least I know there should not be any surprises for a long time.
- Greased every fitting I could find on the drive shafts. Went way overboard flushing the stock grease out with Lucas x-tra heavy duty / green grease. Never tried it so giving it a go. Lots of clean up to do tomorrow night after it is slung all over hell and back
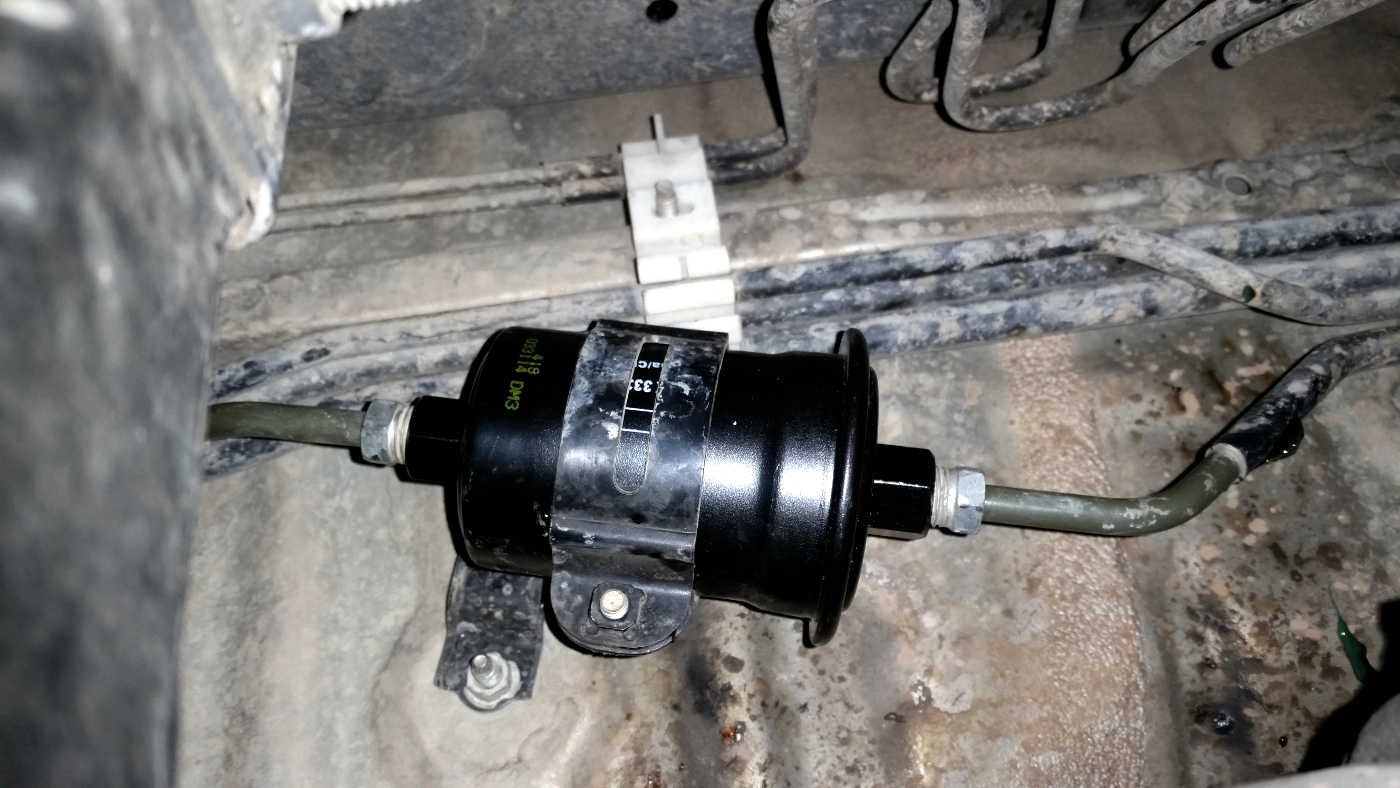
- Changed out the fuel filter. Good news is that it had been changed previously as it already had a wix 33319 installed.
Random boring pics of common new parts installed :moon:
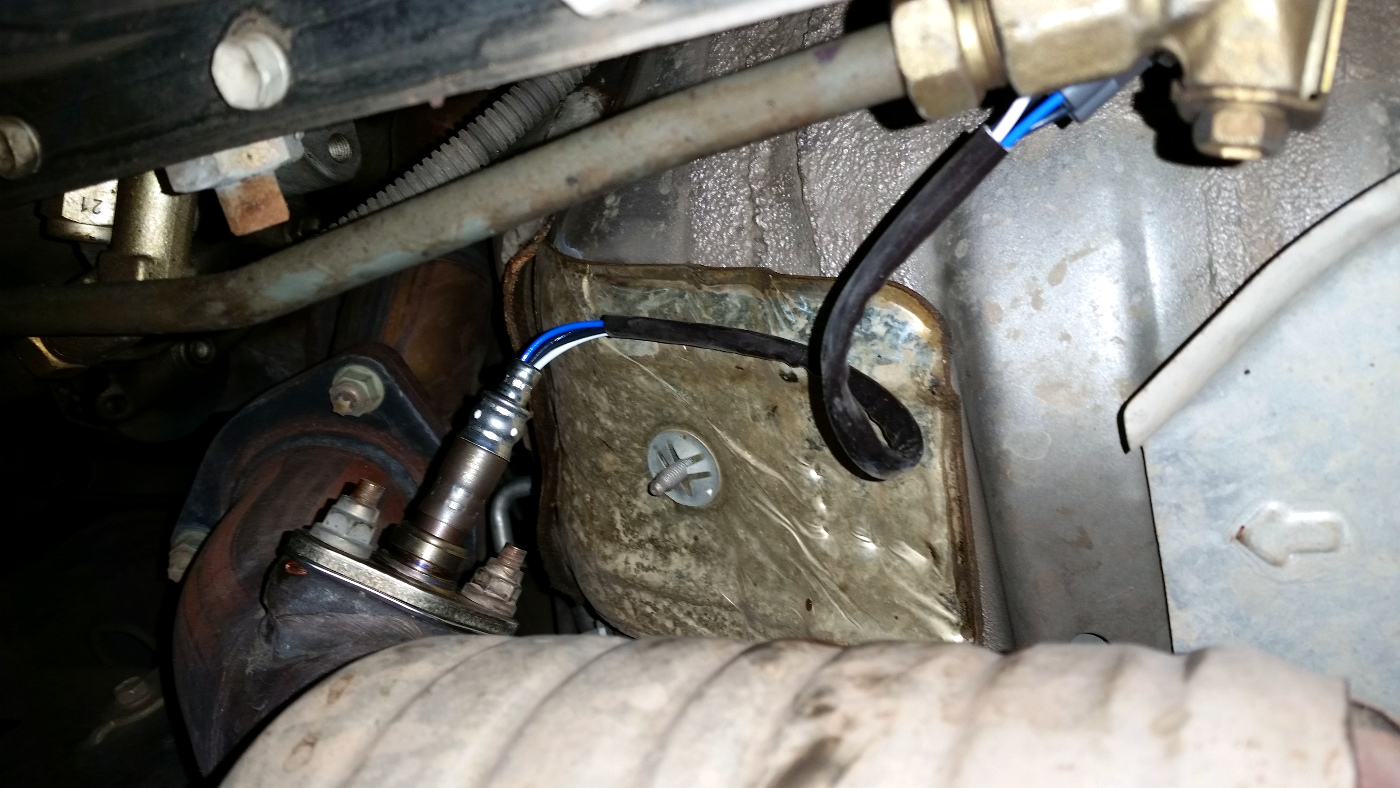
You can see the lovely lucas grease slung all over in this shot of the rear O2 :toilet:
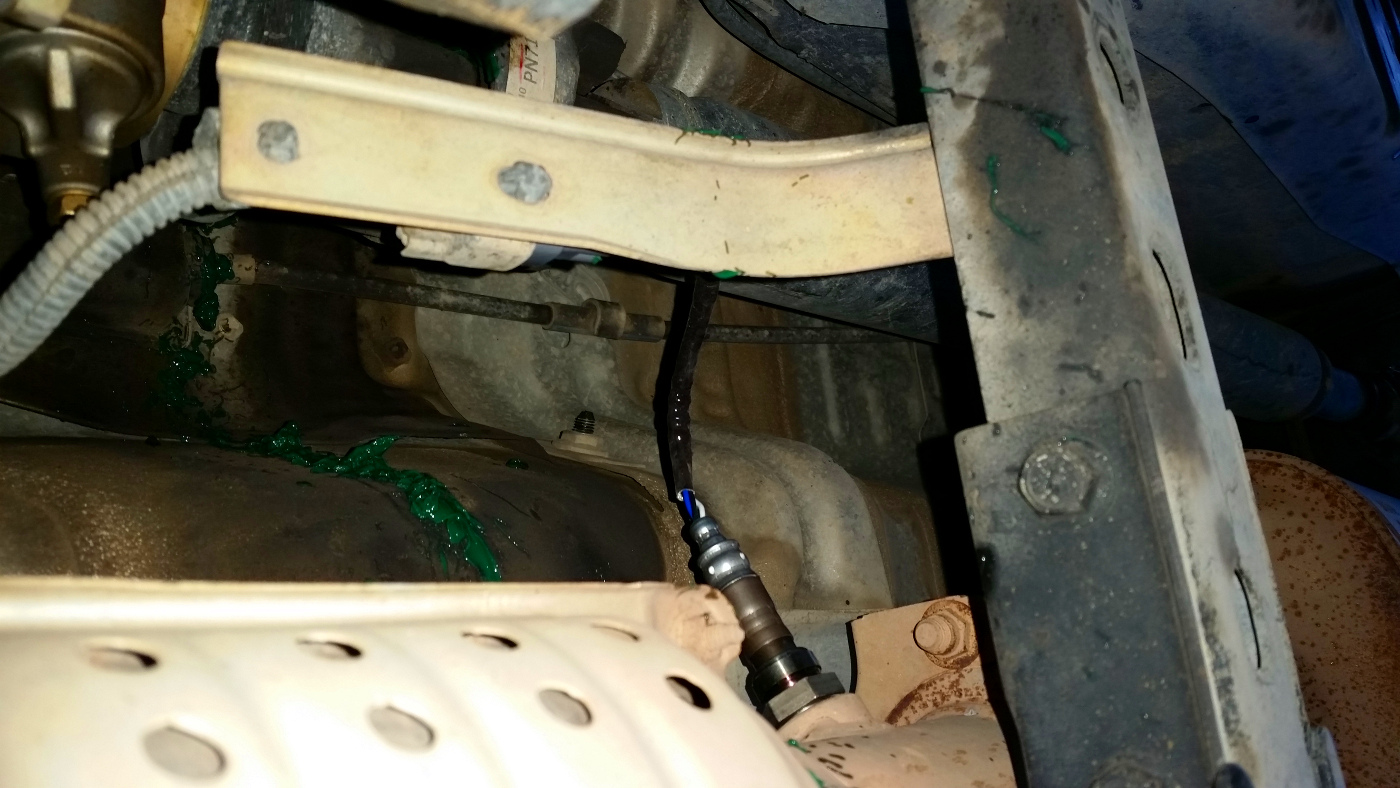
New fuel filter
Edit: Totally forgot that I replaced all the broken door switches tonight! All 4 were broken and 3, somehow were barely working with one stuck closed. My best guess is that when the rubber drys out / gets sticky, that when the door shuts, it puts slight lateral pressure on the pin every time the door shuts. Eventually snapping it off. I plan to test this theory by keeping the rubber tops and place they contact on the door slightly lubed with dry Teflon spray (use it on my mountain bike) or may use silicone chute lube from CRC - also works killer on my bikes suspension! guess I will knopb more in 150-200K miles. Stay tuned
- Replaced both O2 sensors. Fuel mileage was not terrible at 17 average in city and I did not check them electrically but went ahead anyways. Sensors looked to be Bosch as they had orange tape on them... Not really a fan (hate their spark plugs... just sayin) so put denso back in. At least I know there should not be any surprises for a long time.
- Greased every fitting I could find on the drive shafts. Went way overboard flushing the stock grease out with Lucas x-tra heavy duty / green grease. Never tried it so giving it a go. Lots of clean up to do tomorrow night after it is slung all over hell and back
- Changed out the fuel filter. Good news is that it had been changed previously as it already had a wix 33319 installed.
Random boring pics of common new parts installed :moon:
You can see the lovely lucas grease slung all over in this shot of the rear O2 :toilet:
New fuel filter
Edit: Totally forgot that I replaced all the broken door switches tonight! All 4 were broken and 3, somehow were barely working with one stuck closed. My best guess is that when the rubber drys out / gets sticky, that when the door shuts, it puts slight lateral pressure on the pin every time the door shuts. Eventually snapping it off. I plan to test this theory by keeping the rubber tops and place they contact on the door slightly lubed with dry Teflon spray (use it on my mountain bike) or may use silicone chute lube from CRC - also works killer on my bikes suspension! guess I will knopb more in 150-200K miles. Stay tuned
Last edited:

1985taylor1925
Senior Member
Did you already install those KYB shocks? I put KYB gas adjust shocks on my truck right after I bought it, and I hated them. They were just stupid stiff. I would send those back for Bilsteins
Jhelms
New member
Appreciate it but I actually loved the gas adjusts on my 98 4runner limited that was also a 4wd. I did not find the ride harsh or stiff at all. Just well damped but not overly so. That is why I bought another set.
But as I mentioned in an earlier post... IF the deal goes down as I am still hoping it will.... I will have a set of 1" (more like 2") lift performance pro springs and bilstein HD's coming my way. Still keeping fingers crossed.
Who knows, brands often change things up, maybe I had an early set or a later set than yours? I guess if the deal falls through - I will know for sure when I install them and will post up either way!
But as I mentioned in an earlier post... IF the deal goes down as I am still hoping it will.... I will have a set of 1" (more like 2") lift performance pro springs and bilstein HD's coming my way. Still keeping fingers crossed.
Who knows, brands often change things up, maybe I had an early set or a later set than yours? I guess if the deal falls through - I will know for sure when I install them and will post up either way!
Jhelms
New member
Looks like I have to call the performance pro lift and bilstein suspension a bust. Strangest thing.. Tried to buy from the guy all week long and he kept saying he would text and set it up, then I would not hear from him till the next day and we would go round again and again. I was very understanding and cool about it. Says he started a business and is slammed - which I understand that. Then he said I could pick them up from his wife and would arrange that. After that, never heard a word back from him. Quite odd. Think it best if I just give up on the idea. Cosmos must be telling me something lol
Looks like I will just run with the KYB's I bought and stick with stock suspension for now
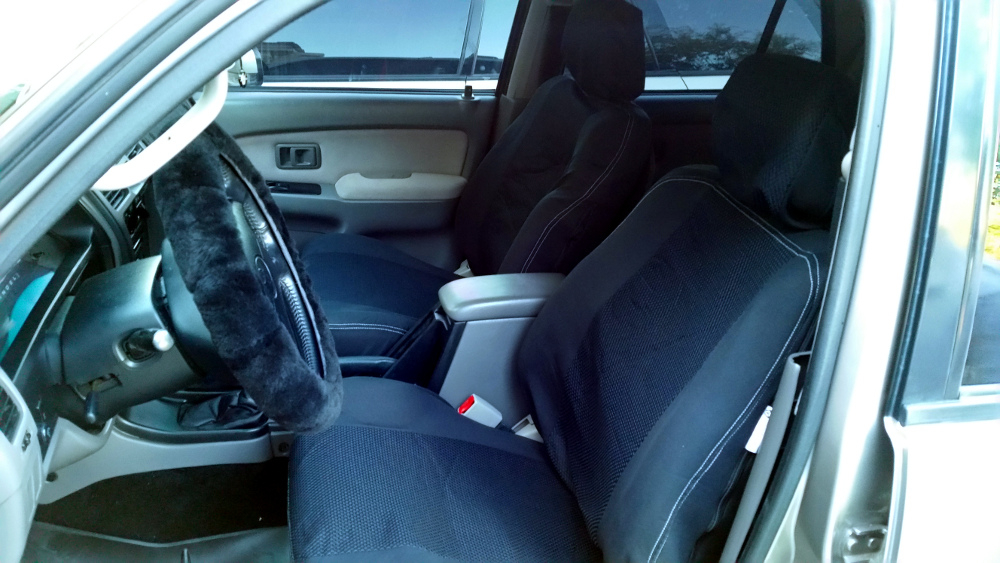
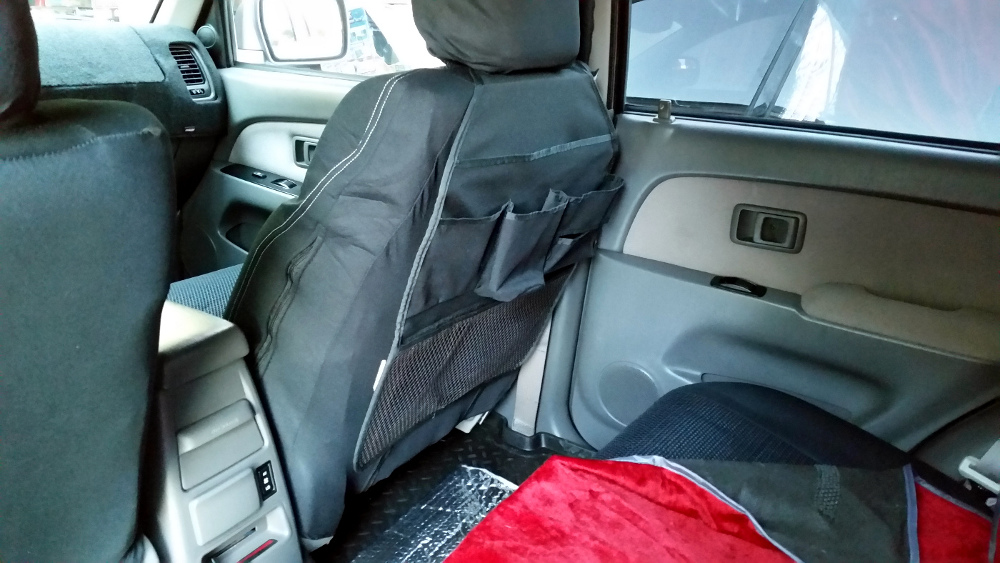
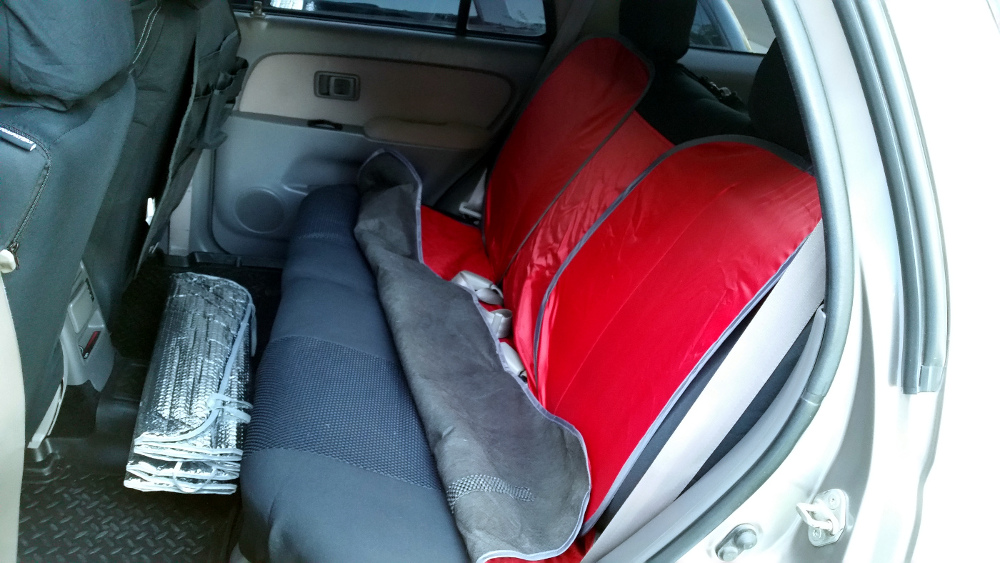
Did not do much at all this weekend to the gunner. Installed some cheap seat covers to keep the seats clean. They turned out... tolerable. Bought a horrid sheepskin steering wheel cover lol Hurts your hands after driving for a bit as you have to grip it so hard to keep hold of the wheel. That is going back very soon Wife did get a cheap - "back of the seat" Thing holder which is nice. I dig it. Aslo tossed in a red dog cover thing as we have a big shepherd. Last, of course no ride is complete without the zombie family stickers. 
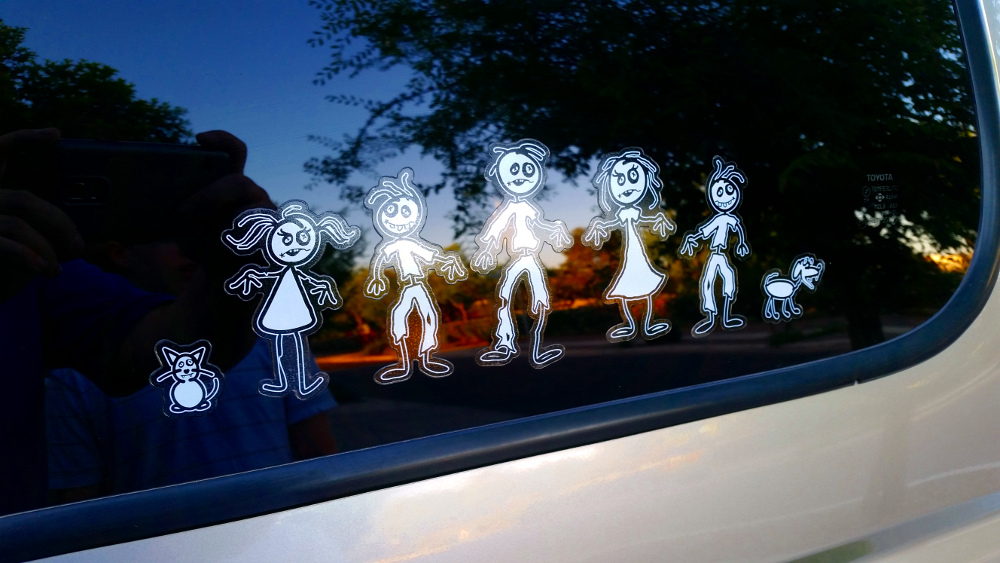
Looks like I will just run with the KYB's I bought and stick with stock suspension for now
Did not do much at all this weekend to the gunner. Installed some cheap seat covers to keep the seats clean. They turned out... tolerable. Bought a horrid sheepskin steering wheel cover lol Hurts your hands after driving for a bit as you have to grip it so hard to keep hold of the wheel. That is going back very soon
Wife did get a cheap - "back of the seat" Thing holder which is nice. I dig it. Aslo tossed in a red dog cover thing as we have a big shepherd. Last, of course no ride is complete without the zombie family stickers.

Jhelms
New member
Well, obviously you can't return that sheepskin steering wheel cover?
Oh, it is going back! No question on that HA!
Jhelms
New member
Epic battle today. Jhelms and some of my old harbor freight collection kicked ass!
Completed today on the front:
- Replaced the wheel BAB's (big ass bearings)
- Stainless lines
- Tundra brake upgrade / Callahan
- KYB Gas Adjust with new hats
- Swaybar bushings
- Wanted to do LCA bushings but this kicked my ass royally as it was... so that will be a battle for another day (have the new P/N whitelines ready to roll at some point)
Bearings were quite a bit more of a chore than I had imagined as I am setup more for car bearings or smaller bearings. Things I learned:
- Slide hammer will NOT work on these hubs HA! They laughed at me
- God bless my 20T press
- Re-affirmed my hate for dust shields
- Need to buy another set of arbor press plates for the press for larger jobs like this (need 4 total arbors)
- Always keep stock rotors around for your press. This can be dangerous if all of your crap is rusted solid and massive force is needed to press things apart... but for lighter duty, they work AWESOME
- You cannot do this job with very basic pressing tools. You need a lot of different press plates and such to make it all work properly.
Here are two critical kits I use with my press all the time:
http://www.harborfreight.com/10-piece-bearing-race-and-seal-driver-set-95853.html
http://www.harborfreight.com/fwd-front-wheel-bearing-adapters-66829.html
Tomorrow will take a look at the rear drums, replace shoes, cylinders and such if axles seals are good and also replace rear brake lines / adjust and re-bleed the whole setup.
:cheers:
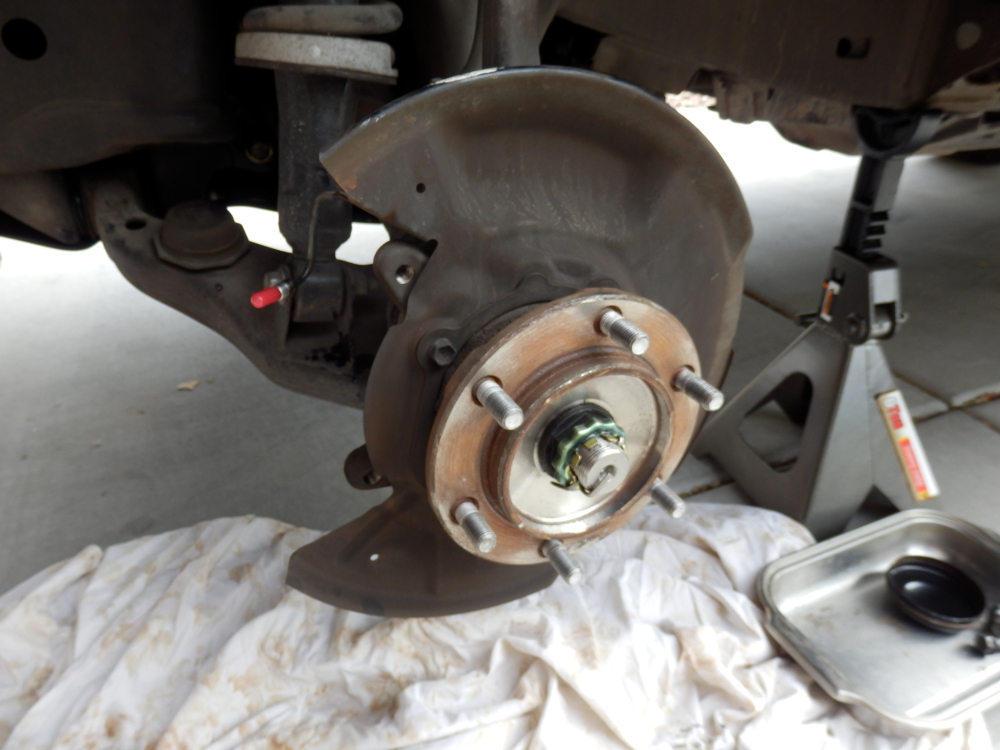
Photos of the battle:
Bone stock except quite new LBJ's
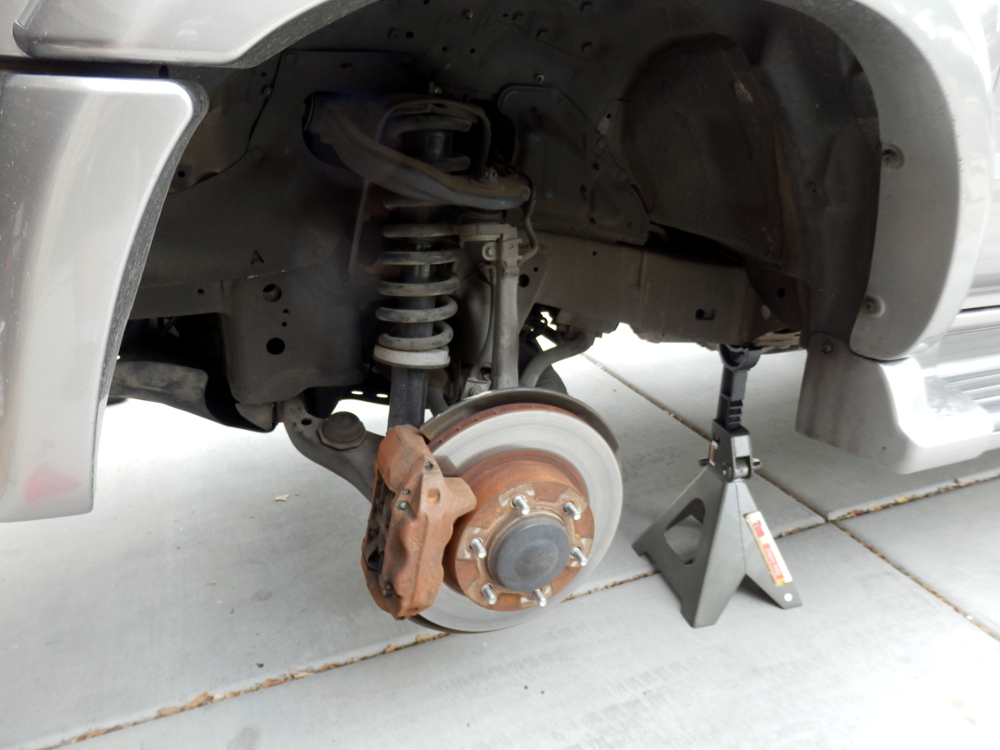
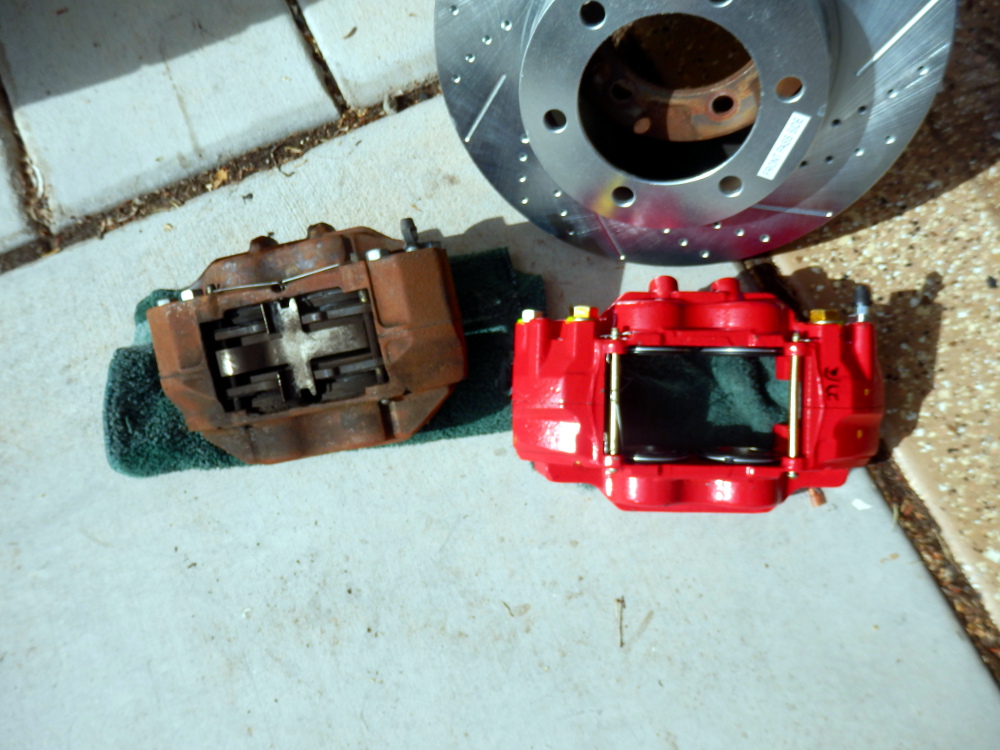
Stock vs tundra caliper
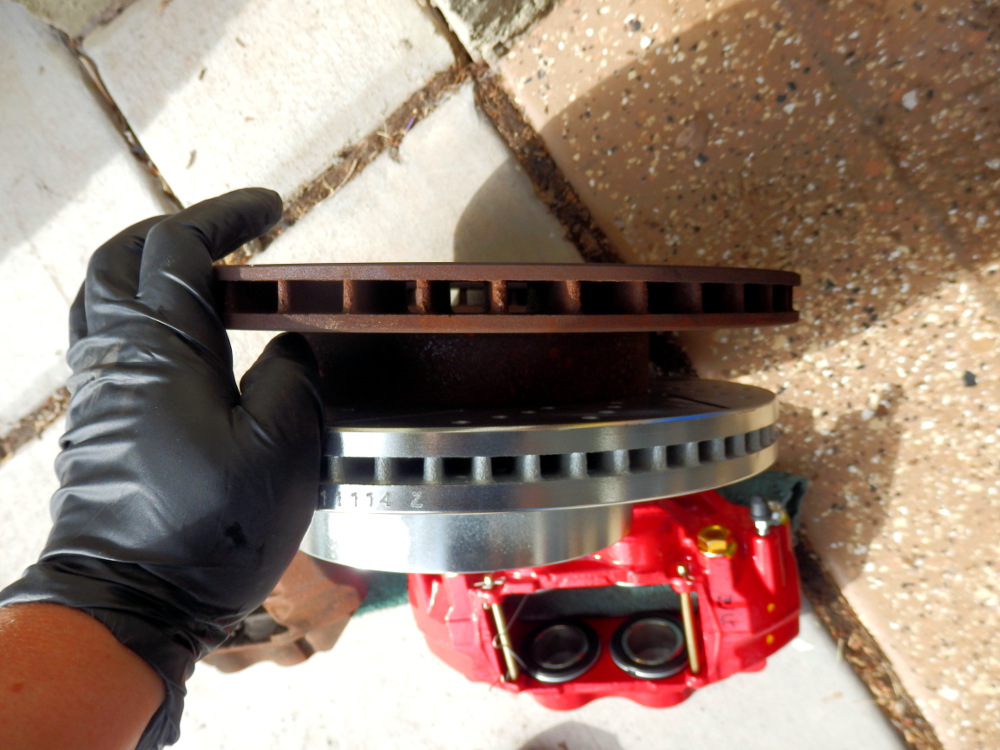
Pathetic rotors at the end of their life (No idea how they were not glazed horribly or did not shake when stopping as thin as they are)
Caliper and rotor off with brake line capped
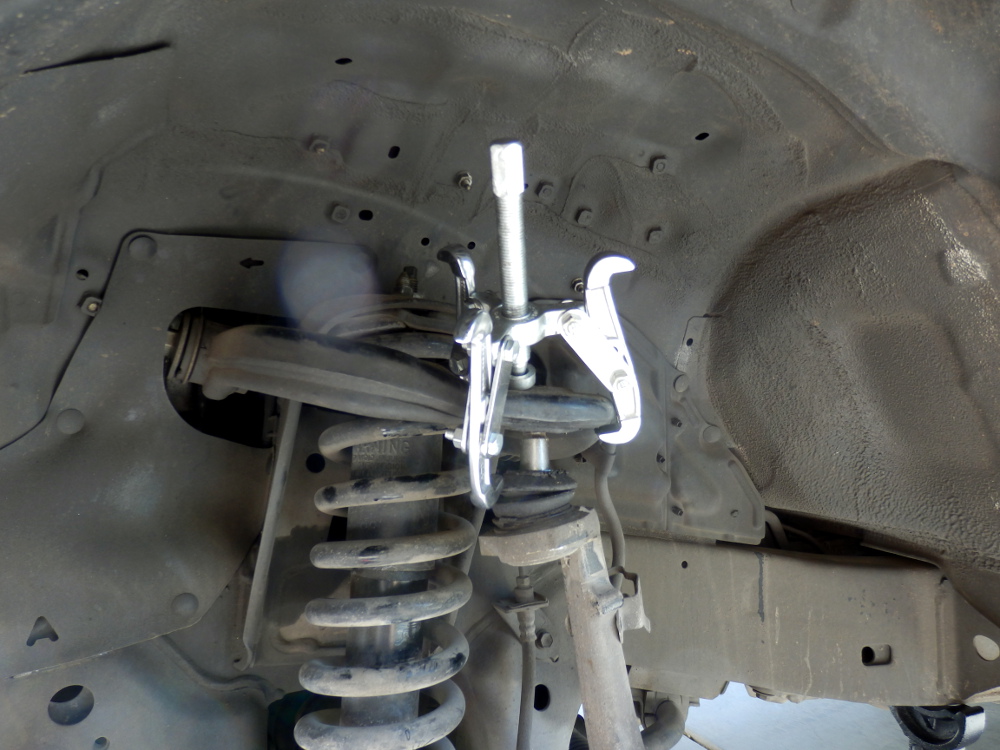
3 jaw made quick work of the UBJ
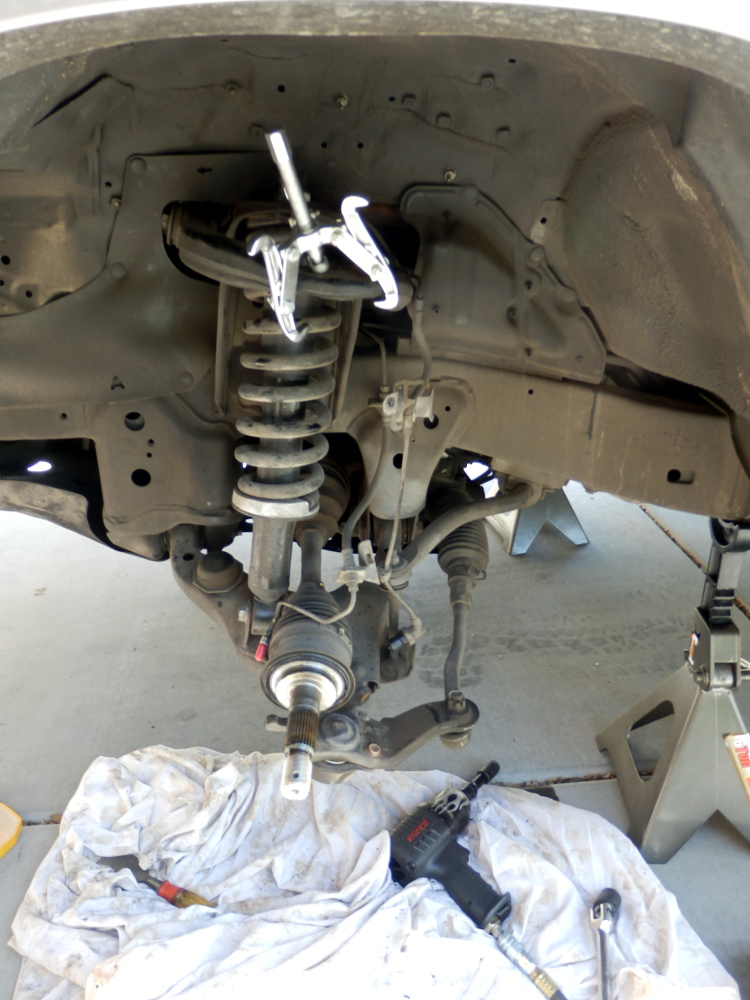
Juts a photo of dis-assembly at this stage
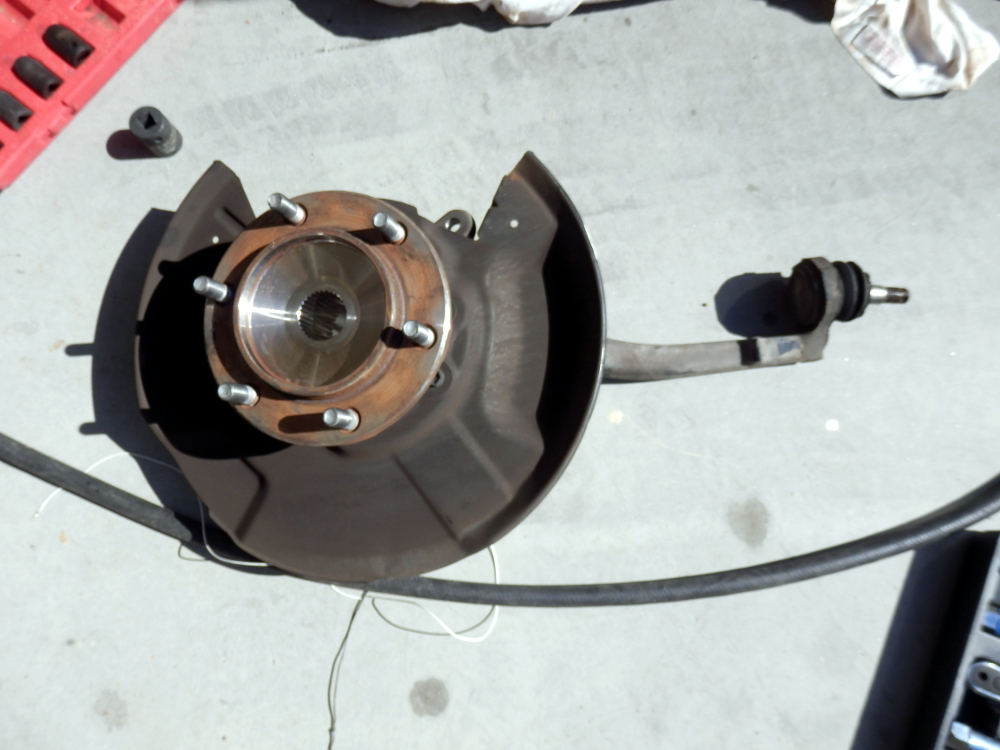
Spindle and hub assembly
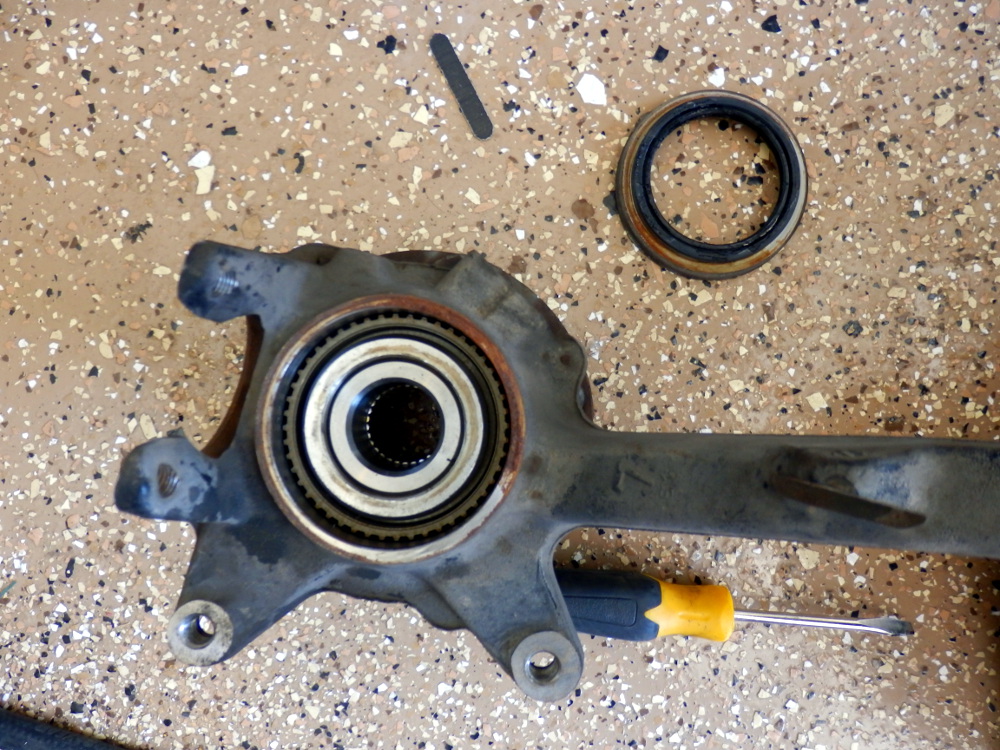
Inner seal removed to expose ABS ring and spacer
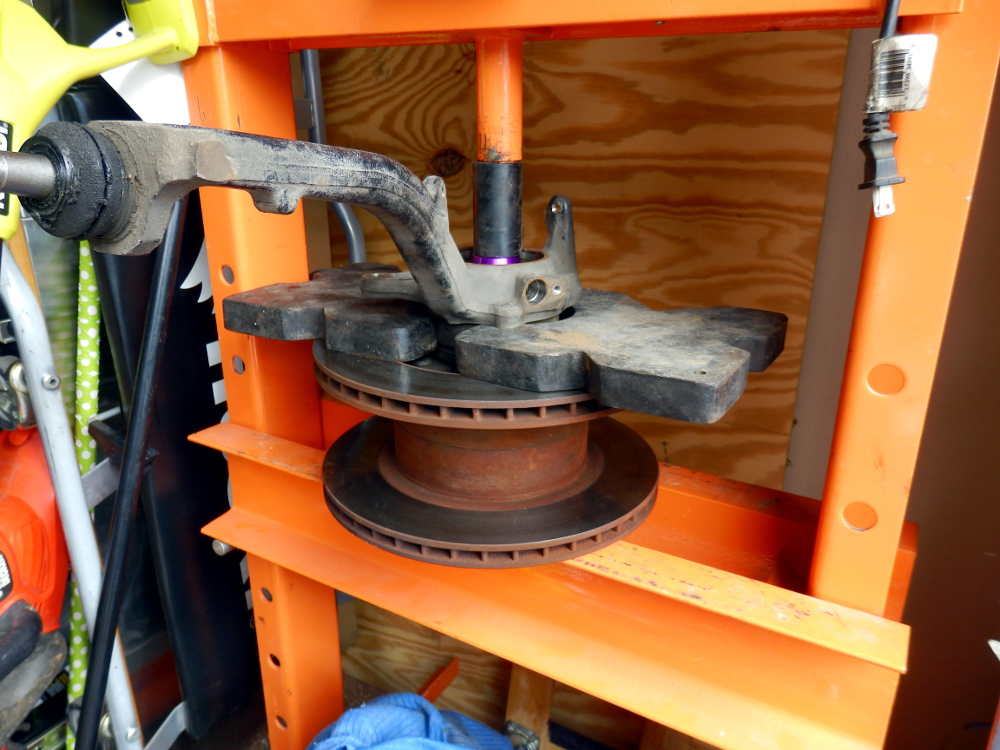
Rocket science / using stock rotors and 20t press. This is where I really needed two more arbors. When doing it this way, you line the stock hub up so that while pressing, the stock wheel studs literally drop down through the holes in the rotors. With two arbors, this gives plenty of room to drop the hub free of the spindle
New bearing, hub and seals installed. Make sure to grease the heck out of ALL seals and the CV shaft where the seal rides
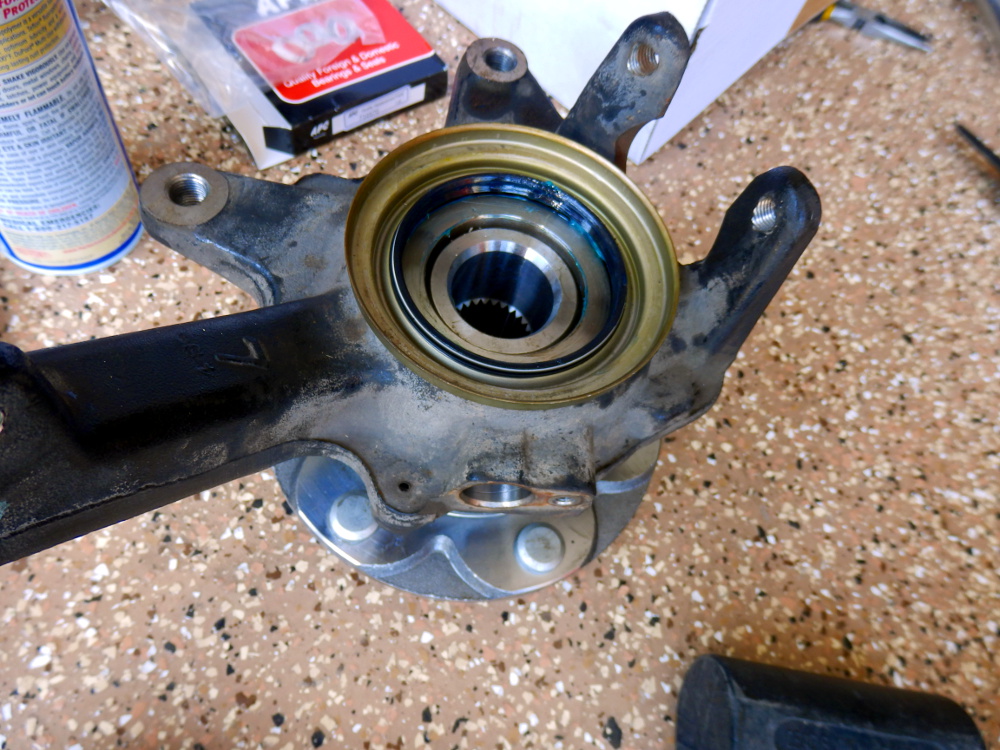
Random pic of the new spindle assembly ready to bolt back on

Next up, Used my kick ass spring compressor to make quick and easy work of replacing the struts.
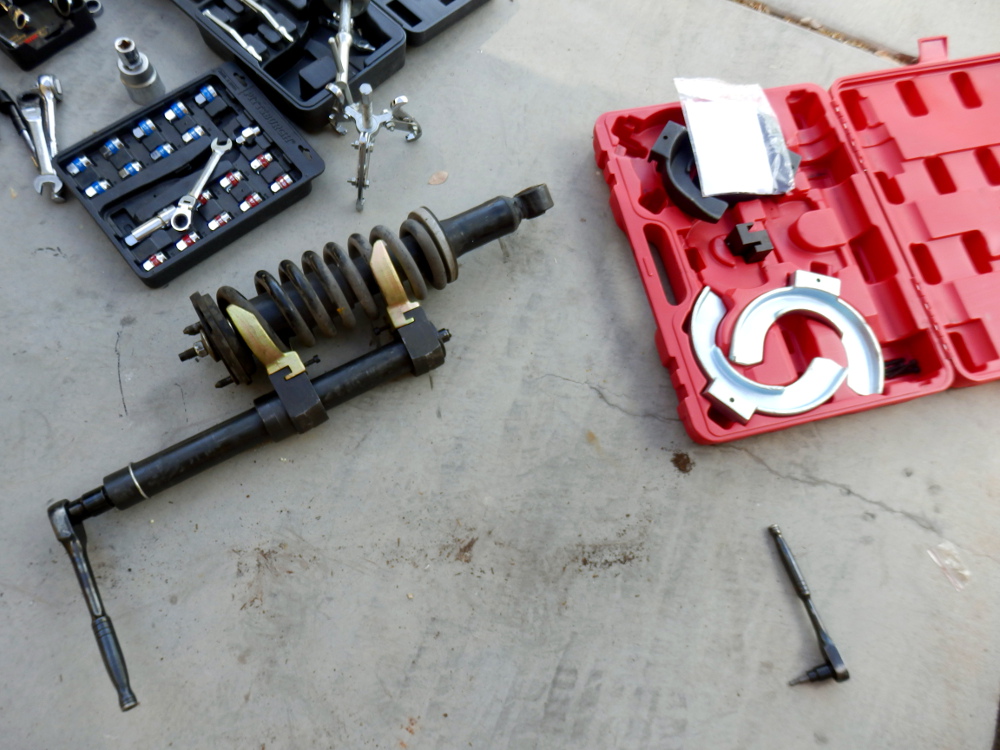
Re-assembled
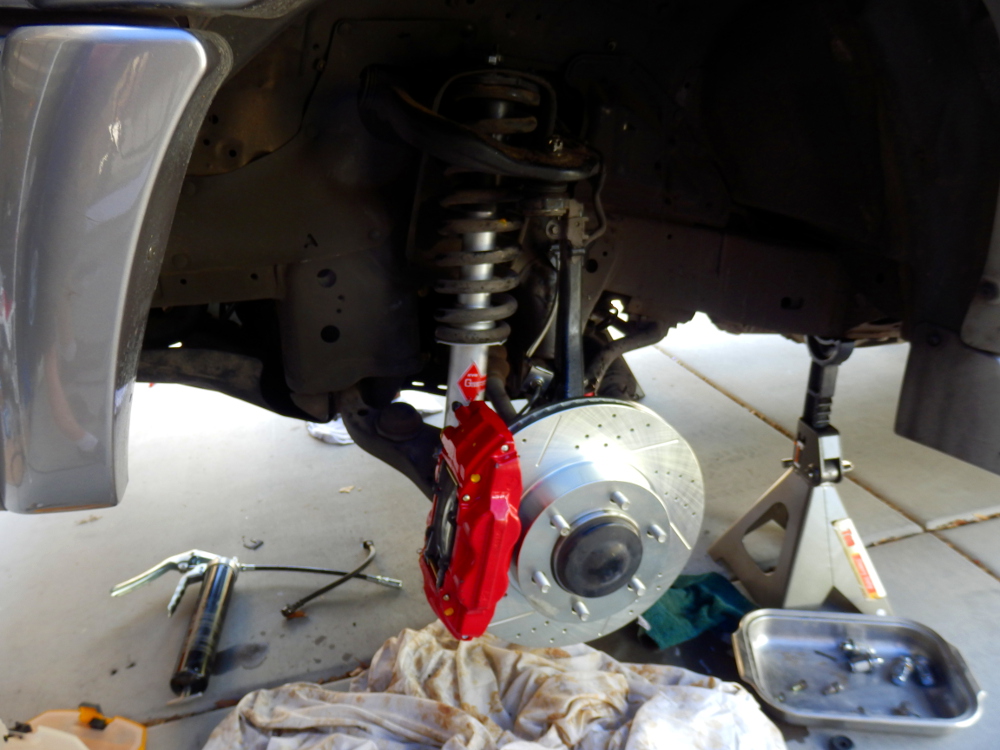
Made a little mess, hose came out of the cup when bleeding. Speed bleeders ROCK.
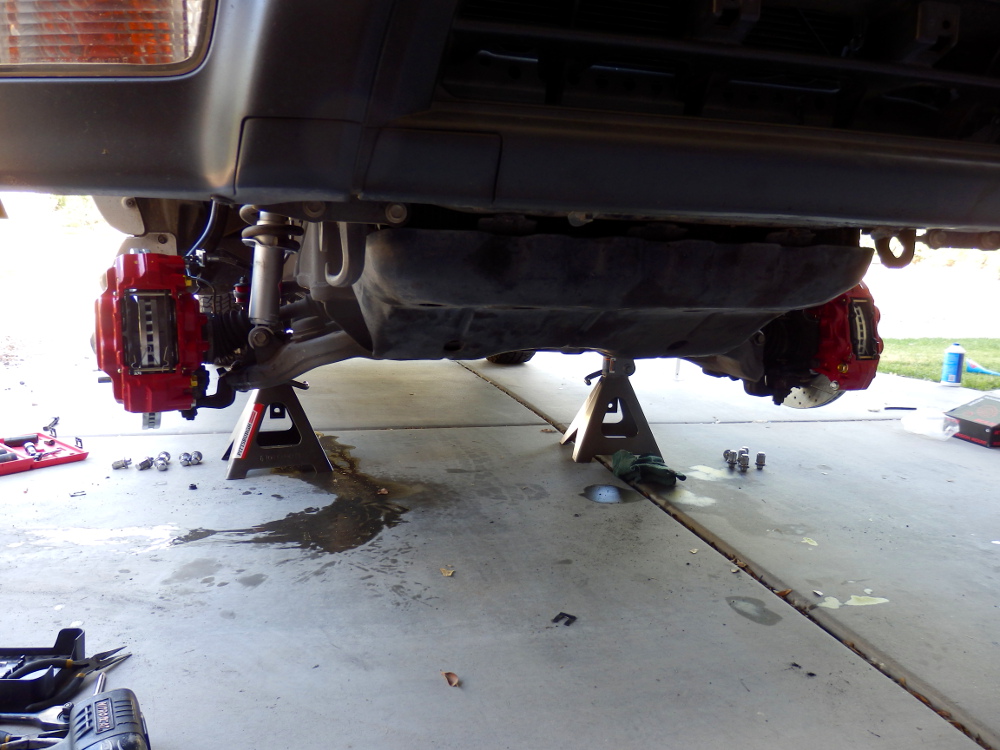
Other side
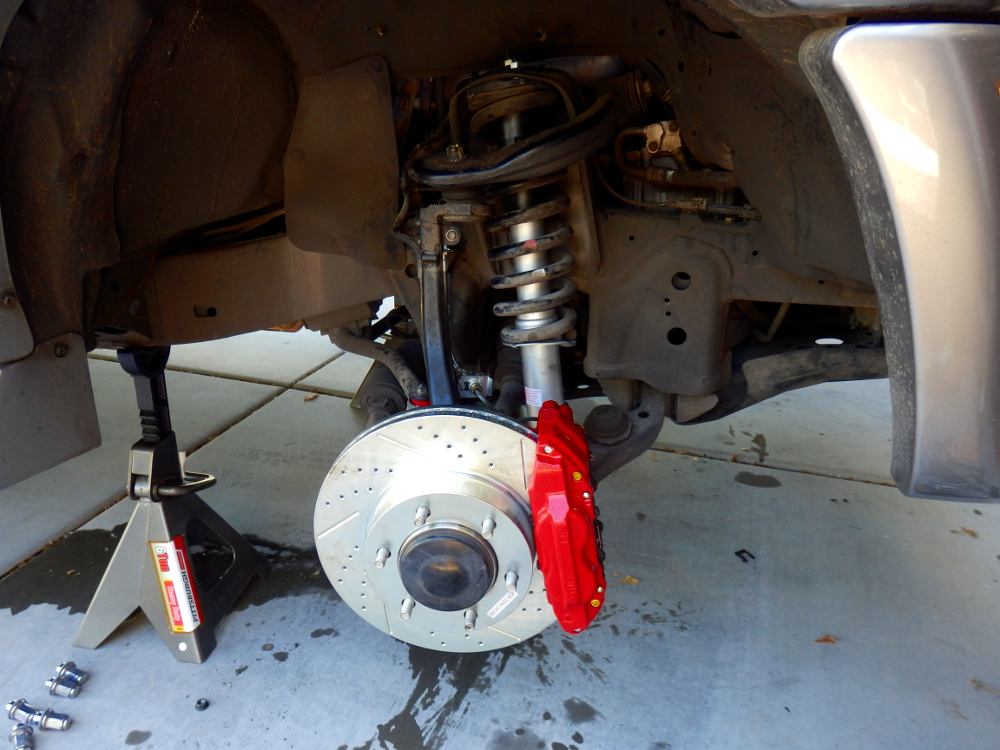
One of the stock bearings. You can visibly see the heat discoloration as it was starting to go. Grease was a little black and cooked too.
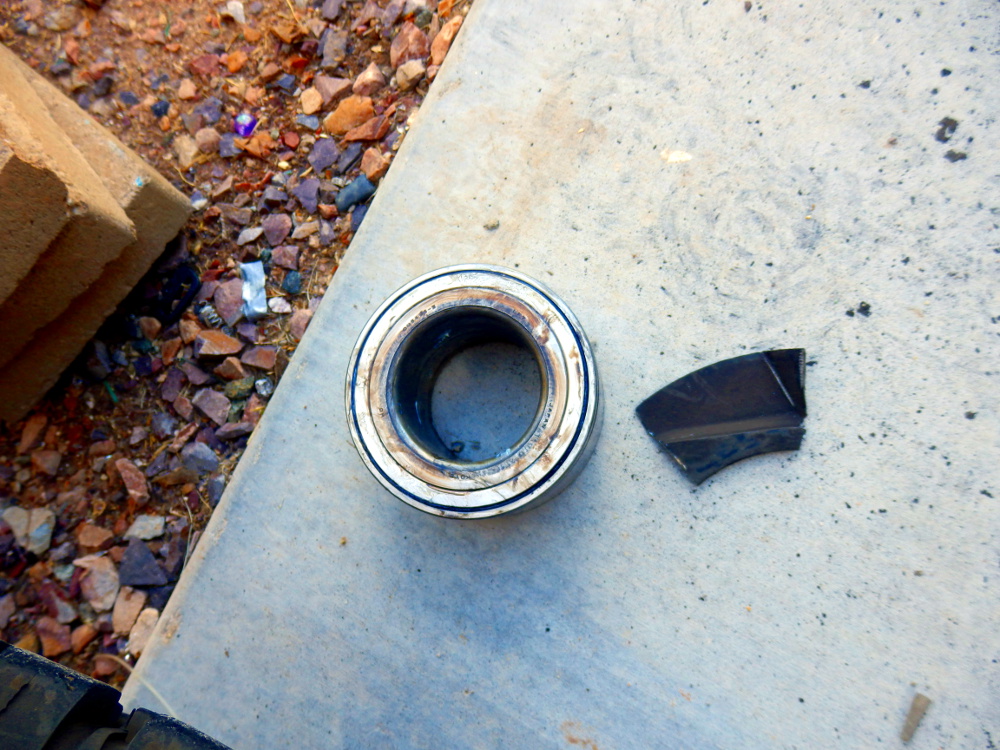
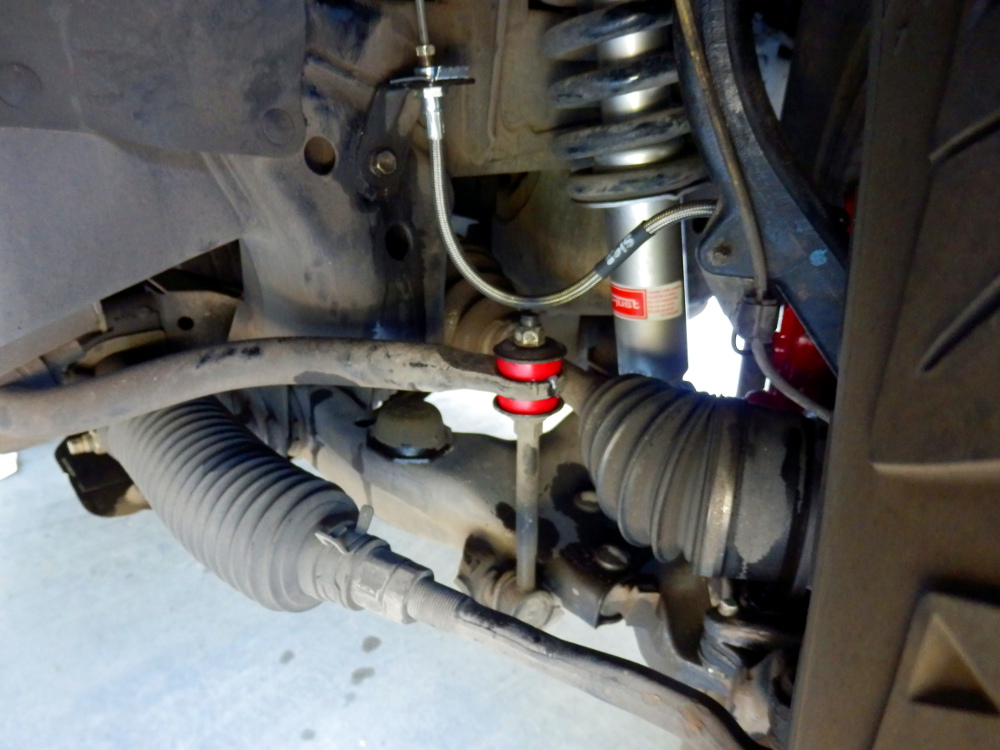
Installed poly endlink bushings and in this pic you can see the slee stainless lines.
Completed today on the front:
- Replaced the wheel BAB's (big ass bearings)
- Stainless lines
- Tundra brake upgrade / Callahan
- KYB Gas Adjust with new hats
- Swaybar bushings
- Wanted to do LCA bushings but this kicked my ass royally as it was... so that will be a battle for another day (have the new P/N whitelines ready to roll at some point)
Bearings were quite a bit more of a chore than I had imagined as I am setup more for car bearings or smaller bearings. Things I learned:
- Slide hammer will NOT work on these hubs HA! They laughed at me
- God bless my 20T press
- Re-affirmed my hate for dust shields
- Need to buy another set of arbor press plates for the press for larger jobs like this (need 4 total arbors)
- Always keep stock rotors around for your press. This can be dangerous if all of your crap is rusted solid and massive force is needed to press things apart... but for lighter duty, they work AWESOME
- You cannot do this job with very basic pressing tools. You need a lot of different press plates and such to make it all work properly.
Here are two critical kits I use with my press all the time:
http://www.harborfreight.com/10-piece-bearing-race-and-seal-driver-set-95853.html
http://www.harborfreight.com/fwd-front-wheel-bearing-adapters-66829.html
Tomorrow will take a look at the rear drums, replace shoes, cylinders and such if axles seals are good and also replace rear brake lines / adjust and re-bleed the whole setup.
:cheers:
Photos of the battle:
Bone stock except quite new LBJ's
Stock vs tundra caliper
Pathetic rotors at the end of their life (No idea how they were not glazed horribly or did not shake when stopping as thin as they are)
Caliper and rotor off with brake line capped
3 jaw made quick work of the UBJ
Juts a photo of dis-assembly at this stage
Spindle and hub assembly
Inner seal removed to expose ABS ring and spacer
Rocket science / using stock rotors and 20t press. This is where I really needed two more arbors. When doing it this way, you line the stock hub up so that while pressing, the stock wheel studs literally drop down through the holes in the rotors. With two arbors, this gives plenty of room to drop the hub free of the spindle
New bearing, hub and seals installed. Make sure to grease the heck out of ALL seals and the CV shaft where the seal rides
Random pic of the new spindle assembly ready to bolt back on
Next up, Used my kick ass spring compressor to make quick and easy work of replacing the struts.
Re-assembled
Made a little mess, hose came out of the cup when bleeding. Speed bleeders ROCK.
Other side
One of the stock bearings. You can visibly see the heat discoloration as it was starting to go. Grease was a little black and cooked too.
Installed poly endlink bushings and in this pic you can see the slee stainless lines.
Last edited:

infamousRNR
Senior Member
Epic battle today. Jhelms and some of my old harbor freight collection kicked ass!
Completed today on the front:
- Replaced the wheel BAB's (big ass bearings)
- Stainless lines
- Tundra brake upgrade / Callahan
- KYB Gas Adjust with new hats
- Swaybar bushings
- Wanted to do LCA bushings but this kicked my ass royally as it was... so that will be a battle for another day (have the new P/N whitelines ready to roll at some point)
Bearings were quite a bit more of a chore than I had imagined as I am setup more for car bearings or smaller bearings. Things I learned:
- Slide hammer will NOT work on these hubs HA! They laughed at me
- God bless my 20T press
- Re-affirmed my hate for dust shields
- Need to buy another set of arbor press plates for the press for larger jobs like this (need 4 total arbors)
- Always keep stock rotors around for your press. This can be dangerous if all of your crap is rusted solid and massive force is needed to press things apart... but for lighter duty, they work AWESOME
- You cannot do this job with very basic pressing tools. You need a lot of different press plates and such to make it all work properly.
Re-assembled
Made a little mess, hose came out of the cup when bleeding. Speed bleeders ROCK.
Installed poly endlink bushings and in this pic you can see the slee stainless lines.
how was installing the SLEE stainless steel braided brake lines>????
any tips or pointers?
. .. .
Jhelms
New member
Brake lines went in easily. They seem to be good quality and Christo at Slee was a pleasure to deal with.
My only tips....
- Have an assortment of vacuum line caps handy so when you take off the line, you can cap it off or it will keep dripping and make a heck of a mess
- Loosen the ends prior to removing the clips
- DO NOT use a standard box end wrench as you can round off the ends rather easily. Use a flair nut wrench instead
- Spend the money on speed bleeders / they work fantastic. Skip old fashioned bleeding
- Have plenty of brake fluid on hand. At least 3-4 large bottles to flush the system
Today's work, I did not take any photos. Yesterdays work combined with todays makes me feel like I took last place in an ass kicking contest.
- Replaced rear brake cylinders
- Did not replace rear lines yet - ran out of ass and would have been easy with a lift. So that will require another bleeding when done.
- Rear shoes were virtually brand new which I did not expect from the excessive draw in the e-brake. This was caused by the knucklehead not adjusting them after install. I inspected the installation and all was good - just needed a LOT of adjustment before they were correct
- YAAAAH axles seals are doing great / no leaking
- Replaced rear shocks
- Replaced swaybar end links
That is it for me for at least 2 weeks. Pretty sore as this sort of thing is not my day job.
One more thing... I was worried from the previous poster that the KYB gas adjusts had been changed and were now harsh as he stated. Test drove / slight offroad and lots of bumps and I honestly have no idea what you are talking about bud! She rides like a dream - nice and smooth with just the right amount of damping. VERY happy with them just as I was on my last gunner. Did you perhaps do a lift or springs when you tried them? Otherwise I am lost as to your experience.
Edit: And another... 1 more thing!
After adjusting the rear, properly bleeding the fronts twice... I am VERY happy with the tundra upgrade. Night and day difference overall. Feel and modulation is excellent. No issues locking up the tires / tripping abs if I want to. Upgrade for me was worth every penny as the brake setup as it was.. was terrible.
- One caliper had very slow, sticking piston(s) which would cause an initial pull to the left when braking / then would settle
- Seals were shot on some of the pistons
- Rotors were dangerously thin and pads had about 30% left
- rears were WAY WAY WAY out of adjustment
- Did not look like the fluid had ever been flushed / looked nearly like used motor oil. Took a lot of fluid but it is mostly clear now
My only tips....
- Have an assortment of vacuum line caps handy so when you take off the line, you can cap it off or it will keep dripping and make a heck of a mess
- Loosen the ends prior to removing the clips
- DO NOT use a standard box end wrench as you can round off the ends rather easily. Use a flair nut wrench instead
- Spend the money on speed bleeders / they work fantastic. Skip old fashioned bleeding
- Have plenty of brake fluid on hand. At least 3-4 large bottles to flush the system
Today's work, I did not take any photos. Yesterdays work combined with todays makes me feel like I took last place in an ass kicking contest.
- Replaced rear brake cylinders
- Did not replace rear lines yet - ran out of ass and would have been easy with a lift. So that will require another bleeding when done.
- Rear shoes were virtually brand new which I did not expect from the excessive draw in the e-brake. This was caused by the knucklehead not adjusting them after install. I inspected the installation and all was good - just needed a LOT of adjustment before they were correct
- YAAAAH axles seals are doing great / no leaking
- Replaced rear shocks
- Replaced swaybar end links
That is it for me for at least 2 weeks. Pretty sore as this sort of thing is not my day job.
One more thing... I was worried from the previous poster that the KYB gas adjusts had been changed and were now harsh as he stated. Test drove / slight offroad and lots of bumps and I honestly have no idea what you are talking about bud! She rides like a dream - nice and smooth with just the right amount of damping. VERY happy with them just as I was on my last gunner. Did you perhaps do a lift or springs when you tried them? Otherwise I am lost as to your experience.
Edit: And another... 1 more thing!
After adjusting the rear, properly bleeding the fronts twice... I am VERY happy with the tundra upgrade. Night and day difference overall. Feel and modulation is excellent. No issues locking up the tires / tripping abs if I want to. Upgrade for me was worth every penny as the brake setup as it was.. was terrible.
- One caliper had very slow, sticking piston(s) which would cause an initial pull to the left when braking / then would settle
- Seals were shot on some of the pistons
- Rotors were dangerously thin and pads had about 30% left
- rears were WAY WAY WAY out of adjustment
- Did not look like the fluid had ever been flushed / looked nearly like used motor oil. Took a lot of fluid but it is mostly clear now
Last edited:
Similar threads

- Replies
- 2
- Views
- 3K

- Replies
- 1
- Views
- 8K
- Replies
- 2
- Views
- 3K
- Replies
- 0
- Views
- 1K

