Need help draining coolant

The following is part of the 1GR-FE coolant replacement found in the FSM here provided by nashman69g:

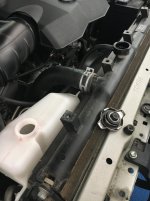
(d) Slowly pour coolant into the radiator reservoir until it reaches the F line.
(e) Install the reservoir cap.
(f) Ins tall the radiator cap.* 1
(g) Start the engine and stop it immediately.* 2
(h) Allow approximately 10 seconds to pass . Then remove the radiator cap and check the coolant
level. If the coolant level has decreased, add coolant.* 3
(i) Repeat steps * 1 , * 2 and * 3 until the coolant level does not decrease.
 
I doubt this is necessary on this vehicle but when I had a inline 6 vehicle, they recommended we raise the front of the vehicle to get maximum burp-age out through the radiator cap.
 
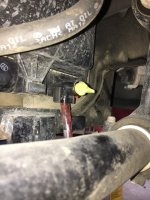
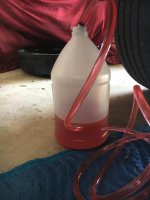
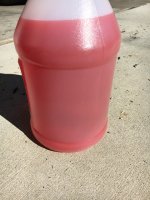
I changed my coolant today. Since the stuff that came out was clean as a whistle I decided to only do the radiator and reservoir drain, barely got more than a gallon. I think I’ll just do partials like this every few years since Toyota doesn’t really recommend normal “flushing” type flushing.
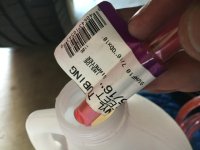
Drain Tubing ID is 5/16”
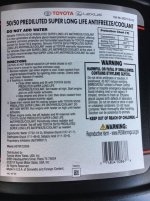
Interesting note, I’ve got a Lexus dealer close to me so I thought I’d buy the coolant there. $39/gal. Twice retail. We used to call that the FTC book price. Toyota dealer was better but still about a $2 over retail at $23.
 

Attachments

  • 8AE04B9C-ABDE-4F24-955C-E2BD4C042615.jpg
    8AE04B9C-ABDE-4F24-955C-E2BD4C042615.jpg
    74.4 KB · Views: 2,638
  • E15A6FC2-3886-4B63-9904-3BC7B27F5906.jpg
    E15A6FC2-3886-4B63-9904-3BC7B27F5906.jpg
    130.3 KB · Views: 2,407
  • 8C57D43E-EE88-42F5-8AE1-7F518D65A160.jpeg
    8C57D43E-EE88-42F5-8AE1-7F518D65A160.jpeg
    108.9 KB · Views: 2,405
  • F8103C0E-58B7-4072-A658-C495E9C036FF.jpg
    F8103C0E-58B7-4072-A658-C495E9C036FF.jpg
    128.7 KB · Views: 2,233
  • 54578513-C97F-47A6-96BD-BA7B048FE94E.jpeg
    54578513-C97F-47A6-96BD-BA7B048FE94E.jpeg
    69.6 KB · Views: 2,229
  • BF30BB83-DAAA-4905-B615-B1B212C96648.jpeg
    BF30BB83-DAAA-4905-B615-B1B212C96648.jpeg
    113.2 KB · Views: 2,224
  • 447D8C03-08BC-4F14-A45F-D9806F4CF3D1.jpeg
    447D8C03-08BC-4F14-A45F-D9806F4CF3D1.jpeg
    117.8 KB · Views: 2,234
  • B775F138-3E03-4B16-AE92-3053B641D437.jpg
    B775F138-3E03-4B16-AE92-3053B641D437.jpg
    53.1 KB · Views: 2,210
Last edited:
More pics.
 

Attachments

  • DF645648-9DA9-44D6-A994-F2264E2D7FED.jpeg
    DF645648-9DA9-44D6-A994-F2264E2D7FED.jpeg
    79 KB · Views: 2,223
  • 14FF0D29-05FF-4488-B453-0A99D71A3367.jpeg
    14FF0D29-05FF-4488-B453-0A99D71A3367.jpeg
    83.2 KB · Views: 2,227
When I did mine a year or so ago, I just pulled the lower rad hose and popped out the passenger side plug. Good enough for me. I remember it being super easy to burp after. I think I put the front on ramps and had the rad cap off, started it, let it run until the thermostat opened and the coolant level went down, added more in the rad until it was full, and the job was done. Way easier than most other vehicles I own or have owned recently (Jeep/Infiniti). Obviously monitor the overflow tank for a few days after so that you can make up for any additional air getting worked out by adding coolant as needed.
 
When I did mine a year or so ago, I just pulled the lower rad hose and popped out the passenger side plug. Good enough for me. I remember it being super easy to burp after. I think I put the front on ramps and had the rad cap off, started it, let it run until the thermostat opened and the coolant level went down, added more in the rad until it was full, and the job was done. Way easier than most other vehicles I own or have owned recently (Jeep/Infiniti). Obviously monitor the overflow tank for a few days after so that you can make up for any additional air getting worked out by adding coolant as needed.

Totally agree with you that burping was a nonevent. Thinking about it overnight I’m a little disappointed I did a half-assed job. I might revisit this sometime in the next year. According to the Toyota parts website there’s a dealer with much better prices in Sacramento ($14/gal). I’ll swing by on my next California road trip and get a few more gallons.
 
The heat and easiest way to do this is literally remove rad cap ( MAKE SURE ENGINE IS NOT HOT!!! CAN SEVERELY BURN YOURSELF IF CCOLANT SPRAYS OUT!!! PRESSURIZED SYSTEM PLEASE BE CAREFUL!!) pull the drain valve on bottom of radiator and let completely drain out, once done replace the valve and tighten closed !! Fill coolant while engine is off , will bubble as air is being displaced , once it no longer takes coolant start the engine and let it run.. top up as coolant level goes down.!! Once engine temp is all warmed up ensure you get hot air from interior vents, wait for fans to cycle at least once, check for no more air bubbles coming out of radiator, top up coolant reservoir , replace cap , clean up mess which I know you’ve made and you’re all done !
 
Does this block Bolt on pass side makes mess all over engine and bay while draining? When I did my 2004 I attached hose to a tap on the block and routed it to the drain container but now there is no tap where is more than gallon of pink stuff going to go?
 
The heat and easiest way to do this is literally remove rad cap ( MAKE SURE ENGINE IS NOT HOT!!! CAN SEVERELY BURN YOURSELF IF CCOLANT SPRAYS OUT!!! PRESSURIZED SYSTEM PLEASE BE CAREFUL!!) pull the drain valve on bottom of radiator and let completely drain out, once done replace the valve and tighten closed !! Fill coolant while engine is off , will bubble as air is being displaced , once it no longer takes coolant start the engine and let it run.. top up as coolant level goes down.!! Once engine temp is all warmed up ensure you get hot air from interior vents, wait for fans to cycle at least once, check for no more air bubbles coming out of radiator, top up coolant reservoir , replace cap , clean up mess which I know you’ve made and you’re all done !

Doing this, how much fluid did you actually get out?

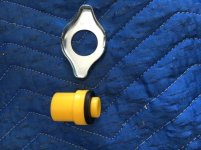
As for the drain plug on the block Passenger side. Anyone have a pic of this? Since the beginning of the thread the only pics look to be of the Drivers side plug that apparently is no longer needed to drain.
 
More pics.

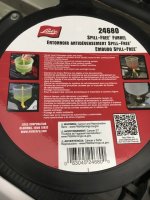
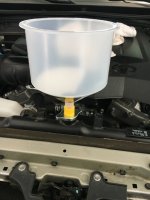
Saw that funnel on a youtube vid, wonder if Autozone or O'Reilly sells it?

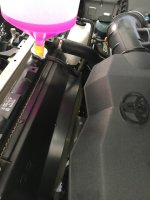
What is that blue stuff, a flush?

Going to tackle this on the wife's 2010 tomorrow. Her's is nowhere near as clean as yours. I will most likely do a distilled water re-fill and drain if it looks nasty. Seems using tap water to flush is not the best idea.
 
Doing this, how much fluid did you actually get out?

As for the drain plug on the block Passenger side. Anyone have a pic of this? Since the beginning of the thread the only pics look to be of the Drivers side plug that apparently is no longer needed to drain.

I didn’t do the block drain and I got only a little over a gallon. After almost a year, I’m good with this method and will do just the radiator again next year.

Saw that funnel on a youtube vid, wonder if Autozone or O'Reilly sells it?

What is that blue stuff, a flush?

Going to tackle this on the wife's 2010 tomorrow. Her's is nowhere near as clean as yours. I will most likely do a distilled water re-fill and drain if it looks nasty. Seems using tap water to flush is not the best idea.

Yes you can get the funnel at most auto parts stores, but it’s cheaper online. No idea what blue stuff you’re talking about.

Do not flush at all. Toyota says this in their FSM.
 
Yes you can get the funnel at most auto parts stores, but it’s cheaper online. No idea what blue stuff you’re talking about.

Do not flush at all. Toyota says this in their FSM.

In your picture the fluid in the funnel looked blue.

I have looked at the FSM and the maintenance manual, I don't see where it says not to flush. Is there a reason for this such as damaging something due to flow direction?
 
Sorry, it doesn’t say not to flush in the FSM, it says to replace coolant if “excessively dirty”.
The warning is to not replace coolant with “plain water”.
The coolant container says if flushing is needed, to fill with SLLC, run until heater operates, and drain.
From what I’ve read, it seems some/most mechanics suggest not to flush with anything else so the coolant/water ratio is not altered.
 
Last edited:
When I went to the dealer to pick up some SLL fluid, I asked them about flushing the system. They said they perform a full system flush as their procedure but would not specify how they flushed it. Instead they said I would need a full 3 gal of SLL to complete a full flush at home.

So if the radiator drain only produces a little over 1/2 gal. And draining the passenger side engine block pulls almost 1 gal. Where is the rest? There's no way the coolant lines are holding another 1.5 gal. As per the manual the system holds 11.1 liters which is almost 3 gal as they said.
 
I posted previously that I got just over a gallon draining only the rad, did someone post they only got a 1/2? I had the same questions as you, where’s the rest? But after seeing the good condition of my 10 year old coolant and the pain it was to drain the block, I decided that I would just do the rad now and then do it again this year or the next. I’m still feeling good about that decision.
Oh, I also did my 2015 RAV4 the same way a few months ago. Super easy.
 
Between draining the radiator, reserve tank and the pass. side block drain. Pulled out 2.25 gallons. So only 3/4gal left in the system.
 
So I have not seen anyone mention if that drivers side block bolt can be replaced with the drain that the pre-2013's had.. or does anyone know the thread type where a petcock/drain valve can replace that drivers side bolt?
 
I just did my 2nd drain and fill on the coolant, super easy! Was surprised that I got only 3.5 quarts on my first, and 4 quarts on my second. Hardest part was taking off the skids. Both drain and fills were done in the morning on a stone-cold engine.

Pro Tip: Leave the radiator cap on when you open the Pee-Cock valve on the bottom of the radiator, as the coolant drains its pulls/sucks all the fluid out of the overflow reservoir.
 

Members online

Forum statistics

Threads
278,307
Messages
3,554,050
Members
248,016
Latest member
Advally Service

Trending content

Back
Top