nglayton's Mod Thread

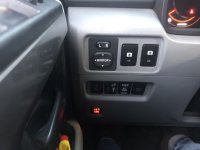
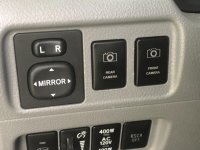
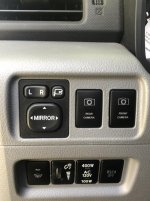
When I installed the POD system I relocated the switches for my anytime backup camera system. Works good with the cheap $10 switches from amazon, but I will probably order some custom labeled ones.

EDIT: Ha! Just noticed even though I ordered them at exactly the same time/place they don't even match! Lame

AOB switched ordered!!


EDIT 2: Look at the second pic, More appropriately labeled AOB switchs installed. Looks great now!

img_2398a.jpeg

CAMERA SWITCHES.jpeg
 

Attachments

  • IMG_2398a.jpeg
    IMG_2398a.jpeg
    52.4 KB · Views: 474
  • CAMERA SWITCHES.jpg
    CAMERA SWITCHES.jpg
    55.7 KB · Views: 495
Last edited:
Remote Start via iPhone - Accessorides

This is going to sound a bit strange but about 8 years ago.........

My very first post to t4r.org was in search of info for a remote start system. A google search on starting my T4R with my iPhone, lead me to the forum and I joined up. Asked my question and got basically nothing for an answer. So I dropped it and basically just forgot about it until I saw the latest offering from accessorides.

It's nice to know, a mere 8 years later, what I wanted is now finally available and installed on my T4R.
Here's a video of the install process (not mine) I found this video after my install was done, but you don't really need it.

Update 7/17/19: A few notes for anyone considering this....I just installed this last week, it only took about an hour and I was dinking around with other stuff at the same time. (Moving switches) I'm loving it so far.

I went for the cell phone option. The app seems a bit clunky to me, but it has worked every time. (kind of, keep reading) It will tell you if the doors are locked or unlocked and give you a read out on the battery voltage as well. You can set a pin on the app so no one can mess with the car if you leave your phone someplace. The app could use a few other small improvements, like letting you upload a pic of your own car instead of having to choose something close. (No '11 TE option, at least they got the headlights right, I'm stuck with SR5 or Limited pic :barf:)
It would also be nice if you could adjust the pre-run time from the app, but that currently requires you to send the module back to Accessorides.

My last peeve about the app is the start and shutoff buttons don't say start or shut off. They just have some circular icon arrows that have never been associated with start or stop. It wouldn't kill them to even add the text below them and I could get over it. The lock/unlocked symbols and text are as you would expect...why not the start stop?

The app also hints that you can add 4 switched accessories...like lights etc. However, there is nothing on the Accessorides website for this. Imagine forgetting where you parked and being able to turn on the LED light bar remotely.....can you say airport parking lot after a two week trip? or even a nice security feature for people that have to park in sketchy areas.

One small thing I noticed was when I parked in a home garage for 2 days the cell service was pretty limited if it reads at all. It's 4G service supposedly, however the area I was in didn't have the greatest coverage to begin with. So it could have just been a combination of the house I was at and the area. I was close enough to my T4R that the OEM fob worked fine so in that instance I did't really need the app.
 

Attachments

  • CL6.jpg
    CL6.jpg
    27.7 KB · Views: 506
Last edited:
Power-Folding Mirror Install - Part 1

Just a teaser, more to post as soon as I get a bit more time to write up my experience.

<iframe width="560" height="315" src="https://www.youtube.com/embed/ZtoMK_uu9yY" frameborder="0" allow="accelerometer; autoplay; encrypted-media; gyroscope; picture-in-picture" allowfullscreen></iframe>
 

Attachments

  • IMG_7268.jpg
    IMG_7268.jpg
    70.8 KB · Views: 468
Last edited:
Power-Folding Mirror Install - Part 2 - Back Story

So I have been drooling about this mod for over 2 years. Ever since Antman posted the very first original 4Runner folding mirror mod here.

Not having all the mirror parts (There used to be links, now they are gone) and not being able to find the parts, (too vague to figure out EXACTLY what I needed)
My eyes and brain sort of glossed over when trying to visualize what the man was doing to combine these 2 sets of mirrors.
I periodically re-read Antman's mirror mod post thinking the fog will lift, but it never does, so I forgot about the mod for awhile.

Fast forward 2 years and I see these posts from Jesse and KTJO4x4

Power Folding Mirrors by KTJO4x4

<a href="https://www.4runners.com/threads/new-5th-gen-4runner-power-folding-mirrors-order-now.9165/#post-84693">New 5th Gen 4Runner Power Folding Mirrors - ORDER NOW!</a>

(Note: Separate from the thread Jesse started, KTJO has one more thread on this forum, it's running around here someplace but it keeps disappearing so I can't find it at the moment.)

I asked too many questions to get in on the first batch of mirrors she had to offer and a few other hungry(greedy?) T4R owners jumped on it and bought them up...my bad for asking too many questions.
So I had to wait until she could source more parts and get her orders caught up and in etc.

SO when she finally announced that she was ready to start taking orders I jumped and bought the kit.
Option 1 $275 + $45 the plug and play option for so I don't have to tap any wires for the auto fold on lock/unlock function.

Turns out the parts to make the plug/play adapter don't exist for the 4runner so my $45 was refunded.

And to top it off, I ordered before she had the parts in hand so I had to be patient and wait for everything to arrive, but I wasn't going to miss my window a second time and get beat to the punch.
So even though the wait was killing me I was fine with it. At one point I did begin to wonder if I got scammed out of $320, but sure enough the parts can through and everything is good.
 
Last edited:
Power-Folding Mirror Install - Part 3 - Bad/ugly & a few observations along the way

This is just a list of all the things that just didn't go as planned for me with this mod.
I will update this as I go along and remember stuff.

And don't be discouraged by what I have posted here, I would totally do it again, I'm just posting so others can avoid the mistakes I made and save some money.
This mod works perfectly, 100% as advertised!

Not counting the wait for parts, the trouble started when I had a 2011 model and the kit is designed for 2014+ style mirrors.
But since this whole mirror mod is brand new no one really understand what that meant. KTJO4x4 wasn't sure, no one really was.
But, a 5th Gen is a 5th Gen so I thought we could figure it out and did not realize the mirrors are actually totally different.

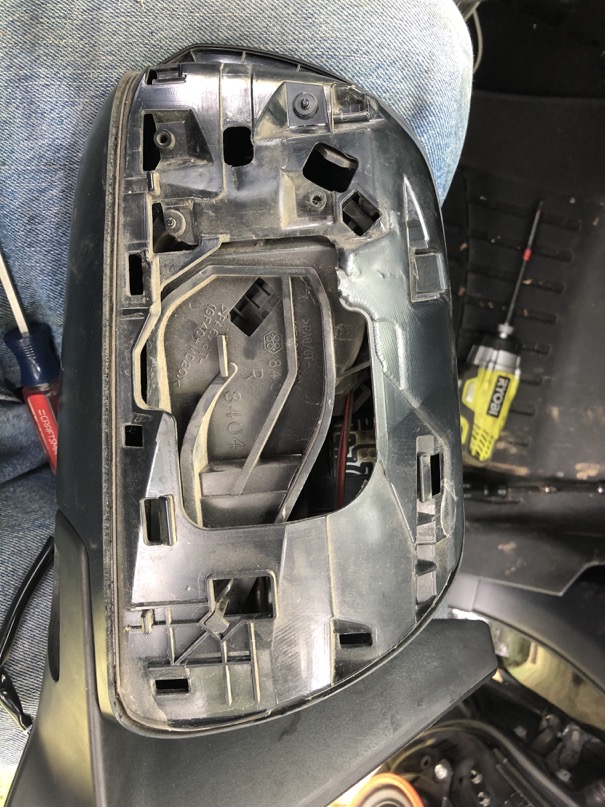
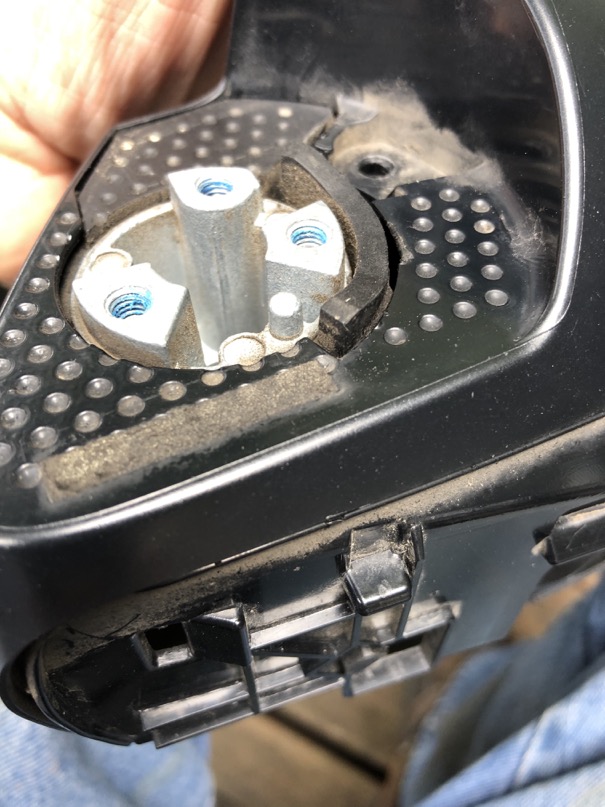
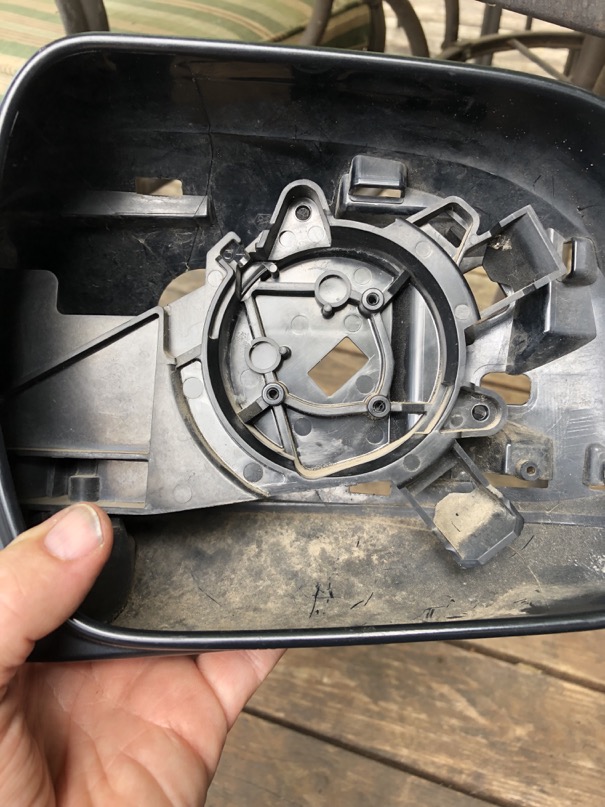
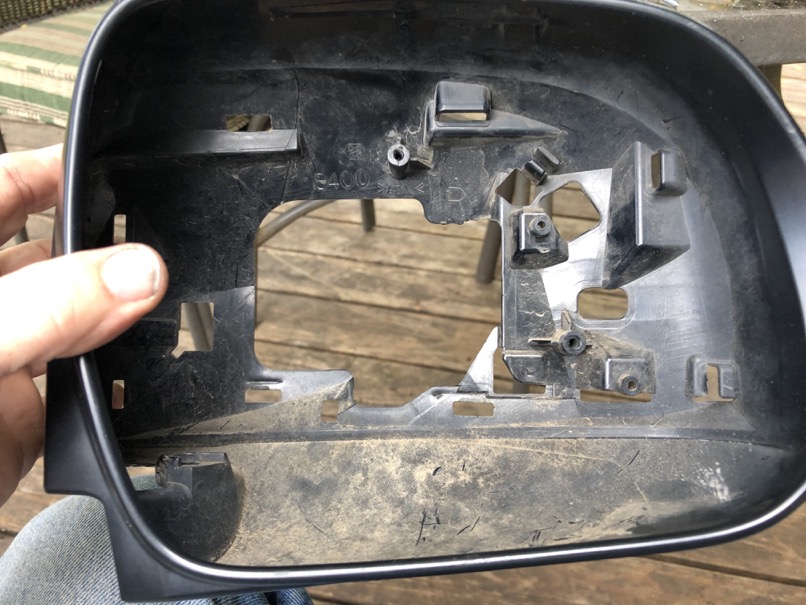
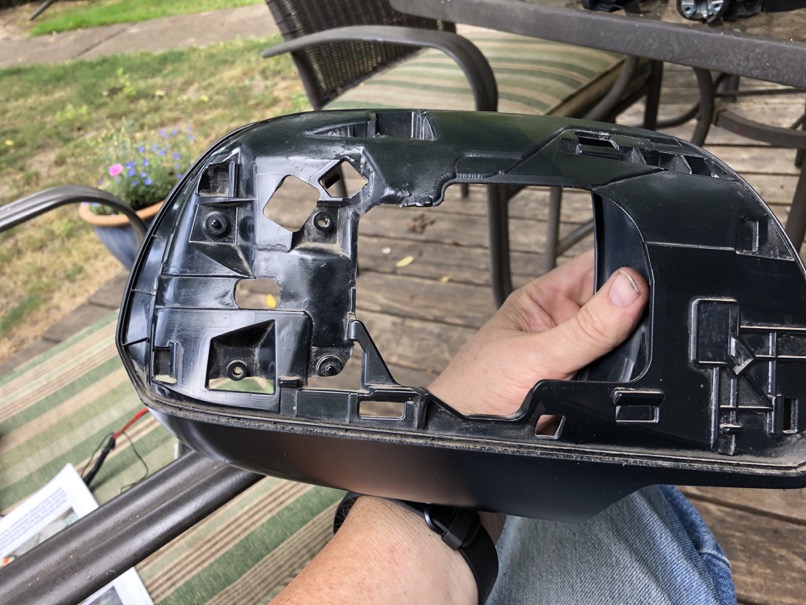
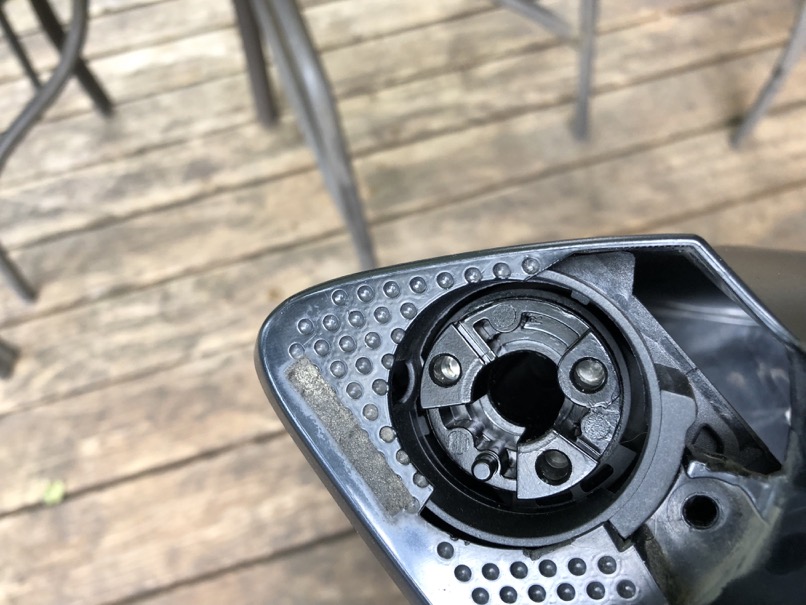
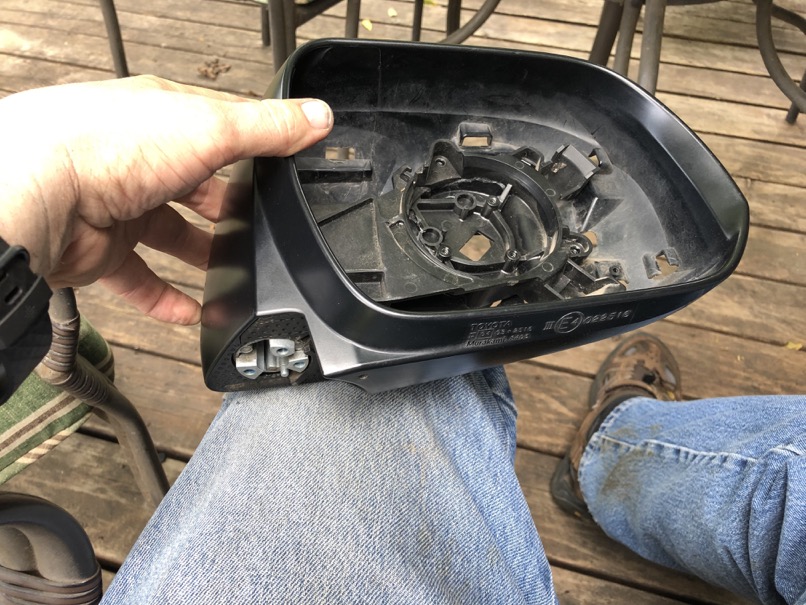
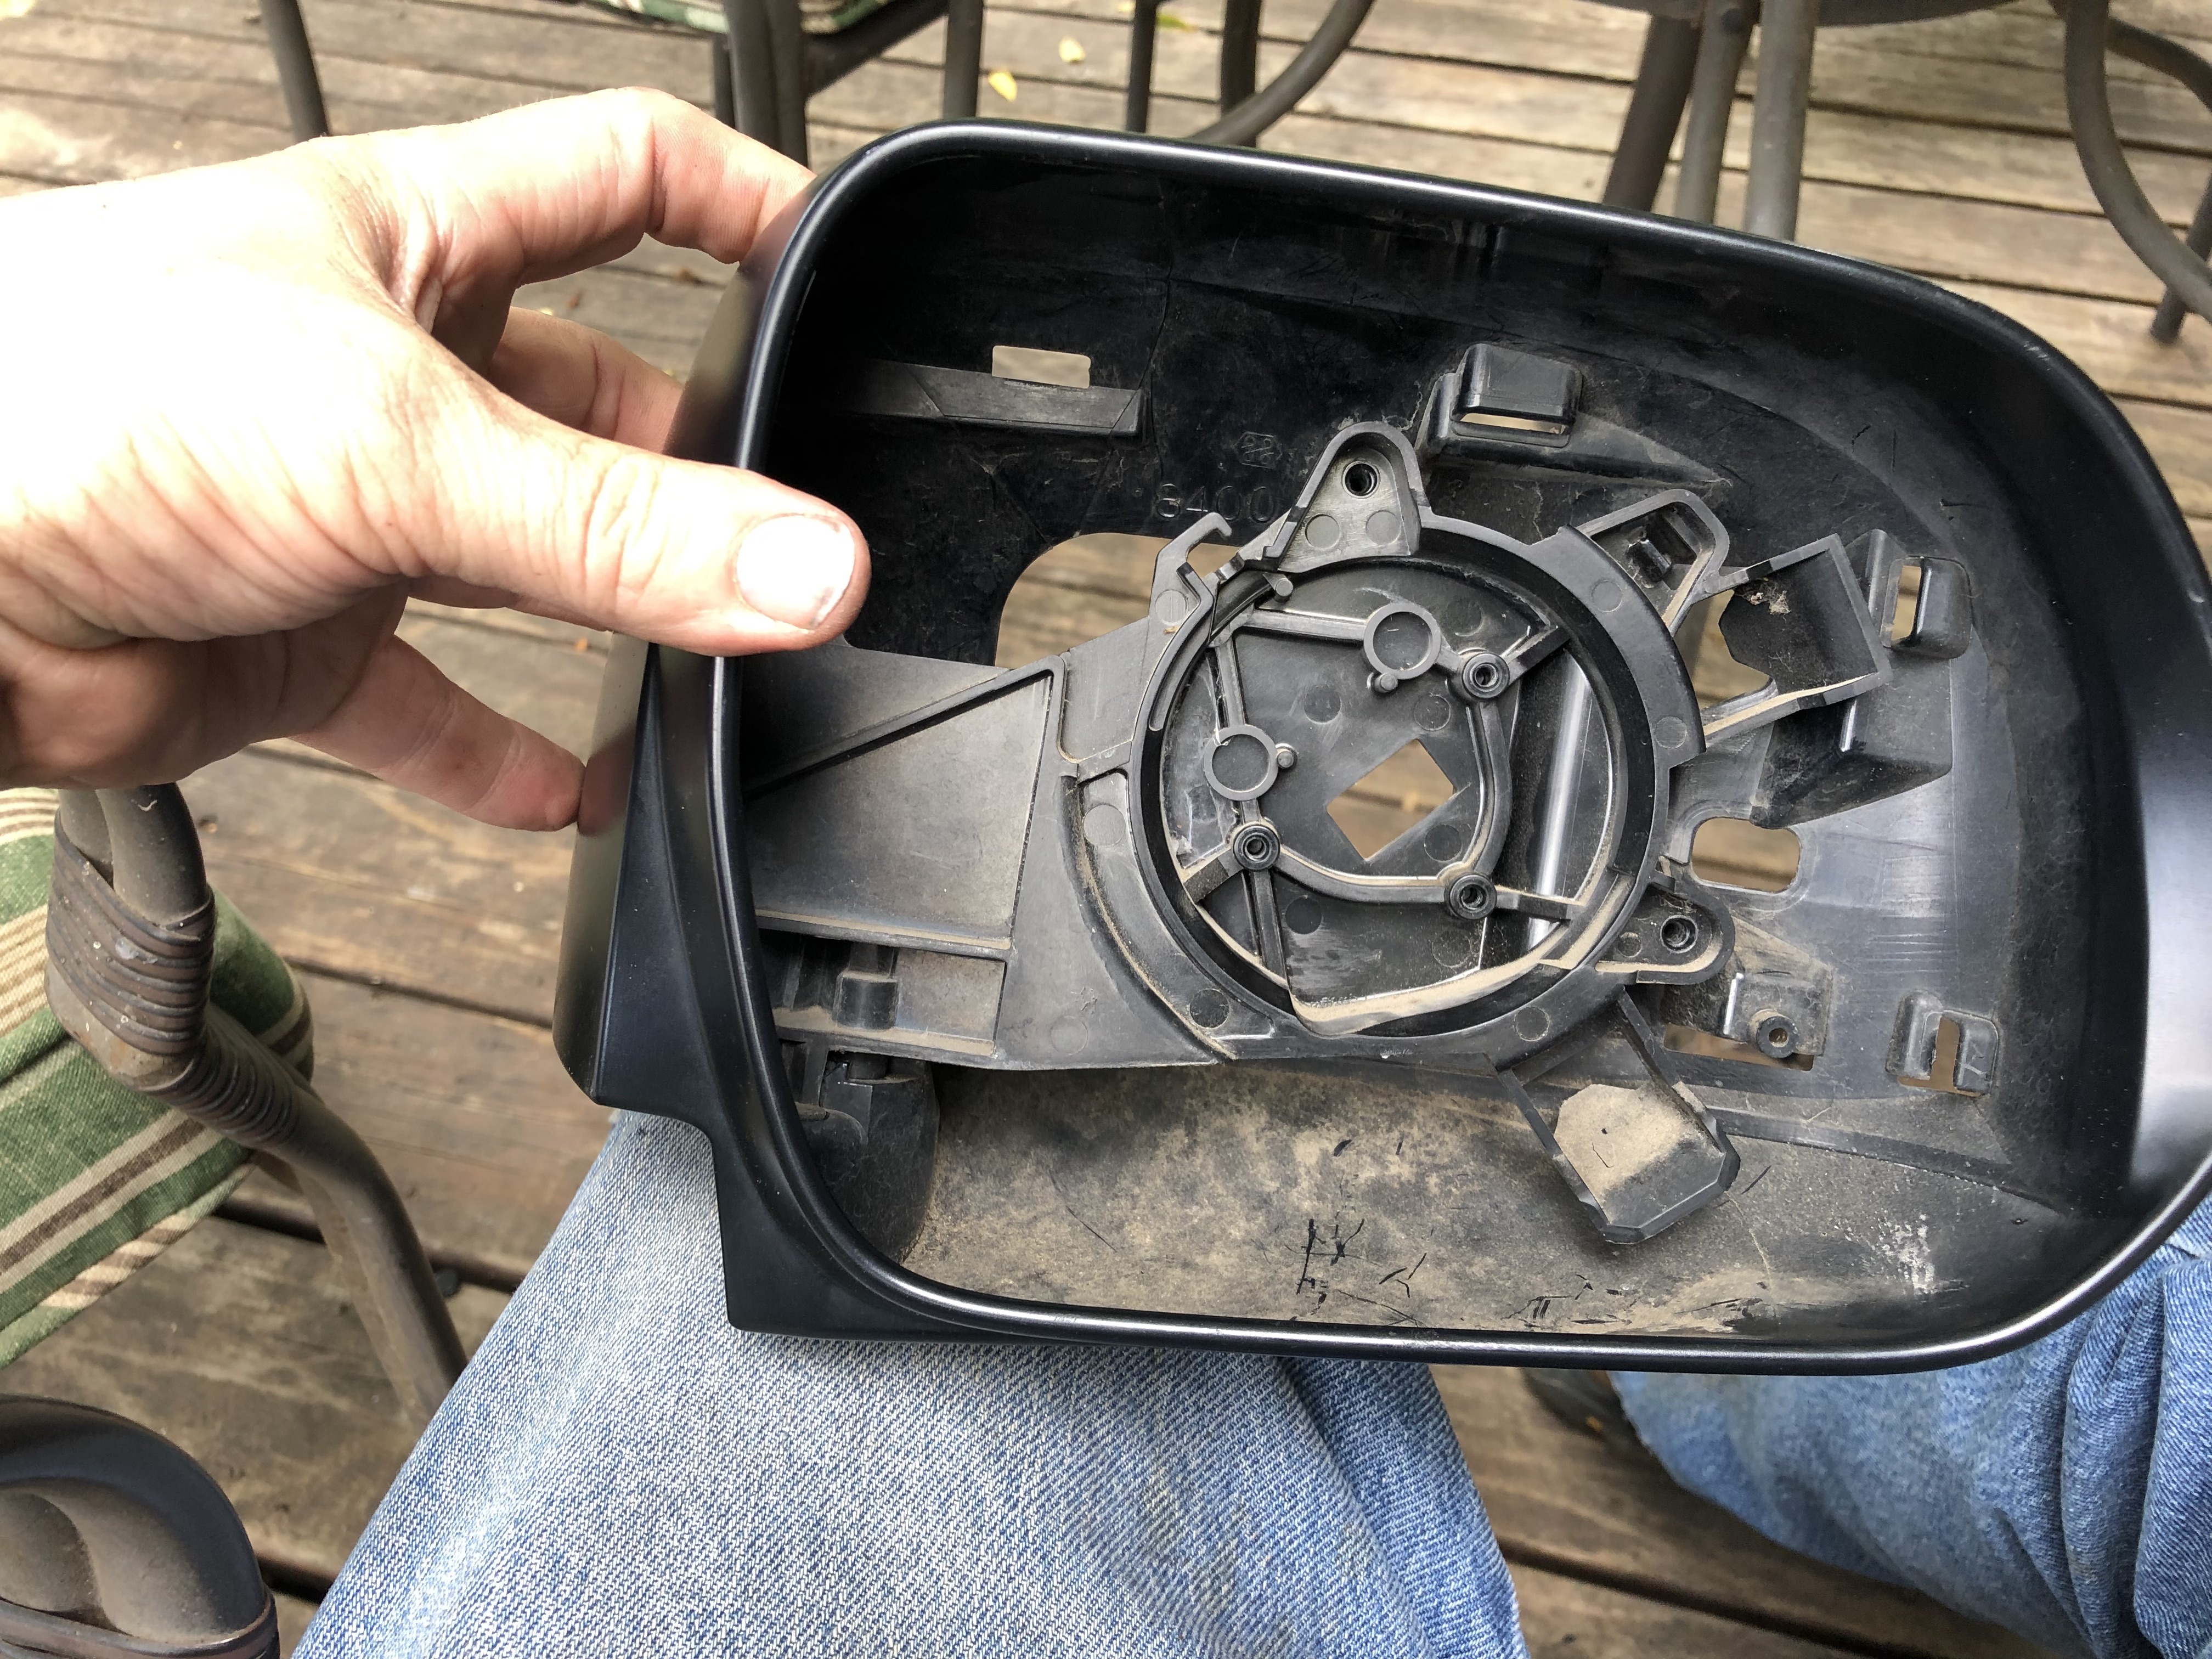
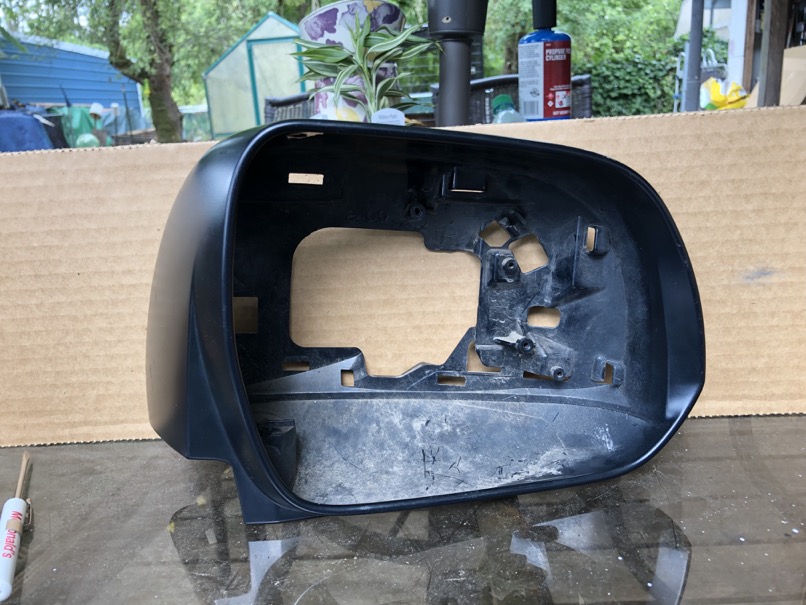
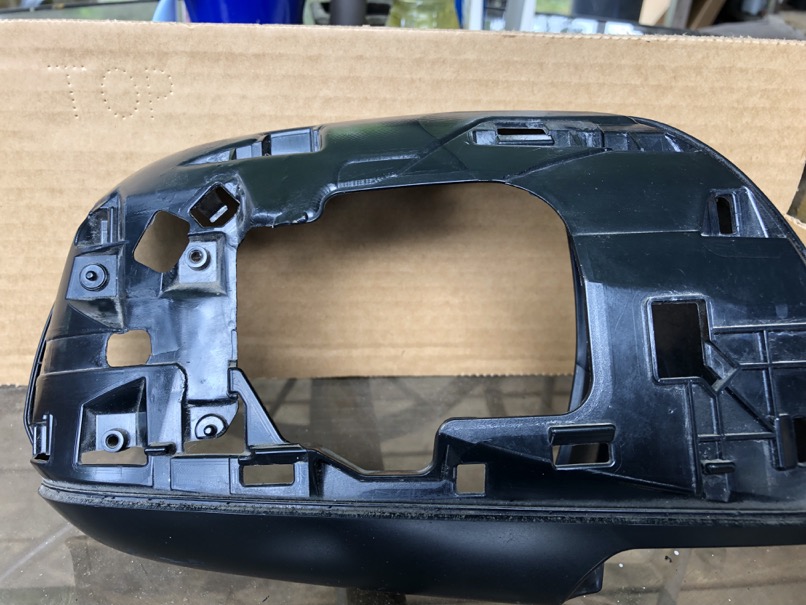
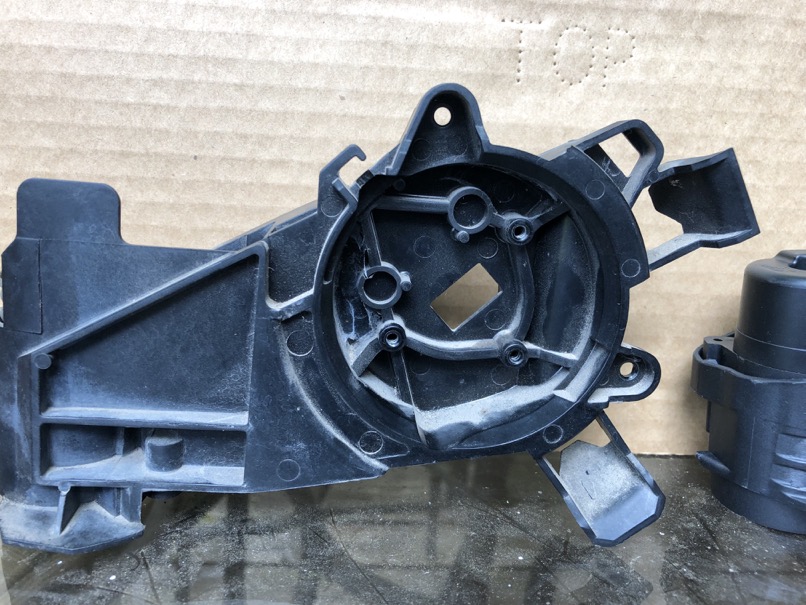
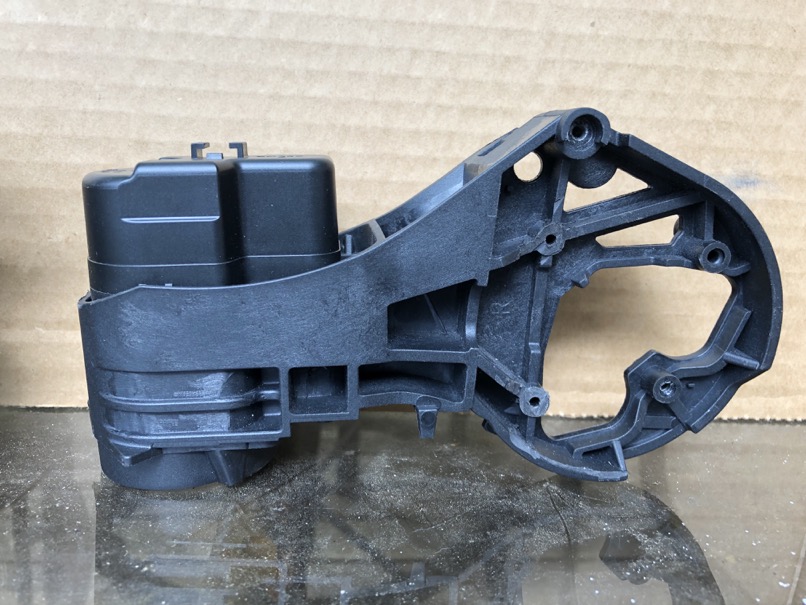
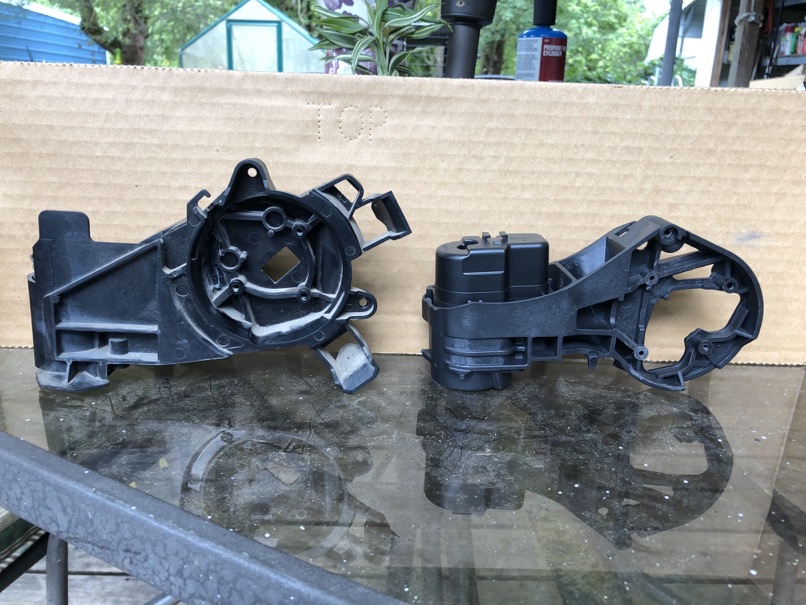
Here's some pics of my 2011 mirrors as I took them apart. Notice how "square" the outer frame is, and the shape the mirror glass has to be to fit the square area

IMG_2450.jpeg
IMG_2452.jpeg

IMG_2453.jpeg
IMG_2454.jpeg

IMG_2455.jpeg

IMG_2456.jpeg

IMG_2459.jpeg

IMG_2460.jpeg

IMG_2464.jpeg

IMG_2465.jpeg

IMG_2466.jpeg

IMG_2467.jpeg


Here is a pic of the 2014+ mirror shape from the back side. It tapers down the farther you get from the window.
IMG_2475_2.jpg


This becomes important as you see the shot of the 2011 connection plate vs the replacement connection plate in the kit.


First the 2011 Connection Plate
IMG_2461.jpeg


Now the Connection Plate in the kit w/ the motor installed
IMG_2462.jpeg


Now the 2 side by side
IMG_2463.jpeg


The 2011 version sort of curves up to get the squarish mirror glass centered, while the 2014+ sort of curves DOWN to center the mirror glass in the tapered housing.
NOT GOOD. The geometry of the 11 vs 14+ mirrors is way different.

I started with trying to mod my original 2011 mirrors, that was a definite fail/no-go. The kit from KTJO4x4 isn't even close to a match for the 2010-2013 mirrors style.
So I looked at Antman's thread and tried to figure out where he sourced the first set from (again), but it was too vague and
I just didn't want to take a chance with an eBay purchase because who knows what you are really getting or what the return policy is, coming from China, Taiwan etc.

I did try an aftermarket set from amazon that were a perfect match to my OEM 2011, but they wouldn't work for the upgrade either and I was able to return them after a carefully re-assembling them.

Then I noticed in Antman's thread all the pictures he posted of the original modded mirrors. Antman owned a 2011 T4R, but the mirrors in the pics are not 2011 mirrors.
If you look close you'll notice they are the 2014+ style mirrors with the taper. Not only did he add teh folding mod, he upgraded to the new style all at the same time without really mentioning it.
Once I realized that, it was easy.

I went to the local dealership and cruised the new vehicle lot until I found a T4R that had the mirrors on it exactly like I wanted (Black, no puddle light, no turn signal) I snapped a pic of the VIN and used it to get the exact same parts.

I bought them brand new from the cheapest online Toyota parts place I could find. (If you have a cheaper OEM source give it up to the rest of us!!)

Genuine OEM Toyota Parts | Conicelli Toyota

Here is what I ordered

Part Number Part Name Price Quantity Total
87910-35B91 Mirror Assembly $158.98 1 $158.98 (Left or Right, IDK?)
87940-35B61 Mirror Assembly $158.98 1 $158.98 (This is whatever the above # isn't)
87945-42160-C4 Mirror Cover $36.18 1 $36.18 - Black
87915-42160-C4 Mirror Cover $36.63 1 $36.63 - Black
Total $390.77

Coupon code 'EBAY10' 10% off - $39.08
Total $ $351.69 + shipping (was just a little over $21)


Then I installed KTJO4x4's folding mirrors kit in the new mirrors and swapped them for my 2011 style. (more on this in the next part)

The 2019 style mount perfectly (the door trim is identical) and now I have the "new look" tapered mirrors.

Buying new mirrors wasn't something I was crazy about, but I figured if I wanted the folding style, I needed to upgrade. I didn't even bother to look at wrecking yards or other online used parts places, I was just impatient after waiting over a month+ to get this done. Once I had all the parts it took less than a day to install and swap everything out.

If you already have 2014+ style mirrors all you need is the kit from KTJO4x4 and you're good to go.

Fixed!:Note: Currently the fold on lock and unfold on unlock feature DOES NOT WORK (yes, it's wired as instructed)
I'm trying to figure out why, but I may scrap this "feature" by just disconnecting the 2 wires to that module that supposedly controls this.

Edit: 8/10/19 - We think this maybe a bad control module. We are in the process of swapping it for a new one. Stay tuned.

Edit #2: 8/14/19 - This is now fixed! I don't believe it was a bad module. Replacing the module didn't solve the issue.
My OCD and retracing the steps to wiring the mirrors solved the issue (I had the motor wires flipped)

FYI - Under useless trivia:
Item 1) The 2014+ mirror assemblies weigh approximately 7-8 ounces LESS the the 2011 mirror assembly.
I lost a whole pound in weight (not me, the truck!) doing this mod, between that and the increased aerodynamics with the tapered vs square mirrors, I suspect the increased MPG's will pay for this mod all by itself. :lol: :jk:

Item 2) I spent $275 for the kit, thinking I could just mod my mirrors and be done. But that didn't work out so I was in another $375'ish on new mirrors. So it only cost me $650 for a plain set. I could have bought a plain set from KTJO for $565 (but no color covers) so by the time I bought and shipped those it was within a few bucks, only I still HAD TO DO ALL THE MOD WORK!

I think if I had to do it over again, I would select option 3 core exchange, with the refund KTJO gives for the old parts, I could've been into this mod for as cheap as $375 and 1/2 the work. (except I don't have a 2014+ and my cores would be dead to me/KTJO = No refund)

Doing my meatball math, KTJO actually makes more $$ with less work when she sells the kit (I should have known) but once I bought it I didn't really feel right about hassling her for the return, re-purchase etc, etc. Especially since it was dragging out and I really wanted this freaking mod done.

Item 3) Toyota shares many part numbers with multiple years and models. I have no doubt that the highlanders and RAV4's all have the same internal mirror parts.
Not the way the mirror is mounted to the door, but if you separate the mirror from the hinge, I bet the mirror head unit is identical.
It wouldn't surprise me to see this mod popup on either of those models....just a different switch and a bit different wiring.

Item 4) The drivers side mirror takes about 1-2 seconds longer to open and 1-2 seconds longer to close than the one on the passenger side. (Weird)
Item 5) They are noisier opening and closing than I expected, but I guess it's normal.
Item 6) FIXED! Two small very minor annoyances I'll ignore, but would be nice for the OCD. First the fold mirror button is an actual button.
It stays down when on and pops out when it's turn off. I wish it was a more of a touch style button that didn't physically change in depth of the button that is showing.
It's at least a 1/4" when out all the way. (which is seldom, so I'll get over it) I suspect this is not really a OEM Toyota switch, but a carefully copied version.
Toyota buttons are usually a little tighter tolerances than this. It still looks completely OEM so I could be wrong. (I think I'm wrong)
Item 6a) FIXED!Second minor annoyance, which is when it's pushed down or on, the mirrors are OUT, when it's popped out or off, the mirrors are folded in.
This seems backwards to me, but it's probably just me.

 
Last edited:
Power-Folding Mirror Install - Part 4 - Success!

Here is the original set up instructions included with the kit.
KTJO 4x4 5th Gen 4Runner Power Folding Mirror Install Guide

Okay, once the 2019 mirrors arrived last week, It was fairly easy, to use the option 1 kit I purchased to modify the mirrors.
It definitely is not a plug and play kit.
As a matter of fact, (I hate to say this) if you have issues with the install, you're pretty much on your own.
The seller of the kit is not great at returning emails or responding to PM/DM's. It's sucks, but I speak from experience.

Edit: 8/10/19 - Seller responded, see below........
Edit #2: 8/10/19 thru 8/14/19 - Seller went above and beyond to resolve every issue

The instructions for disassembling, then modifying the mirrors and connection plates are pretty good, but just didn't quite show the full detail steps needed.
IF you're doing this mod, make sure you look at everything posted in this thread and the other threads I've listed.
Then make your own best choices on what to do. I pretty much made it up as I went along using the instructions as a vague guide.
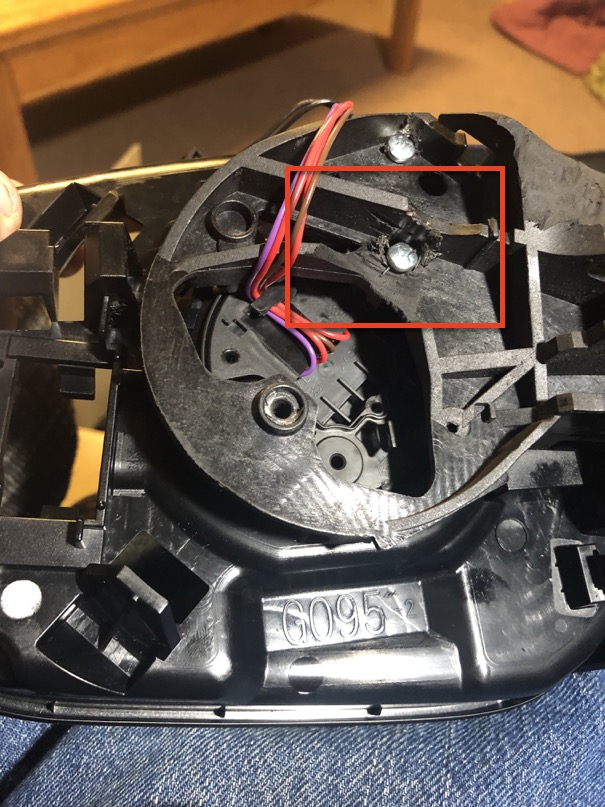
I referred to the pictures in all the threads I listed earlier especially the one showing the "new connection plate mount point" by shaving the new spot to drill a hole and attach the motor.

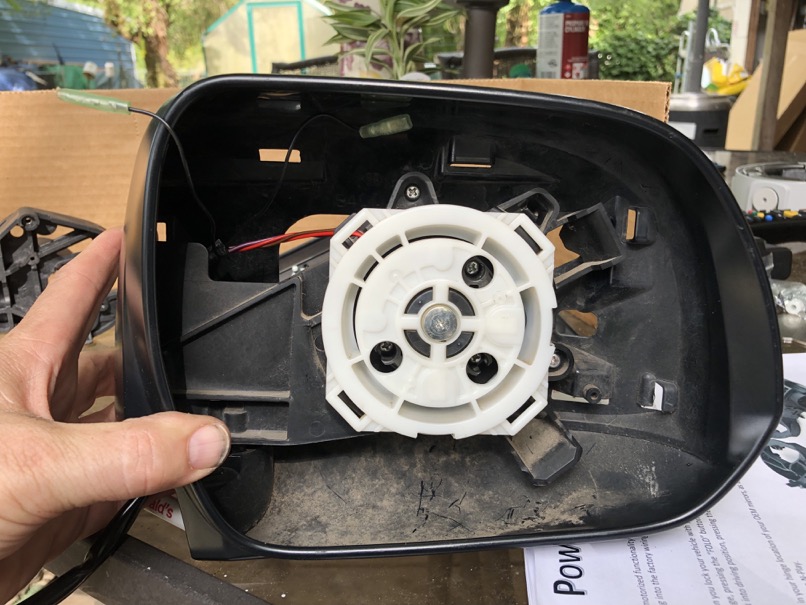
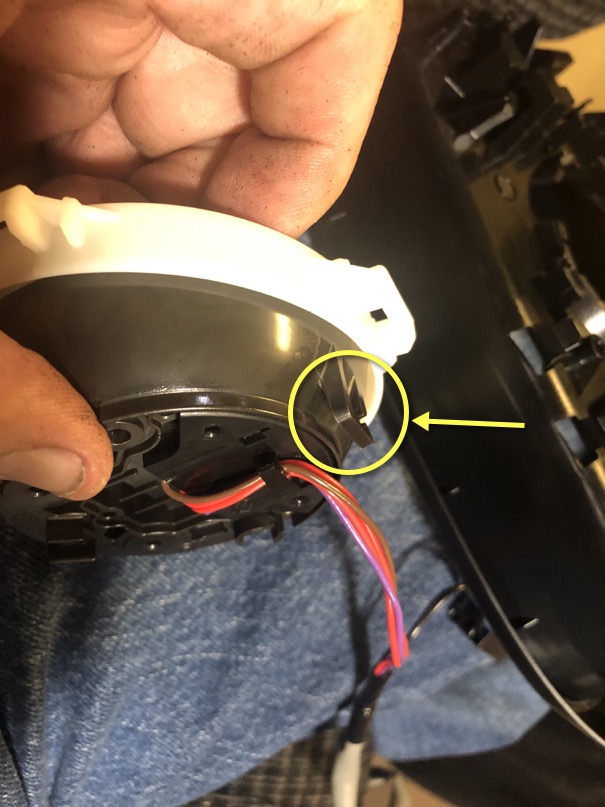
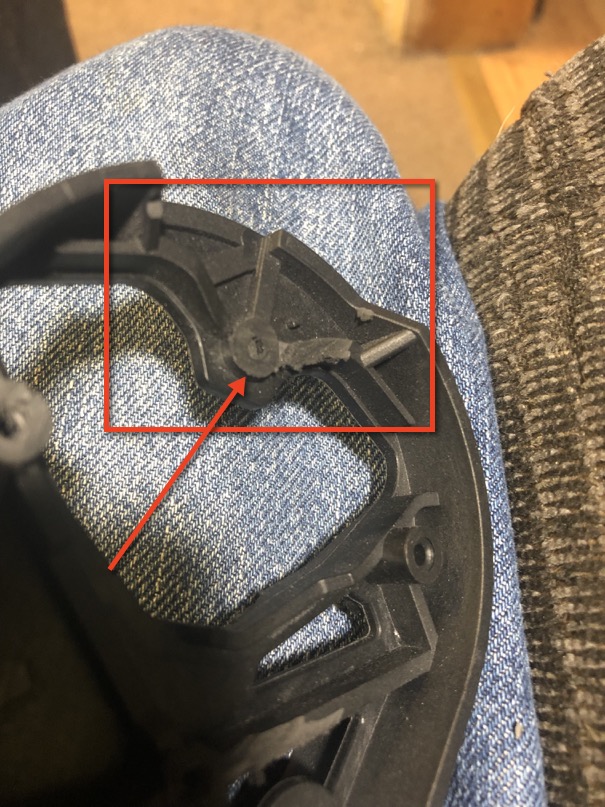
I was less destructive to the OEM mirrors than the instructions showed. I left the one hole for mounting the oem mirror motor.
img_2234_2.jpeg


On the oem mirror motor I also left the little hook for the wires. But I do not actually use it for the wires. There is just no reason to cut it off.
img_9489_2.jpeg


Leaving those 2 things helps orient the parts in the original position.
I also did not shave the 3 nubs off the back of the mirror glass because with everything in the exact original place there was no need to.


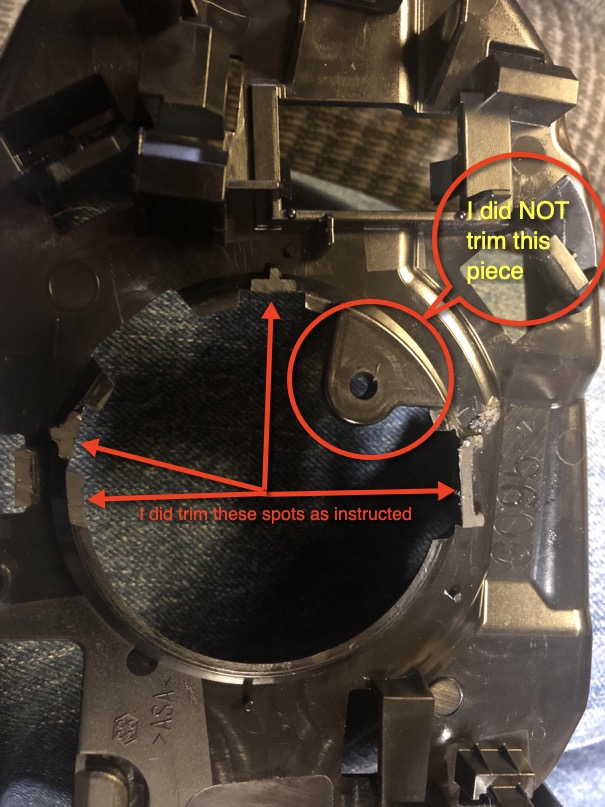
I was also less destructive to the new motorized connection plates by not cutting out the section mentioned for the turn signals (I don't have them in my mirrors.)
I did have to shave off a few nubs on the connection plates to get a better fit.
img_0263_2.jpeg

img_3966 2.jpeg

img_2624_2.jpeg

img_4057 2.jpeg

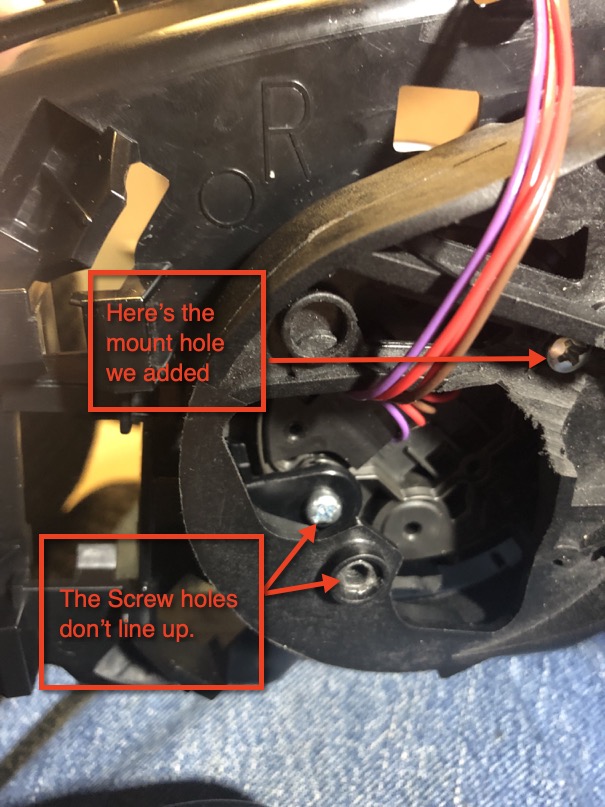
Leaving the original actuator motor tab and drilling the one extra mount point allowed me to use 2 of the original 3 actuator motor mount screws and keep the motor in the exact original location.
No chance of it being off center or out of wack now.

If I had followed the included instructions, it seems like I was only using 1 mount point and it was going to be off center so I did what I felt best for my mirrors, my mod.

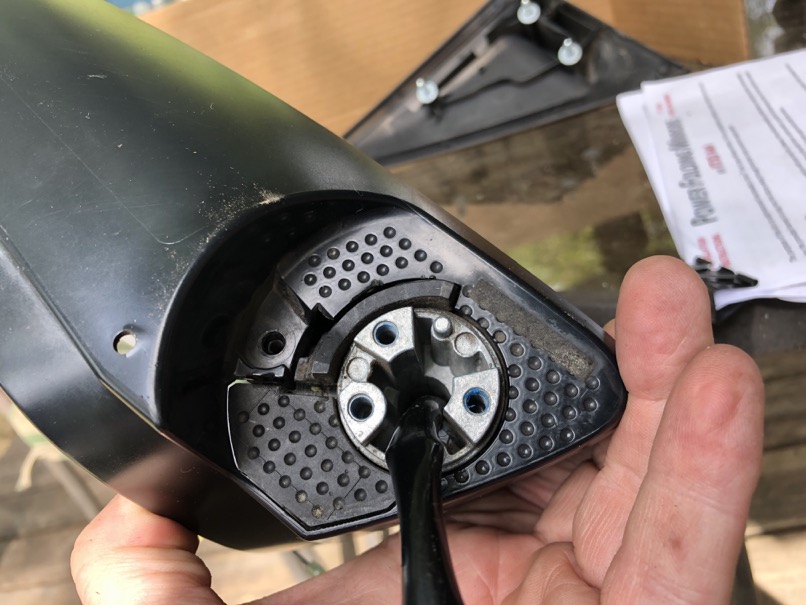
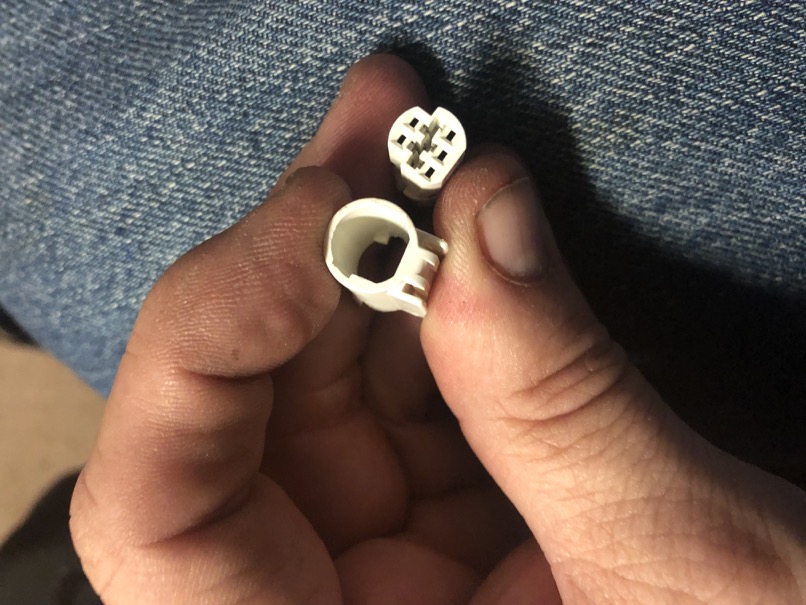
I also took a few pics of my electrical connector since it's different than the ones in the instructions.
It has a couple of little tabs that you have to release to slide it apart so you can thread it through the various holes in the mirror, etc.
img_4836 2.jpeg

img_2254_2.jpeg

img_5021 2.jpeg

img_9379_2.jpeg


Here's the added wires to control the folding motors
img_0160_2.jpeg


I did not use the included aluminum adjustor plate but I considered it.
I just didn't want to keep cutting up the new connection plates to make clearance for those also.
I think if they were included in the kit they could have been sized correctly so you didn't have to cut up more stuff.
I do see how some members might want to use them, just not with my changes to the way i kept the motor aligned. It just felt better to me to do it my way.
To each his or her own on that choice.

The first mirror took me about 2.5 hours, the second one was barely 30 minutes.

The bottom line is go slow, make some choices as you go along that might not be on the instructions and you should be able get a perfect fit for the new parts.
 
Last edited:
Just a teaser, more to post as soon as I get a bit more time to write up my experience.

<iframe width="560" height="315" src="https://www.youtube.com/embed/ZtoMK_uu9yY" frameborder="0" allow="accelerometer; autoplay; encrypted-media; gyroscope; picture-in-picture" allowfullscreen></iframe>

Can't wait to see this one!!!
 
I finally got around to installing some quality LED headlights.
Morimoto 2 Stroke. Much better color match now with the LED fogs.

And yes, I re-aimed them after this pic.

Hey Neal, are you still happy with the Morimoto 2 stroke LEDs? I've convinced myself that I don't want to go through another winter with the lousy halogen low beams on my 4Runner. Although they seam kind of spendy, I like that you don't have to mess with the dust caps and I just want to get something that works well with the existing projector housing. Any feedback would be appreciated!
 
Hey Neal, are you still happy with the Morimoto 2 stroke LEDs? I've convinced myself that I don't want to go through another winter with the lousy halogen low beams on my 4Runner. Although they seam kind of spendy, I like that you don't have to mess with the dust caps and I just want to get something that works well with the existing projector housing. Any feedback would be appreciated!

I am happy with them so far, but I honestly can't say too much. It's not my daily driver anymore (I have a work car), I'm able to pretty much choose my own work hours, and more daylight this time of year, I haven't driven it at night more than 1 or 2 times. I'm still a little leery from my last experience with the cheapo LED's so I'm still packing around the stock bulbs in case I have an issue some night.

It's funny once my T4R was no longer my DD, All I've been doing is making mods. Did you see the folding mirrors I added? Look up about 4 posts for my write up.
 
I am happy with them so far, but I honestly can't say too much. It's not my daily driver anymore (I have a work car), I'm able to pretty much choose my own work hours, and more daylight this time of year, I haven't driven it at night more than 1 or 2 times. I'm still a little leery from my last experience with the cheapo LED's so I'm still packing around the stock bulbs in case I have an issue some night.

It's funny once my T4R was no longer my DD, All I've been doing is making mods. Did you see the folding mirrors I added? Look up about 4 posts for my write up.

I did see that, very cool! Thanks for posting that write up. I've got to stay off this forum, it's dangerous!

The Trail4Runner website did an install/review of those same bulbs, and they sound pretty good. I did "cheaper" LEDs in my WRX (both high and low) and have been happy enough with them, although I also carry around the halogens "just in case".
 
Power-Folding Mirror Install - Misc Pics

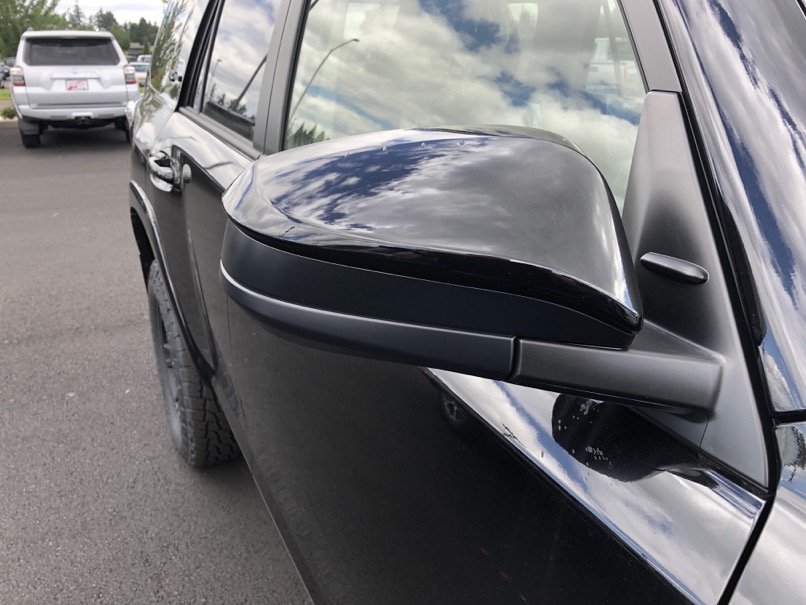
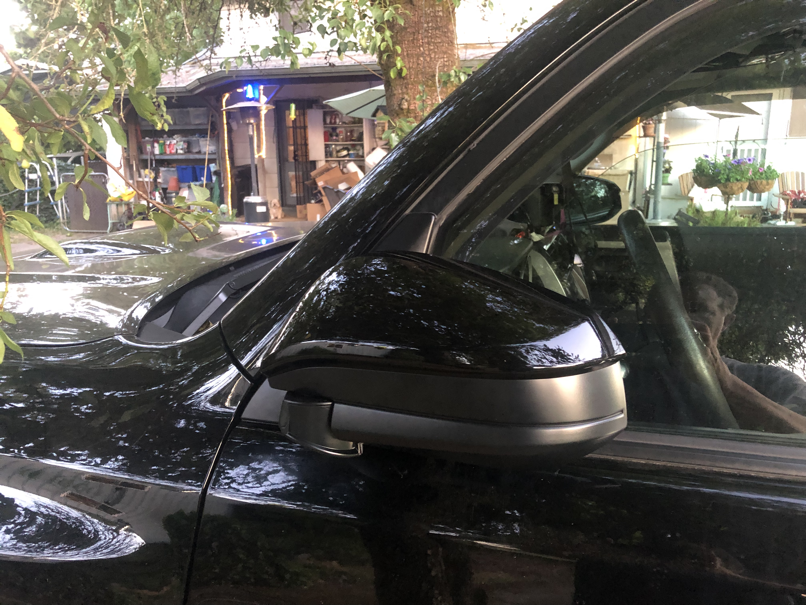
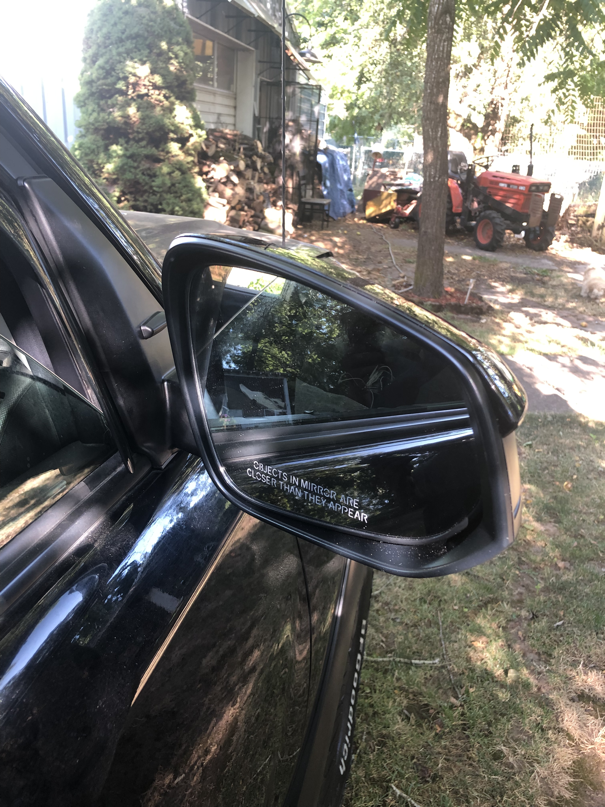
Here's a few after install pics. Color match is just fine.
I noticed a Rav4 today that has the same mirrors only with a flat black covers.
I might pick up a set of those just for options.

img_2527.png

img_2529.png

img_2974.png
 
Last edited:
Nice work on the mirrors, your skills are well above my pay grade with that project!

Follow up on the lights - I got a surprise $92 check in the mail from that ARCO class action lawsuit thing, and I'm going to go ahead get those Morimoto 2 stroke lights since I have some found $. The Trail4Runner write up talks about a H11 male adapter harness that is needed, but it isn't clear if the set came with that or not. Were the bulbs just plug and play for you or did you need to order that harness as well?
 
Nice work on the mirrors, your skills are well above my pay grade with that project!

Follow up on the lights - I got a surprise $92 check in the mail from that ARCO class action lawsuit thing, and I'm going to go ahead get those Morimoto 2 stroke lights since I have some found $. The Trail4Runner write up talks about a H11 male adapter harness that is needed, but it isn't clear if the set came with that or not. Were the bulbs just plug and play for you or did you need to order that harness as well?

I ordered it because it didn't seem like I could remove it from the order. Once they arrived, there was no separate adapter, so I think it's just their way of telling you it will fit with that connector. More like a feature rather than an option.

I did order one set of the $20 anti-flicker adapters, but I didn't install them. I have yet to see the lights flicker, but as I mentioned I haven't really driven it enough at night to determine a need or not.
 
Last edited:
This is just a list of all the things that just didn't go right for me with this mod.
I will update this as I go along and remember stuff.

And don't be discouraged by what I have posted here, I would totally do it again, I'm just posting so others can avoid the mistakes I made and save some money.

Not counting the wait for parts, the trouble started when I had a 2011 model and the kit is designed for 2014+ style mirrors.
But since this whole mirror mod is brand new no one really understand what that meant. KTJO4x4 wasn't sure, no one really was.
But, a 5th Gen is a 5th Gen so I thought we could figure it out and did not realize the mirrors are actually totally different.

Here's some pics of my 2011 mirrors as I took them apart. Notice how "square" the outer frame is, and the shape the mirror glass has to be to fit the square area

IMG_2450.jpeg
IMG_2452.jpeg

IMG_2453.jpeg
IMG_2454.jpeg

IMG_2455.jpeg

IMG_2456.jpeg

IMG_2459.jpeg

IMG_2460.jpeg

IMG_2464.jpeg

IMG_2465.jpeg

IMG_2466.jpeg

IMG_2467.jpeg


Here is a pic of the 2014+ mirror shape from the back side. It tapers down the farther you get from the window.
IMG_2475_2.jpg


This becomes important as you see the shot of the 2011 connection plate vs the replacement connection plate in the kit.


First the 2011 Connection Plate
IMG_2461.jpeg


Now the Connection Plate in the kit w/ the motor installed
IMG_2462.jpeg


Now the 2 side by side
IMG_2463.jpeg


The 2011 version sort of curves up to get the squarish mirror glass centered, while the 2014+ sort of curves DOWN to center the mirror glass in the tapered housing.
NOT GOOD. The geometry of the 11 vs 14+ mirrors is way different.

I started with trying to mod my original 2011 mirrors, that was a definite fail/no-go. The kit from KTJO4x4 isn't even close to a match for the 2010-2013 mirrors style.
So I looked at Antman's thread and tried to figure out where he sourced the first set from (again), but it was too vague and
I just didn't want to take a chance with an eBay purchase because who knows what you are really getting or what the return policy is, coming from China, Taiwan etc.

I did try an aftermarket set from amazon that were a perfect match to my OEM 2011, but they wouldn't work for the upgrade either and I was able to return them after a carefully re-assembling them.

Then I noticed in Antman's thread all the pictures he posted of the original modded mirrors. Antman owned a 2011 T4R, but the mirrors in the pics are not 2011 mirrors.
If you look close you'll notice they are the 2014+ style mirrors with the taper. Not only did he add teh folding mod, he upgraded to the new style all at the same time without really mentioning it.
Once I realized that, it was easy.

I went to the local dealership and cruised the new vehicle lot until I found a T4R that had the mirrors on it exactly like I wanted (Black, no puddle light, no turn signal) I snapped a pic of the VIN and used it to get the exact same parts.

I bought them brand new from the cheapest online Toyota parts place I could find. (If you have a cheaper OEM source give it up to the rest of us!!)

Genuine OEM Toyota Parts | Conicelli Toyota

Here is what I ordered

Part Number Part Name Price Quantity Total
87910-35B91 Mirror Assembly $158.98 1 $158.98 (Left or Right, IDK?)
87940-35B61 Mirror Assembly $158.98 1 $158.98 (This is whatever the above # isn't)
87945-42160-C4 Mirror Cover $36.18 1 $36.18 - Black
87915-42160-C4 Mirror Cover $36.63 1 $36.63 - Black
Total $390.77

Coupon code 'EBAY10' 10% off - $39.08
Total $ $351.69 + shipping (was just a little over $21)


Then I installed KTJO4x4's folding mirrors kit in the new mirrors and swapped them for my 2011 style. (more on this in the next part)

The 2019 style mount perfectly (the door trim is identical) and now I have the "new look" tapered mirrors.

Buying new mirrors wasn't something I was crazy about, but I figured if I wanted the folding style, I needed to upgrade. I didn't even bother to look at wrecking yards or other online used parts places, I was just impatient after waiting over a month+ to get this done. Once I had all the parts it took less than a day to install and swap everything out.

If you already have 2014+ style mirrors all you need is the kit from KTJO4x4 and you're good to go.

Note: Currently the fold on lock and unfold on unlock feature DOES NOT WORK (yes, it's wired as instructed)
I'm trying to figure out why, but I may scrap this "feature" by just disconnecting the 2 wires to that module that supposedly control this.


FYI - Under useless trivia:
Item 1) The 2014+ mirror assemblies weigh approximately 7-8 ounces LESS the the 2011 mirror assembly.
I lost a whole pound in weight (not me, the truck!) doing this mod, between that and the increased aerodynamics with the tapered vs square mirrors, I suspect the increased MPG's will pay for this mod all by itself. :lol: :jk:

Item 2) I spent $275 for the kit, thinking I could just mod my mirrors and be done. But that didn't work out so I was in another $375'ish on new mirrors. So it only cost me $650 for a plain set. I could have bought a plain set from KTJO for $565 (but no color covers) so by the time I bought and shipped those it was within a few bucks, only I still HAD TO DO ALL THE MOD WORK!

I think if I had to do it over again, I would select option 3 core exchange, with the refund KTJO gives for the old parts, I could've been into this mod for as cheap as $375 and 1/2 the work. (except I don't have a 2014+ and my cores would be dead to me/KTJO = No refund)

Doing my meatball math, KTJO actually makes more $$ with less work when she sells the kit (I should have known) but once I bought it I didn't really feel right about hassling her for the return, re-purchase etc, etc. Especially since it was dragging out and I really wanted this freaking mod done.

Item 3) Toyota shares many part numbers with multiple years and models. I have no doubt that the highlanders and RAV4's all have the same internal mirror parts.
Not the way the mirror is mounted to the door, but if you separate the mirror from the hinge, I bet the mirror head unit is identical.
It wouldn't surprise me to see this mod popup on either of those models....just a different switch and a bit different wiring.

Item 4) The drivers side mirror takes about 1-2 seconds longer to open and 1-2 seconds longer to close than the one on the passenger side. (Weird)
Item 5) They are noisier opening and closing than I expected, but I guess it's normal.
Item 6) Two small very minor annoyances I'll ignore, but would be nice for the OCD. First the fold mirror button is an actual button.
It stays down when on and pops out when it's turn off. I wish it was a more of a touch style button that didn't physically change in depth of the button that is showing.
It's at least a 1/4" when out all the way. (which is seldom, so I'll get over it) I suspect this is not really a OEM Toyota switch, but a carefully copied version.
Toyota buttons are usually a little tighter tolerances than this. It still looks completely OEM so I could be wrong.
This leads to the second thing, which is when it's pushed down or on, the mirrors are OUT, when it's popped out or off, the mirrors are folded in.
This seems backwards to me, but it's probably just me.
If it’s backwards then you just have to flip your fold and Unfold wires. That’s all. The green/red and the black wires. Just flop those wires with the blue and grey and then press the button again and you will see that the button now folds and unfolds the other way. :)
 
Here is the original set up instructions included with the kit.
KTJO 4x4 5th Gen 4Runner Power Folding Mirror Install Guide

Okay, once the 2019 mirrors arrived last week, It was fairly easy, to use the option 1 kit I purchased to modify the mirrors.
It definitely is not a plug and play kit.
As a matter of fact, (I hate to say this) if you have issues with the install, you're pretty much on your own.
The seller of the kit is not great at returning emails or responding to PM/DM's. It's sucks, but I speak from experience.

The instructions for disassembling, then modifying the mirrors and connection plates are pretty good, but just didn't quite show the full steps needed.
IF you're doing this mod, make sure you look at everything posted in this thread and the other threads I've listed.
Then make your own best choices on what to do. I pretty much made it up as I went along using the instructions as a vague guide.
I referred to the pictures in all the threads I listed earlier especially the one showing the "new connection plate mount point" by shaving the new spot to drill a hole and attach the motor.

I was less destructive to the OEM mirrors than the instructions showed. I left the one hole for mounting the oem mirror motor.
img_2234_2.jpeg


On the oem mirror motor I also left the little hook for the wires.
img_9489_2.jpeg


Leaving those 2 things helps orient the parts in the original position.
I also did not shave the 3 nubs off the back of the mirror glass because with everything in the exact original place there was no need to.


I was also less destructive to the new motorized connection plates by not cutting out the section mentioned for the turn signals (I don't have them in my mirrors.)
I did have to shave off a few nubs on the connection plates to get a better fit.
img_0263_2.jpeg

img_3966 2.jpeg

img_2624_2.jpeg

img_4057 2.jpeg

Leaving the original actuator motor tab and drilling the one extra mount point allowed me to use 2 of the original 3 actuator motor mount screws and keep the motor in the exact original location.
No chance of it being off center or out of wack now.

If I had followed the included instructions, it seems like I was only using 1 mount point and it was going to be off center so I did what I felt best for my mirrors, my mod.

I also took a few pics of my electrical connector since it's different than the ones in the instructions.
It has a couple of little tabs that you have to release to slide it apart so you can thread it through the various holes in the mirror, etc.
img_4836 2.jpeg

img_2254_2.jpeg

img_5021 2.jpeg

img_9379_2.jpeg


Here's the added wires to control the folding motors
img_0160_2.jpeg


I did not use the included aluminum adjustor plate but I considered it.
I just didn't want to keep cutting up the new connection plates to make clearance for those also.
I think if they were included in the kit they could have been sized correctly so you didn't have to cut up more stuff.
I do see how some members might want to use them, just not with my changes to the way i kept the motor aligned. It just felt better to me to do it my way.
To each his or her own on that choice.

The first mirror took me about 2.5 hours, the second one was barely 30 minutes.

The bottom line is go slow, make some choices as you go along that might not be on the instructions and you should be able get a perfect fit for the new parts.
Well it doesn’t really help that both my grandmother and my mother have been in the hospital for the past month with both having heart-attacks. So...when you have family emergencies, the forum life, mods, sells, and everything else kind of takes a back seat to my family. See everyone my Tacoma forums were wishing prayers and hoping that my family was doing ok. I’d hope that you would do the same thing. When my mom gets told that she isn’t going to live past two weeks if she doesn’t have this triple bypass, it’s pretty damn scary and when my grandmother goes in shortly after her and gets told that she has two blockages and one is on the top and one is in the bottom and they both are life threatening, that’s also scary. So I’m sorry that I didn’t answer you. The forum life was the last of my concern for the past month or so. However, I’m glad you worked it all out.

PS. Since both of them have had surgery and are out and SLOWLY RECOVERING. We are extremely thankful that god was with us and we continue to thank him every day that he continues to give them both strength.

As for you mirrors and other mirrors, I have requested all Toyota Connection Plates from my Vendor that I should receive on my next order. Also, I had made some lists on 4Runners.com regarding a 2003 4Runner that looked similar to your 2011 awhile ago that you could have probably seen awhile ago and maybe would have saved you some time that you could have tried and possibly waited for or PMd me and waited for a response from me when I had time. It looks really similar. I have to Connection Plates actually that I think will probably work for it. Again, I had those pictures posted awhile ago. Definitely before I took a leave from the forum.

As for the Switch, there are different styles of folding switches that I offer if you wanted a different one. I also have just the Push Button Switch. Like the two you have right next to your Folding Switch currently. Well and then the Tacoma one is just a different one but I guess I have that one too. But yes it is a Toyota Switch. It is installed in the Toyota Tundra as well.
 
Well it doesn’t really help that both my grandmother and my mother have been in the hospital for the past month with both having heart-attacks. So...when you have family emergencies, the forum life, mods, sells, and everything else kind of takes a back seat to my family. See everyone my Tacoma forums were wishing prayers and hoping that my family was doing ok. I’d hope that you would do the same thing. When my mom gets told that she isn’t going to live past two weeks if she doesn’t have this triple bypass, it’s pretty damn scary and when my grandmother goes in shortly after her and gets told that she has two blockages and one is on the top and one is in the bottom and they both are life threatening, that’s also scary. So I’m sorry that I didn’t answer you. The forum life was the last of my concern for the past month or so. However, I’m glad you worked it all out.

PS. Since both of them have had surgery and are out and SLOWLY RECOVERING. We are extremely thankful that god was with us and we continue to thank him every day that he continues to give them both strength.

[MENTION=308409]KTJO4x4[/MENTION] My thoughts and prayers are with you. I wish nothing but the best for you and your family

As for you mirrors and other mirrors, I have requested all Toyota Connection Plates from my Vendor that I should receive on my next order. Also, I had made some lists on 4Runners.com regarding a 2003 4Runner that looked similar to your 2011 awhile ago that you could have probably seen awhile ago and maybe would have saved you some time that you could have tried and possibly waited for or PMd me and waited for a response from me when I had time. It looks really similar. I have to Connection Plates actually that I think will probably work for it. Again, I had those pictures posted awhile ago. Definitely before I took a leave from the forum.

I would love to send you my original 2011 mirrors to see if you can upgrade them with alternate connection plates.

As for the Switch, there are different styles of folding switches that I offer if you wanted a different one. I also have just the Push Button Switch. Like the two you have right next to your Folding Switch currently. Well and then the Tacoma one is just a different one but I guess I have that one too. But yes it is a Toyota Switch. It is installed in the Toyota Tundra as well.

The switch I have is fine. It's exactly the style I want. I was only trying to point out some of the small things about it that I thought others might like to know. There is no issue with the function, I just thought it was a little diff/weird thats all.
 
Last edited:
If it’s backwards then you just have to flip your fold and Unfold wires. That’s all. The green/red and the black wires. Just flop those wires with the blue and grey and then press the button again and you will see that the button now folds and unfolds the other way. :)

I tried to follow the pictures the best I could. This part was a little hard to see in the instructions. Are these the blue & gray wires you are referring to?
These are attached directly to the motor. I had to snap these into that little black connector after I threaded them through with the OEM wires.

I will swap them when I get a chance.
 

Attachments

  • img_0160_3.jpeg
    img_0160_3.jpeg
    41.7 KB · Views: 488
Last edited:
I tried to follow the pictures the best I could. This part was a little hard to see in the instructions. Are these the blue & gray wires you are referring to?
These are attached directly to the motor. I had to snap these into that little black connector after I threaded them through with the OEM wires.

I will swap them when I get a chance.

Yes. Those are them :) I made it so that the colored wires go together: Blue matches up with Red/Green and then Grey matches up with Black. If that doesn’t work for you please let me know.
 
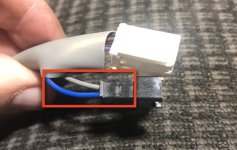
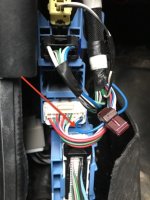
Neal, how did you connect the white wire to the blue (locking) in step 8? Did you just cut the blue a couple of inches back from the connector and splice all three wires together?
 
Neal, how did you connect the white wire to the blue (locking) in step 8? Did you just cut the blue a couple of inches back from the connector and splice all three wires together?


I attached a pic, but this is not my permanent plan. This was only for initial testing. It works great, but not always the best tap.

So this feature of fold/unfold on lock/unlock does work for me. But it's not the taps fault. I have a good connection and can trace 12v all the way to the module. It just doesn't work for some reason (still working on it)
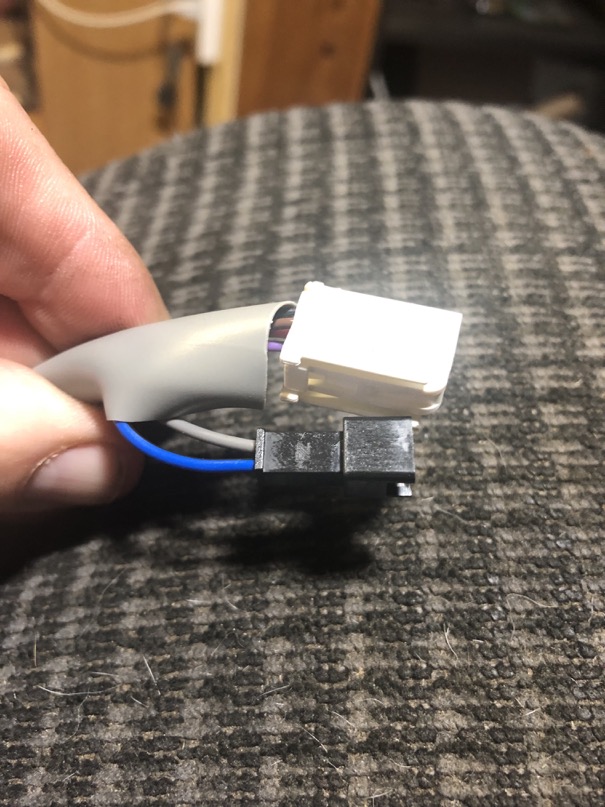
If I can get the feature work, I will carefully strip back the blue wire insulation and solder the white wire directly to it for a permanent tap.
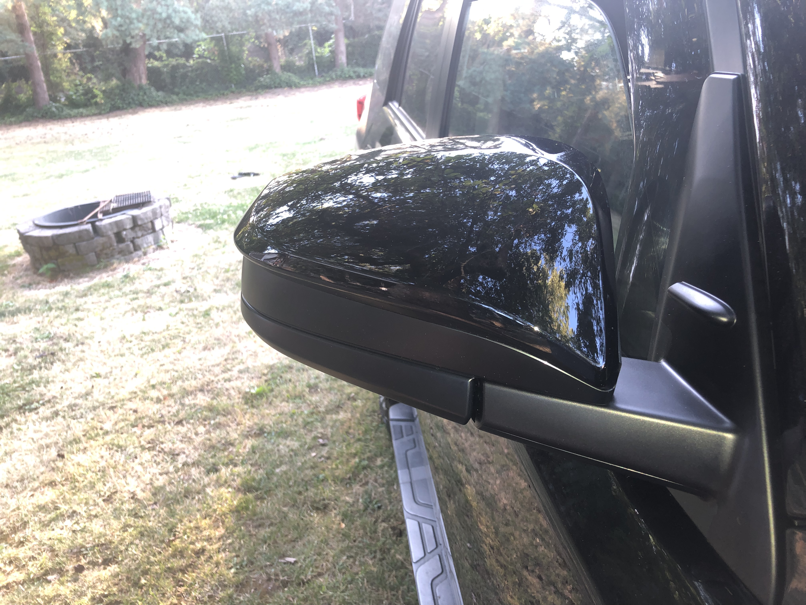
If I can't get the feature to work, I will just pull it off all together and put some blue tape back over the spot the insulation was cut.

The plug and play adapter would have been the best choice, but it was not available for us. :Cry:
 

Attachments

  • IMG_0057.jpg
    IMG_0057.jpg
    56.4 KB · Views: 424

Members online

No members online now.

Forum statistics

Threads
278,306
Messages
3,554,045
Members
248,016
Latest member
Advally Service

Trending content

Back
Top