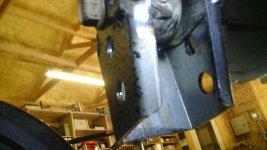
Panhard bar question

Eager to see these installed, and to see if there is any rubbing issues for people with stock bump stops on full stuff. Let us know what you find!

Ill be getting some sliders in the next month or so, so I might just wait till then to find a welder.
 
I [emoji173]@eimkeith. There, I said it.
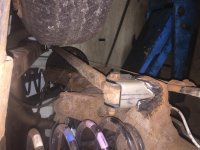
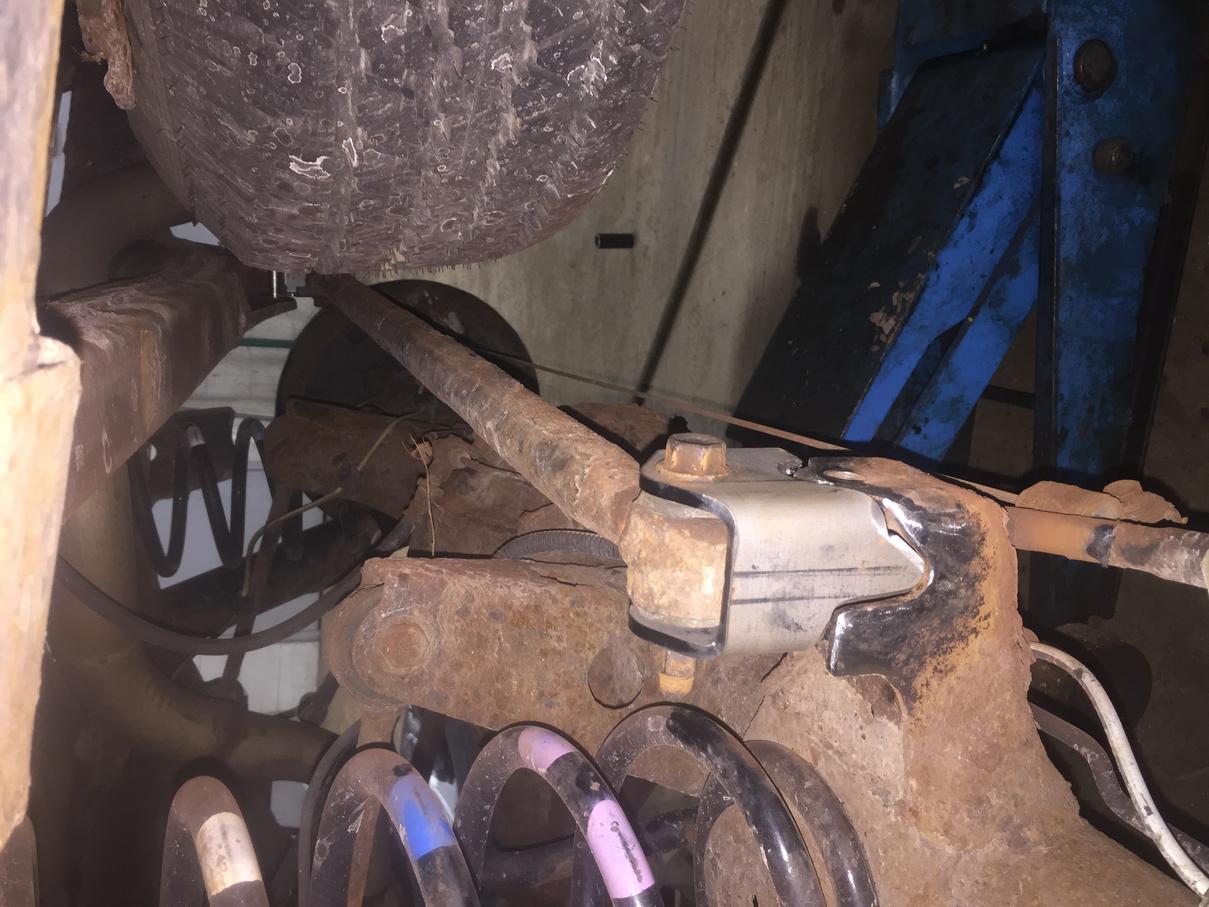
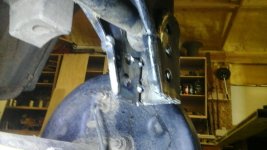
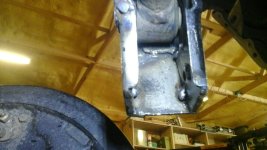
I can't believe how well these brackets were thought out, designed, and manufactured! And to have them offered to all of us for so inexpensive- I can't thank Keith enough! Can't wait to get em burned in [emoji1360]
88cde86a97e2fb5014a472ac2f1939cf.jpg
903c2542175301a3c89d40eef37bd3b7.jpg
9cb54bc469e86a10babc23ffe4f9b95a.jpg
d6c5f9ef3331da81cbbff7752845c958.jpg

Been running no panhard for a couple months now, so roll center has been horrible [emoji23]*♂️
 
I [emoji173]@eimkeith. There, I said it.
I can't believe how well these brackets were thought out, designed, and manufactured! And to have them offered to all of us for so inexpensive- I can't thank Keith enough! Can't wait to get em burned in [emoji1360]
88cde86a97e2fb5014a472ac2f1939cf.jpg
903c2542175301a3c89d40eef37bd3b7.jpg
9cb54bc469e86a10babc23ffe4f9b95a.jpg
d6c5f9ef3331da81cbbff7752845c958.jpg

Been running no panhard for a couple months now, so roll center has been horrible [emoji23]*♂️


First of all..
Damn! Those look killer! I wish mine looked half as good as those.
Secondly...
No panhard bar? I hope your joking [emoji51]


Sent from my iPhone using Tapatalk
 
First of all..
Damn! Those look killer! I wish mine looked half as good as those.
Secondly...
No panhard bar? I hope your joking [emoji51]

They really do.
No; not joking. The upper links are triangulated enough to keep the rear end in place just fine. Like I said, it lowers the roll center down a few inches, but I go pretty hard when it comes to throwin my rig around corners, and it's never sketchy. I left it off when I put in the taller Superflex coils. The suspension would be in such a constant bind with the stock PH and mounts, I felt it was better off. I "shook" the back end side-to-side REAL hard, and watching the flare vs wheel, there was NO movement.
That's one reason I think it's funny guys want a bolt for "backup", and say there's a lot of stress on the mounts that are welded on. You know, the stock brackets are "just" welded on, right? Show me cracked or broken PH bar mounts on a "regular" rig- 3rd gen at a tough truck run doesn't count[emoji23]- and I'll eat my words.
That all being said, it's not something I would advise ANYONE to do, and I'm extremely excited to get the bar back on.
 
Last edited:
They really do.
No; not joking. The upper links are triangulated enough to keep the rear end in place just fine. Like I said, it lowers the roll center down a few inches, but I go pretty hard when it comes to throwin my rig around corners, and it's never sketchy. I left it off when I put in the taller Superflex coils. The suspension would be in such a constant bind with the stock PH and mounts, I felt it was better off. I "shook" the back end side-to-side REAL hard, and watching the flare vs wheel, there was NO movement.
That's one reason I think it's funny guys want a bolt for "backup", and say there's a lot of stress on the mounts that are welded on. You know, the stock brackets are "just" welded on, right? Show me cracked or broken PH bar mounts on a "regular" rig- 3rd gen at a tough truck run doesn't count[emoji23]- and I'll eat my words.
That all being said, it's not something I would advise ANYONE to do, and I'm extremely excited to get the bar back on.


That's pretty wild dude! I don't trust those upper links at all. I've already broken an upper link with the panhard on. Those upper links aren't that strong. Are you running aftermarket links at all? I'm surprised you haven't bent or broken anything yet.


Sent from my iPhone using Tapatalk
 
In for being the first. It didn't have the best fit all the way around but he filled it in well. Only cost me $20 through a diesel mechanic friend. Did some slight modifying to the pass side. Where the two open end bent in, they looked like they would rub the panhard so we Bent it out and put two small washer inside. Sorry for the one shitty pic but I was in a rush to get out since he had another side job pulling in and it's 1130 pm.

THANKS KEITH. The bar is perfectly flat and now I can take it to get aligned tomorrow.
 

Attachments

  • IMG_9669.jpg
    IMG_9669.jpg
    130.4 KB · Views: 785
zoombyu86;In for being the first. It didn't have the best fit all the way around but he filled it in well. Only cost me $20 through a diesel mechanic friend. Did some slight modifying to the pass side. Where the two open end bent in said:
Nice job jumping on it Zoom congratulations! Were you able to get a picture showing it welded in ?
 
It didn't have the best fit all the way around but he filled it in well.

233412d1483763179-panhard-bar-question-img_9669.jpg

The brackets will definitely need trimming in during fit-up when chamfering for the weld, but it should be minor tweaking (with the exception of the right angle notch in the bend on the slope, which is there for ease of bending.)

It's interesting seeing the differences in contour between your (2000?) axle and my '98 (and '96) axles, where initial fit-up is tighter.

f7ddb416b6a8802be5965dbb4a8624d0.jpg


87ba06136085e3b90b3c5abc0f1b3b12.jpg


Wear in the factory tooling over time is evident on the cars we work with in my day job, but they span a much greater year range (although possibly less overall production volume) so I'd be curious to see if the contour changes even moreso on the later 3rd gens...?


Were you able to get a picture showing it welded in ?

Yeah - definitely post a pic of the end result! :tongue:
 
I initially thought that was a picture of it welded in until I looked. Apparently I didn't take any. It's getting an alignment now and then when I get it home I'm going to do a rotation and oil change so I'll make sure to get some close pics. I already painted over it though since I live in Ohio and salt has already wreaked havoc.

Keith, no doubt there is a difference in tooling. My frame is rusted a fair amount too so I wonder how much that contributed. Overall, I was thouroughly impressed w the quality of the parts. It still welded up nicely.
 
Damn, that's some rust.
Wanted to get mine TIG'd on so they'd be all picture-perfect, but I think I'm just gonna burn em in myself. Hopefully today [emoji1374]
 
Damn, that's some rust.
Wanted to get mine TIG'd on so they'd be all picture-perfect, but I think I'm just gonna burn em in myself. Hopefully today [emoji1374]

Eh, just some light surface rust...
I'd like to get the body off the frame next summer and attack the frame. I plan on keeping this thing indefinitely. I wish I had sought out a southern vehicle.
 
**ADVICE FOR THOSE WHO HAVE YET TO INSTALL**
Make sure you test fit the axle-side bracket to your PH before welding! These pieces are bent to shape, and may need adjusting- most like, spreading.
I was an idiot, and didn't do this. That resulted in me shaving down my axle-end PH bushing sleeve to fit.
I digress.
Got mine welded up last night!
The brackets fit awesome, and minimal trimming was req'd to fit. For the frame end, I made sure the vehicle was level(checked on the hitch, as well as the bottom side of the body- both agreed), and then plumbed the bracket. Shave the bottom of the stock bracket a couple mm to ensure clearance with the 3" lift hole. Trim the top of the folded ears- that face the driver side- a mm or so to allow the bracket to rotate parallel. Use the stock bolt to locate the bracket properly as well. Easy peasy.
c41d7bba6169c8c0969226124f0c2feb.jpg

e823eeed8b4db9b1d55ce6f363a176d8.jpg
d23705f8282ebe56b878bd3a884e1652.jpg

On the axle end, I chamfered the bottom of the new bracket, as well as the top of the existing bracket.
f62c02adb6235c8721ffb4f3b16f2700.jpg

f1ff7620236656cf54d657fda7ee0f8a.jpg

I also softened the edges just a tad-
4c60218c328475621673c4559b1eb2b8.jpg

The only trimming/adjusting I did, was to trim the forward facing edge of the ear that "sticks down"- if that makes sense. This allowed the bracket to sit flush with the rear-facing side of the existing bracket. As stated above- I should have also slightly spread the new bracket, but I didn't. Also an easy install on this end-
f67ced269d934bc49ce27eac5a32638a.jpg
f2f43bf45a0414aea86e4eeb5ec4935d.jpg

Now that I look at the pictures, I remembered I did trim the passenger-side edge of the new bracket- once it was welded on- so it didn't overhang the existing bracket.
Bar sits perfectly parallel to the ground/chassis [emoji1362]

e7422746efe3c749fe7026754f0430f6.jpg
 
Fit on my 96 was great , didn't have to trim anything . But I did spread the lift bracket a little . My only problem is that I need to use the middle hole on the drop bracket and I didn't realize until after I welded it on that I should have notched the existing bracket for the washers . O well , I'll grind the top of the washers and tack weld them in .
 
Fit on my 96 was great , didn't have to trim anything . But I did spread the lift bracket a little . My only problem is that I need to use the middle hole on the drop bracket and I didn't realize until after I welded it on that I should have notched the existing bracket for the washers . O well , I'll grind the top of the washers and tack weld them in .

D'oh!! - I didn't think of that either! :behindsofa: Glad you picked up on the least expensive, most efficient workaround! - I'd absolutely recommend grinding the spacer over notching the factory mount for spacer clearance on the 3" hole. (Guess I'll need to add some printed notes to future kits.)

Also - PICTURES!!
 
Last edited:
Stunning work [MENTION=116470]Tyler James Inc[/MENTION] absolutly beautiful !! Thank you so much for the detailed post and pictures I can for sure use your post to show a welder when I locate a patient one. By the way how do you manage to keep your rig so darn clean underneath? That is phenomenal. I have serious envy going on.

Thanks for the tip [MENTION=102573]hounddogman[/MENTION]. Can you pls elaborate or share a pic I'm not getting it though.

[MENTION=28464]eimkeith[/MENTION] you must feel like you just had a new baby lol... Really nice man...!
 
Last edited:
Fit on my 96 was great , didn't have to trim anything .

The trimming was more of a personal preference rather than a necessity. I'm pretty picky. I could have installed both without trimming, and everything would have been just fine. That said, I'd be willing to bet your PHD isn't 100% perpendicular to the chassis if you didn't trim anything. Glad you checked the bar fitment before welding though!
Stunning work [MENTION=116470]Tyler James Inc[/MENTION] absolutly beautiful !! Thank you so much for the detailed post and pictures I can for sure use your post to show a welder when I locate a patient one. By the way how do you manage to keep your rig so darn clean underneath? That is phenomenal. I have serious envy going on.


Thanks for the tip [MENTION=102573]hounddogman[/MENTION]. Can you pls elaborate or share a pic I'm not getting it though.

Hey thanks man! Glad the welder was cooperating for me. Hopefully it helps some people out.
I paint everything underneath with appliance epoxy every year, and take the pressure washer to it every couple months or so. Pretty easy to keep it clean if you just keep up with it. I avoid painting certain things- like electrical connectors, springs/shocks, bottom of body, etc- to not make it look like a used car lot rig. The epoxy dries super hard, so it's a great paint to use.
Okay, to try to clarify the center hole "issue"-
The PHD bracket center hole sits just under the factory bracket. The spacers Keith includes are to compensate for the existing bracket "wall" thickness- does that make sense? So the spacers work perfectly when using the 4"(bottom) hole, but since the 3" hole(center) is just below the existing bracket edge, the top 1/3 of the spacers will interfere. Does that make it any clearer?
Here's a pic-
660bec79a45517b469edde8f758e2337.jpg
 
Last edited:
Received mine the other day and the build quality is excellent, really appreciated the sealed bag correctly holding everything in place. Just waiting to pick up my e-locker axle housing so I can get this welded on.

Cheers!
 
Hey thanks man! Glad the welder was cooperating for me. Hopefully it helps some people out. I paint everything underneath with appliance epoxy every year, and take the pressure washer to it every couple months or so. Pretty easy to keep it clean if you just keep up with it. I avoid painting certain things- like electrical connectors, springs/shocks, bottom of body, etc- to not make it look like a used car lot rig. The epoxy dries super hard, so it's a great paint to use.
Okay, to try to clarify the center hole "issue"-
The PHD bracket center hole sits just under the factory bracket. The spacers Keith includes are to compensate for the existing bracket "wall" thickness- does that make sense? So the spacers work perfectly when using the 4"(bottom) hole, but since the 3" hole(center) is just below the existing bracket edge, the top 1/3 of the spacers will interfere. Does that make it any clearer?]

Thanks and that Sir 100% clears it up I really appreciate that photo. Good grief I am dense sometimes... :redbrick:
 
Ok so here's some pictures such as they are . All I had with me was a tablet and it does not do well in artificial light .Tyler James Inc posted a great picture showing the problem with the middle hole . What I did was take some scrap that I had that was the same thickness as the washers and cut two pieces @ 1 1/2" x 2" and tack weld them in and redrill the lower two holes . If anyone else goes this route I recommend tacking and drilling the spacers before welding the bracket on ,it was very difficult drilling the holes strait in place . The reason I did it this way is I wanted to be able to use either the 3" hole or the 4" hole . Right now my LC 7 wraps are sagging to only a 3" lift but I'll eventually swap them for OME 861s . 20170108_141943.jpg

20170108_141955.jpg
 

Attachments

  • 20170108_141943.jpg
    20170108_141943.jpg
    102.9 KB · Views: 499
  • 20170108_141955.jpg
    20170108_141955.jpg
    105.6 KB · Views: 525
  • 20170108_121831.jpg
    20170108_121831.jpg
    90.5 KB · Views: 442
That said, I'd be willing to bet your PHD isn't 100% perpendicular to the chassis if you didn't trim anything.
Well , it was dead on before welding , I didn't check after though . I jacked up one side of the 4Runner until the outer passenger frame was level and matched up the bracket . If there is one thing I can do after 20 plus years as a carpenter it's read a level .:hello:
 

Members online

Forum statistics

Threads
278,309
Messages
3,554,071
Members
248,016
Latest member
Advally Service

Trending content

Back
Top