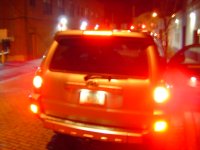
Putting the red bumper lenses to use

damn it when i finally put the rear fogs back on my runner i drop my tail light lamp so i have one out in the pic, oh well now time to upgrade my tail lights to led. lol.
HPIM0990.jpg~original


this mod looks so sexy, if you havent done this mod yet you have to do it. if you line in socal around the L.A. area and dont feel like your able to do it and you like the way i did it pm me and we can figure it out.
 
Re: Re: Re: Yeah!! Got Mine All Done!!

MDT4RNR said:
Hey TRDCOROLLA,
The way I wired mine was for "on all the time", when I press the breake the breake lights become brighter than the bumper lights. Plus don't forget the top breake light . So when I pass a runner i tap on the breake lights to show the bumper lights off. :D

Thanks for the reply MDT4RNR,

When you say "on all the time", do you mean they are on all the time or on when the headlights and taillights are on? What part number is the bulb? Thanks!
 
Last edited:
trdcorolla said:
Thanks for the reply MDT4RNR,

When you say "on all the time", do you mean they are on all the time or on when the headlights and taillights are on? What part number is the bulb? Thanks!

Hey TRDCOROLLA,
Yes, they are only on when I turn the headlights/tailights on.

I have all the info you need at my web site, check it out, part number and where to buy them from is there.
http://groups.msn.com/MyToy4RNR/redbumperlense.msnw

I used HONDA parts, they work great, and they are very inexpensive.
also when I place the order I order 4 bulbs in case i have one blow out on me.

Post pix when you are done :)
 
viper4evr2001 said:
connectors that i used to splice into the taillight.

My Clifford alarm was also installed using those and I've looked for them since in various places, but wasn't able to find them. Have you a name/description or even a part number?
--
Chris
 
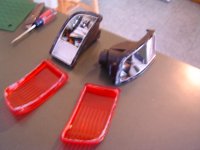
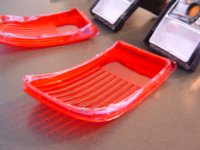
For all those who asked and were curious, the red bumper lenses DO come apart using the over method. I set the over to 250 and placed the lens on wax paper on a cookie sheet and in about 7 or 8 minutes, the seal was soft enough to pry apart. The only catch is that there are 4 tabs (2 on the bottom and 2 on the top) that need to be depressed before starting to pry. What I did is use a screwdriver when the lenses were nice and warm to pry the lens from the housing. After doing this for all four tabs, it takes some strength to pull the lens off. So, to answer some questions from earlier in this post, it can be done.

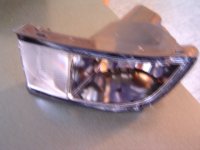
I did this mod a couple months ago using standard filament bulbs, but always wanted to replace the bulb with a led based bulb. I bought the Light Tower 2 bulb from a guy on ebay called jp warden, or something along these lines (for about $25 /pair). Even though the bulbs are supposed to be the same size as the 3157, I needed to enlarge the hole a little for the bulb to fit. I noticed that when enlarging the hole, the dremel did a good job of throwing the shavings back into the lens. I tried rinsing one out with water and it did get the black shavings out,but it was difficult to get all of the water out. I tried to use a heat gun to remove the condensation, but it wasn't working too well. The other lens I just tried to blow the shavings out using compressed air and I tried using a vacuum to suck them out but they were too stubborn and the relector inside was covered in black shavings. As a last resort, I tried to use the oven method to separate the lens and housing for cleaning and it worked! I cleaned out the housing and lenses and resealed them back with silicon to prevent water from finding its way back in.

Now there is a trick that I needed to do to get these bulbs (Light Tower 2) to work correctly. I'm not sure if this is normal of if the bulb is internally wired incorrectly, but you must use a diode on the tail light input to the bulb. Originally, the bulb would work fine with tail lights only and it would for fine with brake lights only, but when the tail lights were on and the brakes were hit, they would NOT get brighter. From what I found out, the stop current was feeding back through the tail input. By using the diode, you force the brake current to flow to ground and not back through the tail circuit. Make sense? I did some experimenting on a breadboard and determined that this was what was happening and the diode was the easiest/cheapest way to solve this problem.

If there are any questions or suggestions, feel free to post your thoughts.

Tom

 
Pennywise said:
For all those who asked and were curious, the red bumper lenses DO come apart using the over method. I set the over to 250 and placed the lens on wax paper on a cookie sheet and in about 7 or 8 minutes, the seal was soft enough to pry apart. The only catch is that there are 4 tabs (2 on the bottom and 2 on the top) that need to be depressed before starting to pry. What I did is use a screwdriver when the lenses were nice and warm to pry the lens from the housing. After doing this for all four tabs, it takes some strength to pull the lens off. So, to answer some questions from earlier in this post, it can be done.

I did this mod a couple months ago using standard filament bulbs, but always wanted to replace the bulb with a led based bulb. I bought the Light Tower 2 bulb from a guy on ebay called jp warden, or something along these lines (for about $25 /pair). Even though the bulbs are supposed to be the same size as the 3157, I needed to enlarge the hole a little for the bulb to fit. I noticed that when enlarging the hole, the dremel did a good job of throwing the shavings back into the lens. I tried rinsing one out with water and it did get the black shavings out,but it was difficult to get all of the water out. I tried to use a heat gun to remove the condensation, but it wasn't working too well. The other lens I just tried to blow the shavings out using compressed air and I tried using a vacuum to suck them out but they were too stubborn and the relector inside was covered in black shavings. As a last resort, I tried to use the oven method to separate the lens and housing for cleaning and it worked! I cleaned out the housing and lenses and resealed them back with silicon to prevent water from finding its way back in.

Now there is a trick that I needed to do to get these bulbs (Light Tower 2) to work correctly. I'm not sure if this is normal of if the bulb is internally wired incorrectly, but you must use a diode on the tail light input to the bulb. Originally, the bulb would work fine with tail lights only and it would for fine with brake lights only, but when the tail lights were on and the brakes were hit, they would NOT get brighter. From what I found out, the stop current was feeding back through the tail input. By using the diode, you force the brake current to flow to ground and not back through the tail circuit. Make sense? I did some experimenting on a breadboard and determined that this was what was happening and the diode was the easiest/cheapest way to solve this problem.

If there are any questions or suggestions, feel free to post your thoughts.

Tom

That is great news about them coming apart! I'm going to do my LED retro at the end of the month being able to take them apart really will make this eaiser!

woohoo!
 
Pennywise said:
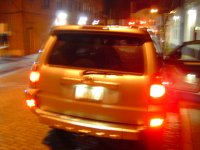
One last one (Sorry for the blurry images, but I hope you get the idea)...

I'm soooo glad these come apart. Going to order my superflux LEDs in a couple weeks, and then when I"m on vacation in December I'll do my retro.

Do you have any pics of yours with the LED towers?
 
Sorry that the pictures are a little blurry, but trying to hold the camera still with this cold weather wasn't happening...

Tom
 
Pennywise said:
Sorry that the pictures are a little blurry, but trying to hold the camera still with this cold weather wasn't happening...

Tom

How cold is in Pittsburgh? It's also cold here on the north (Toronto, Canada). This afternoon we had -5C => 22F.
 
It's all relative. It's about 28 F here now, but 4 days ago, I was wearing shorts cutting the grass. How quickly things change... :)

Tom
 
Pennywise said:
It's all relative. It's about 28 F here now, but 4 days ago, I was wearing shorts cutting the grass. How quickly things change... :)

Tom

Oh, it's something like I have in Toronto. It's 20F right now. What can I tell you, winter is coming! This is actually good news - snowboarding....and more snowboarding.
Be careful on the icy roads. I'm watching weather network and those guys on the road don
 
cdoyle said:
they look nice and bright!!
Oh, yeah! The camera doesn't do justice. It's always hard taking pictures of lights because I never how to correctly set my camera options to make it look the most realistic as possible. Trust me, they look good.

I was actually hoping to try these bulbs in the main tail/stop location to see how well this bulb lights up the housing. I think it would be ok, but not acceptable. However, this bulb was slightly larger than the stock opening so all thoughts of just testing it went out the window...

Tom
 

Members online

No members online now.

Forum statistics

Threads
278,316
Messages
3,554,120
Members
248,016
Latest member
Advally Service

Trending content

Back
Top