Rock_Rat
Senior Member
Storage System With FrontRunner Wolfpack Storage Containers
I had a very productive weekend thinking through and building my own storage solution well under budget. With just under two weeks to go before my next big trip, I wanted to make some changes to my storage system.
My Limitations Which I'm Sure Others Can Relate
So as you can see, those were my thoughts going into this build. Now for the actual mental roadmap:
Designing Stages
It had to be lightweight and very strong but not too costly.
I ordered four Front Runner Wolfpack storage boxes to build the unit around.
I definitely wanted carpet no drawers for now.
Want to install an ARB fridge on top with sliding mount.
The Actual Build
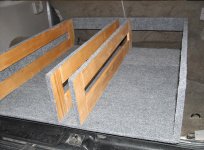
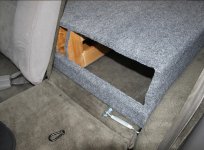
Rather than use plywood, I decided to go with a decent hardwood for the skeliton and piece of Birch plywood for the top. I covered the box using a very lightweight indoor/outdoor grey carpet attached with 3M 90 spray glue.
To piece everything together I went with #10 biscuits and just a few deck screws. I have all the measurements at home.
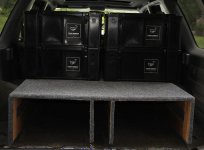
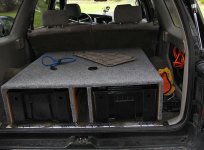
Total cost was under 300 which includes the $200 plus, spent on the Wolfpack containers. Overall I'm very pleased with how it turned out.
The first thing I did was begin taking a few measurements and thinking through what I though was the best way to build the frame.
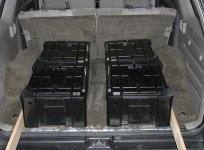
I needed to construct the frame pieces first. After measuring a few times, I made the cuts and attached the pieces with my biscuit joiner and liquid nails.
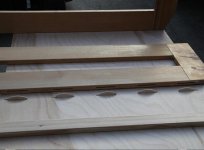
Once the frame pieces were made, I cut the piece of Birch to 38" wide, measured the width needed for tandem storage units running front to back and side-by-side. This left me some additional storage space in the center. Using clamps and long pieces of wood, I secured everything in place.
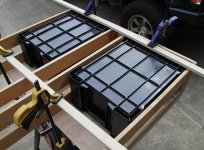
The carpet I picked up ( 6' x 6') from Home Depot was amazingly light and extremely inexpensive. Now began the painstakingly tedious process of cutting to size and gluing one section at a time.
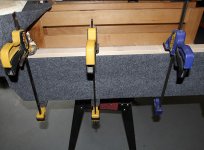
At times it was a bit challenging. But I've learned a long time ago, to NEVER rush anything or you'll end up doing it over.
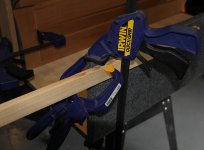
I had a very productive weekend thinking through and building my own storage solution well under budget. With just under two weeks to go before my next big trip, I wanted to make some changes to my storage system.
My Limitations Which I'm Sure Others Can Relate
- Money is a HUGE factor
- Unsure of what system I want to purchase until I see them
- I have very little time to fab up anything too extravagant
- I need to have my back seats available so I'm limited to the rear cargo area only
- Still need to use the "U" part of my SUV for other things so it must be removable
So as you can see, those were my thoughts going into this build. Now for the actual mental roadmap:
Designing Stages
It had to be lightweight and very strong but not too costly.
I ordered four Front Runner Wolfpack storage boxes to build the unit around.
I definitely wanted carpet no drawers for now.
Want to install an ARB fridge on top with sliding mount.
The Actual Build
Rather than use plywood, I decided to go with a decent hardwood for the skeliton and piece of Birch plywood for the top. I covered the box using a very lightweight indoor/outdoor grey carpet attached with 3M 90 spray glue.
To piece everything together I went with #10 biscuits and just a few deck screws. I have all the measurements at home.
Total cost was under 300 which includes the $200 plus, spent on the Wolfpack containers. Overall I'm very pleased with how it turned out.
The first thing I did was begin taking a few measurements and thinking through what I though was the best way to build the frame.
I needed to construct the frame pieces first. After measuring a few times, I made the cuts and attached the pieces with my biscuit joiner and liquid nails.
Once the frame pieces were made, I cut the piece of Birch to 38" wide, measured the width needed for tandem storage units running front to back and side-by-side. This left me some additional storage space in the center. Using clamps and long pieces of wood, I secured everything in place.
The carpet I picked up ( 6' x 6') from Home Depot was amazingly light and extremely inexpensive. Now began the painstakingly tedious process of cutting to size and gluing one section at a time.
At times it was a bit challenging. But I've learned a long time ago, to NEVER rush anything or you'll end up doing it over.